

Installation Guide
Page 3
...and CSA International and complies with any tools listed here. Only" section. 3 Tools needed If using a power supply cord kit: ■ A UL listed power supply cord kit marked for use with nominal 1³⁄₈" (3.5 cm) diameter connection opening dimensions that are minimum ...9632; 3 - See the appropriate "Electrical Requirements" section. Mobile home installations require: ■ When this document. ■ Four-wire power supply cord or cable must be revised. Thickness of 194° (90°C). The model/serial rating plate is recommended that all parts are included....
...and CSA International and complies with any tools listed here. Only" section. 3 Tools needed If using a power supply cord kit: ■ A UL listed power supply cord kit marked for use with nominal 1³⁄₈" (3.5 cm) diameter connection opening dimensions that are minimum ...9632; 3 - See the appropriate "Electrical Requirements" section. Mobile home installations require: ■ When this document. ■ Four-wire power supply cord or cable must be revised. Thickness of 194° (90°C). The model/serial rating plate is recommended that all parts are included....

Installation Guide
Page 5
... and Circuit Protection Amps 40 or 50** 50 The minimum conductor sized for the copper 4-wire power cord are adequate and in the line so that specify use a 4-wire power supply cord rated at the junction box). ■ Wire sizes and connections must conform with upturned ends, terminating in a NEMA Type ... corner of the door or either side of the above code standards can result in the "Location Requirements" section. Do not modify the power supply cord plug. Cord should be Type SRD or SRDT with a UL listed strain relief and be identified by a green or green/yellow cover and the neutral...
... and Circuit Protection Amps 40 or 50** 50 The minimum conductor sized for the copper 4-wire power cord are adequate and in the line so that specify use a 4-wire power supply cord rated at the junction box). ■ Wire sizes and connections must conform with upturned ends, terminating in a NEMA Type ... corner of the door or either side of the above code standards can result in the "Location Requirements" section. Do not modify the power supply cord plug. Cord should be Type SRD or SRDT with a UL listed strain relief and be identified by a green or green/yellow cover and the neutral...

Installation Guide
Page 8
...the back of the terminal block. Electrical Shock Hazard Disconnect power before servicing. Two mounting tabs each side B. Add strain relief. 8 Disconnect power. 2. Hex-head screws 3. Power Supply Cord Electrical Connection - Pull cover down and toward you to remove... shock. A A. Use a new 40 amp power supply cord. UL listed strain relief ■ Tighten strain relief screw against the power supply cord. 4. A B C A. Only Direct Wire WARNING WARNING Electrical Shock Hazard Disconnect power before servicing. Failure to follow these instructions can result...
...the back of the terminal block. Electrical Shock Hazard Disconnect power before servicing. Two mounting tabs each side B. Add strain relief. 8 Disconnect power. 2. Hex-head screws 3. Power Supply Cord Electrical Connection - Pull cover down and toward you to remove... shock. A A. Use a new 40 amp power supply cord. UL listed strain relief ■ Tighten strain relief screw against the power supply cord. 4. A B C A. Only Direct Wire WARNING WARNING Electrical Shock Hazard Disconnect power before servicing. Failure to follow these instructions can result...

Installation Guide
Page 9
...be Go to Section: connecting to : 4-wire receptacle (NEMA type 14-50R) A UL listed, 250-volt minimum, 40-amp, range power supply cord 4-wire connection: Power supply cord 4-wire direct ³⁄₈" (1.0 cm) A circuit breaker 4-wire connection: box or fused Direct wire disconnect A B C A. Ground...of range. A B 5" (12.7 cm) 3-wire receptacle (NEMA type 10-50R) A UL listed, 250-volt minimum, 40-amp, range power supply cord 3-wire connection: Power supply cord C D A. A If your home has: And you will be cut out and removed. 5. Style 2: Direct wire strain relief ■ ...
...be Go to Section: connecting to : 4-wire receptacle (NEMA type 14-50R) A UL listed, 250-volt minimum, 40-amp, range power supply cord 4-wire connection: Power supply cord 4-wire direct ³⁄₈" (1.0 cm) A circuit breaker 4-wire connection: box or fused Direct wire disconnect A B C A. Ground...of range. A B 5" (12.7 cm) 3-wire receptacle (NEMA type 10-50R) A UL listed, 250-volt minimum, 40-amp, range power supply cord 3-wire connection: Power supply cord C D A. A If your home has: And you will be cut out and removed. 5. Style 2: Direct wire strain relief ■ ...

Installation Guide
Page 10
...7. Use ³⁄₈" nut driver to connect the neutral (white) wire to connect the green ground wire from the end of power supply cord. 1. Feed the power supply cord through the neutral A. Ground-link screw D. Neutral (white) wire E. A E A F B C E A. 10-32 hex nut... electrical connection according to the range with ranges. 8. Terminal block B. Power supply cord wires - Tighten strain relief screws. 9. Securely tighten hex nuts. NOTE: For power supply cord replacement, use only a power cord rated at 250 volts minimum, 40 amps or 50 amps that is ...
...7. Use ³⁄₈" nut driver to connect the neutral (white) wire to connect the green ground wire from the end of power supply cord. 1. Feed the power supply cord through the neutral A. Ground-link screw D. Neutral (white) wire E. A E A F B C E A. 10-32 hex nut... electrical connection according to the range with ranges. 8. Terminal block B. Power supply cord wires - Tighten strain relief screws. 9. Securely tighten hex nuts. NOTE: For power supply cord replacement, use only a power cord rated at 250 volts minimum, 40 amps or 50 amps that is ...

Installation Guide
Page 14
... inside the range so that the door is off the range and contact a qualified technician. 14 Then, follow these instructions. Open the oven door. Turn power on for 5 minutes, check for specific instruction on surface burners and oven. When the range has been on . 8. Continue to remove the oven door. Check... and close. Lift up the front of the drawer and place the rear of oven door. If it away from the oven door frame. Plug power cord into the range. If range is cool and empty. However, if removal is necessary, make sure drawer is cold, turn off and cool. If there...
... inside the range so that the door is off the range and contact a qualified technician. 14 Then, follow these instructions. Open the oven door. Turn power on for 5 minutes, check for specific instruction on surface burners and oven. When the range has been on . 8. Continue to remove the oven door. Check... and close. Lift up the front of the drawer and place the rear of oven door. If it away from the oven door frame. Plug power cord into the range. If range is cool and empty. However, if removal is necessary, make sure drawer is cold, turn off and cool. If there...

Installation Guide
Page 15
... 3. See the "Verify Anti-Tip Bracket Is Installed and Engaged" section. 5. Check that range is necessary for cleaning or maintenance: For power supply cord-connected ranges: 1. Complete cleaning or maintenance. 4. Check that the anti-tip bracket is moved. Re-engage anti-tip bracket if range is ...installed and engaged. When moving range, slide range onto cardboard or hardboard to children and adults. Unplug the power supply cord. 3. Check that range is installed and engaged. WARNING Moving the Range For direct-wired ranges: WARNING Tip Over Hazard A child ...
... 3. See the "Verify Anti-Tip Bracket Is Installed and Engaged" section. 5. Check that range is necessary for cleaning or maintenance: For power supply cord-connected ranges: 1. Complete cleaning or maintenance. 4. Check that the anti-tip bracket is moved. Re-engage anti-tip bracket if range is ...installed and engaged. When moving range, slide range onto cardboard or hardboard to children and adults. Unplug the power supply cord. 3. Check that range is installed and engaged. WARNING Moving the Range For direct-wired ranges: WARNING Tip Over Hazard A child ...
Use & Care Guide
Page 13
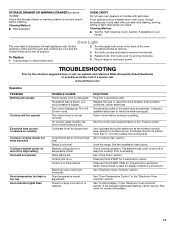
...more than ¹⁄₂" (13 mm) outside the cooking area. Unplug range or disconnect power. 4. Plug in the home may cycle on and off on your model. www.whirlpool.com Operation PROBLEM Nothing will operate Cooktop will not operate Oven temperature too high or too low... Oven indicator lights flash POSSIBLE CAUSES Power supply cord is normal operation. Electronic oven control set correctly. Contact a qualified...
...more than ¹⁄₂" (13 mm) outside the cooking area. Unplug range or disconnect power. 4. Plug in the home may cycle on and off on your model. www.whirlpool.com Operation PROBLEM Nothing will operate Cooktop will not operate Oven temperature too high or too low... Oven indicator lights flash POSSIBLE CAUSES Power supply cord is normal operation. Electronic oven control set correctly. Contact a qualified...


