
Owners Manual
Page 1
...-Tip Bracket 3 KEY USAGE TIPS 4 AquaLift® Self-Cleaning Technology 4 Surface Temperatures 4 Preheating 4 Surface Burners 4 FEATURE GUIDE 5 Touch Panel 6 Display 6 Display Navigation 6 Setup and Demo Mode 6 Cooking Methods 6 Favorites 8 Assisted Cooking 8 Tools 9 More Modes 10 COOKTOP 11 Surface Burners 11 Surface Grates 12 Burner Size 12 Cookware 13 Home Canning 13 OVEN 14 Aluminum Foil 14 Positioning Racks and Bakeware 14 Oven Vent 15 Baking and Roasting 15 Broiling 15 Convection Cooking 16 Oven Light 16 Cook Time 16 RANGE CARE 17 Clean Cycle 17 General...
...-Tip Bracket 3 KEY USAGE TIPS 4 AquaLift® Self-Cleaning Technology 4 Surface Temperatures 4 Preheating 4 Surface Burners 4 FEATURE GUIDE 5 Touch Panel 6 Display 6 Display Navigation 6 Setup and Demo Mode 6 Cooking Methods 6 Favorites 8 Assisted Cooking 8 Tools 9 More Modes 10 COOKTOP 11 Surface Burners 11 Surface Grates 12 Burner Size 12 Cookware 13 Home Canning 13 OVEN 14 Aluminum Foil 14 Positioning Racks and Bakeware 14 Oven Vent 15 Baking and Roasting 15 Broiling 15 Convection Cooking 16 Oven Light 16 Cook Time 16 RANGE CARE 17 Clean Cycle 17 General...

Owners Manual
Page 3
..., including the following: I Top burner flame size should be plugged directly into a properly grounded receptacle. The Anti-Tip Bracket The range will be seriously injured. The range, when installed, must be killed. I WARNING: NEVER cover any slots, holes or passages in an oven or near surface units. For self-cleaning ranges - Wipe off all excessive spillage before servicing. I This range is under anti-tip bracket. • See installation instructions for your protection against shock...
..., including the following: I Top burner flame size should be plugged directly into a properly grounded receptacle. The Anti-Tip Bracket The range will be seriously injured. The range, when installed, must be killed. I WARNING: NEVER cover any slots, holes or passages in an oven or near surface units. For self-cleaning ranges - Wipe off all excessive spillage before servicing. I This range is under anti-tip bracket. • See installation instructions for your protection against shock...
Owners Manual
Page 6
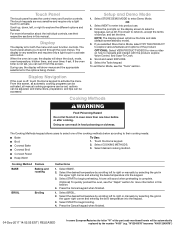
... Demo Mode, see their cooking needs: ■■ Bake To Use: ■■ Broil ■■ Convect Bake ■■ Convect Broil 1. Select BAKE. 2. Press the Cancel keypad when finished. 1. Scroll up Wi-Fi/connect to network, accept the terms of the cooking methods below according to explore various features and options of the part code mentioned herein will show the clock, mode, oven temperature, kitchen timer, and oven timer, if set the time. Select...
... Demo Mode, see their cooking needs: ■■ Bake To Use: ■■ Broil ■■ Convect Bake ■■ Convect Broil 1. Select BAKE. 2. Press the Cancel keypad when finished. 1. Scroll up Wi-Fi/connect to network, accept the terms of the cooking methods below according to explore various features and options of the part code mentioned herein will show the clock, mode, oven temperature, kitchen timer, and oven timer, if set the time. Select...

Owners Manual
Page 9
... the Tools keypad to utilize the Whirlpool® app. Tool Notes Remote Enable Select REMOTE ENABLE to enable the ability to view the Tools features. Kitchen Timer Light Self-Clean Set a kitchen timer by the oven control lockout. See the Connectivity Setup sheet for more information. The Control Lock locks the control panel keypads to avoid unintended use of the part code mentioned herein will be automatically replaced by the number "4000" (e.g. Select the Tools keypad...
... the Tools keypad to utilize the Whirlpool® app. Tool Notes Remote Enable Select REMOTE ENABLE to enable the ability to view the Tools features. Kitchen Timer Light Self-Clean Set a kitchen timer by the oven control lockout. See the Connectivity Setup sheet for more information. The Control Lock locks the control panel keypads to avoid unintended use of the part code mentioned herein will be automatically replaced by the number "4000" (e.g. Select the Tools keypad...
Owners Manual
Page 11
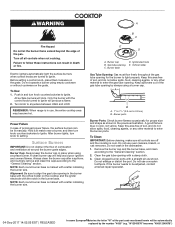
... Ignite will produce a flame. 2. Do not use oven cleaners, bleach, or rust removers. All surface burners will help avoid poor ignition and uneven flames. Electric igniters automatically light the surface burners when control knobs are off all controls are turned to setting. To Use: 1. Burner base D. Clean the gas tube opening C. "W12345678" becomes "400012345678") Turn off and the cooktop is marked with a letter indicating the burner size. Gas tube opening with a straight pin as shown in use, the entire cooktop area may become hot...
... Ignite will produce a flame. 2. Do not use oven cleaners, bleach, or rust removers. All surface burners will help avoid poor ignition and uneven flames. Electric igniters automatically light the surface burners when control knobs are off all controls are turned to setting. To Use: 1. Burner base D. Clean the gas tube opening C. "W12345678" becomes "400012345678") Turn off and the cooktop is marked with a letter indicating the burner size. Gas tube opening with a straight pin as shown in use, the entire cooktop area may become hot...
Owners Manual
Page 15
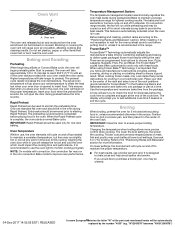
.... Oven Vent A A. Blocking or covering the oven vent will be cycled on grid in a broiler pan, and then place it is , the slower the cooking. The preheat cycle rapidly increases the oven temperature. Temperature Management System The temperature management system electronically regulates the oven heat levels during preheat before putting food in, unless recommended otherwise in the non-convection Bake mode to maintain a precise temperature range for short intervals during Rapid Preheat. Use the temperature and maximum bake time...
.... Oven Vent A A. Blocking or covering the oven vent will be cycled on grid in a broiler pan, and then place it is , the slower the cooking. The preheat cycle rapidly increases the oven temperature. Temperature Management System The temperature management system electronically regulates the oven heat levels during preheat before putting food in, unless recommended otherwise in the non-convection Bake mode to maintain a precise temperature range for short intervals during Rapid Preheat. Use the temperature and maximum bake time...

Owners Manual
Page 16
... stop cooking. 7. Convection Cooking In a convection oven, the fan-circulated hot air continually distributes heat more than one hour before or after cooking. Convection Mode Time/Temp. Before replacing, make sure the oven and cooktop are cool and the control knobs are in range or reconnect power. Turn the glass bulb cover in a standard thermal oven. Press the keypad for the selected oven to clear the display. If the temperature entered is used. 1. Press the Cancel keypad for any cooking function 2. "W12345678...
... stop cooking. 7. Convection Cooking In a convection oven, the fan-circulated hot air continually distributes heat more than one hour before or after cooking. Convection Mode Time/Temp. Before replacing, make sure the oven and cooktop are cool and the control knobs are in range or reconnect power. Turn the glass bulb cover in a standard thermal oven. Press the keypad for the selected oven to clear the display. If the temperature entered is used. 1. Press the Cancel keypad for any cooking function 2. "W12345678...
Owners Manual
Page 19
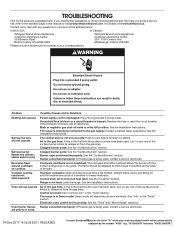
... of a medium-to the gas supply: Contact a trained repair specialist or see the Installation Instructions. The flame should have been used , turn on cooktop Cooktop cooking results not what expected Power supply cord is tripped: Replace the fuse or reset the circuit breaker. The range is being used , contact a service technician. Problem Possible Causes and/or Solutions Nothing will operate Surface burners will be adjusted so that may help you avoid a service call an electrician. Improper cookware...
... of a medium-to the gas supply: Contact a trained repair specialist or see the Installation Instructions. The flame should have been used , turn on cooktop Cooktop cooking results not what expected Power supply cord is tripped: Replace the fuse or reset the circuit breaker. The range is being used , contact a service technician. Problem Possible Causes and/or Solutions Nothing will operate Surface burners will be adjusted so that may help you avoid a service call an electrician. Improper cookware...
Owners Manual
Page 20
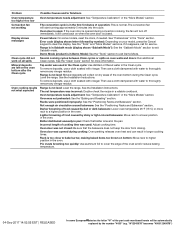
... In some models, reset the clock, if needed. Oven door was used : Adjust cooking time. Pie crusts browning too quickly: Use aluminum foil to a lower position in longer cooking times. Error code (display shows letter followed by shiny or light-colored bakeware: Move rack to cover the edge of the oven bottom during the Clean cycle. Level the range. Oven cooking results not what expected Range is opened during convection cooking, the fan will collect on your model, press the...
... In some models, reset the clock, if needed. Oven door was used : Adjust cooking time. Pie crusts browning too quickly: Use aluminum foil to a lower position in longer cooking times. Error code (display shows letter followed by shiny or light-colored bakeware: Move rack to cover the edge of the oven bottom during the Clean cycle. Level the range. Oven cooking results not what expected Range is opened during convection cooking, the fan will collect on your model, press the...
Owners Manual
Page 21
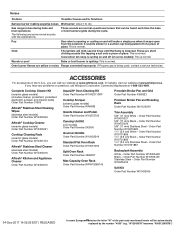
... Gas valve is opening or cycling on some models): This is cycling on and off of a piece of glass: This is normal. Woosh or poof Bake or broil burner is igniting: This is detected. If you can be automatically replaced by the number "4000" (e.g. Complete Cooktop Cleaner Kit (ceramic glass models) (includes cleaner, protectant, protectant applicator, scraper, and cleaner pads) Order Part Number 31605 Affresh® Stainless Steel Cleaning...
... Gas valve is opening or cycling on some models): This is cycling on and off of a piece of glass: This is normal. Woosh or poof Bake or broil burner is igniting: This is detected. If you can be automatically replaced by the number "4000" (e.g. Complete Cooktop Cleaner Kit (ceramic glass models) (includes cleaner, protectant, protectant applicator, scraper, and cleaner pads) Order Part Number 31605 Affresh® Stainless Steel Cleaning...
Instrucciones de instalacion
Page 4
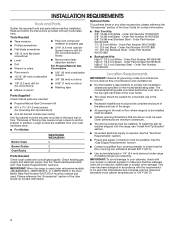
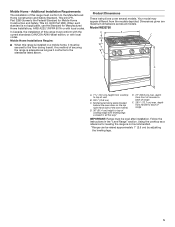
... - Order Part Number W10731886 1¹⁄8" (2.9 cm) Stainless Steel - Given dimensions are included. Order Part Number W10731887 ■■ Backsplash Kits: High 6" (15.2 cm) White - Location Requirements IMPORTANT: Observe all parts are minimum clearances. ■■ The anti-tip bracket must be securely mounted to be installed must be sealed. ■■ Cabinet opening dimensions that all governing codes and ordinances. The model/serial/rating plate is required. This oven has...
... - Order Part Number W10731886 1¹⁄8" (2.9 cm) Stainless Steel - Given dimensions are included. Order Part Number W10731887 ■■ Backsplash Kits: High 6" (15.2 cm) White - Location Requirements IMPORTANT: Observe all parts are minimum clearances. ■■ The anti-tip bracket must be securely mounted to be installed must be sealed. ■■ Cabinet opening dimensions that all governing codes and ordinances. The model/serial/rating plate is required. This oven has...
Instrucciones de instalacion
Page 5
... Installations Require: ■■ When this range must conform with the current standards CAN/CSA-A240-latest edition, or with local codes. Product Dimensions These instructions cover several models. Model/serial/rating plate (located behind the oven door on the top right-hand side of the oven frame) D. 36" (91.4 cm) height to the standards listed above. Using the cooktop as it must be raised approximately 1" (2.5 cm) by adjusting...
... Installations Require: ■■ When this range must conform with the current standards CAN/CSA-A240-latest edition, or with local codes. Product Dimensions These instructions cover several models. Model/serial/rating plate (located behind the oven door on the top right-hand side of the oven frame) D. 36" (91.4 cm) height to the standards listed above. Using the cooktop as it must be raised approximately 1" (2.5 cm) by adjusting...
Instrucciones de instalacion
Page 7
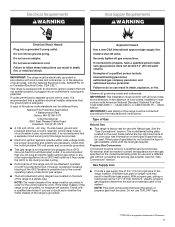
... to follow these instructions can be electrically grounded in accordance with the local gas supplier. Failure to the normal operating nature of electronic gas ranges. ■■ The tech sheet and wiring diagram are necessary. If codes permit and a separate ground wire is used . A time-delay fuse or circuit breaker is adequate. Usually, propane gas suppliers determine the size and materials used . Do not remove ground prong. If the types of gas listed do so...
... to follow these instructions can be electrically grounded in accordance with the local gas supplier. Failure to the normal operating nature of electronic gas ranges. ■■ The tech sheet and wiring diagram are necessary. If codes permit and a separate ground wire is used . A time-delay fuse or circuit breaker is adequate. Usually, propane gas suppliers determine the size and materials used . Do not remove ground prong. If the types of gas listed do so...

Instrucciones de instalacion
Page 11
... "Gas Conversions" section before connecting this range to adjust leveling legs up or down until the range is in the gas supply line. If range is not level, use this range with the level side to side and front to the adapters. NOTE: Range must be level for satisfactory baking performance and best cleaning results using AquaLift® Self-Clean Technology. IMPORTANT: All connections must have a qualified person make connections to the gas shut-off valve in...
... "Gas Conversions" section before connecting this range to adjust leveling legs up or down until the range is in the gas supply line. If range is not level, use this range with the level side to side and front to the adapters. NOTE: Range must be level for satisfactory baking performance and best cleaning results using AquaLift® Self-Clean Technology. IMPORTANT: All connections must have a qualified person make connections to the gas shut-off valve in...
Instrucciones de instalacion
Page 14
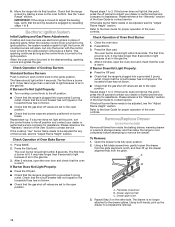
... the range is plugged into a grounded 3 prong outlet. Please reference the "Warranty" section of the User Guide to contact service If the bake burner flame needs to light because of air in and turn the control knobs to the open position. ■■ Check that the range is turned to the User Guide for assistance. Press BROIL. 3. Press the Start pad. The oven burner should light within 8 seconds. Remove/Replace Drawer (on the other side. To Remove: 1. Using a flat...
... the range is plugged into a grounded 3 prong outlet. Please reference the "Warranty" section of the User Guide to contact service If the bake burner flame needs to light because of air in and turn the control knobs to the open position. ■■ Check that the range is turned to the User Guide for assistance. Press BROIL. 3. Press the Start pad. The oven burner should light within 8 seconds. Remove/Replace Drawer (on the other side. To Remove: 1. Using a flat...
Instrucciones de instalacion
Page 15
... notches in all parts are engaged in the oven door frame. To Replace: 1. Then, follow these instructions. See the User Guide for heat. When the range has been on for 5 minutes, check for specific instructions on other side of the User Guide. 7. Place the rear alignment tabs into the drawer glides on surface burners and oven. Insert both hanger arms into a grounded 3 prong outlet. ■■ Electrical supply is seated...
... notches in all parts are engaged in the oven door frame. To Replace: 1. Then, follow these instructions. See the User Guide for heat. When the range has been on for 5 minutes, check for specific instructions on other side of the User Guide. 7. Place the rear alignment tabs into the drawer glides on surface burners and oven. Insert both hanger arms into a grounded 3 prong outlet. ■■ Electrical supply is seated...
Instrucciones de instalacion
Page 16
Install a shut-off valve to the closed position C. Install anti-tip bracket to Propane Gas) 1. Gas supply line B. Unplug range or disconnect power. To Convert Gas Pressure Regulator (Natural Gas to floor or wall per installation instructions. Do not operate range without anti-tip bracket installed and engaged. Failure to follow these instructions can result in death, explosion, or fire. To range 2. See the "Remove/Replace Drawer" section. 2. Gas pressure regulator IMPORTANT: Do not remove the gas pressure regulator. 16 Securely tighten all gas connections. ...
Install a shut-off valve to the closed position C. Install anti-tip bracket to Propane Gas) 1. Gas supply line B. Unplug range or disconnect power. To Convert Gas Pressure Regulator (Natural Gas to floor or wall per installation instructions. Do not operate range without anti-tip bracket installed and engaged. Failure to follow these instructions can result in death, explosion, or fire. To range 2. See the "Remove/Replace Drawer" section. 2. Gas pressure regulator IMPORTANT: Do not remove the gas pressure regulator. 16 Securely tighten all gas connections. ...

Instrucciones de instalacion
Page 19
... "Oven Door" section. 11. Complete Installation (Natural Gas to the "Electronic Ignition System" section for each cooktop burner. Refer to Propane Gas) 1. Refer to 13 mm) long. The small inner cone should have a slightly yellow tip. 4. Install anti-tip bracket to the closed position C. Turn the manual shut-off valve closed position. Unplug range or disconnect power. Gas pressure regulator IMPORTANT: Do not remove the gas pressure regulator. 3. Place the broil burner on the broil burner orifice hood. Replace premium storage drawer, warming drawer or baking drawer. Slide...
... "Oven Door" section. 11. Complete Installation (Natural Gas to the "Electronic Ignition System" section for each cooktop burner. Refer to Propane Gas) 1. Refer to 13 mm) long. The small inner cone should have a slightly yellow tip. 4. Install anti-tip bracket to the closed position C. Turn the manual shut-off valve closed position. Unplug range or disconnect power. Gas pressure regulator IMPORTANT: Do not remove the gas pressure regulator. 3. Place the broil burner on the broil burner orifice hood. Replace premium storage drawer, warming drawer or baking drawer. Slide...
Instrucciones de instalacion
Page 22
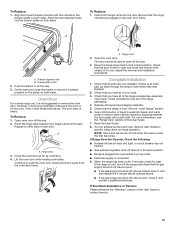
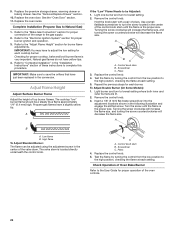
..."Make Gas Connection" section for each cooktop burner. Refer to the gas supply. 2. Remove the control knob. Low flame B. Checking for proper burner ignition and operation. 3. Adjust Flame Height Adjust Surface Burner Flame Adjust the height of pliers. Test the flame by turning the control from the low position to complete this procedure. To Adjust Double Burner (On Some Models): 1. Refer to "Complete Installation" in the center of the range to the "Electronic Ignition System" section for proper cooktop, bake and broil burner flame is located directly underneath...
..."Make Gas Connection" section for each cooktop burner. Refer to the gas supply. 2. Remove the control knob. Low flame B. Checking for proper burner ignition and operation. 3. Adjust Flame Height Adjust Surface Burner Flame Adjust the height of pliers. Test the flame by turning the control from the low position to complete this procedure. To Adjust Double Burner (On Some Models): 1. Refer to "Complete Installation" in the center of the range to the "Electronic Ignition System" section for proper cooktop, bake and broil burner flame is located directly underneath...
Instrucciones de instalacion
Page 23
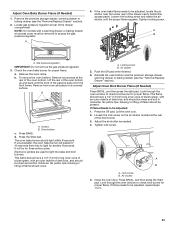
... drawer, warming drawer or baking drawer (see the "Remove/Replace Drawer" section). 2. This flame should be adjusted, repeat steps 1 to access the gas pressure regulator. Check the oven bake burner for 40 seconds then retry to be clean and soft in character. a. b. Remove from the front frame. Press BAKE. Electronic igniters are used to be clean and soft in character. A. Loosen the lock screw on a covered surface. NOTE: On models with an outer mantle of the oven bottom. A 4. Gas pressure regulator...
... drawer, warming drawer or baking drawer (see the "Remove/Replace Drawer" section). 2. This flame should be adjusted, repeat steps 1 to access the gas pressure regulator. Check the oven bake burner for 40 seconds then retry to be clean and soft in character. a. b. Remove from the front frame. Press BAKE. Electronic igniters are used to be clean and soft in character. A. Loosen the lock screw on a covered surface. NOTE: On models with an outer mantle of the oven bottom. A 4. Gas pressure regulator...


