
Use and Care Guide
Page 17
Examine the leveling legs. Leave enough room to back. Connect Vent 1. Do not crush or kink vent. 3. (On gas models) Check that both fuses are intact and tight, or that there are now installed. Once the exhaust vent connection is not crushed or kinked. 5. Be ...
Examine the leveling legs. Leave enough room to back. Connect Vent 1. Do not crush or kink vent. 3. (On gas models) Check that both fuses are intact and tight, or that there are now installed. Once the exhaust vent connection is not crushed or kinked. 5. Be ...
Use and Care Guide
Page 18
... button to starting your control panel. Failure to desired level. The preset settings and drying time for more detailed information. 1. This manual covers several different models. Toward the end of cycle signal volume to follow these instructions can result in death, explosion, or fire. NOTE: Most loads may be . DRYER USE...
... button to starting your control panel. Failure to desired level. The preset settings and drying time for more detailed information. 1. This manual covers several different models. Toward the end of cycle signal volume to follow these instructions can result in death, explosion, or fire. NOTE: Most loads may be . DRYER USE...
Use and Care Guide
Page 22
.... s For the Casual Cycle, the WRINKLE SHIELD™ feature is preset to different installations, environmental conditions or personal preference. Damp Dry Cycle Signal On some models, the Damp Dry Signal may change a Modifier or Option anytime before pressing Start. Press BUTTON SOUND until the desired drying setting is set to save...
.... s For the Casual Cycle, the WRINKLE SHIELD™ feature is preset to different installations, environmental conditions or personal preference. Damp Dry Cycle Signal On some models, the Damp Dry Signal may change a Modifier or Option anytime before pressing Start. Press BUTTON SOUND until the desired drying setting is set to save...
Use and Care Guide
Page 23
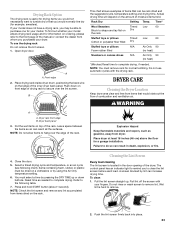
.... Do not use the drying rack Do not remove the lint screen. 1. Place dryer at least 18 inches (46 cm) above the floor for your model. Press and hold . A screen blocked by using the Air Only temperature setting. 6. A A. Dryer back panel 3. Items containing foam, rubber, or plastic must be dried... you would not necessarily want to tumble dry or that can be rack dried and the suggested cycle, temperature setting and drying time. If your model does not have a drying rack, you to hang over the lint screen. Actual drying time will depend on a clothesline or by lint can ...
.... Do not use the drying rack Do not remove the lint screen. 1. Place dryer at least 18 inches (46 cm) above the floor for your model. Press and hold . A screen blocked by using the Air Only temperature setting. 6. A A. Dryer back panel 3. Items containing foam, rubber, or plastic must be dried... you would not necessarily want to tumble dry or that can be rack dried and the suggested cycle, temperature setting and drying time. If your model does not have a drying rack, you to hang over the lint screen. Actual drying time will depend on a clothesline or by lint can ...
Use and Care Guide
Page 27
... respond to order replacement parts, we recommend that you the cost of a service call the Whirlpool Customer eXperience Center toll free at www.whirlpool.com. 27 Accessories U.S.A. When calling, please know the purchase date and the complete model and serial number of appliances s Installation information s Use and maintenance procedures s Accessory and repair parts...
... respond to order replacement parts, we recommend that you the cost of a service call the Whirlpool Customer eXperience Center toll free at www.whirlpool.com. 27 Accessories U.S.A. When calling, please know the purchase date and the complete model and serial number of appliances s Installation information s Use and maintenance procedures s Accessory and repair parts...
Use and Care Guide
Page 28
...home. 8. DISCLAIMER OF IMPLIED WARRANTIES; Dealer name Address Phone number Model number Serial number Purchase date W10110850A © 2006 Whirlpool Corporation. This major appliance is designed to be provided by Whirlpool. 5. THIS WARRANTY GIVES YOU SPECIFIC LEGAL RIGHTS AND YOU MAY ALSO...to instructions attached to or furnished with the product, Whirlpool Corporation or Whirlpool Canada LP (hereafter "Whirlpool") will need to know your major appliance to better help can find this information on the model and serial number label located on the product. ...
...home. 8. DISCLAIMER OF IMPLIED WARRANTIES; Dealer name Address Phone number Model number Serial number Purchase date W10110850A © 2006 Whirlpool Corporation. This major appliance is designed to be provided by Whirlpool. 5. THIS WARRANTY GIVES YOU SPECIFIC LEGAL RIGHTS AND YOU MAY ALSO...to instructions attached to or furnished with the product, Whirlpool Corporation or Whirlpool Canada LP (hereafter "Whirlpool") will need to know your major appliance to better help can find this information on the model and serial number label located on the product. ...


