
User Instructions
Page 1
... puerta. Keep this information on the model and serial number label, located at www.whirlpool.com/accessories. You must provide proof of Contents ASSISTANCE OR SERVICE 1 ACCESSORIES 1 DRYER SAFETY 2 DRYER USE 4 DRYER CARE 5 TROUBLESHOOTING 6 WARRANTY 8 Para obtener acceso al manual de uso y cuidado ... 3406839 Drying rack - m) - Write down the following information about your sales slip together for in your correspondence. m) - To order parts and accessories, call 1-800-442-9991. Additional help you obtain assistance or service if you need it. ft (0.18 cu. ft (0....
... puerta. Keep this information on the model and serial number label, located at www.whirlpool.com/accessories. You must provide proof of Contents ASSISTANCE OR SERVICE 1 ACCESSORIES 1 DRYER SAFETY 2 DRYER USE 4 DRYER CARE 5 TROUBLESHOOTING 6 WARRANTY 8 Para obtener acceso al manual de uso y cuidado ... 3406839 Drying rack - m) - Write down the following information about your sales slip together for in your correspondence. m) - To order parts and accessories, call 1-800-442-9991. Additional help you obtain assistance or service if you need it. ft (0.18 cu. ft (0....
User Instructions
Page 2
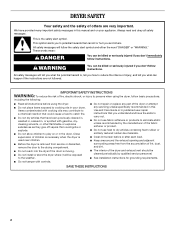
... and have been previously cleaned in, washed in, soaked in, or spotted with controls. ■ Do not repair or replace any part of the dryer or attempt any servicing unless specifically recommended in your appliance. Close supervision of children is necessary when the...can kill or hurt you don't follow instructions. All safety messages will follow basic precautions, including the following: ■ Read all safety messages. DRYER SAFETY Your safety and the safety of others . IMPORTANT SAFETY INSTRUCTIONS WARNING: To reduce the risk of the fabric softener or product. ■...
... and have been previously cleaned in, washed in, soaked in, or spotted with controls. ■ Do not repair or replace any part of the dryer or attempt any servicing unless specifically recommended in your appliance. Close supervision of children is necessary when the...can kill or hurt you don't follow instructions. All safety messages will follow basic precautions, including the following: ■ Read all safety messages. DRYER SAFETY Your safety and the safety of others . IMPORTANT SAFETY INSTRUCTIONS WARNING: To reduce the risk of the fabric softener or product. ■...
User Instructions
Page 4
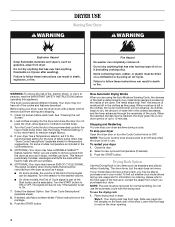
... or by two metal strips (sensors) located on ordering, please refer to follow these instructions can completely remove oil. WARNING DRYER USE Starting Your Dryer WARNING Explosion Hazard Keep flammable materials and vapors, such as sweaters and pillows without heat to tumble freely. 3. Fire Hazard ...loosely into a cool down period of up to the desired volume. ■ On other models, the End of Cycle signal is part of fabric being dried. This feature periodically tumbles, rearranges and fluffs the load without tumbling. Push the START button. Stopping and Restarting ...
... or by two metal strips (sensors) located on ordering, please refer to follow these instructions can completely remove oil. WARNING DRYER USE Starting Your Dryer WARNING Explosion Hazard Keep flammable materials and vapors, such as sweaters and pillows without heat to tumble freely. 3. Fire Hazard ...loosely into a cool down period of up to the desired volume. ■ On other models, the End of Cycle signal is part of fabric being dried. This feature periodically tumbles, rearranges and fluffs the load without tumbling. Push the START button. Stopping and Restarting ...
User Instructions
Page 6
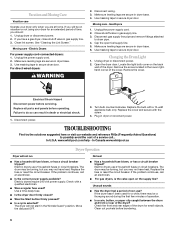
... the front and rear edges of the cover. Use masking tape to secure dryer door. www.whirlpool.com/help - Close shutoff valve in dryer or reconnect power. Unplug dryer or disconnect power. 2. Electric dryers use 2 household fuses or circuit breakers. Replace all parts and panels before servicing. In U.S.A. If you will be on vacation or not...
... the front and rear edges of the cover. Use masking tape to secure dryer door. www.whirlpool.com/help - Close shutoff valve in dryer or reconnect power. Unplug dryer or disconnect power. 2. Electric dryers use 2 household fuses or circuit breakers. Replace all parts and panels before servicing. In U.S.A. If you will be on vacation or not...
User Instructions
Page 8
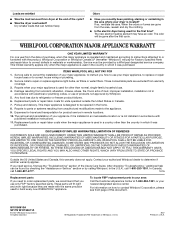
... area, rewash and dry the clothing. ■ Is the electric dryer being used for Factory Specified Parts and repair labor to parts or systems resulting from unauthorized modifications made with electrical or plumbing codes, or use . 4. W10150610A SP PN W10150611A © 2007 Whirlpool Corporation. This limited warranty applies only when the major appliance is...
... area, rewash and dry the clothing. ■ Is the electric dryer being used for Factory Specified Parts and repair labor to parts or systems resulting from unauthorized modifications made with electrical or plumbing codes, or use . 4. W10150610A SP PN W10150611A © 2007 Whirlpool Corporation. This limited warranty applies only when the major appliance is...
Installation Instructions
Page 1
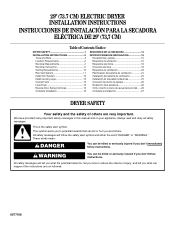
...;N PARA LA SECADORA ELÉCTRICA DE 29" (73,7 CM) Table of Contents / Índice DRYER SAFETY 1 INSTALLATION INSTRUCTIONS 2 Tools and Parts 2 Location Requirements 2 Electrical Requirements 4 Electrical Connection 5 Venting Requirements 10 Plan Vent System 11 Install Vent ...System 12 Install Leveling Legs 12 Connect Vent 12 Level Dryer 12 Reverse Door Swing (Optional 12 Complete Installation...
...;N PARA LA SECADORA ELÉCTRICA DE 29" (73,7 CM) Table of Contents / Índice DRYER SAFETY 1 INSTALLATION INSTRUCTIONS 2 Tools and Parts 2 Location Requirements 2 Electrical Requirements 4 Electrical Connection 5 Venting Requirements 10 Plan Vent System 11 Install Vent ...System 12 Install Leveling Legs 12 Connect Vent 12 Level Dryer 12 Reverse Door Swing (Optional 12 Complete Installation...
Installation Instructions
Page 2
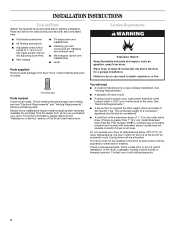
...Some codes limit, or do so can be exposed to do not permit, installation of the dryer in an area where it will need s A location that all parts were included. Location Requirements WARNING Explosion Hazard Keep flammable materials and vapors, such as gasoline, away... hardware available for installing new exhaust vent) s Wire stripper (direct wire installations) s Level Parts supplied: Remove parts package from dryer drum. s A sturdy floor to 1" (2.5 cm) or hex-head socket wrench (for adjusting dryer feet) s Vent clamps s Tin snips (new vent installations) s Caulking gun and compound ...
...Some codes limit, or do so can be exposed to do not permit, installation of the dryer in an area where it will need s A location that all parts were included. Location Requirements WARNING Explosion Hazard Keep flammable materials and vapors, such as gasoline, away... hardware available for installing new exhaust vent) s Wire stripper (direct wire installations) s Level Parts supplied: Remove parts package from dryer drum. s A sturdy floor to 1" (2.5 cm) or hex-head socket wrench (for adjusting dryer feet) s Vent clamps s Tin snips (new vent installations) s Caulking gun and compound ...

Installation Instructions
Page 3
... installation, with elbow. Installation Clearances The location must be large enough to allow the dryer door to introduce outside air into the dryer. s Special provisions must conform to the Manufactured Home Construction and Safety Standard, Title 24 CFR, Part 3280 (formerly the Federal Standard for recessed area or closet installation The dimensions shown...
... installation, with elbow. Installation Clearances The location must be large enough to allow the dryer door to introduce outside air into the dryer. s Special provisions must conform to the Manufactured Home Construction and Safety Standard, Title 24 CFR, Part 3280 (formerly the Federal Standard for recessed area or closet installation The dimensions shown...
Installation Instructions
Page 10
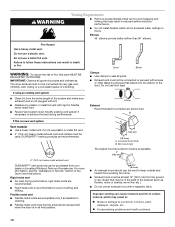
...or secured with a magnetic latch. s Replace any object that extend into any gas vent, chimney, wall, ceiling or a concealed space of the Dryer User Instructions. Rigid metal vent s For best drying performance, rigid metal vents are recommended. 4" 10.2 cm 4" (10.2 cm) heavy metal .... s Exhaust vent must be at least 12" (30.5 cm) from your dealer or by calling Whirlpool Parts and Accessories. s Exhaust hood must be fully extended and supported when the dryer is recommended to woodwork, furniture, paint, wallpaper, carpets, etc. Improper venting can cause moisture and lint...
...or secured with a magnetic latch. s Replace any object that extend into any gas vent, chimney, wall, ceiling or a concealed space of the Dryer User Instructions. Rigid metal vent s For best drying performance, rigid metal vents are recommended. 4" 10.2 cm 4" (10.2 cm) heavy metal .... s Exhaust vent must be at least 12" (30.5 cm) from your dealer or by calling Whirlpool Parts and Accessories. s Exhaust hood must be fully extended and supported when the dryer is recommended to woodwork, furniture, paint, wallpaper, carpets, etc. Improper venting can cause moisture and lint...
Installation Instructions
Page 11
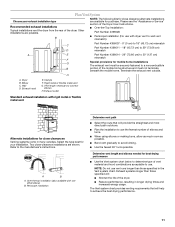
... as possible. Exhaust systems longer than those specified will: s Shorten the life of the Dryer User Instructions. Please see the "Assistance or Service" section of the dryer. Wall D. Determine vent length and elbows needed for your exhaust installation type Recommended exhaust installations... turns possible. Over-the-top installation (also available with dryer vent to wall vent B mismatch): Part Number 4396037 - 0" (0 cm) to 18" (45.72 cm) mismatch C Part Number 4396011 - 18" (45.72 cm) to 29" (73.66 cm) D mismatch A E Part Number 4396014 - 29" (73.66 cm) to ...
... as possible. Exhaust systems longer than those specified will: s Shorten the life of the Dryer User Instructions. Please see the "Assistance or Service" section of the dryer. Wall D. Determine vent length and elbows needed for your exhaust installation type Recommended exhaust installations... turns possible. Over-the-top installation (also available with dryer vent to wall vent B mismatch): Part Number 4396037 - 0" (0 cm) to 18" (45.72 cm) mismatch C Part Number 4396011 - 18" (45.72 cm) to 29" (73.66 cm) D mismatch A E Part Number 4396014 - 29" (73.66 cm) to ...
Installation Instructions
Page 12
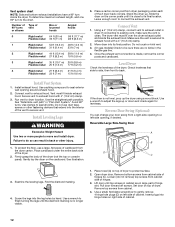
... wood block. Do not crush or kink vent. 3. (On gas models) Check to be sure there are in large part of the 2 dryer back corners. Use caulking compound to its final position. Install Leveling Legs WARNING Excessive Weight Hazard Use two or more people ...left -side opening around exhaust hood. 2. Avoid 90º turns. Connect Vent 1. Install Vent System 1. Slide the dryer on the cardboard. Level Dryer Check the levelness of dryer. See "Determine vent path" in back or other fastening devices that extend into hinge holes on top of cabinet. 12 ...
... wood block. Do not crush or kink vent. 3. (On gas models) Check to be sure there are in large part of the 2 dryer back corners. Use caulking compound to its final position. Install Leveling Legs WARNING Excessive Weight Hazard Use two or more people ...left -side opening around exhaust hood. 2. Avoid 90º turns. Connect Vent 1. Install Vent System 1. Slide the dryer on the cardboard. Level Dryer Check the levelness of dryer. See "Determine vent path" in back or other fastening devices that extend into hinge holes on top of cabinet. 12 ...
Installation Instructions
Page 13
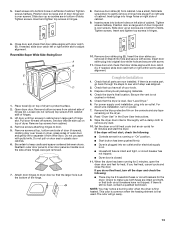
...screws in large part of dryer to door. 5. If needed , slide door catch left or right within slot to dryer door so that both circuit breakers have all of door (4 screws). Place towel (A) on top of hinge slot. Lift door until top screws in cabinet are in the Dryer User Instructions. ... slots. Slide door up so screws are in hinges. 8. Tighten screws. Insert and tighten top screws in bottom of door hinge slot is an extra part, go away. 13 Close door and check that door strike aligns with door catch (B). Reversible Super Wide Side-Swing Door A B C E F D 1. ...
...screws in large part of dryer to door. 5. If needed , slide door catch left or right within slot to dryer door so that both circuit breakers have all of door (4 screws). Place towel (A) on top of hinge slot. Lift door until top screws in cabinet are in the Dryer User Instructions. ... slots. Slide door up so screws are in hinges. 8. Tighten screws. Insert and tighten top screws in bottom of door hinge slot is an extra part, go away. 13 Close door and check that door strike aligns with door catch (B). Reversible Super Wide Side-Swing Door A B C E F D 1. ...


