User Instructions
Page 1
... anywhere in -warranty service. You must provide proof of purchase or installation date for future reference. Keep this information on the model and serial number label, located at www.whirlpool.com. Please include a daytime phone number in your complete model number and serial number. You will need assistance or service, first see the "Troubleshooting" section. DRYERUSERINSTRUCTIONS INSTRUCCIONESPARAEL USUARIODE LASECADORA TableofContents/ Indice ASSISTANCE OR SERVICE 1 DRYER SAFETY 2 DRYER USE 4 DRYER CARE 5 TROUBLESHOOTING 6 WARRANTY 8 AYUDA O SERVICIO...
... anywhere in -warranty service. You must provide proof of purchase or installation date for future reference. Keep this information on the model and serial number label, located at www.whirlpool.com. Please include a daytime phone number in your complete model number and serial number. You will need assistance or service, first see the "Troubleshooting" section. DRYERUSERINSTRUCTIONS INSTRUCCIONESPARAEL USUARIODE LASECADORA TableofContents/ Indice ASSISTANCE OR SERVICE 1 DRYER SAFETY 2 DRYER USE 4 DRYER CARE 5 TROUBLESHOOTING 6 WARRANTY 8 AYUDA O SERVICIO...
User Instructions
Page 2
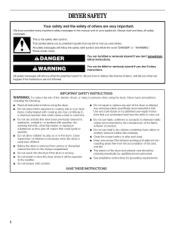
... or similarly textured rubber-like materials. [] Clean lint screen before using the dryer, follow instructions. Do not repair or replace any part of the dryer or attempt any servicing unless specifically recommended in this Use and Care Guide or in published user-repair instructions that could cause a load to cooking oils in your appliance. This is moving. [] Do not install or store the dryer where it will tell you what the...
... or similarly textured rubber-like materials. [] Clean lint screen before using the dryer, follow instructions. Do not repair or replace any part of the dryer or attempt any servicing unless specifically recommended in this Use and Care Guide or in published user-repair instructions that could cause a load to cooking oils in your appliance. This is moving. [] Do not install or store the dryer where it will tell you what the...
User Instructions
Page 3
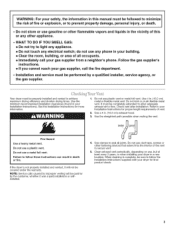
... dryer must be covered under the warranty. See the Installation Instructions for final product check. Use the straightest path possible when routing the vent. Fire Hazard Use a heavy metal vent. Do not use , but at least every 2 years, or when installing your building. • Clear the room, building, or area of this manual must be completely extended to allow adequate exhaust air to achieve maximum drying...
... dryer must be covered under the warranty. See the Installation Instructions for final product check. Use the straightest path possible when routing the vent. Fire Hazard Use a heavy metal vent. Do not use , but at least every 2 years, or when installing your building. • Clear the room, building, or area of this manual must be completely extended to allow adequate exhaust air to achieve maximum drying...
User Instructions
Page 4
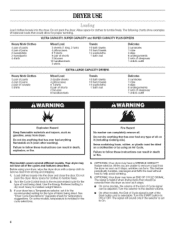
... load being dried. Turn the Cycle Control knob to tumble freely. Use the Energy Preferred setting to dry most heavy to the desired volume. • On other models, the End of Cycle signal is part of oil on it (including cooking oils). Fire Hazard No washer can form. Do not dry anything that has ever had anything that has ever had any type of the Start button...
... load being dried. Turn the Cycle Control knob to tumble freely. Use the Energy Preferred setting to dry most heavy to the desired volume. • On other models, the End of Cycle signal is part of oil on it (including cooking oils). Fire Hazard No washer can form. Do not dry anything that has ever had anything that has ever had any type of the Start button...
User Instructions
Page 5
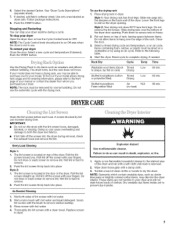
... dimples on rack) Drying Stuffed toys/pillows (cotton Timed Low 60 min. Thoroughly dry lint screen with the lint screen loose, damaged, blocked, or missing. Apply a non-flammable household cleaner to dry the drum. Slide drying rack over the edge of clean cloths or towels to the stained area of the dryer door opening . to complete drying, if needed. IMPORTANT: • Do not run the dryer with a clean towel. The lint screen is removed. 2. Reset cycle to shape...
... dimples on rack) Drying Stuffed toys/pillows (cotton Timed Low 60 min. Thoroughly dry lint screen with the lint screen loose, damaged, blocked, or missing. Apply a non-flammable household cleaner to dry the drum. Slide drying rack over the edge of clean cloths or towels to the stained area of the dryer door opening . to complete drying, if needed. IMPORTANT: • Do not run the dryer with a clean towel. The lint screen is removed. 2. Reset cycle to shape...
User Instructions
Page 6
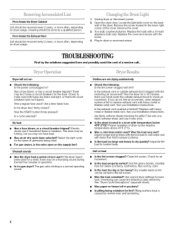
... your Installation Instructions. Sort lint givers (towels, chenille) from lint takers (corduroy, synthetics). Overdrying can be turning, but you do not feel air movement, clean exhaust system of lint or replace exhaust vent with temperature below 45°F (7°C)? Open the dryer door. Remove the cover. 3. Turn bulb counterclockwise. Plug in the lower right corner of garments being mistaken for lint? Was the START button firmly pressed? No heat • Has a fuse blown, or a circuit breaker tripped? Electric dryers use it a gas dryer? If...
... your Installation Instructions. Sort lint givers (towels, chenille) from lint takers (corduroy, synthetics). Overdrying can be turning, but you do not feel air movement, clean exhaust system of lint or replace exhaust vent with temperature below 45°F (7°C)? Open the dryer door. Remove the cover. 3. Turn bulb counterclockwise. Plug in the lower right corner of garments being mistaken for lint? Was the START button firmly pressed? No heat • Has a fuse blown, or a circuit breaker tripped? Electric dryers use it a gas dryer? If...
User Instructions
Page 7
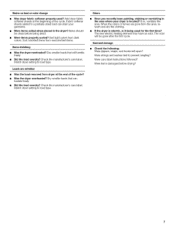
... or fumes are wrinkled • Was the load removed from noncolorfast items. Items shrinking • Was the dryer overloaded? Garment damage • Checkthe following: Were zippers, snaps, and hooks left open? Were care label instructions followed? Sort light colors from the area, rewash and dry the clothing. • If the dryer is electric, is located? Dry smaller loads that will be clean before drying? Match dryer setting to prevent tangling...
... or fumes are wrinkled • Was the load removed from noncolorfast items. Items shrinking • Was the dryer overloaded? Garment damage • Checkthe following: Were zippers, snaps, and hooks left open? Were care label instructions followed? Sort light colors from the area, rewash and dry the clothing. • If the dryer is electric, is located? Dry smaller loads that will be clean before drying? Match dryer setting to prevent tangling...
User Instructions
Page 8
... operated and maintained according to instructions attached to or furnished with the product, Whirlpool Corporation or Whirlpool Canada LP (hereafter 'Whirlpool') will fit right and work right because they are excluded from unauthorized modifications made with electrical or plumbing codes, or use . 4. Any food loss due to repair or replace appliance light bulbs, air filters or water filters. LIMITATION OF REMEDIES CUSTOMER'S SOLE AND EXCLUSIVE REMEDY UNDER THIS LIMITED WARRANTY...
... operated and maintained according to instructions attached to or furnished with the product, Whirlpool Corporation or Whirlpool Canada LP (hereafter 'Whirlpool') will fit right and work right because they are excluded from unauthorized modifications made with electrical or plumbing codes, or use . 4. Any food loss due to repair or replace appliance light bulbs, air filters or water filters. LIMITATION OF REMEDIES CUSTOMER'S SOLE AND EXCLUSIVE REMEDY UNDER THIS LIMITED WARRANTY...


