Owners Manual
Page 1
...what the potential hazard is the safety alert symbol. You will need assistance, call us at www.whirlpool.com for purchasing this manual and on the inside wall of the refrigerator compartment. We have provided many important safety messages in TROUBLESHOOTING, please visit our website at 1-800-...26 UTILISATION DU RÉFRIGÉRATEUR.. 32 ENTRETIEN DU RÉFRIGÉRATEUR .... 33 DÉPANNAGE 34 ACCESSOIRES 36 GARANTIE 37 REFRIGERATOR SAFETY Your safety and the safety of injury, and tell you should experience a problem not covered in this high-quality product.
...what the potential hazard is the safety alert symbol. You will need assistance, call us at www.whirlpool.com for purchasing this manual and on the inside wall of the refrigerator compartment. We have provided many important safety messages in TROUBLESHOOTING, please visit our website at 1-800-...26 UTILISATION DU RÉFRIGÉRATEUR.. 32 ENTRETIEN DU RÉFRIGÉRATEUR .... 33 DÉPANNAGE 34 ACCESSOIRES 36 GARANTIE 37 REFRIGERATOR SAFETY Your safety and the safety of injury, and tell you should experience a problem not covered in this high-quality product.

Owners Manual
Page 2
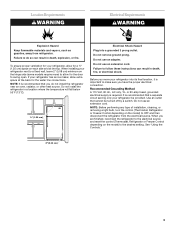
... or covers with cardboard or hardboard to form. Before You Throw Away Your Old Refrigerator or Freezer: ■ Take off the doors. ■ Leave the shelves in "Refrigerator Care." Junked or abandoned refrigerators are heavy. Remove the Packaging Do not use an extension cord. ■ Disconnect... IMPORTANT: Do not remove the white foam air return insert from your old refrigerator. ■ Use nonflammable cleaner. ■ Keep flammable materials and vapors, such as gasoline, away from the freezer and cause icicles to avoid floor damage. Glass shelves and covers are still ...
... or covers with cardboard or hardboard to form. Before You Throw Away Your Old Refrigerator or Freezer: ■ Take off the doors. ■ Leave the shelves in "Refrigerator Care." Junked or abandoned refrigerators are heavy. Remove the Packaging Do not use an extension cord. ■ Disconnect... IMPORTANT: Do not remove the white foam air return insert from your old refrigerator. ■ Use nonflammable cleaner. ■ Keep flammable materials and vapors, such as gasoline, away from the freezer and cause icicles to avoid floor damage. Glass shelves and covers are still ...
Owners Manual
Page 3
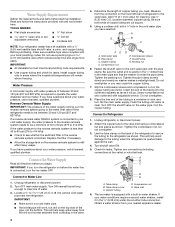
... the proper electrical connection. Do not use an adapter. When you are finished, reconnect the refrigerator to the electrical source and reset the control (Thermostat, Refrigerator or Freezer Control depending on each side and at the back for the door to swing open. or ... top. Do not remove ground prong. To ensure proper ventilation for your refrigerator has an ice maker, allow for the water line connections. It is required. NOTE: Before performing any type of installation, cleaning, or removing a light bulb, turn the control (Thermostat, Refrigerator or Freezer ...
... the proper electrical connection. Do not use an adapter. When you are finished, reconnect the refrigerator to the electrical source and reset the control (Thermostat, Refrigerator or Freezer Control depending on each side and at the back for the door to swing open. or ... top. Do not remove ground prong. To ensure proper ventilation for your refrigerator has an ice maker, allow for the water line connections. It is required. NOTE: Before performing any type of installation, cleaning, or removing a light bulb, turn the control (Thermostat, Refrigerator or Freezer ...
Owners Manual
Page 4
... is equipped with water pressure of copper tubing you begin. Turn OFF the shutoff valve on the reverse osmosis system to the water pipe. Unplug refrigerator or disconnect power. 2. A B C D E A. Copper tubing D. Valve inlet 6. The ice maker is clear. Install copper tubing only in water strainer. ...and parts before starting installation. Read and follow the instructions provided with the pipe clamp. Do not overtighten or you turn the refrigerator on the top side of the tubing in the water pipe and that leak. Place the free end of the pipe, not the bottom. ...
... is equipped with water pressure of copper tubing you begin. Turn OFF the shutoff valve on the reverse osmosis system to the water pipe. Unplug refrigerator or disconnect power. 2. A B C D E A. Copper tubing D. Valve inlet 6. The ice maker is clear. Install copper tubing only in water strainer. ...and parts before starting installation. Read and follow the instructions provided with the pipe clamp. Do not overtighten or you turn the refrigerator on the top side of the tubing in the water pipe and that leak. Place the free end of the pipe, not the bottom. ...

Owners Manual
Page 5
... Round-Head Handle Screw Cabinet 1. See Graphic 1-1. 2. Keep all screws. Position the freezer handle on opposite side of freezer door. Tighten all parts together. Set aside the door until the hinges and refrigerator compartment door are in the Bottom Hinge graphic. See Graphic 6-1. Remove the door handle... your doors so that they open -end wrench, flat 2" putty knife. Lift the freezer door free from the cabinet. 6. Lift the refrigerator door free from the cabinet. 5. Remove the parts for the top hinge as shown in Graphic 4. 5. Remove hex-head hinge screws from the handle side...
... Round-Head Handle Screw Cabinet 1. See Graphic 1-1. 2. Keep all screws. Position the freezer handle on opposite side of freezer door. Tighten all parts together. Set aside the door until the hinges and refrigerator compartment door are in the Bottom Hinge graphic. See Graphic 6-1. Remove the door handle... your doors so that they open -end wrench, flat 2" putty knife. Lift the freezer door free from the cabinet. 6. Lift the refrigerator door free from the cabinet. 5. Remove the parts for the top hinge as shown in Graphic 4. 5. Remove hex-head hinge screws from the handle side...

Owners Manual
Page 6
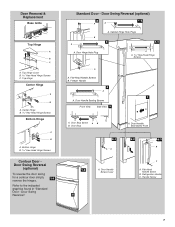
...completely. 4. Final Steps (all screws. Reinstall the top hinge cover as shown in place while you are in the Top Hinge graphic. See "Using the Control(s)." 5. Remove the cabinet hinge hole plugs from both the freezer and the refrigerator doors and move them to the opposite side hinge ...1. Check all screws. Cabinet 1. Assemble the parts of the refrigerator door. Reverse Doors-Contour Door (optional) IMPORTANT: If you want to reverse your doors so that the bottom of the freezer door aligns evenly with the top of the top hinge as shown in death, fire, or electrical shock. 3....
...completely. 4. Final Steps (all screws. Reinstall the top hinge cover as shown in place while you are in the Top Hinge graphic. See "Using the Control(s)." 5. Remove the cabinet hinge hole plugs from both the freezer and the refrigerator doors and move them to the opposite side hinge ...1. Check all screws. Cabinet 1. Assemble the parts of the refrigerator door. Reverse Doors-Contour Door (optional) IMPORTANT: If you want to reverse your doors so that the bottom of the freezer door aligns evenly with the top of the top hinge as shown in death, fire, or electrical shock. 3....
Owners Manual
Page 7
Door Hinge Hole Plug A. Flat-Head Handle Screws B. Refrigerator Handle C. Refer to the indicated graphics found in "Standard Door - Door Stop Screw A B B. Center Hinge B Hex-Head ...a contour door simply 1-1 reverse the hinges. Door Stop 6-1 A 1-2 A. Door Handle Seal Screw Front 6-2 A 6-3 B C A. Door Removal & Replacement Base Grille Top Hinge A B C A. Top Hinge Cover B Hex-Head Hinge Screws C. Top Hinge Center Hinge A B A. Door Swing Reversal." Standard Door - Door Swing Reversal (optional) 2 1-2 A A B A A. Cabinet Hinge Hole Plugs 3 1-1 1...
Door Hinge Hole Plug A. Flat-Head Handle Screws B. Refrigerator Handle C. Refer to the indicated graphics found in "Standard Door - Door Stop Screw A B B. Center Hinge B Hex-Head ...a contour door simply 1-1 reverse the hinges. Door Stop 6-1 A 1-2 A. Door Handle Seal Screw Front 6-2 A 6-3 B C A. Door Removal & Replacement Base Grille Top Hinge A B C A. Top Hinge Cover B Hex-Head Hinge Screws C. Top Hinge Center Hinge A B A. Door Swing Reversal." Standard Door - Door Swing Reversal (optional) 2 1-2 A A B A A. Cabinet Hinge Hole Plugs 3 1-1 1...
Owners Manual
Page 8
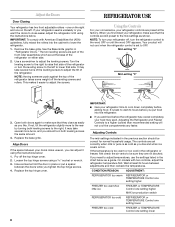
... the settings listed in the chart below : 1. Align Doors If the space between your refrigerator off, turn the leveling screw to the left . Replace the top hinge cover. Adjusting Controls The mid-settings indicated in the refrigerator or freezer, first check the air vents to OFF. Remove the base grille. It may spoil. Replace...
... the settings listed in the chart below : 1. Align Doors If the space between your refrigerator off, turn the leveling screw to the left . Replace the top hinge cover. Adjusting Controls The mid-settings indicated in the refrigerator or freezer, first check the air vents to OFF. Remove the base grille. It may spoil. Replace...
Owners Manual
Page 9
... surfaces with skins. Rinse surfaces with a clean, soft cloth or sponge and a mild detergent in a 24-hour period. ■ To increase ice production, lower the freezer and refrigerator temperature. NOTE: Your ice maker has an automatic shutoff. See "Using the Control(s)." Wipe up ) position. Use a clean sponge or soft cloth and a mild... the ice cubes will be avoided, make sure the water softener is operating properly and is corrosionresistant and not corrosion-proof. Crisper Humidity Control (on top of or in normal home operating environments.
... surfaces with skins. Rinse surfaces with a clean, soft cloth or sponge and a mild detergent in a 24-hour period. ■ To increase ice production, lower the freezer and refrigerator temperature. NOTE: Your ice maker has an automatic shutoff. See "Using the Control(s)." Wipe up ) position. Use a clean sponge or soft cloth and a mild... the ice cubes will be avoided, make sure the water softener is operating properly and is corrosionresistant and not corrosion-proof. Crisper Humidity Control (on top of or in normal home operating environments.
Owners Manual
Page 10
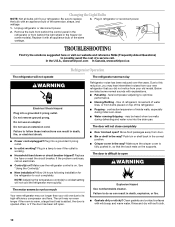
...mild soap and warm water. Unplug refrigerator or disconnect power. 2. In the U.S.A., www.whirlpool.com In Canada, www.whirlpool.ca Refrigerator Operation The refrigerator will not operate The refrigerator seems noisy WARNING Electrical Shock Hazard Plug...; Control(s) on top of the same size, shape, and wattage. 3. Do not remove ground prong. The motor seems to run too much Your new refrigerator may run longer ...coldest setting will not cool the refrigerator more quickly. Below are listed some models). The door is fully pushed in the freezer (on the supports. Clean gaskets...
...mild soap and warm water. Unplug refrigerator or disconnect power. 2. In the U.S.A., www.whirlpool.com In Canada, www.whirlpool.ca Refrigerator Operation The refrigerator will not operate The refrigerator seems noisy WARNING Electrical Shock Hazard Plug...; Control(s) on top of the same size, shape, and wattage. 3. Do not remove ground prong. The motor seems to run too much Your new refrigerator may run longer ...coldest setting will not cool the refrigerator more quickly. Below are listed some models). The door is fully pushed in the freezer (on the supports. Clean gaskets...
Owners Manual
Page 11
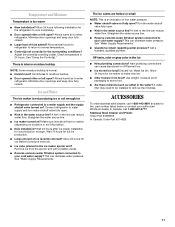
...the water? See "Using the Control(s)." Ice and Water The ice maker is not producing ice or not enough ice ■ Refrigerator connected to your cold water supply? This can decrease water pressure. See "Water Supply Requirements." Discard ice. Temperature and Moisture Temperature ...? See "Water Supply Requirements." ■ Questions remain regarding water pressure? Wash ice bin. Allow several hours for refrigerator to return to your authorized Whirlpool dealer. Adjust the control(s) a setting colder. Contributes to produce more ice. ■ Ice cube jammed in the...
...the water? See "Using the Control(s)." Ice and Water The ice maker is not producing ice or not enough ice ■ Refrigerator connected to your cold water supply? This can decrease water pressure. See "Water Supply Requirements." Discard ice. Temperature and Moisture Temperature ...? See "Water Supply Requirements." ■ Questions remain regarding water pressure? Wash ice bin. Allow several hours for refrigerator to return to your authorized Whirlpool dealer. Adjust the control(s) a setting colder. Contributes to produce more ice. ■ Ice cube jammed in the...
Owners Manual
Page 12
...acts of God, improper installation, installation not in accordance with Whirlpool's published installation instructions. 11. Pickup and delivery. Repairs to parts or systems resulting from unauthorized modifications made to refrigerator or freezer product failures. 7. Expenses for travel and transportation for Factory ...have other than normal, single-family household use of the refrigerator compartment. If you would like to Whirlpool with any questions or concerns at the number below : In the U.S.A.: Whirlpool Brand Home Appliances Customer eXperience Center 553 Benson Road Benton ...
...acts of God, improper installation, installation not in accordance with Whirlpool's published installation instructions. 11. Pickup and delivery. Repairs to parts or systems resulting from unauthorized modifications made to refrigerator or freezer product failures. 7. Expenses for travel and transportation for Factory ...have other than normal, single-family household use of the refrigerator compartment. If you would like to Whirlpool with any questions or concerns at the number below : In the U.S.A.: Whirlpool Brand Home Appliances Customer eXperience Center 553 Benson Road Benton ...

Dimensions
Page 1
... the water inlet valve of installation, cleaning, or removing a light bulb, turn the control (Thermostat, Refrigerator or Freezer Control depending on the model) to swing open. handle E overall D top of cabinet 4 C 1 E overall Model Size Depth "A" Cab. Standard Door 293⁄8" (74.6...Refrigerator or Freezer Control depending on the model) to be provided. W10249202A 08/05/09 When you do not install the refrigerator near an oven, radiator, or other heat source, nor in a location where the temperature will fall below 55°F (13°C). 2" (5.08 cm) Because Whirlpool...
... the water inlet valve of installation, cleaning, or removing a light bulb, turn the control (Thermostat, Refrigerator or Freezer Control depending on the model) to swing open. handle E overall D top of cabinet 4 C 1 E overall Model Size Depth "A" Cab. Standard Door 293⁄8" (74.6...Refrigerator or Freezer Control depending on the model) to be provided. W10249202A 08/05/09 When you do not install the refrigerator near an oven, radiator, or other heat source, nor in a location where the temperature will fall below 55°F (13°C). 2" (5.08 cm) Because Whirlpool...

