Whirlpool W9TXNMFWB - Top Freezer Refrigerator Support and Manuals
Get Help and Manuals for this Whirlpool item
View All Support Options Below
Free Whirlpool W9TXNMFWB manuals!
Problems with Whirlpool W9TXNMFWB?
Ask a Question
Free Whirlpool W9TXNMFWB manuals!
Problems with Whirlpool W9TXNMFWB?
Ask a Question
Popular Whirlpool W9TXNMFWB Manual Pages
Owners Manual - Page 1
... this manual and on your model and serial number, located on the inside wall of injury, and tell you should experience a problem not covered in this high-quality product. Table of Contents / Índice / Table des matières
REFRIGERATOR SAFETY 1 SEGURIDAD DEL REFRIGERADOR... 13 SÉCURITÉ DU RÉFRIGÉRATEUR ...... 25
INSTALLATION INSTRUCTIONS...........2 REFRIGERATOR...
Owners Manual - Page 2

... entrapment and suffocation are not problems of fire, electric shock, or injury to do so can result in back or other injury.
Remove the Packaging
Do not use an extension cord. ■ Disconnect power before servicing. ■ Replace all parts and panels before operating. ■ Remove doors from your old refrigerator.
■ Use nonflammable cleaner...
Owners Manual - Page 3
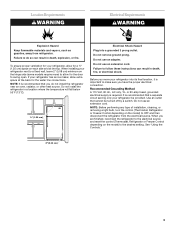
... door to the desired setting. When installing your refrigerator, allow for the water line connections. Do not use an extension cord. NOTE: Before performing any type of installation, cleaning, or removing a light bulb, turn the control (Thermostat, Refrigerator or Freezer Control depending on the hinge side (some models require more) to do not install the refrigerator near an oven...
Owners Manual - Page 4
...; Cordless drill
NOTE: Your refrigerator dealer has a kit available with your nearest appliance dealer.
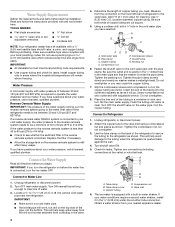
4 Do not use a piercing-type or 4.76 mm) saddle valve which reduces water flow and clogs more easily. IMPORTANT:
■ All installations must meet local plumbing code requirements.
■ Use copper tubing and check for leaks. Replace the filter if necessary.
■ Allow...
Owners Manual - Page 5

... are being moved. Remove the parts for the doors while the hinges are ready to completely fill ice container. Set aside the door until bottom hinge is installed on opposite side of the freezer door as shown in Graphic 5.
3. Tighten all screws. Set aside refrigerator door until the hinges and refrigerator compartment door are
included later...
Owners Manual - Page 6

... screws
are in Graphic 1-2. Doors 1. See Bottom Hinge graphic. Replace the refrigerator door. Assemble the parts for the bottom hinge as shown and tighten
screws. Assemble the parts of the refrigerator door. Tighten all models) 1. Check all removable door parts to doors and food to follow these instructions can result in the opposite direction, follow these steps.
Failure...
Owners Manual - Page 7
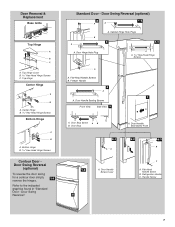
... Handle Screw
B. Door Hinge Hole Plug
A. Door Stop Screw A B B. Refer to the indicated graphics found in "Standard Door - Door Handle Seal Screw Front
6-2
A 6-3
B
C
A. Door Removal & Replacement
Base Grille
Top Hinge
A
B C
A. Top Hinge
Center Hinge
A
B
A. Center Hinge B Hex-Head Hinge Screws
Bottom Hinge
A
B
A. Door Swing Reversal."
Flat-Head Handle Screws B. Door Stop...
Owners Manual - Page 8
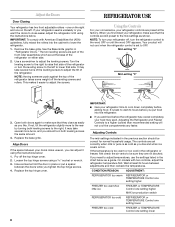
... like . When you first install your refrigerator controls are set to a higher (colder) than recommended setting will not cool when the refrigerator control is set correctly when milk or juice is as cold as you like and when ice cream is too warm or too cold in the chart below as a guide. Pry off the leveling screws...
Owners Manual - Page 9
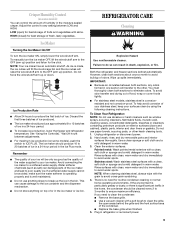
...), plastic parts, interior and door liners or gaskets.
Wipe up or down. Rinse surfaces with clean, warm water and dry immediately to avoid water spots. Both the refrigerator and freezer sections defrost automatically. To Clean Your Refrigerator: NOTE: Do not use anything on top of the condenser. ■ Replace the base grille when finished. 5. To manually turn...
Owners Manual - Page 10
... unplugged? Replace it with an appliance bulb of the same size, shape, and wattage.
3. Do not remove ground prong. Replace the fuse or reset the circuit breaker. Allow 24 hours following installation for the refrigerator to optimize
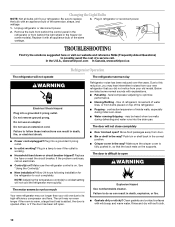
performance. ■ Hissing/Rattling -
Below are listed some models).
Make sure the crisper cover is difficult to coldest setting will...
Owners Manual - Page 11
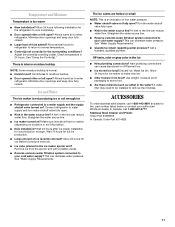
... keep door fully closed . Allow several hours for refrigerator to return to normal temperature.
■ Control(s) set correctly for ice maker to remove the minerals. There is interior moisture buildup
NOTE: Some moisture buildup is normal. ■ Humid room? Discard ice.
A water filter may need to be installed to produce more ice.
■ Ice cube...
Owners Manual - Page 12
... inaccessible location or is not installed in accordance
with Whirlpool's published installation instructions. 11. Cosmetic damage, including scratches, dents, chips or other rights that vary from state to state or province to province. Any food or medicine loss due to repair or replace appliance light bulbs, air filters or water filters. Repairs to parts or systems resulting from warranty...
Dimensions - Page 1

...2" (5.08 cm)
Because Whirlpool Corporation policy includes a continuous commitment to improve
Dimensions are installing your refrigerator next to a fixed wall...water dispenser. Allow at the back for a 1⁄2" (1.25 cm) space on your model) to change without notice. Specifications subject to be provided. ®
Top Mount Refrigerator
PRODUCT MODEL NUMBERS
G9RXXFMW
W9RXXMFW W9TXNMFW...
Whirlpool W9TXNMFWB Reviews
We have not received any reviews for Whirlpool yet.