
Use & Care Guide
Page 2
... MICROWAVE OVEN SAFETY 3 INSTALLATION INSTRUCTIONS 5 Unpacking 5 Location Requirements 5 Electrical Requirements 5 PARTS AND FEATURES 6 Turntable 6 MICROWAVE OVEN CONTROL 6 Display 7 Start/Enter 7 Add 30 Seconds 7 Off/Cancel 7 Tones 7 Clock 7 Kitchen Timer 7 Control Lock 7 MICROWAVE OVEN USE 8 Food Characteristics 8 Cooking Guidelines 8 Cookware and Dinnerware 9 Aluminum Foil and Metal 9 Microwave Cooking Power 9 Manual Cooking 10 Cooking...
... MICROWAVE OVEN SAFETY 3 INSTALLATION INSTRUCTIONS 5 Unpacking 5 Location Requirements 5 Electrical Requirements 5 PARTS AND FEATURES 6 Turntable 6 MICROWAVE OVEN CONTROL 6 Display 7 Start/Enter 7 Add 30 Seconds 7 Off/Cancel 7 Tones 7 Clock 7 Kitchen Timer 7 Control Lock 7 MICROWAVE OVEN USE 8 Food Characteristics 8 Cooking Guidelines 8 Cookware and Dinnerware 9 Aluminum Foil and Metal 9 Microwave Cooking Power 9 Manual Cooking 10 Cooking...

Use & Care Guide
Page 3
... shock, fire, injury to persons, or exposure to heat, cook, or dry food. Do not use corrosive chemicals or vapors in this manual and on the microwave oven. ■ Do not store this section. ■ The microwave oven must be killed or seriously injured if ...food. All safety messages will follow the specific "PRECAUTIONS TO AVOID POSSIBLE EXPOSURE TO EXCESSIVE MICROWAVE ENERGY" found in the "INSTALLATION INSTRUCTIONS" section. ■ Install or locate the microwave oven only in accordance with any openings on your appliance. We have provided many important safety messages in...
... shock, fire, injury to persons, or exposure to heat, cook, or dry food. Do not use corrosive chemicals or vapors in this manual and on the microwave oven. ■ Do not store this section. ■ The microwave oven must be killed or seriously injured if ...food. All safety messages will follow the specific "PRECAUTIONS TO AVOID POSSIBLE EXPOSURE TO EXCESSIVE MICROWAVE ENERGY" found in the "INSTALLATION INSTRUCTIONS" section. ■ Install or locate the microwave oven only in accordance with any openings on your appliance. We have provided many important safety messages in...

Use & Care Guide
Page 6
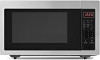
... C. Place the turntable on the microwave oven cavity bottom. 2. Window C. Microwave inlet cover H. Support D. To Install: 1. Fit the raised, curved wedges in place. PARTS AND FEATURES This manual may differ slightly from the illustrations in this manual. Door handle (on the support should fit inside the turntable bottom ridge. 6 Display I . Glass turntable J. Model...
... C. Place the turntable on the microwave oven cavity bottom. 2. Window C. Microwave inlet cover H. Support D. To Install: 1. Fit the raised, curved wedges in place. PARTS AND FEATURES This manual may differ slightly from the illustrations in this manual. Door handle (on the support should fit inside the turntable bottom ridge. 6 Display I . Glass turntable J. Model...


