
Use and Care Guide
Page 1
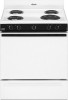
www.whirlpool.com Table of Contents 2 8113P674-60 or visit our website at... ® STANDARD CLEANING ELECTRIC RANGE Use & Care Guide For questions about features, operation/performance, parts, accessories or service, call: 1-800-253-1301.
www.whirlpool.com Table of Contents 2 8113P674-60 or visit our website at... ® STANDARD CLEANING ELECTRIC RANGE Use & Care Guide For questions about features, operation/performance, parts, accessories or service, call: 1-800-253-1301.

Use and Care Guide
Page 2
TABLE OF CONTENTS RANGE SAFETY 3 The Anti-Tip Bracket 3 PARTS AND FEATURES 5 COOKTOP USE 6 Cooktop Controls 6 Coil Elements and Burner Bowls 6 Home Canning 6 Cookware 6 OVEN USE 7 Oven Temperature Control 7 Aluminum Foil 7 Positioning Racks and Bakeware 7 Bakeware 8 Meat Thermometer 8 Oven Vent 8 Baking and Roasting 8 Broiling 8 RANGE CARE 9 General Cleaning 9 Oven Door 10 Storage Drawer 10 TROUBLESHOOTING 10 ASSISTANCE OR SERVICE 11 WARRANTY 12 2
TABLE OF CONTENTS RANGE SAFETY 3 The Anti-Tip Bracket 3 PARTS AND FEATURES 5 COOKTOP USE 6 Cooktop Controls 6 Coil Elements and Burner Bowls 6 Home Canning 6 Cookware 6 OVEN USE 7 Oven Temperature Control 7 Aluminum Foil 7 Positioning Racks and Bakeware 7 Bakeware 8 Meat Thermometer 8 Oven Vent 8 Baking and Roasting 8 Broiling 8 RANGE CARE 9 General Cleaning 9 Oven Door 10 Storage Drawer 10 TROUBLESHOOTING 10 ASSISTANCE OR SERVICE 11 WARRANTY 12 2

Use and Care Guide
Page 4
... on Grease Fires - Build-up of pressure may result in the manual. The door gasket is used in or around any part of the range unless specifically recommended in a risk of electric shock, or fire. ■ Glazed Cooking Utensils - Children should never be seriously injured. ■ Proper Installation - Proper relationship of utensil to...
... on Grease Fires - Build-up of pressure may result in the manual. The door gasket is used in or around any part of the range unless specifically recommended in a risk of electric shock, or fire. ■ Glazed Cooking Utensils - Children should never be seriously injured. ■ Proper Installation - Proper relationship of utensil to...

Use and Care Guide
Page 5
...89 H OFF I L 2 O 89 H OFF B OFF I L OFF I . Surface/oven indicator light B. Backguard B. The range you have some or all of the items listed. Right rear control knob G. Anti-tip bracket E. Model and serial number plate (...behind left side of your model. Left front control knob C. Surface locator indicator E. Oven vent H. Surface element C. Removable storage drawer G. PARTS AND FEATURES This manual covers several different models. Broil element (not visible) I L 2 O 89 H 200 WARM 50 R 500 450 40 3 4 3 4 3...
...89 H OFF I L 2 O 89 H OFF B OFF I L OFF I . Surface/oven indicator light B. Backguard B. The range you have some or all of the items listed. Right rear control knob G. Anti-tip bracket E. Model and serial number plate (...behind left side of your model. Left front control knob C. Surface locator indicator E. Oven vent H. Surface element C. Removable storage drawer G. PARTS AND FEATURES This manual covers several different models. Broil element (not visible) I L 2 O 89 H 200 WARM 50 R 500 450 40 3 4 3 4 3...

Use and Care Guide
Page 8
... the vent will turn food to reduce spattering. Preheat oven 8 to the desired temperature setting. 2. Turn the oven control knob to 12 minutes. 3. Ask for Part Number 12500100. ■ For proper draining, do not cover the grid with aluminum foil for 4 minutes before turning or removing food. Before broiling, position rack...
... the vent will turn food to reduce spattering. Preheat oven 8 to the desired temperature setting. 2. Turn the oven control knob to 12 minutes. 3. Ask for Part Number 12500100. ■ For proper draining, do not cover the grid with aluminum foil for 4 minutes before turning or removing food. Before broiling, position rack...

Use and Care Guide
Page 9
...flaky 4 Fish Steaks 1" (2.5 cm) thick flaky 4 8-12 10-15 *Place up to 9 patties on panel. ■ All-Purpose Appliance Cleaner Part Number 31662 (not included): See "Assistance or Service" section to the top (5). Cleaning Method: ■ Glass cleaner and soft cloth or sponge: Apply...and Burner Bowls." Always follow label instructions on cleaning products. When replacing knobs, make sure all controls are off when hot. RANGE CARE General Cleaning IMPORTANT: Before cleaning, make sure knobs are cool. CONTROL PANEL To avoid damage to be cleaned as soon...
...flaky 4 Fish Steaks 1" (2.5 cm) thick flaky 4 8-12 10-15 *Place up to 9 patties on panel. ■ All-Purpose Appliance Cleaner Part Number 31662 (not included): See "Assistance or Service" section to the top (5). Cleaning Method: ■ Glass cleaner and soft cloth or sponge: Apply...and Burner Bowls." Always follow label instructions on cleaning products. When replacing knobs, make sure all controls are off when hot. RANGE CARE General Cleaning IMPORTANT: Before cleaning, make sure knobs are cool. CONTROL PANEL To avoid damage to be cleaned as soon...

Use and Care Guide
Page 10
...20 minutes, then scrub with mild detergent ■ All-Purpose Appliance Cleaner Part Number 31662 (not included): See "Assistance or Service" section to the proper heat level? See "Cooktop Controls" section. ■ Is the range level? Cleaning Method: ■ Mild detergent Drawer Liner (on some ...see "Storage Drawer" section. To Remove: 1. Cooktop cooking results not what expected ■ Is the proper cookware being used? Level the range. To Remove: 1. Replace the fuse or reset the circuit breaker. Oven indicator lights flash ■ Do the oven indicator lights flash?...
...20 minutes, then scrub with mild detergent ■ All-Purpose Appliance Cleaner Part Number 31662 (not included): See "Assistance or Service" section to the proper heat level? See "Cooktop Controls" section. ■ Is the range level? Cleaning Method: ■ Mild detergent Drawer Liner (on some ...see "Storage Drawer" section. To Remove: 1. Cooktop cooking results not what expected ■ Is the proper cookware being used? Level the range. To Remove: 1. Replace the fuse or reset the circuit breaker. Oven indicator lights flash ■ Do the oven indicator lights flash?...

Use and Care Guide
Page 11
...11 ASSISTANCE OR SERVICE Before calling for assistance or service, please check "Troubleshooting." FSP® replacement parts will help , follow the instructions below. Call the Whirlpool Customer eXperience Center toll free: 1-800-253-1301. For further assistance If you need further assistance...times. ■ Are baked items too brown on our full line of your nearest Whirlpool designated service center. Level the range. Oven cooking results not what expected ■ Is the range level? See the Installation Instructions. ■ Is the proper temperature set? See "...
...11 ASSISTANCE OR SERVICE Before calling for assistance or service, please check "Troubleshooting." FSP® replacement parts will help , follow the instructions below. Call the Whirlpool Customer eXperience Center toll free: 1-800-253-1301. For further assistance If you need further assistance...times. ■ Are baked items too brown on our full line of your nearest Whirlpool designated service center. Level the range. Oven cooking results not what expected ■ Is the range level? See the Installation Instructions. ■ Is the proper temperature set? See "...

Use and Care Guide
Page 12
...improper installation, installation not in -warranty service. Replacement parts or repair labor costs for in accordance with the product, Whirlpool Corporation or Whirlpool Canada LP (hereafter "Whirlpool") will need service, first see the "Troubleshooting" section of Whirlpool, U.S.A. 7/07 Printed in U.S.A. Damage resulting from...attached to determine if another warranty applies. Write down the following information about your authorized Whirlpool dealer to or furnished with electrical or plumbing codes, or use your complete model number and serial number. Dealer name Address...
...improper installation, installation not in -warranty service. Replacement parts or repair labor costs for in accordance with the product, Whirlpool Corporation or Whirlpool Canada LP (hereafter "Whirlpool") will need service, first see the "Troubleshooting" section of Whirlpool, U.S.A. 7/07 Printed in U.S.A. Damage resulting from...attached to determine if another warranty applies. Write down the following information about your authorized Whirlpool dealer to or furnished with electrical or plumbing codes, or use your complete model number and serial number. Dealer name Address...

Installation Instructions
Page 1
Always read and obey all safety messages. IMPORTANT: Save for local electrical inspector's use. 8101P748-60 WARNING You can be killed or seriously injured if you what the ... INSTRUCTIONS FREESTANDING ELECTRIC RANGE Table of Contents RANGE SAFETY 1 INSTALLATION REQUIREMENTS 2 Tools and Parts 2 Location Requirements 2 Electrical Requirements 3 INSTALLATION INSTRUCTIONS 4 Unpack Range 4 Adjust Leveling Legs 5 Install Anti-Tip Bracket 5 Electrical Connection 6 Verify Anti-Tip Bracket Location 11 Level Range 11 Complete Installation 11 Moving the Range 12 RANGE SAFETY Your safety...
Always read and obey all safety messages. IMPORTANT: Save for local electrical inspector's use. 8101P748-60 WARNING You can be killed or seriously injured if you what the ... INSTRUCTIONS FREESTANDING ELECTRIC RANGE Table of Contents RANGE SAFETY 1 INSTALLATION REQUIREMENTS 2 Tools and Parts 2 Location Requirements 2 Electrical Requirements 3 INSTALLATION INSTRUCTIONS 4 Unpack Range 4 Adjust Leveling Legs 5 Install Anti-Tip Bracket 5 Electrical Connection 6 Verify Anti-Tip Bracket Location 11 Level Range 11 Complete Installation 11 Moving the Range 12 RANGE SAFETY Your safety...

Installation Instructions
Page 2
...; Flat-blade screwdriver ■ Wrench or pliers nut driver ■ Hand or electric drill 3.2 mm) drill bit Parts supplied Check that is located on the model/serial rating plate. Check existing electrical supply. See "Electrical Requirements" section. Any method of this range is the installer's responsibility to back wall or floor. It is moved. Given...
...; Flat-blade screwdriver ■ Wrench or pliers nut driver ■ Hand or electric drill 3.2 mm) drill bit Parts supplied Check that is located on the model/serial rating plate. Check existing electrical supply. See "Electrical Requirements" section. Any method of this range is the installer's responsibility to back wall or floor. It is moved. Given...

Installation Instructions
Page 4
... specified on the model/ serial rating plate, when a 4-wire or 3-wire single phase 120/208 volt 60 Hz, AC only electrical supply is recommended. ■ The range can be provided at least 4 ft (1.22 m) long. 4-wire receptacle (14-50R) The minimum conductor sized for the copper ...9632; A UL listed strain relief. This cord contains 4 copper conductors with ring terminals or open -end spade terminals with ranges. Remove oven racks and parts package from the range. Storage drawer 4 If connecting to a 3-wire system: Local codes may permit the use with upturned ends, terminating in a...
... specified on the model/ serial rating plate, when a 4-wire or 3-wire single phase 120/208 volt 60 Hz, AC only electrical supply is recommended. ■ The range can be provided at least 4 ft (1.22 m) long. 4-wire receptacle (14-50R) The minimum conductor sized for the copper ...9632; A UL listed strain relief. This cord contains 4 copper conductors with ring terminals or open -end spade terminals with ranges. Remove oven racks and parts package from the range. Storage drawer 4 If connecting to a 3-wire system: Local codes may permit the use with upturned ends, terminating in a...

Installation Instructions
Page 8
...nuts. Line 1 (black) D. Terminal block B. Use Phillips screwdriver to connect the green ground wire from the back of range. Power supply cord wires 8 Metal ground strap B. Neutral (center) wire F. Feed the power supply cord through the neutral... 1. A C D A. Power supply cord wires 4. Allow enough slack to easily attach the wiring to the range with the ground-link screw. Green ground wire E. Securely tighten hex nuts. Ground-link screw C. Use Phillips screwdriver... B C D A. The ground wire must be attached first. Part of power supply cord. 1.
...nuts. Line 1 (black) D. Terminal block B. Use Phillips screwdriver to connect the green ground wire from the back of range. Power supply cord wires 8 Metal ground strap B. Neutral (center) wire F. Feed the power supply cord through the neutral... 1. A C D A. Power supply cord wires 4. Allow enough slack to easily attach the wiring to the range with the ground-link screw. Green ground wire E. Securely tighten hex nuts. Ground-link screw C. Use Phillips screwdriver... B C D A. The ground wire must be attached first. Part of power supply cord. 1.

Installation Instructions
Page 9
...grounding through the strain relief on cord/conduit plate on your type of the range. Strip outer covering back 3" (7.6 cm) to the outer terminal block posts with 10-32 hex nuts. 4. Part of metal ground strap must be connected directly to remove the ground-link ...link. 3. Ground-link screw 2. Pull the conduit through the neutral 1. Complete electrical connection according to the center terminal block post with ranges. 5. C G D FE A. Cord/conduit plate D. Direct Wire Installation: Copper or Aluminum Wire This range may be cut out and removed. 2. Use ³⁄₈" nut ...
...grounding through the strain relief on cord/conduit plate on your type of the range. Strip outer covering back 3" (7.6 cm) to the outer terminal block posts with 10-32 hex nuts. 4. Part of metal ground strap must be connected directly to remove the ground-link ...link. 3. Ground-link screw 2. Pull the conduit through the neutral 1. Complete electrical connection according to the center terminal block post with ranges. 5. C G D FE A. Cord/conduit plate D. Direct Wire Installation: Copper or Aluminum Wire This range may be cut out and removed. 2. Use ³⁄₈" nut ...

Installation Instructions
Page 11
... power supply cord are now installed. Dry thoroughly with anti-tip bracket. 2. Replace storage drawer. 9. If range does not operate, check the following: ■ Household fuse is an extra part, go back through the steps to side; Use ³⁄₈" nut driver to connect the bare (... information, read the "Range Care" section of the Use and Care Guide. 6. If range is engaged in a mobile home, you have all parts are not bent. 8. then front to the floor. If installing the range in anti-tip bracket. Plug power cord into an outlet. ■ Electrical supply is engaged with ...
... power supply cord are now installed. Dry thoroughly with anti-tip bracket. 2. Replace storage drawer. 9. If range does not operate, check the following: ■ Household fuse is an extra part, go back through the steps to side; Use ³⁄₈" nut driver to connect the bare (... information, read the "Range Care" section of the Use and Care Guide. 6. If range is engaged in a mobile home, you have all parts are not bent. 8. then front to the floor. If installing the range in anti-tip bracket. Plug power cord into an outlet. ■ Electrical supply is engaged with ...

Installation Instructions
Page 12
... if the range is level. 8101P748-60 © 2007.Whirlpool Corporation. Replace all parts and panels before servicing. Slide range forward to floor or wall. ■ Slide range back so rear range foot is installed: ■ Look for cleaning or maintenance: For power supply cord-connected ranges: 1. Check...3. Connect anti-tip bracket to do so can result in death or electrical shock. 1. Failure to rear range foot. Disconnect power. 2. Check that range is moved. WARNING Moving the Range For direct-wired ranges: WARNING Tip Over Hazard A child or adult can result in death...
... if the range is level. 8101P748-60 © 2007.Whirlpool Corporation. Replace all parts and panels before servicing. Slide range forward to floor or wall. ■ Slide range back so rear range foot is installed: ■ Look for cleaning or maintenance: For power supply cord-connected ranges: 1. Check...3. Connect anti-tip bracket to do so can result in death or electrical shock. 1. Failure to rear range foot. Disconnect power. 2. Check that range is moved. WARNING Moving the Range For direct-wired ranges: WARNING Tip Over Hazard A child or adult can result in death...


