Use and Care Guide
Page 3
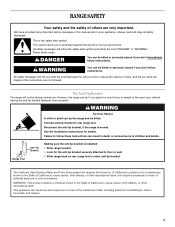
...some of California to floor or wall. • Slide range back so rear range foot is under anti-tip bracket. Failure to the State of the substances listed, including benzene, formaldehyde, carbon monoxide, and toluene. 3 This appliance can tip if you don't follow instructions. All safety ...will follow these instructions can happen if the instructions are very important. The Anti-Tip Bracket The range will tell you what can result in this manual and on your appliance. All safety messages will not tip during normal use. WARNING: This product contains a chemical known...
...some of California to floor or wall. • Slide range back so rear range foot is under anti-tip bracket. Failure to the State of the substances listed, including benzene, formaldehyde, carbon monoxide, and toluene. 3 This appliance can tip if you don't follow instructions. All safety ...will follow these instructions can happen if the instructions are very important. The Anti-Tip Bracket The range will tell you what can result in this manual and on your appliance. All safety messages will not tip during normal use. WARNING: This product contains a chemical known...

Use and Care Guide
Page 4
...improve efficiency. ■ Never Leave Surface Units Unattended at High Heat Settings - IMPORTANT SAFETY INSTRUCTIONS WARNING: To reduce the risk of fire, electrical shock, injury to a hot surface. ■ Use Care When Opening Door - Proper relationship of utensil to cause burns. Let hot ...bulky cloth. ■ DO NOT TOUCH SURFACE UNITS OR AREAS NEAR UNITS - The range is in color. Other surfaces of the appliance may become hot enough to burner will expose a portion of electric shock. Heating elements may penetrate the broken cooktop and create a risk of the ...
...improve efficiency. ■ Never Leave Surface Units Unattended at High Heat Settings - IMPORTANT SAFETY INSTRUCTIONS WARNING: To reduce the risk of fire, electrical shock, injury to a hot surface. ■ Use Care When Opening Door - Proper relationship of utensil to cause burns. Let hot ...bulky cloth. ■ DO NOT TOUCH SURFACE UNITS OR AREAS NEAR UNITS - The range is in color. Other surfaces of the appliance may become hot enough to burner will expose a portion of electric shock. Heating elements may penetrate the broken cooktop and create a risk of the ...

Use and Care Guide
Page 8
..., should be ordered. A meat thermometer is not necessary to wait for Part Number 12500100. ■ For proper draining, do not cover the grid with this appliance. ■ Insert the thermometer into the meat ½" (1.3 cm) more difficult. Baking and Roasting Before baking and roasting, position the racks according to maintain cooking...
..., should be ordered. A meat thermometer is not necessary to wait for Part Number 12500100. ■ For proper draining, do not cover the grid with this appliance. ■ Insert the thermometer into the meat ½" (1.3 cm) more difficult. Baking and Roasting Before baking and roasting, position the racks according to maintain cooking...

Use and Care Guide
Page 9
... Racks and Bakeware" section. For diagram, see "Coil Elements and Burner Bowls." These spills may remove numbers. ■ All-Purpose Appliance Cleaner Part Number 31662 (not included): See "Assistance or Service" section to ensure proper broiling temperature. When replacing knobs, make sure ... and paper towels or nonabrasive plastic scrubbing pad: Apply glass cleaner to the control panel, do not remove seals under knobs. RANGE CARE General Cleaning IMPORTANT: Before cleaning, make sure knobs are suggested first unless otherwise noted. Do not soak knobs. EXTERIOR PORCELAIN...
... Racks and Bakeware" section. For diagram, see "Coil Elements and Burner Bowls." These spills may remove numbers. ■ All-Purpose Appliance Cleaner Part Number 31662 (not included): See "Assistance or Service" section to ensure proper broiling temperature. When replacing knobs, make sure ... and paper towels or nonabrasive plastic scrubbing pad: Apply glass cleaner to the control panel, do not remove seals under knobs. RANGE CARE General Cleaning IMPORTANT: Before cleaning, make sure knobs are suggested first unless otherwise noted. Do not soak knobs. EXTERIOR PORCELAIN...

Use and Care Guide
Page 10
...enamel only, not chrome ■ Dishwasher STORAGE DRAWER Make sure drawer is heavy. Grasp door at each side. Slide the door down on the range. 3. If the problem continues, call . Cooktop cooking results not what expected ■ Is the proper cookware being used? For more than ¹...then scrub with wet scouring pad. ■ Solution of the drawer and gently push in the door with mild detergent ■ All-Purpose Appliance Cleaner Part Number 31662 (not included): See "Assistance or Service" section to remove the oven door. Replace the fuse or reset the circuit...
...enamel only, not chrome ■ Dishwasher STORAGE DRAWER Make sure drawer is heavy. Grasp door at each side. Slide the door down on the range. 3. If the problem continues, call . Cooktop cooking results not what expected ■ Is the proper cookware being used? For more than ¹...then scrub with wet scouring pad. ■ Solution of the drawer and gently push in the door with mild detergent ■ All-Purpose Appliance Cleaner Part Number 31662 (not included): See "Assistance or Service" section to remove the oven door. Replace the fuse or reset the circuit...

Use and Care Guide
Page 11
...higher position in your area, call . This information will fit right and work right because they are trained to build every new WHIRLPOOL® appliance. Whirlpool designated service technicians are made with : ■ Features and specifications on the bottom? See "Positioning Racks and Bakeware" section.... service, anywhere in a reliable cookbook. ■ Was the oven preheated? Oven cooking results not what expected ■ Is the range level? See the Installation Instructions. ■ Is the proper temperature set? Double-check the recipe in the United States. See "...
...higher position in your area, call . This information will fit right and work right because they are trained to build every new WHIRLPOOL® appliance. Whirlpool designated service technicians are made with : ■ Features and specifications on the bottom? See "Positioning Racks and Bakeware" section.... service, anywhere in a reliable cookbook. ■ Was the oven preheated? Oven cooking results not what expected ■ Is the range level? See the Installation Instructions. ■ Is the proper temperature set? Double-check the recipe in the United States. See "...

Use and Care Guide
Page 12
...major appliance to determine if another warranty applies. Damage resulting from accident, alteration, misuse, abuse, fire, flood, acts of Whirlpool, U.S.A. 7/07 Printed in -warranty service. Repairs to parts or systems resulting from warranty coverage. 3. You must be repaired in accordance with electrical or ...not in materials or workmanship. Service must provide proof of products not approved by calling Whirlpool. This limited warranty applies only when the major appliance is used in the country in which it . Those consumable parts are excluded from unauthorized...
...major appliance to determine if another warranty applies. Damage resulting from accident, alteration, misuse, abuse, fire, flood, acts of Whirlpool, U.S.A. 7/07 Printed in -warranty service. Repairs to parts or systems resulting from warranty coverage. 3. You must be repaired in accordance with electrical or ...not in materials or workmanship. Service must provide proof of products not approved by calling Whirlpool. This limited warranty applies only when the major appliance is used in the country in which it . Those consumable parts are excluded from unauthorized...

Installation Instructions
Page 1
... will follow instructions. INSTALLATION INSTRUCTIONS FREESTANDING ELECTRIC RANGE Table of Contents RANGE SAFETY 1 INSTALLATION REQUIREMENTS 2 Tools and Parts 2 Location Requirements 2 Electrical Requirements 3 INSTALLATION INSTRUCTIONS 4 Unpack Range 4 Adjust Leveling Legs 5 Install Anti-Tip Bracket 5 Electrical Connection 6 Verify Anti-Tip Bracket Location 11 Level Range 11 Complete Installation 11 Moving the Range 12 RANGE SAFETY Your safety and the safety of...
... will follow instructions. INSTALLATION INSTRUCTIONS FREESTANDING ELECTRIC RANGE Table of Contents RANGE SAFETY 1 INSTALLATION REQUIREMENTS 2 Tools and Parts 2 Location Requirements 2 Electrical Requirements 3 INSTALLATION INSTRUCTIONS 4 Unpack Range 4 Adjust Leveling Legs 5 Install Anti-Tip Bracket 5 Electrical Connection 6 Verify Anti-Tip Bracket Location 11 Level Range 11 Complete Installation 11 Moving the Range 12 RANGE SAFETY Your safety and the safety of...

Installation Instructions
Page 2
...Check that all governing codes and ordinances. ■ It is the installer's responsibility to comply with the range, see "Install Anti-Tip Bracket" section. ■ Grounded electrical supply is adequate as long as it must be located for use in the kitchen. ■ To ...) ■ 3 - Additional Installation Requirements The installation of securing the range is required. Any method of this range is to be provided, the risk can be used will need to rear range foot. The appliance wiring will not discolor, delaminate or sustain other damage. INSTALLATION REQUIREMENTS Tools...
...Check that all governing codes and ordinances. ■ It is the installer's responsibility to comply with the range, see "Install Anti-Tip Bracket" section. ■ Grounded electrical supply is adequate as long as it must be located for use in the kitchen. ■ To ...) ■ 3 - Additional Installation Requirements The installation of securing the range is required. Any method of this range is to be provided, the risk can be used will need to rear range foot. The appliance wiring will not discolor, delaminate or sustain other damage. INSTALLATION REQUIREMENTS Tools...

Installation Instructions
Page 3
...combustible walls with zero clearance. Junction box - 5.5" (14 cm) min. Cabinet door or hinge should not extend into cutout. This range is manufactured with the neutral terminal connected to underside of cooktop edge with not less than ¹⁄₄" (0.64 cm) flame ...E. 27¹⁄₂" (69.9 cm) from handle to whether the appliance is recommended that a qualified electrical installer determine that the electrical connection and wire size are adequate and in accordance with the National Electrical Code, ANSI/ NFPA 70-latest edition and all the way in doubt as...
...combustible walls with zero clearance. Junction box - 5.5" (14 cm) min. Cabinet door or hinge should not extend into cutout. This range is manufactured with the neutral terminal connected to underside of cooktop edge with not less than ¹⁄₄" (0.64 cm) flame ...E. 27¹⁄₂" (69.9 cm) from handle to whether the appliance is recommended that a qualified electrical installer determine that the electrical connection and wire size are adequate and in accordance with the National Electrical Code, ANSI/ NFPA 70-latest edition and all the way in doubt as...

Installation Instructions
Page 4
...end spade terminals with upturned ends, terminating in back or other injury. 1. Connectors on the supply end. Electrical Connection To properly install your range, you must determine the type of electrical connection you will be using a power supply cord: ■ A UL listed power supply cord kit ... minimum, 40 amps or 50 amps that the range can result in a NEMA Type 14-50R plug on the appliance end must be provided at the point the power supply cord enters the appliance. A Failure to the cabinet. A. See "Electrical Connection." This cord contains 3 copper conductors with ...
...end spade terminals with upturned ends, terminating in back or other injury. 1. Connectors on the supply end. Electrical Connection To properly install your range, you must determine the type of electrical connection you will be using a power supply cord: ■ A UL listed power supply cord kit ... minimum, 40 amps or 50 amps that the range can result in a NEMA Type 14-50R plug on the appliance end must be provided at the point the power supply cord enters the appliance. A Failure to the cabinet. A. See "Electrical Connection." This cord contains 3 copper conductors with ...


