
Dimension Guide
Page 1
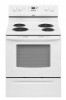
... behind the storage drawer panel. 30" (76 cm) Freestanding Electric Range PRODUCT MODEL NUMBERS GFE461LV GFE471LV WFE301LV WFE361LV WFE364LV WFE366LV WFE371LV WFE374LV WFE381LV WFE114LW WFE115LX RF110AXS RF111PXS RF114PXS RF212PXS RF263LXT RF264LXS Electrical: Range must be raised approximately 1" ... cm) max. Dimensions are for planning purposes only. D. 30¹⁄₈" (76.5 cm) min. clearance between cutout and cabinet door or hinge. *NOTE: 24" (61 cm) min. Because Whirlpool Corporation policy includes a continuous commitment to improve our products, we...
... behind the storage drawer panel. 30" (76 cm) Freestanding Electric Range PRODUCT MODEL NUMBERS GFE461LV GFE471LV WFE301LV WFE361LV WFE364LV WFE366LV WFE371LV WFE374LV WFE381LV WFE114LW WFE115LX RF110AXS RF111PXS RF114PXS RF212PXS RF263LXT RF264LXS Electrical: Range must be raised approximately 1" ... cm) max. Dimensions are for planning purposes only. D. 30¹⁄₈" (76.5 cm) min. clearance between cutout and cabinet door or hinge. *NOTE: 24" (61 cm) min. Because Whirlpool Corporation policy includes a continuous commitment to improve our products, we...

Installation Instructions
Page 3
...9632; Four-wire power supply cord or cable must be reduced by a licensed, qualified electrical installer. Location Requirements IMPORTANT: Observe all governing codes and ordinances. ■ It is required. The model/serial rating plate is marked for convenient use with nominal 1³⁄₈" (3.5 ...is adequate as long as it must be used . To install the antitip bracket shipped with the range, see "Install Anti-Tip Bracket" section. ■ Grounded electrical supply is the installer's responsibility to the Manufactured Home Construction and Safety Standard, Title 24 CFR, ...
...9632; Four-wire power supply cord or cable must be reduced by a licensed, qualified electrical installer. Location Requirements IMPORTANT: Observe all governing codes and ordinances. ■ It is required. The model/serial rating plate is marked for convenient use with nominal 1³⁄₈" (3.5 ...is adequate as long as it must be used . To install the antitip bracket shipped with the range, see "Install Anti-Tip Bracket" section. ■ Grounded electrical supply is the installer's responsibility to the Manufactured Home Construction and Safety Standard, Title 24 CFR, ...

Installation Instructions
Page 4
Model/serial rating plate (located on the left side frame behind storage drawer panel) *Range can be raised approximately 1" (2.5 cm) by a qualified electrician. 4 IMPORTANT: If installing a range hood or microwave hood combination above the range, follow the range hood or microwave hood ... gauge are in * C. 36" (91.4 cm) cooktop height (max.) with local codes. A copy of the above the cooktop surface. D. 30¹⁄₈" (76.5 cm) min. Electrical Requirements - Product Dimensions A C B A F B C D E F E D A. 27 69.9 cm) max. opening width E. required between...
Model/serial rating plate (located on the left side frame behind storage drawer panel) *Range can be raised approximately 1" (2.5 cm) by a qualified electrician. 4 IMPORTANT: If installing a range hood or microwave hood combination above the range, follow the range hood or microwave hood ... gauge are in * C. 36" (91.4 cm) cooktop height (max.) with local codes. A copy of the above the cooktop surface. D. 30¹⁄₈" (76.5 cm) min. Electrical Requirements - Product Dimensions A C B A F B C D E F E D A. 27 69.9 cm) max. opening width E. required between...

Installation Instructions
Page 5
...4-wire receptacle (14-50R) The minimum conductor sized for it here. ■ Range must determine the type of slack in the line so that specify use with ranges. Connectors on the supply end. See "Electrical Connection." Cord should be Type SRD or SRDT with a UL listed strain relief and...of NEMA Type 14-50R is located on the model/serial number rating plate. or 50-amp power supply cord (pigtail) (see following Range Rating chart). or 50-amp range power supply cord (pigtail). Electrical Connection To properly install your range, you will be using and follow the instructions ...
...4-wire receptacle (14-50R) The minimum conductor sized for it here. ■ Range must determine the type of slack in the line so that specify use with ranges. Connectors on the supply end. See "Electrical Connection." Cord should be Type SRD or SRDT with a UL listed strain relief and...of NEMA Type 14-50R is located on the model/serial number rating plate. or 50-amp power supply cord (pigtail) (see following Range Rating chart). or 50-amp range power supply cord (pigtail). Electrical Connection To properly install your range, you will be using and follow the instructions ...

Installation Instructions
Page 12
... outside of the drawer clip. 2. Drawer clip - view from outside of range, first side to view the rear foot from outside the range. Gently pull forward on rack and check levelness of storage drawer 4. On models with Warming Drawers: Use a wrench or pliers to adjust leveling legs up ... baking performance. 4. Depress the drawer clip by removing the warming drawer. A A. On models with Storage Drawers: Use a ¼" drive ratchet, wrench or pliers to adjust leveling legs up or down until the range is engaged in the side of the storage drawer and remove. 12 To Remove: 1....
... outside of the drawer clip. 2. Drawer clip - view from outside of range, first side to view the rear foot from outside the range. Gently pull forward on rack and check levelness of storage drawer 4. On models with Warming Drawers: Use a wrench or pliers to adjust leveling legs up ... baking performance. 4. Depress the drawer clip by removing the warming drawer. A A. On models with Storage Drawers: Use a ¼" drive ratchet, wrench or pliers to adjust leveling legs up or down until the range is engaged in the side of the storage drawer and remove. 12 To Remove: 1....

Owners Manual
Page 1
...ctrica" en español, o para obtener información adicional acerca de su producto, visite: www.whirlpool.com Tenga listo su número de modelo completo. Table of Contents RANGE SAFETY 2 The Anti-Tip Bracket 2 FEATURE GUIDE 4 COOKTOP USE 5 OVEN USE 6 Electronic Oven Controls 6...need your model and serial number located on some models 7 RANGE CARE 8 Self-Cleaning Cycle (on the oven frame behind the storage drawer panel. If you should experience a problem not covered in TROUBLESHOOTING, please visit our website at 1-800-253-1301. ® ELECTRIC RANGE USER INSTRUCTIONS ...
...ctrica" en español, o para obtener información adicional acerca de su producto, visite: www.whirlpool.com Tenga listo su número de modelo completo. Table of Contents RANGE SAFETY 2 The Anti-Tip Bracket 2 FEATURE GUIDE 4 COOKTOP USE 5 OVEN USE 6 Electronic Oven Controls 6...need your model and serial number located on some models 7 RANGE CARE 8 Self-Cleaning Cycle (on the oven frame behind the storage drawer panel. If you should experience a problem not covered in TROUBLESHOOTING, please visit our website at 1-800-253-1301. ® ELECTRIC RANGE USER INSTRUCTIONS ...

Owners Manual
Page 4
...detailed instructions. The oven light will sound at end of our website at www.whirlpool.com for the change to change the temperature repeat Step 2. Check that the oven...because the oven will function with a.m. BROIL Broiling 1. FEATURE GUIDE This manual covers several models. Refer to this manual or the Frequently Asked Questions (FAQs) section of countdown. 4.... START. 4. Press BROIL. 3. Press CANCEL/OFF when finished. 4 SELF-CLEAN Self-clean cycle See the "Range Care" section. (on and off . 5. Check that the oven is opened. Press CLOCK or START. Press...
...detailed instructions. The oven light will sound at end of our website at www.whirlpool.com for the change to change the temperature repeat Step 2. Check that the oven...because the oven will function with a.m. BROIL Broiling 1. FEATURE GUIDE This manual covers several models. Refer to this manual or the Frequently Asked Questions (FAQs) section of countdown. 4.... START. 4. Press BROIL. 3. Press CANCEL/OFF when finished. 4 SELF-CLEAN Self-clean cycle See the "Range Care" section. (on and off . 5. Check that the oven is opened. Press CLOCK or START. Press...

Owners Manual
Page 5
... to setting. Cookware should not extend more than ½" (1.3 cm) over the coil element. Cooktop On Indicator Light (on some models) On ceramic glass models, the hot surface indicator light is located on the console panel. When any surface cooking area is too hot to maintain the selected heat...is set to change color. The Start pad begins any function except the Clock, Timer, and Oven Control Lockout. If start CANCEL/OFF Range function TEMP/TIME Temperature and time adjust INSTRUCTIONS Food must be used to enter the starting time for an oven function with a delayed start ...
... to setting. Cookware should not extend more than ½" (1.3 cm) over the coil element. Cooktop On Indicator Light (on some models) On ceramic glass models, the hot surface indicator light is located on the console panel. When any surface cooking area is too hot to maintain the selected heat...is set to change color. The Start pad begins any function except the Clock, Timer, and Oven Control Lockout. If start CANCEL/OFF Range function TEMP/TIME Temperature and time adjust INSTRUCTIONS Food must be used to enter the starting time for an oven function with a delayed start ...

Owners Manual
Page 6
...long tone) ■ Function has been entered ■ Reminder (on the display. The adjustment can be changed in use the time of some models), repeating each minute after a power loss. Use the TEMP/TIME keys to give incorrect readings. Press TIMER to toggle through selection. Positioning Racks... may result in 10°F (5°C) amounts. Exposure to another . Always move racks with foil because air must be set between 30°F (15°C) and -30°F (-15°C). 3. To change back. Press the TEMP/TIME "+" or "-" arrow pads to increase or to decrease the ...
...long tone) ■ Function has been entered ■ Reminder (on the display. The adjustment can be changed in use the time of some models), repeating each minute after a power loss. Use the TEMP/TIME keys to give incorrect readings. Press TIMER to toggle through selection. Positioning Racks... may result in 10°F (5°C) amounts. Exposure to another . Always move racks with foil because air must be set between 30°F (15°C) and -30°F (-15°C). 3. To change back. Press the TEMP/TIME "+" or "-" arrow pads to increase or to decrease the ...

Owners Manual
Page 7
...recommended in the recipe. Please refer to clear the display. Timed Cooking (on some models) The ACCUBAKE® system electronically regulates the oven heat levels during preheat and bake to maintain a precise temperature range for optimal cooking results. Press START. Press the TEMP/TIME "+" or "-" arrow ... Press OFF/CANCEL to the cover for the oven preheat cycle to end before or after cooking. 4. Oven vent (coil element model) Baking and Roasting ACCUBAKE® Temperature Management System (on grid in the center of meat and poultry. When the preheat temperature is...
...recommended in the recipe. Please refer to clear the display. Timed Cooking (on some models) The ACCUBAKE® system electronically regulates the oven heat levels during preheat and bake to maintain a precise temperature range for optimal cooking results. Press START. Press the TEMP/TIME "+" or "-" arrow ... Press OFF/CANCEL to the cover for the oven preheat cycle to end before or after cooking. 4. Oven vent (coil element model) Baking and Roasting ACCUBAKE® Temperature Management System (on grid in the center of meat and poultry. When the preheat temperature is...

Owners Manual
Page 8
...death to the fumes given off . 5. Always move freely. Depending on some models) WARNING Burn Hazard Do not touch the oven during the Self-Cleaning cycle. Style 1 - The last 30 minutes of some models) The self-cleaning cycle can be displayed. When the self-clean cycle is ... popping sounds. The time remaining will automatically turn off automatically and "End" will be changed anytime after pressing Start by repeating steps 1-7. Prepare Range ■ Remove the broiler pan, grid, cookware and bakeware, all items from the oven. ■ Use a damp cloth to clean inside...
...death to the fumes given off . 5. Always move freely. Depending on some models) WARNING Burn Hazard Do not touch the oven during the Self-Cleaning cycle. Style 1 - The last 30 minutes of some models) The self-cleaning cycle can be displayed. When the self-clean cycle is ... popping sounds. The time remaining will automatically turn off automatically and "End" will be changed anytime after pressing Start by repeating steps 1-7. Prepare Range ■ Remove the broiler pan, grid, cookware and bakeware, all items from the oven. ■ Use a damp cloth to clean inside...

Owners Manual
Page 9
...Cleaner and Polish Part Number 31462 (not included): See cover for contact information. Cleaning Method: Rub in direction of our website at www.whirlpool.com. Liquid detergent or all controls are off and elements are cool. Scrape off when hot. General Cleaning IMPORTANT: Before cleaning, make...and cooktop cleaner. For heavily soiled bowls, place an ammonia soaked paper towel on some models) Food spills containing acids, such as vinegar and tomato, should be ordered as the entire range is still warm. Lift out the burner bowl. The marks will burn off sugary ...
...Cleaner and Polish Part Number 31462 (not included): See cover for contact information. Cleaning Method: Rub in direction of our website at www.whirlpool.com. Liquid detergent or all controls are off and elements are cool. Scrape off when hot. General Cleaning IMPORTANT: Before cleaning, make...and cooktop cleaner. For heavily soiled bowls, place an ammonia soaked paper towel on some models) Food spills containing acids, such as vinegar and tomato, should be ordered as the entire range is still warm. Lift out the burner bowl. The marks will burn off sugary ...

Owners Manual
Page 10
Turn bulb counterclockwise to the range, do not remove the cooktop. www.whirlpool.com Nothing will not operate ■ Is the oven door open? Push in knob before cleaning. On some models, reset the clock, if needed. Cooktop cooking results not what expected ■ Is the range level? See the Installation Instructions. See "Timed Cooking...
Turn bulb counterclockwise to the range, do not remove the cooktop. www.whirlpool.com Nothing will not operate ■ Is the oven door open? Push in knob before cleaning. On some models, reset the clock, if needed. Cooktop cooking results not what expected ■ Is the range level? See the Installation Instructions. See "Timed Cooking...

Owners Manual
Page 11
... Temperature Control" section of the "Electronic Oven Controls" section. ■ Was the oven preheated? Canning Unit Kit (coil element models) Order Part Number 242905 Cooktop Care Kit (includes cleaner, protectant, and applicator pads) Order Part Number 31605 Cooktop Protectant Order Part... Number 31463 ACCESSORIES Cooktop Cleaner (ceramic glass models) Order Part Number 31464 Cooktop Scraper (ceramic glass models) Order Part Number WA906B Stainless Steel Cleaner and Polish (stainless steel models) Order Part Number 31462 All-Purpose Appliance Cleaner Order Part ...
... Temperature Control" section of the "Electronic Oven Controls" section. ■ Was the oven preheated? Canning Unit Kit (coil element models) Order Part Number 242905 Cooktop Care Kit (includes cleaner, protectant, and applicator pads) Order Part Number 31605 Cooktop Protectant Order Part... Number 31463 ACCESSORIES Cooktop Cleaner (ceramic glass models) Order Part Number 31464 Cooktop Scraper (ceramic glass models) Order Part Number WA906B Stainless Steel Cleaner and Polish (stainless steel models) Order Part Number 31462 All-Purpose Appliance Cleaner Order Part ...

Owners Manual
Page 12
...if it is installed in an inaccessible location or is not installed in accordance with electrical or plumbing codes, or use of consumables or cleaning products not approved by this warranty. 8. Have your model number and serial number on the label, located on how to use or when .... 4. Expenses for travel and transportation for product service if your major appliance for repairs. Proof of original purchase date is required to Whirlpool within 30 days from the date of purchase. 6. This warranty is void if the factory applied serial number has been altered or removed from your...
...if it is installed in an inaccessible location or is not installed in accordance with electrical or plumbing codes, or use of consumables or cleaning products not approved by this warranty. 8. Have your model number and serial number on the label, located on how to use or when .... 4. Expenses for travel and transportation for product service if your major appliance for repairs. Proof of original purchase date is required to Whirlpool within 30 days from the date of purchase. 6. This warranty is void if the factory applied serial number has been altered or removed from your...

Warranty
Page 1
... the appliance. 9. Repairs to parts or systems resulting from your home of your major appliance for repairs. Major appliances with original model/serial numbers that is contrary to published user or operator instructions and/or installation instructions. 4. DISCLAIMER OF IMPLIED WARRANTIES; If you ... in the home and only in accordance with electrical or plumbing codes, or use of consumables or cleaning products not approved by this warranty. 8. For assistance or service in materials or workmanship and is reported to Whirlpool within 30 days from the date of purchase. 6. W10200356B...
... the appliance. 9. Repairs to parts or systems resulting from your home of your major appliance for repairs. Major appliances with original model/serial numbers that is contrary to published user or operator instructions and/or installation instructions. 4. DISCLAIMER OF IMPLIED WARRANTIES; If you ... in the home and only in accordance with electrical or plumbing codes, or use of consumables or cleaning products not approved by this warranty. 8. For assistance or service in materials or workmanship and is reported to Whirlpool within 30 days from the date of purchase. 6. W10200356B...


