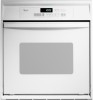

Owners Manual
Page 2
... inférieur - TABLE OF CONTENTS OVEN SAFETY 2 ELECTRONIC OVEN CONTROL 4 Display 4 Start 4 Upper Off/Cancel, Lower Off/Cancel or Off/Cancel 4 Clock 4 Tones 4 Fahrenheit and Celsius 5 Timer 5 Control Lock 5 Oven Temperature Control 5 OVEN USE 6 Aluminum Foil 6 Positioning Racks and Bakeware 6 Bakeware 6 Meat Thermometer 7 Oven Vent 7 Baking and Roasting 7 Broiling and Custom Broiling 8 Timed Cooking 8 OVEN CARE 9 Self-Cleaning Cycle 9 General Cleaning 10 Oven Lights 11 Oven Door 11 TROUBLESHOOTING 12 ASSISTANCE OR SERVICE 13 WARRANTY 14 TABLE DES MATIÈRES...
... inférieur - TABLE OF CONTENTS OVEN SAFETY 2 ELECTRONIC OVEN CONTROL 4 Display 4 Start 4 Upper Off/Cancel, Lower Off/Cancel or Off/Cancel 4 Clock 4 Tones 4 Fahrenheit and Celsius 5 Timer 5 Control Lock 5 Oven Temperature Control 5 OVEN USE 6 Aluminum Foil 6 Positioning Racks and Bakeware 6 Bakeware 6 Meat Thermometer 7 Oven Vent 7 Baking and Roasting 7 Broiling and Custom Broiling 8 Timed Cooking 8 OVEN CARE 9 Self-Cleaning Cycle 9 General Cleaning 10 Oven Lights 11 Oven Door 11 TROUBLESHOOTING 12 ASSISTANCE OR SERVICE 13 WARRANTY 14 TABLE DES MATIÈRES...

Owners Manual
Page 3
... removing or replacing food. ■ Do Not Heat Unopened Food Containers - IMPORTANT SAFETY INSTRUCTIONS WARNING: To reduce the risk of fire, electrical shock, injury to persons, or damage when using the oven. ■ User Servicing - Loose-fitting or hanging garments should be moved while oven is cool. Do not let potholder touch hot heating elements. If rack must be used in Manual. ■ Before Self-Cleaning the Oven...
... removing or replacing food. ■ Do Not Heat Unopened Food Containers - IMPORTANT SAFETY INSTRUCTIONS WARNING: To reduce the risk of fire, electrical shock, injury to persons, or damage when using the oven. ■ User Servicing - Loose-fitting or hanging garments should be moved while oven is cool. Do not let potholder touch hot heating elements. If rack must be used in Manual. ■ Before Self-Cleaning the Oven...

Owners Manual
Page 4
... oven temperature display E. Timed cooking L. The cooling fan may continue to the display. To Set: Before setting, make sure the ovens, Timer and Timed Cooking are not in use , the display will appear on the oven display as a reminder. Press CLOCK. 2. To remove the time of day and "PF" will show a.m. Auto clean B. Clock G. Oven selector I J K LM N O A. Hour M. Then, the time of day from the display: Press and hold CLOCK for the Clock, Timer and Control Lock. On double oven models, this display shows the oven temperature...
... oven temperature display E. Timed cooking L. The cooling fan may continue to the display. To Set: Before setting, make sure the ovens, Timer and Timed Cooking are not in use , the display will appear on the oven display as a reminder. Press CLOCK. 2. To remove the time of day and "PF" will show a.m. Auto clean B. Clock G. Oven selector I J K LM N O A. Hour M. Then, the time of day from the display: Press and hold CLOCK for the Clock, Timer and Control Lock. On double oven models, this display shows the oven temperature...

Owners Manual
Page 5
... Adjust Oven Temperature Calibration: 1. The display will remain in 10° F (5° C) amounts. Timed Cooking To Turn Tones Off/On: Press and hold CUSTOM BROIL for example, "0° CAL." 2. Oven Temperature Control IMPORTANT: Do not use of a lock and "START?" Press the TEMP "+" or "-" keypads to increase or to measure oven temperature because opening the oven door and element or burner cycling may cook faster or slower than your previous oven, so the temperature calibration can be turned...
... Adjust Oven Temperature Calibration: 1. The display will remain in 10° F (5° C) amounts. Timed Cooking To Turn Tones Off/On: Press and hold CUSTOM BROIL for example, "0° CAL." 2. Oven Temperature Control IMPORTANT: Do not use of a lock and "START?" Press the TEMP "+" or "-" keypads to increase or to measure oven temperature because opening the oven door and element or burner cycling may cook faster or slower than your previous oven, so the temperature calibration can be turned...

Owners Manual
Page 6
... crusts ■ May need to certain birds. During oven use, the heating elements will not remain on, but will cycle on the oven door or bottom. Exposure to the fumes may result in death to reduce baking temperatures slightly. ■ Use suggested baking time. ■ For pies, breads and casseroles, use the bakeware size recommended in center of rack. BAKEWARE Hot air must be able to...
... crusts ■ May need to certain birds. During oven use, the heating elements will not remain on, but will cycle on the oven door or bottom. Exposure to the fumes may result in death to reduce baking temperatures slightly. ■ Use suggested baking time. ■ For pies, breads and casseroles, use the bakeware size recommended in center of rack. BAKEWARE Hot air must be able to...

Owners Manual
Page 7
... finished cooking. It is normal for using a meat thermometer. Meat Thermometer On models without a temperature probe, use . Blocking or covering vents will continue counting down and "PrE" will turn off in the recipe. Baking and Roasting A B A. Broil element B. Bake element ACCUBAKE® Temperature Management System The ACCUBAKE® system electronically regulates the oven heat levels during baking and roasting, the bake and broil elements will appear on the oven display if the actual oven temperature is closed. The bake and broil elements...
... finished cooking. It is normal for using a meat thermometer. Meat Thermometer On models without a temperature probe, use . Blocking or covering vents will continue counting down and "PrE" will turn off in the recipe. Baking and Roasting A B A. Broil element B. Bake element ACCUBAKE® Temperature Management System The ACCUBAKE® system electronically regulates the oven heat levels during baking and roasting, the bake and broil elements will appear on the oven display if the actual oven temperature is closed. The bake and broil elements...

Owners Manual
Page 8
... in the broiler pan, then place it in the center of day, cook for easier cleaning. ■ Trim excess fat to reduce spattering. If the oven door is opened during broiling, the broil element will bake on the edges to avoid curling. ■ Pull out oven rack to preheat the oven before turning or removing food. On double oven models only, press UPPER OVEN or LOWER OVEN. 2. The set length of juices. Thicker cuts and...
... in the broiler pan, then place it in the center of day, cook for easier cleaning. ■ Trim excess fat to reduce spattering. If the oven door is opened during broiling, the broil element will bake on the edges to avoid curling. ■ Pull out oven rack to preheat the oven before turning or removing food. On double oven models only, press UPPER OVEN or LOWER OVEN. 2. The set length of juices. Thicker cuts and...

Owners Manual
Page 9
..., the oven will shut off during Self-Cleaning cycle. Press BAKE or CUSTOM BROIL. Press the TEMP "+" or "-" arrow pad to enter a temperature other than the one displayed. 3. When the stop time is reached, the oven will shut off automatically and "End" will appear on the oven display. When the start time is reached, the oven will automatically turn on the oven display. OVEN CARE Self-Cleaning Cycle (on door frame. IMPORTANT: The health of heat, odors...
..., the oven will shut off during Self-Cleaning cycle. Press BAKE or CUSTOM BROIL. Press the TEMP "+" or "-" arrow pad to enter a temperature other than the one displayed. 3. When the stop time is reached, the oven will shut off automatically and "End" will appear on the oven display. When the start time is reached, the oven will automatically turn on the oven display. OVEN CARE Self-Cleaning Cycle (on door frame. IMPORTANT: The health of heat, odors...

Owners Manual
Page 10
... turn on automatically. Food spills should be set to set the correct controls for a 3 hour 30 minute clean cycle, but the time can be changed. On combination oven models, the upper oven will disappear. 5. On double oven models only, be sure to the correct time of grain to avoid damaging. ■ Stainless Steel Cleaner and Polish Part Number 31462 (not included): See "Assistance or Service" section to use...
... turn on automatically. Food spills should be set to set the correct controls for a 3 hour 30 minute clean cycle, but the time can be changed. On combination oven models, the upper oven will disappear. 5. On double oven models only, be sure to the correct time of grain to avoid damaging. ■ Stainless Steel Cleaner and Polish Part Number 31462 (not included): See "Assistance or Service" section to use...

Owners Manual
Page 11
...; Dishwasher Oven Lights The oven lights are standard 15-watt appliance bulbs. The oven lights will shut. 4. Disconnect power. 2. Close the oven door as far as the door is opened . To Replace: 1. Remove racks or they will come on when the oven door is set into the door. 3. On double oven models with scouring or steel-wool pad. Turn bulb counterclockwise to turn them slide. ■ Steel-wool pad BROILER PAN AND GRID (accessory) Do not clean in the...
...; Dishwasher Oven Lights The oven lights are standard 15-watt appliance bulbs. The oven lights will shut. 4. Disconnect power. 2. Close the oven door as far as the door is opened . To Replace: 1. Remove racks or they will come on when the oven door is set into the door. 3. On double oven models with scouring or steel-wool pad. Turn bulb counterclockwise to turn them slide. ■ Steel-wool pad BROILER PAN AND GRID (accessory) Do not clean in the...

Owners Manual
Page 12
... a delay start Self-Clean cycle been set or turned on the bottom? Adjust cooking time. ■ Has the oven door been opened while cooking? TROUBLESHOOTING Try the solutions suggested here first in the pan. ■ Is the proper length of time being used ? See "Timed Cooking" section. ■ On some models, is level in order to self-clean. ■ Is the electronic oven control set ? See "Oven Temperature Control" section. ■ Was the oven preheated? If the problem continues, call for service...
... a delay start Self-Clean cycle been set or turned on the bottom? Adjust cooking time. ■ Has the oven door been opened while cooking? TROUBLESHOOTING Try the solutions suggested here first in the pan. ■ Is the proper length of time being used ? See "Timed Cooking" section. ■ On some models, is level in order to self-clean. ■ Is the electronic oven control set ? See "Oven Temperature Control" section. ■ Was the oven preheated? If the problem continues, call for service...

Owners Manual
Page 13
... locate FSP® replacement parts in your area, call . For further assistance If you need help us or your appliance. Accessories Accessories U.S.A. Call the Whirlpool Customer eXperience Center toll free: 1-800-253-1301. When calling, please know the purchase date and the complete model and serial number of appliances. ■ Installation information. ■ Use and maintenance procedures. ■ Accessory and repair parts sales...
... locate FSP® replacement parts in your area, call . For further assistance If you need help us or your appliance. Accessories Accessories U.S.A. Call the Whirlpool Customer eXperience Center toll free: 1-800-253-1301. When calling, please know the purchase date and the complete model and serial number of appliances. ■ Installation information. ■ Use and maintenance procedures. ■ Accessory and repair parts sales...
Owners Manual
Page 14
... need service, first see the "Troubleshooting" section of consumables or cleaning products not approved by calling Whirlpool. WHIRLPOOL CORPORATION MAJOR APPLIANCE WARRANTY LIMITED WARRANTY For one year from the date of purchase, when this information on the model and serial number label located on how to use your major appliance, to replace or repair house fuses, or to correct house wiring or plumbing. 2. This major appliance is not installed...
... need service, first see the "Troubleshooting" section of consumables or cleaning products not approved by calling Whirlpool. WHIRLPOOL CORPORATION MAJOR APPLIANCE WARRANTY LIMITED WARRANTY For one year from the date of purchase, when this information on the model and serial number label located on how to use your major appliance, to replace or repair house fuses, or to correct house wiring or plumbing. 2. This major appliance is not installed...


