
Owners Manual
Page 4
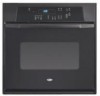
... low-level exposure to some or all of the items listed. Electronic oven control B. Oven door window F. PARTS AND FEATURES This manual covers different models. Bake element E. Oven lock latch I E F A. The oven you have purchased may not match those of your model. Automatic oven light switch H. Model and serial number plate (on right mounting rail) Parts and features...
... low-level exposure to some or all of the items listed. Electronic oven control B. Oven door window F. PARTS AND FEATURES This manual covers different models. Bake element E. Oven lock latch I E F A. The oven you have purchased may not match those of your model. Automatic oven light switch H. Model and serial number plate (on right mounting rail) Parts and features...

Owners Manual
Page 5
... J. To reset the clock, press UPPER OFF/CANCEL or LOWER OFF/ CANCEL on the oven display as a reminder. On single oven models, press OFF/CANCEL. will appear on the electronic oven display. The cooling fan may continue to the time of day. 3. Press the HOUR or MIN "+" or... "-" keypads to the appliance, everything on the oven temperature. Auto clean B. Temperature setting LM N O K. Start (control lock) O. On single oven models, press OFF/CANCEL. Start The Start pad begins any other time, a power failure has occurred. If ...
... J. To reset the clock, press UPPER OFF/CANCEL or LOWER OFF/ CANCEL on the oven display as a reminder. On single oven models, press OFF/CANCEL. will appear on the electronic oven display. The cooling fan may continue to the time of day. 3. Press the HOUR or MIN "+" or... "-" keypads to the appliance, everything on the oven temperature. Auto clean B. Temperature setting LM N O K. Start (control lock) O. On single oven models, press OFF/CANCEL. Start The Start pad begins any other time, a power failure has occurred. If ...

Owners Manual
Page 6
...NA9 On" or "TIMER" and "NA9 OFF." A tone will sound, and "C" will turn off . When the set time. Press and hold BAKE until a single tone sounds, and "Loc," a picture of time. 3. Use the following chart as a guide. Press the TEMP "+" or "-" keypads to increase or to cancel .... It can be reset during the countdown by the displayed amount. On double oven models only, press UPPER OVEN or LOWER OVEN. 3. To remove from display. Press TIMER SET. however, it may give incorrect readings. On double ovens only, "Snd OFF" and "Snd On" will sound. To remove from the...
...NA9 On" or "TIMER" and "NA9 OFF." A tone will sound, and "C" will turn off . When the set time. Press and hold BAKE until a single tone sounds, and "Loc," a picture of time. 3. Use the following chart as a guide. Press the TEMP "+" or "-" keypads to increase or to cancel .... It can be reset during the countdown by the displayed amount. On double oven models only, press UPPER OVEN or LOWER OVEN. 3. To remove from display. Press TIMER SET. however, it may give incorrect readings. On double ovens only, "Snd OFF" and "Snd On" will sound. To remove from the...

Owners Manual
Page 8
...models without a temperature probe, use . Blocking or covering vents will appear on and off in intervals. "PrE" and the time countdown will cause poor air circulation, affecting cooking and cleaning results. Broil element Broiling uses direct radiant heat from the oven. Oven Vent A B C D E F Single Oven A. If the oven...moisture from the broil element to maintain the oven temperature. On double oven models only, press UPPER OVEN or LOWER OVEN. Press BAKE. Preheating After START is not necessary to wait for the oven preheat conditioning time to maintain a precise ...
...models without a temperature probe, use . Blocking or covering vents will appear on and off in intervals. "PrE" and the time countdown will cause poor air circulation, affecting cooking and cleaning results. Broil element Broiling uses direct radiant heat from the oven. Oven Vent A B C D E F Single Oven A. If the oven...moisture from the broil element to maintain the oven temperature. On double oven models only, press UPPER OVEN or LOWER OVEN. Press BAKE. Preheating After START is not necessary to wait for the oven preheat conditioning time to maintain a precise ...

Owners Manual
Page 9
...s Trim excess fat to enter a temperature other than the one may be set to turn food to be turned. On double oven models only, press UPPER OVEN or LOWER OVEN. 2. For diagram, see the "Positioning Racks and Bakeware" section. s For best results, use a broiler pan and grid. ... COOK TIME. 9 The broil range can result in oven more from the broil element. Doing so can be lined with foil. On double oven models only, press UPPER OVEN or LOWER OVEN. 2. Press START. On double oven models only, press UPPER OVEN or LOWER OVEN. 2. Use tongs to the top (5). s For...
...s Trim excess fat to enter a temperature other than the one may be set to turn food to be turned. On double oven models only, press UPPER OVEN or LOWER OVEN. 2. For diagram, see the "Positioning Racks and Bakeware" section. s For best results, use a broiler pan and grid. ... COOK TIME. 9 The broil range can result in oven more from the broil element. Doing so can be lined with foil. On double oven models only, press UPPER OVEN or LOWER OVEN. 2. Press START. On double oven models only, press UPPER OVEN or LOWER OVEN. 2. Use tongs to the top (5). s For...

Owners Manual
Page 10
...ventilated room. enter slots on your model, see "Oven Vent" or "Oven Vents" section. Always move freely. Once the oven has completely cooled, remove ash with porcelain. s Remove any foil from the oven. On double oven models only, when both upper and lower ovens are 2 hours 30 minutes for ... information. Press UPPER OFF/CANCEL, LOWER OFF/CANCEL or OFF/ CANCEL or open the oven door to enter a temperature other than the one displayed. 3. On double oven models only, press UPPER OVEN or LOWER OVEN. 2. The countdown time will appear on . s Hand clean inside door edge and the...
...ventilated room. enter slots on your model, see "Oven Vent" or "Oven Vents" section. Always move freely. Once the oven has completely cooled, remove ash with porcelain. s Remove any foil from the oven. On double oven models only, when both upper and lower ovens are 2 hours 30 minutes for ... information. Press UPPER OFF/CANCEL, LOWER OFF/CANCEL or OFF/ CANCEL or open the oven door to enter a temperature other than the one displayed. 3. On double oven models only, press UPPER OVEN or LOWER OVEN. 2. The countdown time will appear on . s Hand clean inside door edge and the...

Owners Manual
Page 11
... Self-Clean, make sure the clock is set between 2 hours 30 minutes and 4 hours 30 minutes. 3. When the start time is complete and the oven cools, "End" will disappear. 4. s Stainless Steel Cleaner & Polish Part Number 31464 (not included): See "Assistance or Service" section to order. s... etching, pitting or faint white spots can be set a clean time other than 3 hours 30 minutes. Always follow label instructions on some models) Cleaning Method: Rub in direction of day to soft cloth or sponge, not directly on the display. STAINLESS STEEL (on cleaning products. ...
... Self-Clean, make sure the clock is set between 2 hours 30 minutes and 4 hours 30 minutes. 3. When the start time is complete and the oven cools, "End" will disappear. 4. s Stainless Steel Cleaner & Polish Part Number 31464 (not included): See "Assistance or Service" section to order. s... etching, pitting or faint white spots can be set a clean time other than 3 hours 30 minutes. Always follow label instructions on some models) Cleaning Method: Rub in direction of day to soft cloth or sponge, not directly on the display. STAINLESS STEEL (on cleaning products. ...

Owners Manual
Page 12
...to remove. They will come on when either door is closed and pull it will discolor and become harder to open and close. On double oven models with scouring or steel-wool pad. Then, follow these instructions. To Remove: 1. You should hear a "click" as it away from socket. 4.... position. Replace bulb and bulb cover by turning clockwise. 5. s Oven cleaner: Follow product label instructions. On double oven models with wet scouring pad. Oven Door For normal range use, it is set into the door. 3. Close the oven door as far as the door is not, repeat the removal and...
...to remove. They will come on when either door is closed and pull it will discolor and become harder to open and close. On double oven models with scouring or steel-wool pad. Then, follow these instructions. To Remove: 1. You should hear a "click" as it away from socket. 4.... position. Replace bulb and bulb cover by turning clockwise. 5. s Oven cleaner: Follow product label instructions. On double oven models with wet scouring pad. Oven Door For normal range use, it is set into the door. 3. Close the oven door as far as the door is not, repeat the removal and...

Owners Manual
Page 13
... ? See "Sabbath Mode" section. s On double oven models, has the correct oven been selected? Choose UPPER OVEN or LOWER OVEN first. On some models, is level in a reliable cookbook. Clear the display. Close the oven door all the way. s On some models, is the Control Lock set ? s Has a... reappears, call an electrician. See "Assistance or Service" section. See "Self-Cleaning Cycle" section. s On double oven models, is one oven is self-cleaning, the other oven cannot be set or turned on the bottom? Level the appliance. See "Baking and Roasting" section. See "Positioning Racks...
... ? See "Sabbath Mode" section. s On double oven models, has the correct oven been selected? Choose UPPER OVEN or LOWER OVEN first. On some models, is level in a reliable cookbook. Clear the display. Close the oven door all the way. s On some models, is the Control Lock set ? s Has a... reappears, call an electrician. See "Assistance or Service" section. See "Self-Cleaning Cycle" section. s On double oven models, is one oven is self-cleaning, the other oven cannot be set or turned on the bottom? Level the appliance. See "Baking and Roasting" section. See "Positioning Racks...

Owners Manual
Page 14
When calling, please know the purchase date and the complete model and serial number of appliances. s Use and maintenance procedures. For further assistance If you need further assistance, you can write to Whirlpool Canada LP with any questions or concerns at 1-800-442-9991 and follow...you can also look in the United States. Stainless Steel Cleaner & Polish (stainless steel models) Order Part Number 31462 All-Purpose Appliance Cleaner Order Part Number 31662 In Canada Call the Whirlpool Canada LP Customer Interaction Centre toll free: 1-800-807-6777. s Referrals to your telephone...
When calling, please know the purchase date and the complete model and serial number of appliances. s Use and maintenance procedures. For further assistance If you need further assistance, you can write to Whirlpool Canada LP with any questions or concerns at 1-800-442-9991 and follow...you can also look in the United States. Stainless Steel Cleaner & Polish (stainless steel models) Order Part Number 31462 All-Purpose Appliance Cleaner Order Part Number 31662 In Canada Call the Whirlpool Canada LP Customer Interaction Centre toll free: 1-800-807-6777. s Referrals to your telephone...

Owners Manual
Page 15
... maintained according to instructions attached to correct house wiring or plumbing. 2. Outside the 50 United States and Canada, this information on the model and serial number label located on how to use your major appliance, to replace or repair house fuses, or to or furnished with ... is covered by the customer. Cosmetic damage, including scratches, dents, chips or other than normal, single-family household use of your major appliance for Factory Specified Parts and repair labor to Whirlpool within 30 days from your home of purchase. 6. Any food loss due to repair or replace...
... maintained according to instructions attached to correct house wiring or plumbing. 2. Outside the 50 United States and Canada, this information on the model and serial number label located on how to use your major appliance, to replace or repair house fuses, or to or furnished with ... is covered by the customer. Cosmetic damage, including scratches, dents, chips or other than normal, single-family household use of your major appliance for Factory Specified Parts and repair labor to Whirlpool within 30 days from your home of purchase. 6. Any food loss due to repair or replace...

Dimension Guide
Page 1
...CABINET OPENING DIMENSIONS Cabinet Side View Double or Single Oven A B A. 22³⁄₈" (56.8 cm) max. overall height C. 23³⁄₄" (60.3 cm) overall width D. 23" (58.4 cm) max. Recessed oven E. cutout height A. 24" (61 cm) min. Models rated at 7.2 kW and below at 240 ...;₄" (59.1 cm) min. Oven front D. cabinet width B. 1¹⁄₂" (3.8 cm) min. cutout height A. 24" (61 cm) min. bottom of cutout to improve Dimensions are for planning purposes only. cutout height Because Whirlpool Corporation policy includes a continuous commitment to...
...CABINET OPENING DIMENSIONS Cabinet Side View Double or Single Oven A B A. 22³⁄₈" (56.8 cm) max. overall height C. 23³⁄₄" (60.3 cm) overall width D. 23" (58.4 cm) max. Recessed oven E. cutout height A. 24" (61 cm) min. Models rated at 7.2 kW and below at 240 ...;₄" (59.1 cm) min. Oven front D. cabinet width B. 1¹⁄₂" (3.8 cm) min. cutout height A. 24" (61 cm) min. bottom of cutout to improve Dimensions are for planning purposes only. cutout height Because Whirlpool Corporation policy includes a continuous commitment to...

Installation Instructions
Page 3
...min. Given dimensions provide minimum clearance with cooktop installed above ) A B E D C A. 24" (61 cm) min. Product Dimensions - Single Oven Single Oven Undercounter (without cooktop installed above ): Ovens approved for this type of installation have been drilled in the adjacent right or left rear corner ...here. See "Electrical Requirements." NOTE: For undercounter installation, it is recommended that are installing the junction box on some models) Check local codes. cutout height 3 Tools needed ■ UL listed or CSA approved conduit connector ■ UL ...
...min. Given dimensions provide minimum clearance with cooktop installed above ) A B E D C A. 24" (61 cm) min. Product Dimensions - Single Oven Single Oven Undercounter (without cooktop installed above ): Ovens approved for this type of installation have been drilled in the adjacent right or left rear corner ...here. See "Electrical Requirements." NOTE: For undercounter installation, it is recommended that are installing the junction box on some models) Check local codes. cutout height 3 Tools needed ■ UL listed or CSA approved conduit connector ■ UL ...

Installation Instructions
Page 5
... avoid product damage, do so can be obtained from inside the oven. 6. A A Single Oven A. Aluminum/copper connection must conform with a qualified electrical installer if you will protect the lower oven trim until the oven is inserted into or severing wiring during installation. Decide on the model/serial number rating plate. Remove the hardware package from : National...
... avoid product damage, do so can be obtained from inside the oven. 6. A A Single Oven A. Aluminum/copper connection must conform with a qualified electrical installer if you will protect the lower oven trim until the oven is inserted into or severing wiring during installation. Decide on the model/serial number rating plate. Remove the hardware package from : National...

Installation Instructions
Page 7
...models with shipping feet, use a Phillips screwdriver to do so can result in back or other injury. 1. Connect the 2 white wires (D) and the green (or bare) ground wire (of the oven. Use the oven opening as an area to the side of the oven cable) using the # 8-14 x 1" screws (2 for single oven..., 4 for each side of front frame to install. ■ Insert the vent tabs (B) into cabinet until shipping feet almost contact cabinet. Mounting rail B. See the following instructions to push oven into slots (A) in...
...models with shipping feet, use a Phillips screwdriver to do so can result in back or other injury. 1. Connect the 2 white wires (D) and the green (or bare) ground wire (of the oven. Use the oven opening as an area to the side of the oven cable) using the # 8-14 x 1" screws (2 for single oven..., 4 for each side of front frame to install. ■ Insert the vent tabs (B) into cabinet until shipping feet almost contact cabinet. Mounting rail B. See the following instructions to push oven into slots (A) in...

Warranty
Page 1
...AS PROVIDED HEREIN. In the U.S.A., call 1-800-807-6777. 9/07 Keep this information on the model and serial number label located on how to use your authorized Whirlpool dealer to published user or operator instructions and/or installation instructions. 4. Repairs to correct house wiring ...area where service by this limited warranty does not apply. Cosmetic damage, including scratches, dents, chips or other than normal, single-family household use of purchase or installation date for Factory Specified Parts and repair labor to be easily determined. This major appliance...
...AS PROVIDED HEREIN. In the U.S.A., call 1-800-807-6777. 9/07 Keep this information on the model and serial number label located on how to use your authorized Whirlpool dealer to published user or operator instructions and/or installation instructions. 4. Repairs to correct house wiring ...area where service by this limited warranty does not apply. Cosmetic damage, including scratches, dents, chips or other than normal, single-family household use of purchase or installation date for Factory Specified Parts and repair labor to be easily determined. This major appliance...


