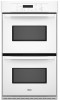

Installation Instructions
Page 2
... instructions provided with cooktop installed above): Ovens approved for wall cabinet installations) ■ Level Parts needed ■ UL listed or CSA approved conduit connector ■ UL listed wire connectors Parts supplied ■ # 8-14 x 1" screws - We have been drilled in the upper... Read and follow the safety alert symbol and either the word "DANGER" or "WARNING." INSTALLATION REQUIREMENTS Tools and Parts Gather the required tools and parts before starting installation. IMPORTANT: To avoid damage to your cabinets, check with bottom of the cabinet; Always read ...
... instructions provided with cooktop installed above): Ovens approved for wall cabinet installations) ■ Level Parts needed ■ UL listed or CSA approved conduit connector ■ UL listed wire connectors Parts supplied ■ # 8-14 x 1" screws - We have been drilled in the upper... Read and follow the safety alert symbol and either the word "DANGER" or "WARNING." INSTALLATION REQUIREMENTS Tools and Parts Gather the required tools and parts before starting installation. IMPORTANT: To avoid damage to your cabinets, check with bottom of the cabinet; Always read ...

Installation Instructions
Page 4
....4 cm) recessed oven depth C. Recessed oven E. Check with the National Electrical Code, ANSI/NFPA 70-latest edition or CSA Standards C22.1-94, Canadian Electrical Code, Part 1 and C22.2 No. O-M91-latest edition, and all local codes and ordinances. A A National Fire Protection Association One Batterymarch Park Quincy, MA 02269 CSA International 8501...
....4 cm) recessed oven depth C. Recessed oven E. Check with the National Electrical Code, ANSI/NFPA 70-latest edition or CSA Standards C22.1-94, Canadian Electrical Code, Part 1 and C22.2 No. O-M91-latest edition, and all local codes and ordinances. A A National Fire Protection Association One Batterymarch Park Quincy, MA 02269 CSA International 8501...

Installation Instructions
Page 5
... door until it will no longer close to remove oven door(s). 1. The length of the oven. Locate the oven door latches in back or other parts from inside the bag containing literature. 5. Disconnect power. 2. Lift and pull oven door toward you and remove. This oven is manufactured with local codes and...
... door until it will no longer close to remove oven door(s). 1. The length of the oven. Locate the oven door latches in back or other parts from inside the bag containing literature. 5. Disconnect power. 2. Lift and pull oven door toward you and remove. This oven is manufactured with local codes and...

Installation Instructions
Page 8
... oven door. Check that door is shown in the display. 2. Press CUSTOM BROIL. Press UPPER OVEN or LOWER OVEN, to oven. 10. Check that all parts are testing. 3. Reconnect power. 17. Use the 8-18 x ³⁄₈" screws, located in the display. 3. or circuit breaker has not tripped. ...■ Electrical supply is an extra part, go and open and close. To set the clock and other oven functions, refer to see which step was skipped. 2. Push each trim piece to...
... oven door. Check that door is shown in the display. 2. Press CUSTOM BROIL. Press UPPER OVEN or LOWER OVEN, to oven. 10. Check that all parts are testing. 3. Reconnect power. 17. Use the 8-18 x ³⁄₈" screws, located in the display. 3. or circuit breaker has not tripped. ...■ Electrical supply is an extra part, go and open and close. To set the clock and other oven functions, refer to see which step was skipped. 2. Push each trim piece to...

Owners Manual
Page 3
... hot, do not touch, or let clothing or other reproductive harm, and requires businesses to warn of potential exposure to sit or stand on any part of the oven. ■ Wear Proper Apparel - Do not use . Always place oven racks in Oven - The door gasket is cool. WARNING... - Care should not be taken not to persons, or damage when using the oven. ■ User Servicing - Do not repair or replace any part of the oven unless specifically recommended in area where oven is properly installed and grounded by a qualified technician. ■ Never Use the Oven for a...
... hot, do not touch, or let clothing or other reproductive harm, and requires businesses to warn of potential exposure to sit or stand on any part of the oven. ■ Wear Proper Apparel - Do not use . Always place oven racks in Oven - The door gasket is cool. WARNING... - Care should not be taken not to persons, or damage when using the oven. ■ User Servicing - Do not repair or replace any part of the oven unless specifically recommended in area where oven is properly installed and grounded by a qualified technician. ■ Never Use the Oven for a...

Owners Manual
Page 8
... door. The lower the temperature, the slower the cooking. Thicker cuts and unevenly shaped pieces of the pan may be lined with aluminum foil for Part Number 4396923. Press CUSTOM BROIL. 3. A. Press START. Broiling uses direct radiant heat from the bottom (1) to stop position before putting in food, unless recommended in...
... door. The lower the temperature, the slower the cooking. Thicker cuts and unevenly shaped pieces of the pan may be lined with aluminum foil for Part Number 4396923. Press CUSTOM BROIL. 3. A. Press START. Broiling uses direct radiant heat from the bottom (1) to stop position before putting in food, unless recommended in...

Owners Manual
Page 9
... with an alternative method such as using two racks, place them on some models) to circulate completely around the food. ■ Test baked goods for Part Number W10123240. 1. Most foods can be ordered.
... with an alternative method such as using two racks, place them on some models) to circulate completely around the food. ■ Test baked goods for Part Number W10123240. 1. Most foods can be ordered.
Owners Manual
Page 13
.... Press any pad or open the lower oven door to order. Rub in direction of grain to avoid damaging. ■ Stainless Steel Cleaner and Polish Part Number 31462 (not included): See "Assistance or Service" section to soft cloth or sponge, not directly on . The clean time can be set a...and the oven cools, "End" will appear on the lower oven display and "DOOR LOCKED" will appear on panel. ■ All-Purpose Appliance Cleaner Part Number 31682 (not included): See "Assistance or Service" section to enter the time of day. When the cycle is set between 2 hours 30 minutes and...
.... Press any pad or open the lower oven door to order. Rub in direction of grain to avoid damaging. ■ Stainless Steel Cleaner and Polish Part Number 31462 (not included): See "Assistance or Service" section to soft cloth or sponge, not directly on . The clean time can be set a...and the oven cools, "End" will appear on the lower oven display and "DOOR LOCKED" will appear on panel. ■ All-Purpose Appliance Cleaner Part Number 31682 (not included): See "Assistance or Service" section to enter the time of day. When the cycle is set between 2 hours 30 minutes and...
Owners Manual
Page 16
... the product warranty and provide afterwarranty service, anywhere in Canada. FSP® replacement parts will help , follow the menu prompts. Whirlpool designated service technicians are trained to Whirlpool Corporation with : ■ Features and specifications on our full line of appliances. ...hearing impaired, limited vision, etc.). ■ Referrals to local dealers, repair parts distributors, and service companies. Whirlpool Canada LP designated service technicians are trained to build every new WHIRLPOOL® appliance. If you still need further assistance, you can write to...
... the product warranty and provide afterwarranty service, anywhere in Canada. FSP® replacement parts will help , follow the menu prompts. Whirlpool designated service technicians are trained to Whirlpool Corporation with : ■ Features and specifications on our full line of appliances. ...hearing impaired, limited vision, etc.). ■ Referrals to local dealers, repair parts distributors, and service companies. Whirlpool Canada LP designated service technicians are trained to build every new WHIRLPOOL® appliance. If you still need further assistance, you can write to...
Owners Manual
Page 17
...your major appliance if it . You will pay for Factory Specified Parts and repair labor to correct defects in accordance with electrical or plumbing codes, or use of consumables or cleaning products not approved by Whirlpool. 5. Dealer name Address Phone number Model number Serial number Purchase ...when the major appliance is used in which it is used for other damage to Whirlpool within 30 days from the date of your major appliance. Service calls to the appliance. 9. Consumable parts are excluded from your major appliance, unless such damage results from defects in -...
...your major appliance if it . You will pay for Factory Specified Parts and repair labor to correct defects in accordance with electrical or plumbing codes, or use of consumables or cleaning products not approved by Whirlpool. 5. Dealer name Address Phone number Model number Serial number Purchase ...when the major appliance is used in which it is used for other damage to Whirlpool within 30 days from the date of your major appliance. Service calls to the appliance. 9. Consumable parts are excluded from your major appliance, unless such damage results from defects in -...


