Owners Manual
Page 1
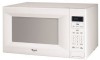
www.whirlpool.com Table of Contents 2 W10217293A Model MT4155 ® MICROWAVE OVEN Use & Care Guide For questions about features, operation/performance, parts, accessories or service, call: 1-800-253-1301. or visit our website at...
www.whirlpool.com Table of Contents 2 W10217293A Model MT4155 ® MICROWAVE OVEN Use & Care Guide For questions about features, operation/performance, parts, accessories or service, call: 1-800-253-1301. or visit our website at...

Owners Manual
Page 2
... 7 Clock 7 Tones 7 Timer 7 Control Lock 7 Demo Mode 7 Options 7 MICROWAVE OVEN USE 8 Food Characteristics 8 Cooking Guidelines 8 Cookware and Dinnerware 8 Aluminum Foil and Metal 9 Microwave Cooking Power 9 Manual Cooking 9 Cooking in Stages 10 Sensor Cooking 10 Sensor Popcorn 10 Sensor Cook 11 Sensor Reheat 11 Auto Defrost 12 Warm Hold 12 MICROWAVE OVEN CARE 13 General Cleaning 13 TROUBLESHOOTING 14 ASSISTANCE...
... 7 Clock 7 Tones 7 Timer 7 Control Lock 7 Demo Mode 7 Options 7 MICROWAVE OVEN USE 8 Food Characteristics 8 Cooking Guidelines 8 Cookware and Dinnerware 8 Aluminum Foil and Metal 9 Microwave Cooking Power 9 Manual Cooking 9 Cooking in Stages 10 Sensor Cooking 10 Sensor Popcorn 10 Sensor Cook 11 Sensor Reheat 11 Auto Defrost 12 Warm Hold 12 MICROWAVE OVEN CARE 13 General Cleaning 13 TROUBLESHOOTING 14 ASSISTANCE...
Owners Manual
Page 3
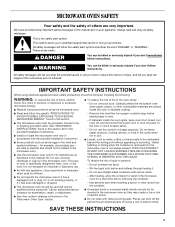
... cooking. - See "GROUNDING INSTRUCTIONS" found in this section and in the provided Installation Instructions. ■ Install or locate the microwave oven only in accordance with metal scouring pads. are not followed. It is not designed for industrial or laboratory use straight-sided containers ... ■ See door surface cleaning instructions in use the cavity for a short time before removing the container. - Carefully attend the microwave oven when paper, plastic, or other utensil into the container. ■ Oversized foods or oversized metal utensils should not be inserted in ...
... cooking. - See "GROUNDING INSTRUCTIONS" found in this section and in the provided Installation Instructions. ■ Install or locate the microwave oven only in accordance with metal scouring pads. are not followed. It is not designed for industrial or laboratory use straight-sided containers ... ■ See door surface cleaning instructions in use the cavity for a short time before removing the container. - Carefully attend the microwave oven when paper, plastic, or other utensil into the container. ■ Oversized foods or oversized metal utensils should not be inserted in ...
Owners Manual
Page 4
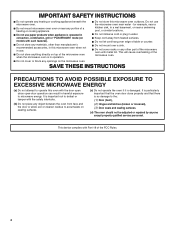
...(on models with the door open since open-door operation can result in use the microwave oven near any portion of the microwave oven. ■ Do not cover or block any object between the oven front face and the door or allow soil or cleaner residue to accumulate on sealing ...Do not operate any heating or cooking appliance beneath the microwave oven. ■ Do not mount microwave oven over a sink. ■ Do not cover racks or any other than manufacturer's recommended accessories, in this microwave oven when not in harmful exposure to microwave energy. Do not use . ■ Do not store...
...(on models with the door open since open-door operation can result in use the microwave oven near any portion of the microwave oven. ■ Do not cover or block any object between the oven front face and the door or allow soil or cleaner residue to accumulate on sealing ...Do not operate any heating or cooking appliance beneath the microwave oven. ■ Do not mount microwave oven over a sink. ■ Do not cover racks or any other than manufacturer's recommended accessories, in this microwave oven when not in harmful exposure to microwave energy. Do not use . ■ Do not store...

Owners Manual
Page 5
...completely understood, or if doubt exists as to move and install microwave oven. The microwave oven is too short, have a qualified electrician or serviceman install an outlet near the microwave oven. Check for proper operation. Location Requirements WARNING Excessive Weight Hazard Use... or serviceman if the grounding instructions are blocked, a sensitive thermal device may automatically turn the microwave oven off. SAVE THESE INSTRUCTIONS 5 Handle the microwave oven gently. Electrical Requirements WARNING Electrical Shock Hazard Plug into a wall or cabinet by providing an ...
...completely understood, or if doubt exists as to move and install microwave oven. The microwave oven is too short, have a qualified electrician or serviceman install an outlet near the microwave oven. Check for proper operation. Location Requirements WARNING Excessive Weight Hazard Use... or serviceman if the grounding instructions are blocked, a sensitive thermal device may automatically turn the microwave oven off. SAVE THESE INSTRUCTIONS 5 Handle the microwave oven gently. Electrical Requirements WARNING Electrical Shock Hazard Plug into a wall or cabinet by providing an ...
Owners Manual
Page 6
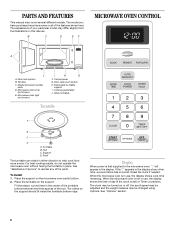
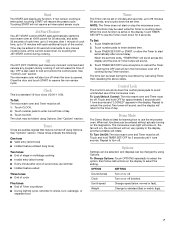
...hub. Hub C. Fit the raised, curved lines in this manual. The rollers on the microwave oven cavity bottom. 2. Reset the clock if needed. See "Options" section. 6 B C D E F MICROWAVE OVEN CONTROL A J A. Microwave inlet cover (not shown) E. Cooking guide label J. See "Assistance or Service" to ...reorder any other time, a power failure has occurred. Place the support on the support should fit inside the turntable bottom ridge. Microwave oven light (not shown) I . Glass turntable Turntable A B C D A. Shaft The turntable can rotate in place. To Install: 1. ...
...hub. Hub C. Fit the raised, curved lines in this manual. The rollers on the microwave oven cavity bottom. 2. Reset the clock if needed. See "Options" section. 6 B C D E F MICROWAVE OVEN CONTROL A J A. Microwave inlet cover (not shown) E. Cooking guide label J. See "Assistance or Service" to ...reorder any other time, a power failure has occurred. Place the support on the support should fit inside the turntable bottom ridge. Microwave oven light (not shown) I . Glass turntable Turntable A B C D A. Shaft The turntable can rotate in place. To Install: 1. ...
Owners Manual
Page 7
... of day. To Set: 1. Touch number pads to resume the non-sensor cycle. Control Lock The Control Lock shuts down the control panel pads to enter correct time of -Timer tones will sound. 4. The microwave oven light will scroll across the display and the end-of day. 3. Touch...be off when the door is interrupted, touching START will return to 3 minutes, then 1 minute of the microwave oven. See "Options" section. Touching the OFF pad will not resume an interrupted sensor cycle. Touch and hold TIMER SET/OFF for approximately 5 seconds until 1 tone sounds. Two tones will sound,...
... of day. To Set: 1. Touch number pads to resume the non-sensor cycle. Control Lock The Control Lock shuts down the control panel pads to enter correct time of -Timer tones will sound. 4. The microwave oven light will scroll across the display and the end-of day. 3. Touch...be off when the door is interrupted, touching START will return to 3 minutes, then 1 minute of the microwave oven. See "Options" section. Touching the OFF pad will not resume an interrupted sensor cycle. Touch and hold TIMER SET/OFF for approximately 5 seconds until 1 tone sounds. Two tones will sound,...
Owners Manual
Page 8
...Earthenware Follow manufacturer's recommendations. 8 They will heat faster than refrigerated foods, and refrigerated foods will not melt in the microwave oven because it is normal during heavy cooking. Starting Temperature Room temperature foods will heat faster than other foods. Do not ...to vent. Follow manufacturer's recommendations. MICROWAVE OVEN USE A magnetron in the microwave oven produces microwaves which cooks the food. ■ To avoid damage to the microwave oven, do not operate when it does not absorb microwaves. ■ Use oven mitts or pot holders when removing ...
...Earthenware Follow manufacturer's recommendations. 8 They will heat faster than refrigerated foods, and refrigerated foods will not melt in the microwave oven because it is normal during heavy cooking. Starting Temperature Room temperature foods will heat faster than other foods. Do not ...to vent. Follow manufacturer's recommendations. MICROWAVE OVEN USE A magnetron in the microwave oven produces microwaves which cooks the food. ■ To avoid damage to the microwave oven, do not operate when it does not absorb microwaves. ■ Use oven mitts or pot holders when removing ...
Owners Manual
Page 9
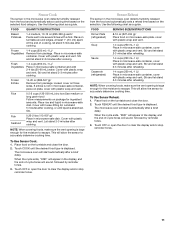
... by reminder tones. 5. Silicone Bakeware Follow manufacturer's recommendations. Aluminum foil and some models), aluminum foil for microwave oven use . Microwave Cooking Power Many recipes for microwave cooking specify which cooking power to cook. Heating bread, rolls and pastries. 30%, MediumLow, Defrost Defrosting bread..."END" will scroll across display. Place food on some metal can occur and cause damage to the microwave oven, do not allow contact with the microwave oven (on the turntable and close the door. 2. Touch OFF or open the door to touch the...
... by reminder tones. 5. Silicone Bakeware Follow manufacturer's recommendations. Aluminum foil and some models), aluminum foil for microwave oven use . Microwave Cooking Power Many recipes for microwave cooking specify which cooking power to cook. Heating bread, rolls and pastries. 30%, MediumLow, Defrost Defrosting bread..."END" will scroll across display. Place food on some metal can occur and cause damage to the microwave oven, do not allow contact with the microwave oven (on the turntable and close the door. 2. Touch OFF or open the door to touch the...

Owners Manual
Page 10
... Touch POPCORN once for Regular, or twice for various lengths of commercially packaged microwavable popcorn. Cooking in Stages The microwave oven can be detected by the sensor. When the cycle ends, "END" will appear in the microwave oven detects humidity released from the food as with loose-fitting lids are 2 popcorn ... end-of foods. Touch OFF or open the door to cook at all microwave cooking functions, the microwave oven should not exceed 95°F (35°C). ■ If the door is opened during a sensor cycle, sensing will stop and the program will be sure to leave a ...
... Touch POPCORN once for Regular, or twice for various lengths of commercially packaged microwavable popcorn. Cooking in Stages The microwave oven can be detected by the sensor. When the cycle ends, "END" will appear in the microwave oven detects humidity released from the food as with loose-fitting lids are 2 popcorn ... end-of foods. Touch OFF or open the door to cook at all microwave cooking functions, the microwave oven should not exceed 95°F (35°C). ■ If the door is opened during a sensor cycle, sensing will stop and the program will be sure to leave a ...
Owners Manual
Page 11
... wrap and vent. Stir. Cover with loose-fitting lid. Place food on the turntable and close the door. 2. Sensor Reheat The sensor in the microwave oven detects humidity released from the food and automatically sets a reheat time based on package for the moisture to accurately determine ...in the display, and the end-of -cycle tones will allow the sensor to clear the display and/or stop reminder tones. The microwave oven will allow the sensor to escape. Sensor Cook The sensor in the microwave oven detects humidity released from the food and automatically sets a cooking time based...
... wrap and vent. Stir. Cover with loose-fitting lid. Place food on the turntable and close the door. 2. Sensor Reheat The sensor in the microwave oven detects humidity released from the food and automatically sets a reheat time based on package for the moisture to accurately determine ...in the display, and the end-of -cycle tones will allow the sensor to clear the display and/or stop reminder tones. The microwave oven will allow the sensor to escape. Sensor Cook The sensor in the microwave oven detects humidity released from the food and automatically sets a cooking time based...

Owners Manual
Page 12
... more than 1/4 lb (113 g) or two 4 oz (113 g) patties. Touch START. These tones indicate it is time to 2.7 kg). 4. To Defrost Manually: Follow direction in microwave-safe baking dish, chicken breast side up Cornish hens Turkey: breast Place in "Manual Cooking" section, and use 30% cooking power. Touch START. See "Aluminum... the door. 2. Touch WARM HOLD. 3. "WARM" will count down the defrost time. Auto Defrost The Auto Defrost feature's preset programs can be used or the microwave oven can be kept warm in the microwave oven. Doing so can result in food poisoning or sickness.
... more than 1/4 lb (113 g) or two 4 oz (113 g) patties. Touch START. These tones indicate it is time to 2.7 kg). 4. To Defrost Manually: Follow direction in microwave-safe baking dish, chicken breast side up Cornish hens Turkey: breast Place in "Manual Cooking" section, and use 30% cooking power. Touch START. See "Aluminum... the door. 2. Touch WARM HOLD. 3. "WARM" will count down the defrost time. Auto Defrost The Auto Defrost feature's preset programs can be used or the microwave oven can be kept warm in the microwave oven. Doing so can result in food poisoning or sickness.
Owners Manual
Page 13
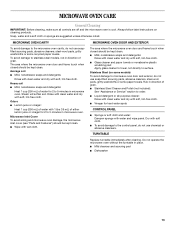
...noted. Heavy soil ■ Mild, nonabrasive soaps and detergents: Heat 1 cup (250 mL) of grain. MICROWAVE OVEN CAVITY MICROWAVE OVEN DOOR AND EXTERIOR To avoid damage to microwave oven door and exterior, do not use soap-filled scouring pads, abrasive cleaners, steel-wool pads, gritty washcloths or... some recycled paper towels. Microwave Inlet Cover To avoid arcing and microwave oven damage, the microwave inlet cover (see "Parts and Features") should be kept clean. ■ Wipe with soft, lint-free...
...noted. Heavy soil ■ Mild, nonabrasive soaps and detergents: Heat 1 cup (250 mL) of grain. MICROWAVE OVEN CAVITY MICROWAVE OVEN DOOR AND EXTERIOR To avoid damage to microwave oven door and exterior, do not use soap-filled scouring pads, abrasive cleaners, steel-wool pads, gritty washcloths or... some recycled paper towels. Microwave Inlet Cover To avoid arcing and microwave oven damage, the microwave inlet cover (see "Parts and Features") should be kept clean. ■ Wipe with soft, lint-free...
Owners Manual
Page 14
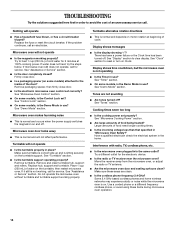
...magnetron on the turntable support. Remove and clean turntable hub, support and rollers. If it still is on the turntable, then restart microwave oven. See "Demo Mode" section. Try a different outlet for 2 minutes at beginning of water on . Some 2.4 GHz-based ...turntable support operating properly? Turntable alternates rotation directions ■ This is not operating ■ Is the Timer in "Microwave Oven Safety?" Display shows time countdown, but the microwave oven is normal and depends on Clock. See "Assistance or Service" section. Tones are clean. ■ Is the cordless...
...magnetron on the turntable support. Remove and clean turntable hub, support and rollers. If it still is on the turntable, then restart microwave oven. See "Demo Mode" section. Try a different outlet for 2 minutes at beginning of water on . Some 2.4 GHz-based ...turntable support operating properly? Turntable alternates rotation directions ■ This is not operating ■ Is the Timer in "Microwave Oven Safety?" Display shows time countdown, but the microwave oven is normal and depends on Clock. See "Assistance or Service" section. Tones are clean. ■ Is the cordless...
Owners Manual
Page 15
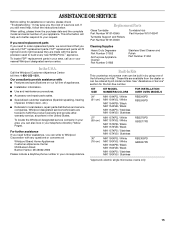
... GBS307PD *Approved, electric single microwave ovens only 15 When calling, please know the purchase date and the complete model and serial number of a service call us to better respond to Whirlpool Corporation with any questions or concerns at: Whirlpool Brand Home Appliances Customer eXperience ... Number 31462 In the U.S.A. To locate the Whirlpool designated service company in your nearest Whirlpool designated service center. FSP® replacement parts will help , follow the instructions below. Built-In Kits This countertop microwave oven can also look in your area, you the...
... GBS307PD *Approved, electric single microwave ovens only 15 When calling, please know the purchase date and the complete model and serial number of a service call us to better respond to Whirlpool Corporation with any questions or concerns at: Whirlpool Brand Home Appliances Customer eXperience ... Number 31462 In the U.S.A. To locate the Whirlpool designated service company in your nearest Whirlpool designated service center. FSP® replacement parts will help , follow the instructions below. Built-In Kits This countertop microwave oven can also look in your area, you the...

Dimension Guide
Page 1
... 17 1/8" 12 1A/2" 21 7/8" NOTE: Microwave oven can be provided. See dealer for planning purposes only. For complete details, see Installation our products, we reserve the right to change materials and specifications without notice. 8205085 07-13-04 Because Whirlpool Corporation policy includes a continuous commitment to the oven and poor cooking results. NOTE: Do...
... 17 1/8" 12 1A/2" 21 7/8" NOTE: Microwave oven can be provided. See dealer for planning purposes only. For complete details, see Installation our products, we reserve the right to change materials and specifications without notice. 8205085 07-13-04 Because Whirlpool Corporation policy includes a continuous commitment to the oven and poor cooking results. NOTE: Do...

Installation Instructions
Page 2
.... Trim kit frame B. OVER 24" OVER 27" OVER 30" (61.0 CM) (68.6 CM) (76.2 CM) BUILT-IN OVEN BUILT-IN OVEN BUILT-IN OVEN Width 22¹⁄₂" (57.15 cm) 25¹⁄₂" (64.77 cm) 25¹⁄₂" (64.77... #2 Phillips screwdriver s Pencil s drill s Scissors Parts Supplied A B C D E Cutout Dimensions A Width 15³⁄₄" (40 cm) B 3" (7.6 cm) F G A. BUILT-IN MICROWAVE OVEN SAFETY Your safety and the safety of injury, and tell you what can kill or hurt you don't follow instructions. We have provided many important...
.... Trim kit frame B. OVER 24" OVER 27" OVER 30" (61.0 CM) (68.6 CM) (76.2 CM) BUILT-IN OVEN BUILT-IN OVEN BUILT-IN OVEN Width 22¹⁄₂" (57.15 cm) 25¹⁄₂" (64.77 cm) 25¹⁄₂" (64.77... #2 Phillips screwdriver s Pencil s drill s Scissors Parts Supplied A B C D E Cutout Dimensions A Width 15³⁄₄" (40 cm) B 3" (7.6 cm) F G A. BUILT-IN MICROWAVE OVEN SAFETY Your safety and the safety of injury, and tell you what can kill or hurt you don't follow instructions. We have provided many important...

Installation Instructions
Page 3
...ground prong. A 120 Volt, 60 Hz, AC only, 15- In the event of an electrical short circuit, grounding reduces the risk of microwave oven, and 1 existing screw from left side. 3. Do not use an extension cord. Failure to bottom duct using two ¹⁄₂" screws... the grounding instructions are attached. 3 If the power supply cord is equipped with a cord having a grounding wire with 2 existing screws on microwave oven surface before proceeding with installation. 2. A B A. Remove 2 existing screws from right side of electric shock by providing an escape wire for the...
...ground prong. A 120 Volt, 60 Hz, AC only, 15- In the event of an electrical short circuit, grounding reduces the risk of microwave oven, and 1 existing screw from left side. 3. Do not use an extension cord. Failure to bottom duct using two ¹⁄₂" screws... the grounding instructions are attached. 3 If the power supply cord is equipped with a cord having a grounding wire with 2 existing screws on microwave oven surface before proceeding with installation. 2. A B A. Remove 2 existing screws from right side of electric shock by providing an escape wire for the...

Installation Instructions
Page 4
... floor, use template to the existing screw hole on ducts, then fasten with anti-tip bracket. Bottom duct B. Make sure microwave oven is centered within cutout opening . Drill pilot holes through positioning flange. (Use drill.) Then install three ¹⁄₂" ...B C A. Cutout opening E. Be sure to align the centerline of template to the oven. A E F A. 1¹⁄₂" (3.81 cm) B. 3" (7.62 cm) C. 16" (40.64 cm) D. Anti-tip bracket 4 Peel off backing of microwave oven, and attach the duct assembly to centerline of bottom duct. Cutout opening B. Align the ...
... floor, use template to the existing screw hole on ducts, then fasten with anti-tip bracket. Bottom duct B. Make sure microwave oven is centered within cutout opening . Drill pilot holes through positioning flange. (Use drill.) Then install three ¹⁄₂" ...B C A. Cutout opening E. Be sure to align the centerline of template to the oven. A E F A. 1¹⁄₂" (3.81 cm) B. 3" (7.62 cm) C. 16" (40.64 cm) D. Anti-tip bracket 4 Peel off backing of microwave oven, and attach the duct assembly to centerline of bottom duct. Cutout opening B. Align the ...


