Use and Care Guide
Page 1
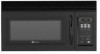
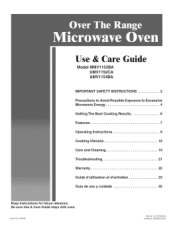
DE68-03143A Use & Care Guide Model iVllVIV1153BA U IVIV1152CA AIVlV1154BA IMPORTANT SAFETY INSTRUCTIONS ........... 2 Precautions to Avoid Possible Exposure to Excessive Microwave Energy 4 Getting The Best Cooking Results 6 Features 7 Operating instructions 9 Cooking Utensils 18 Care and Cleaning 19 Troubleshooting 21 Warranty 22 Guide d'utilisation et d'entretien 23 Gufa de uso y cuidado 45 Keep instructions for future reference. Form No A/08/05 Part No. 8112P292-60 Code No. Be sure Use & Care Guide stays with oven.
DE68-03143A Use & Care Guide Model iVllVIV1153BA U IVIV1152CA AIVlV1154BA IMPORTANT SAFETY INSTRUCTIONS ........... 2 Precautions to Avoid Possible Exposure to Excessive Microwave Energy 4 Getting The Best Cooking Results 6 Features 7 Operating instructions 9 Cooking Utensils 18 Care and Cleaning 19 Troubleshooting 21 Warranty 22 Guide d'utilisation et d'entretien 23 Gufa de uso y cuidado 45 Keep instructions for future reference. Form No A/08/05 Part No. 8112P292-60 Code No. Be sure Use & Care Guide stays with oven.
Use and Care Guide
Page 2
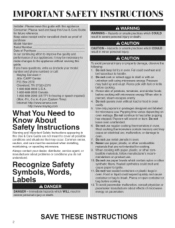
Always contact your dealer, distributor, service agent, or manufacturer about problems or conditions you do not understand. Common sense, caution, and care must be exercised when installing, maintaining, or operating microwave. iiiiiiiiiiiiii Recognize Safety Symbols, Words, Labels SAVE THE STRUCTION IMPORTANT SAFETY INSTRUCTIONS What You Need to Know About Safety instructions Warning and Important Safety instructions appearing in this Use & Care Guide are not meant to cover all possible conditions and situations that may occur.
Always contact your dealer, distributor, service agent, or manufacturer about problems or conditions you do not understand. Common sense, caution, and care must be exercised when installing, maintaining, or operating microwave. iiiiiiiiiiiiii Recognize Safety Symbols, Words, Labels SAVE THE STRUCTION IMPORTANT SAFETY INSTRUCTIONS What You Need to Know About Safety instructions Warning and Important Safety instructions appearing in this Use & Care Guide are not meant to cover all possible conditions and situations that may occur.

Use and Care Guide
Page 3
... providing an escape wire for ISM Equipment pursuant to part 18 of the user to provide reasonable protection against such interference in specifications table. It has been type tested and found to the receiver. Do not use an extension cord. This oven should be plugged into a separate 60 hertz circuit with the manufacturer's instructions, may be required and fuses can be...
... providing an escape wire for ISM Equipment pursuant to part 18 of the user to provide reasonable protection against such interference in specifications table. It has been type tested and found to the receiver. Do not use an extension cord. This oven should be plugged into a separate 60 hertz circuit with the manufacturer's instructions, may be required and fuses can be...
Use and Care Guide
Page 4
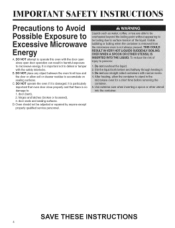
... to operate this oven with the door open since open door operation can result in harmful exposure to microwave energy, it is particularly importantthat oven door close properly and that there is importantnot to : 1. SAVE THE STRUCTION B. door (bent), 2. D. DO NOT operate the oven if it...latches (broken or loosened), 3. DO NOT place any object between the oven front face and the door or allow soil or cleaner residue to Excessive icrowave Energy A. Oven should not be adjusted or repaired by anyone except properly qualified service personnel. IMPORTANT SAFETY INSTRUCTIONS...
... to operate this oven with the door open since open door operation can result in harmful exposure to microwave energy, it is particularly importantthat oven door close properly and that there is importantnot to : 1. SAVE THE STRUCTION B. door (bent), 2. D. DO NOT operate the oven if it...latches (broken or loosened), 3. DO NOT place any object between the oven front face and the door or allow soil or cleaner residue to Excessive icrowave Energy A. Oven should not be adjusted or repaired by anyone except properly qualified service personnel. IMPORTANT SAFETY INSTRUCTIONS...

Use and Care Guide
Page 7
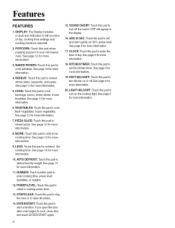
... Defrost I L Cooktop Light OVEN SPECIFICATIONS Power Supply 120 VAC, 60 Hz Input Power 1,650 W Cooking Power 1,000W (IEC 60705 Standard) Frequency Rated Current 2,450 MHz 14.5 A Outer Dimensions (WxHxD) 297/8" x 16 1/2" X 15" Cavity Volume 1.5 Cu. Net Weight 45.4 Ibs. Features I Cooking W rtd ow w th Metal Shield DoorH.ndle I Guide S'Wer-----'-a,Unad/I G la ssTu rntab,e Number Plate t I || Vent Grille I I Lock System | Grease Filter I ..... 2 4 5 7 8 PSizliczea 3 6 9 ..... Pleovweel r STOP CEAR KitChc'rl Timer 0 Clock 30AdSdec ENTER OSTA_ Sound...
... Defrost I L Cooktop Light OVEN SPECIFICATIONS Power Supply 120 VAC, 60 Hz Input Power 1,650 W Cooking Power 1,000W (IEC 60705 Standard) Frequency Rated Current 2,450 MHz 14.5 A Outer Dimensions (WxHxD) 297/8" x 16 1/2" X 15" Cavity Volume 1.5 Cu. Net Weight 45.4 Ibs. Features I Cooking W rtd ow w th Metal Shield DoorH.ndle I Guide S'Wer-----'-a,Unad/I G la ssTu rntab,e Number Plate t I || Vent Grille I I Lock System | Grease Filter I ..... 2 4 5 7 8 PSizliczea 3 6 9 ..... Pleovweel r STOP CEAR KitChc'rl Timer 0 Clock 30AdSdec ENTER OSTA_ Sound...
Use and Care Guide
Page 8
...: Touch this pad to stop the oven or to clear all entries. 14. STOP/CLEAR: Touch this pad to cook, close door and touch ENTER/START again. 15. KITCHEN TIMER: Touch this pad when popping popcorn in the display. 16. DISPLAY: The Display includes a clock and indicators to tell you open the door after oven begins to add more cooking time. POPCORN: Touch this pad to select a cooking power level. 13. BAKED POTATO:Touch this pad to set and start...
...: Touch this pad to stop the oven or to clear all entries. 14. STOP/CLEAR: Touch this pad to cook, close door and touch ENTER/START again. 15. KITCHEN TIMER: Touch this pad when popping popcorn in the display. 16. DISPLAY: The Display includes a clock and indicators to tell you open the door after oven begins to add more cooking time. POPCORN: Touch this pad to select a cooking power level. 13. BAKED POTATO:Touch this pad to set and start...
Use and Care Guide
Page 9
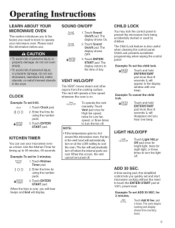
... used by using the number pads. 3. Example: To set the child lock. _ENTER START Touch and hold ENTER/START pad more than 3 seconds. CLOCK Example: To set and start microwave cooking without the need to know to operate your microwave oven as a timer. Vent Hi/Lo/Off NOTE: To operate the vent manually: Touch Vent pad once for High fan speed, twice for 3 minutes. The Child Lock feature is over, you quickly set 8:00. The display returns to the time of day. Operating Instructions...
... used by using the number pads. 3. Example: To set the child lock. _ENTER START Touch and hold ENTER/START pad more than 3 seconds. CLOCK Example: To set and start microwave cooking without the need to know to operate your microwave oven as a timer. Vent Hi/Lo/Off NOTE: To operate the vent manually: Touch Vent pad once for High fan speed, twice for 3 minutes. The Child Lock feature is over, you quickly set 8:00. The display returns to the time of day. Operating Instructions...

Use and Care Guide
Page 10
... 9 power settings in the Reheat, Auto Cooking, Add 30 sec, Time Cook modes. Enter the first cook time. Example: To cook food for Power levels, page 11. COOKING AT LOWER POWER LEVELS HIGH power cooking does not always give you to adjust pre-set to change from one to three cycles at the first cycle is over , you will hear four beeps and End will display. Enter the power level. _ENTER START 7. When the cook time is defrost.
... 9 power settings in the Reheat, Auto Cooking, Add 30 sec, Time Cook modes. Enter the first cook time. Example: To cook food for Power levels, page 11. COOKING AT LOWER POWER LEVELS HIGH power cooking does not always give you to adjust pre-set to change from one to three cycles at the first cycle is over , you will hear four beeps and End will display. Enter the power level. _ENTER START 7. When the cook time is defrost.

Use and Care Guide
Page 11
.... * Cook pasta. * Cook meats, whole poultry. * Cook custard. * Cook whole chicken, turkey, spare ribs, rib roast, sirloin roast. * Cook less tender cuts of meat. * Reheat frozen convenience foods. * Thaw meat, poultry, and seafood. * Cook small quantities of food. * Finish cooking casserole, stew, and some sauces. * Soften butter and cream cheese. * Heat small amounts of microwave power you are listed all the power levels, examples of foods best cooked...
.... * Cook pasta. * Cook meats, whole poultry. * Cook custard. * Cook whole chicken, turkey, spare ribs, rib roast, sirloin roast. * Cook less tender cuts of meat. * Reheat frozen convenience foods. * Thaw meat, poultry, and seafood. * Cook small quantities of food. * Finish cooking casserole, stew, and some sauces. * Soften butter and cream cheese. * Heat small amounts of microwave power you are listed all the power levels, examples of foods best cooked...
Use and Care Guide
Page 12
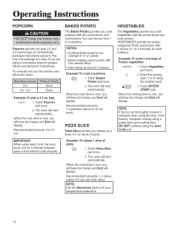
... the serving size (1 to fit your microwave oven, follow manufacturer's instructions. Popcorn 1. Example: To reheat 1 slice of pizza. Vegetables 1. Touch Vegetables pad twice. 2 _ENTER START 2. Touch ENTER/ START pad. When the cook time is over , you will hear four beeps and End will display. each slice) NOTE: Use the More/Less pads to 4) using the Auto Cook pad. 12 If you cook Vegetables with the preset times and cook powers. slices...
... the serving size (1 to fit your microwave oven, follow manufacturer's instructions. Popcorn 1. Example: To reheat 1 slice of pizza. Vegetables 1. Touch Vegetables pad twice. 2 _ENTER START 2. Touch ENTER/ START pad. When the cook time is over , you will hear four beeps and End will display. each slice) NOTE: Use the More/Less pads to 4) using the Auto Cook pad. 12 If you cook Vegetables with the preset times and cook powers. slices...

Use and Care Guide
Page 13
... turntable in microwave-safe ceramic, glass or plastic dish and add 2-4 Tbs. When the cook time is over, you will hear four beeps and End will start automatically. Do not cover. Use measuring cup or mug; After heating, stir well. Use the More(9)/kess(1) i pads to enter quantity, serving size or package weight. Bacon Cover with lid or vented plastic wrap during cooking and stir before using...
... turntable in microwave-safe ceramic, glass or plastic dish and add 2-4 Tbs. When the cook time is over, you will hear four beeps and End will start automatically. Do not cover. Use measuring cup or mug; After heating, stir well. Use the More(9)/kess(1) i pads to enter quantity, serving size or package weight. Bacon Cover with lid or vented plastic wrap during cooking and stir before using...

Use and Care Guide
Page 14
... 14 Cover plate with lid or vented plastic wrap. Contents: - 3-4 oz. If food is not as hot as you will hear four beeps and End will start automatically. Touch Reheat pad 2 times. 3 2. Casserole twice rh-2 The oven will display. pads to enter quantity/ Dinner Plate once rh-1 servings. When the cook time is not as hot as you prefer after heating with REHEAT, continue heating using time and power. If food...
... 14 Cover plate with lid or vented plastic wrap. Contents: - 3-4 oz. If food is not as hot as you will hear four beeps and End will start automatically. Touch Reheat pad 2 times. 3 2. Casserole twice rh-2 The oven will display. pads to enter quantity/ Dinner Plate once rh-1 servings. When the cook time is not as hot as you prefer after heating with REHEAT, continue heating using time and power. If food...
Use and Care Guide
Page 15
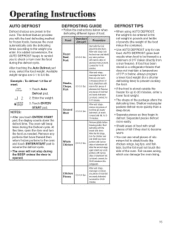
... the weight. _ENTER START NOTES: 3. AUTO DEFROST gives best results when food to the weight you with narrowstripsof aluminumfoil.Letstand, coveredfor 15-30 minutes. 0.5-3.0 Ibs. The defrost feature provides you enter. After touching the Auto Defrost pad once, select the food weight. Auto Defrost 1. Foil causes arcing, which can use small pieces of O°F (taken directly from a true freezer). The oven will not stop during the BEEP unless the door...
... the weight. _ENTER START NOTES: 3. AUTO DEFROST gives best results when food to the weight you with narrowstripsof aluminumfoil.Letstand, coveredfor 15-30 minutes. 0.5-3.0 Ibs. The defrost feature provides you enter. After touching the Auto Defrost pad once, select the food weight. Auto Defrost 1. Foil causes arcing, which can use small pieces of O°F (taken directly from a true freezer). The oven will not stop during the BEEP unless the door...

Use and Care Guide
Page 16
.... Operating Instructions COOKING GUIDE Guide for Cooking Meat in Your Microwave • Place meat on roasting rack. Whole Chicken Up to 15 minutes. • Expect a IO°F rise in a microwave-safe dish. • Cover poultry with wax paper. Cook until juices run clear and meat near the bone is no longer pink. Cover with the thickest portions toward the outside of the food will...
.... Operating Instructions COOKING GUIDE Guide for Cooking Meat in Your Microwave • Place meat on roasting rack. Whole Chicken Up to 15 minutes. • Expect a IO°F rise in a microwave-safe dish. • Cover poultry with wax paper. Cook until juices run clear and meat near the bone is no longer pink. Cover with the thickest portions toward the outside of the food will...

Use and Care Guide
Page 17
.... Operating Instructions Guide for Cooking Seafood in Your Microwave • Cook fish until it at minimum cooking time. Arrange shrimp in the shell; Cover with the stem ends pointing towards the edge of the oven.). Power Level: Medium-High(7). Always place vegetables like asparagus and broccoli with wax paper. Whole, unpeeled vegetables such as potatoes, acorn squash or corn on a microwave-safe roasting rack...
.... Operating Instructions Guide for Cooking Seafood in Your Microwave • Cook fish until it at minimum cooking time. Arrange shrimp in the shell; Cover with the stem ends pointing towards the edge of the oven.). Power Level: Medium-High(7). Always place vegetables like asparagus and broccoli with wax paper. Whole, unpeeled vegetables such as potatoes, acorn squash or corn on a microwave-safe roasting rack...
Use and Care Guide
Page 18
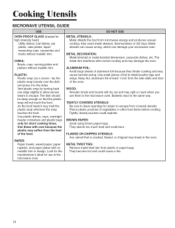
...-banded dinnerware, casserole dishes, etc. Cooking Utensils MICROWAVE UTENSIL GUIDE OVEN PROOF GLASS (treated for high intensity heat): Utility dishes, loaf dishes, pie plates, cake plates, liquid measuring cups, casseroles and bowls without metallic trim. CHINA: Bowls, cups, serving plates and platters without metallic trim. PLASTIC: Plastic wrap (as a cover)-- As the food heats it to escape. Use these with care because the plastic may split...
...-banded dinnerware, casserole dishes, etc. Cooking Utensils MICROWAVE UTENSIL GUIDE OVEN PROOF GLASS (treated for high intensity heat): Utility dishes, loaf dishes, pie plates, cake plates, liquid measuring cups, casseroles and bowls without metallic trim. CHINA: Bowls, cups, serving plates and platters without metallic trim. PLASTIC: Plastic wrap (as a cover)-- As the food heats it to escape. Use these with care because the plastic may split...
Use and Care Guide
Page 19
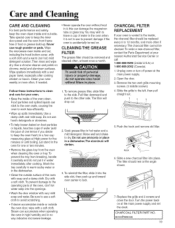
... door panel and the oven front frame free of food or grease build-up. Wipe the microwave oven inside and out-side. Food particles and spilled liquids can damage the magnetron tube or glass tray. Dry with soap and a damp cloth. Remove the two vent grille mounting screws. (3 middle screws) 4. Slide a new charcoal filter into the openings. ,, Wash the door window with a soft cloth and a warm (not hot) mild detergent solution. Turn the power back on food...
... door panel and the oven front frame free of food or grease build-up. Wipe the microwave oven inside and out-side. Food particles and spilled liquids can damage the magnetron tube or glass tray. Dry with soap and a damp cloth. Remove the two vent grille mounting screws. (3 middle screws) 4. Slide a new charcoal filter into the openings. ,, Wash the door window with a soft cloth and a warm (not hot) mild detergent solution. Turn the power back on food...
Use and Care Guide
Page 20
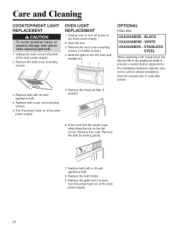
... Cleaning COOKTOP/NIGHT LIGHT REPLACEMENT 1. For installation between cabinets only; Each kit contains two 3" wide filler panels. 3. Replace bulb cover, and mounting so rews. 5. Remove the bulb by turning gently. 7. Unplug the oven or turn off power at the main power supply. 2. Turn the power back on at the main power supply. 5. Slide the grille to provide a custom built-in the additional width to the left corner. not for end-of-cabinet installation. Remove the charcoal filter, if present. 6. Replace bulb...
... Cleaning COOKTOP/NIGHT LIGHT REPLACEMENT 1. For installation between cabinets only; Each kit contains two 3" wide filler panels. 3. Replace bulb cover, and mounting so rews. 5. Remove the bulb by turning gently. 7. Unplug the oven or turn off power at the main power supply. 2. Turn the power back on at the main power supply. 5. Slide the grille to provide a custom built-in the additional width to the left corner. not for end-of-cabinet installation. Remove the charcoal filter, if present. 6. Replace bulb...
Use and Care Guide
Page 21
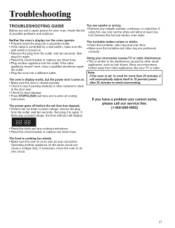
... your microwave further away from the outlet, wait ten seconds, then plug it The oven's display works, but the power won't come on . Press STOP/CLEAR pad twice and re-enter all cooking instructions. The food is cooking too slowly, • Make sure the oven is turned on . If you call our service line: (1-8oo-688-99oo) , Reset the clock and any cooking instructions. , Reset the circuit breaker or replace...
... your microwave further away from the outlet, wait ten seconds, then plug it The oven's display works, but the power won't come on . Press STOP/CLEAR pad twice and re-enter all cooking instructions. The food is cooking too slowly, • Make sure the oven is turned on . If you call our service line: (1-8oo-688-99oo) , Reset the clock and any cooking instructions. , Reset the circuit breaker or replace...
Use and Care Guide
Page 22
... the servicer. 6. instruct the user on owner's responsibilities for product service in your Use and Care Guide or call the dealer from any control. 2. c. Outside of purchase to retain proof of the United States and Canada this warranty does not apply. Consequential or incidental damages sustained by the manufacturer or an authorized servicer. If You Need Service First see the Troubleshooting section in remote locations. 8. Notes...
... the servicer. 6. instruct the user on owner's responsibilities for product service in your Use and Care Guide or call the dealer from any control. 2. c. Outside of purchase to retain proof of the United States and Canada this warranty does not apply. Consequential or incidental damages sustained by the manufacturer or an authorized servicer. If You Need Service First see the Troubleshooting section in remote locations. 8. Notes...


