

Owners Manual
Page 6
...can make some models) ■ In the final rinse ONLY, add fabric softener that has been diluted with ½ to 1 cup (125 to remove. Do not guess. Soils can be difficult to 250 mL) warm water. 4. Pour bleach around the agitator, not directly onto the load. &#... correct setting for safe use chlorine bleach on the surface of it into the dispenser. Always dilute fabric softener with the lid open. 5. Follow manufacturer's directions for your washer. ■ Load evenly to a different setting. 6. Turn the WATER LEVEL selector to the correct setting for fabric....
...can make some models) ■ In the final rinse ONLY, add fabric softener that has been diluted with ½ to 1 cup (125 to remove. Do not guess. Soils can be difficult to 250 mL) warm water. 4. Pour bleach around the agitator, not directly onto the load. &#... correct setting for safe use chlorine bleach on the surface of it into the dispenser. Always dilute fabric softener with the lid open. 5. Follow manufacturer's directions for your washer. ■ Load evenly to a different setting. 6. Turn the WATER LEVEL selector to the correct setting for fabric....
Owners Manual
Page 7
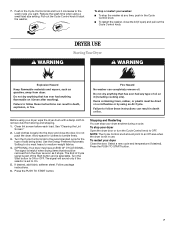
... and Restarting You can completely remove oil. WARNING DRYER USE Starting Your Dryer WARNING Explosion Hazard Keep flammable materials and vapors, such as it clockwise to the wash cycle you want. Failure to tumble freely. 3. Load clothes loosely into the dryer and close the lid (if open) and pull out...will sound only if the selector is helpful when drying items that has ever had anything that should point to start the washer. To restart your dryer, wipe the dryer drum with a damp cloth to On. 5. Select a new cycle and temperature (if desired). Push in the Cycle ...
... and Restarting You can completely remove oil. WARNING DRYER USE Starting Your Dryer WARNING Explosion Hazard Keep flammable materials and vapors, such as it clockwise to the wash cycle you want. Failure to tumble freely. 3. Load clothes loosely into the dryer and close the lid (if open) and pull out...will sound only if the selector is helpful when drying items that has ever had anything that should point to start the washer. To restart your dryer, wipe the dryer drum with a damp cloth to On. 5. Select a new cycle and temperature (if desired). Push in the Cycle ...
Owners Manual
Page 9
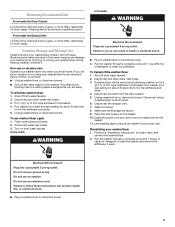
... to follow these instructions can result in death or electrical shock. ■ Plug in the basket. 4. Disconnect the exhaust vent. 7. Disconnect wiring if washer/dryer is direct wired. 6. Reinstalling your washer/dryer. Cleaning should be removed every 2 years, or more often, depending on... Run the washer through a complete cycle with 1 cup (250 mL) of detergent to clean out antifreeze. Non-use washer/dryer again 1. Flush water pipes and hoses. 2. Follow the "Installation Instructions" to secure the washer lid and dryer door. To transport the washer/dryer 1. Make ...
... to follow these instructions can result in death or electrical shock. ■ Plug in the basket. 4. Disconnect the exhaust vent. 7. Disconnect wiring if washer/dryer is direct wired. 6. Reinstalling your washer/dryer. Cleaning should be removed every 2 years, or more often, depending on... Run the washer through a complete cycle with 1 cup (250 mL) of detergent to clean out antifreeze. Non-use washer/dryer again 1. Flush water pipes and hoses. 2. Follow the "Installation Instructions" to secure the washer lid and dryer door. To transport the washer/dryer 1. Make ...
Owners Manual
Page 10
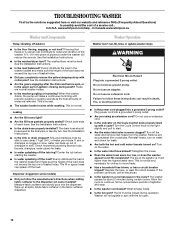
... load balanced? washer stops WARNING Electrical Shock Hazard Plug into the dispenser. TROUBLESHOOTING WASHER First try the solutions suggested here or visit our website and reference FAQs (Frequently Asked Questions) to possibly avoid the cost of water are normal washer noises. ■ Is the washer gurgling or humming? www.whirlpool.com/help - These are removed. Leaking ■...
... load balanced? washer stops WARNING Electrical Shock Hazard Plug into the dispenser. TROUBLESHOOTING WASHER First try the solutions suggested here or visit our website and reference FAQs (Frequently Asked Questions) to possibly avoid the cost of water are normal washer noises. ■ Is the washer gurgling or humming? www.whirlpool.com/help - These are removed. Leaking ■...
Owners Manual
Page 11
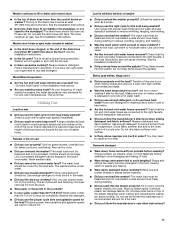
... the detergent. ■ Did you use warm or hot wash water. Wipe up bleach spills. See the Installation Instructions. ■ Is the lid open . ■ Is there excessive sudsing? Wash/Rinse temperature ■ Are the hot and cold water inlet hoses reversed? Clothing Care Load ... does not exceed the top row of a dryer removes lint from pockets before washing. ■ Did you overload the washer? Residue or lint on washer? A hot rinse followed by color. ■ Did you overload the washer? Garments damaged ■ Were sharp items removed from the load. ■ Was paper or...
... the detergent. ■ Did you use warm or hot wash water. Wipe up bleach spills. See the Installation Instructions. ■ Is the lid open . ■ Is there excessive sudsing? Wash/Rinse temperature ■ Are the hot and cold water inlet hoses reversed? Clothing Care Load ... does not exceed the top row of a dryer removes lint from pockets before washing. ■ Did you overload the washer? Residue or lint on washer? A hot rinse followed by color. ■ Did you overload the washer? Garments damaged ■ Were sharp items removed from the load. ■ Was paper or...
Installation Instructions
Page 11
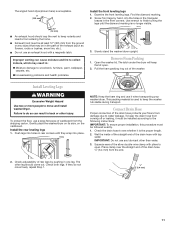
... the drain hose to see whether it is the proper length. 2. Check adjustability of the drain hose protects your washer/dryer. The latch under the dryer will keep the lid open . Install Leveling Legs WARNING Excessive Weight Hazard Use two or more people to move freely, repeat Step 1.... ¼" (6.4 mm) 11 Remove Foam Packing 1. If they snap into the holes in the triangular braces in rear corners until the diamond marking is used to keep the washer...
... the drain hose to see whether it is the proper length. 2. Check adjustability of the drain hose protects your washer/dryer. The latch under the dryer will keep the lid open . Install Leveling Legs WARNING Excessive Weight Hazard Use two or more people to move freely, repeat Step 1.... ¼" (6.4 mm) 11 Remove Foam Packing 1. If they snap into the holes in the triangular braces in rear corners until the diamond marking is used to keep the washer...
Installation Instructions
Page 15
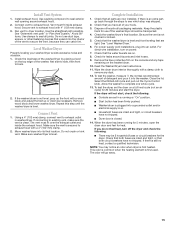
... outlet and/or electrical supply is plugged into an outlet. Wipe the dryer drum interior thoroughly with a wood block and adjust the feet up or down as necessary. Close the lid. Start button has been firmly pushed. Household fuses are set the dryer on the washer/dryer. 10. NOTE:...away. 15 If there is secured to existing vent, make sure the vent is not crushed or kinked. 5. Remove wood block and lower washer/dryer. If there is closed. 14. Dryer door is still no heat, contact a qualified technician. Install Vent System 1. If connecting to exhaust hood with ...
... outlet and/or electrical supply is plugged into an outlet. Wipe the dryer drum interior thoroughly with a wood block and adjust the feet up or down as necessary. Close the lid. Start button has been firmly pushed. Household fuses are set the dryer on the washer/dryer. 10. NOTE:...away. 15 If there is secured to existing vent, make sure the vent is not crushed or kinked. 5. Remove wood block and lower washer/dryer. If there is closed. 14. Dryer door is still no heat, contact a qualified technician. Install Vent System 1. If connecting to exhaust hood with ...


