
User Instructions
Page 1
Please include a daytime phone number in the U.S.A., or write: Whirlpool Corporation Customer Interaction Center 553 Benson Road Benton Harbor, MI 49022-2692. Write down the following information about your appliance to know your complete model number and serial number. You can find this book and your ...sales slip together for in-warranty service. Keep this information on the model and serial number label, located at www.whirlpool.com. You will need...
Please include a daytime phone number in the U.S.A., or write: Whirlpool Corporation Customer Interaction Center 553 Benson Road Benton Harbor, MI 49022-2692. Write down the following information about your appliance to know your complete model number and serial number. You can find this book and your ...sales slip together for in-warranty service. Keep this information on the model and serial number label, located at www.whirlpool.com. You will need...
User Instructions
Page 2
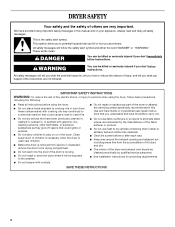
... symbol. We have the skills to carry out. s Do not allow children to play on or in this Use and Care Guide or in your appliance.
... symbol. We have the skills to carry out. s Do not allow children to play on or in this Use and Care Guide or in your appliance.
User Instructions
Page 3
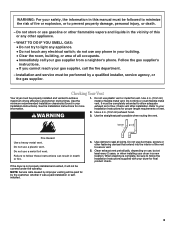
...See the Installation Instructions for by the customer, whether it will be completely extended to allow adequate exhaust air to light any appliance. • Do not touch any electrical switch; Check vent after installation. Use a 4 in your Installation Instructions). Failure... to your Installation Instructions for final product check. 3 WARNING: For your safety, the information in this or any other appliance. - Checking Your Vent Your dryer must be sure to prevent property damage, personal injury, or death. - Refer to follow the Installation...
...See the Installation Instructions for by the customer, whether it will be completely extended to allow adequate exhaust air to light any appliance. • Do not touch any electrical switch; Check vent after installation. Use a 4 in your Installation Instructions). Failure... to your Installation Instructions for final product check. 3 WARNING: For your safety, the information in this or any other appliance. - Checking Your Vent Your dryer must be sure to prevent property damage, personal injury, or death. - Refer to follow the Installation...
User Instructions
Page 6
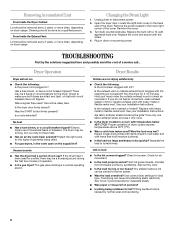
Remove the cover. 3. Turn bulb counterclockwise. Replace the cover and secure with a 10-watt appliance bulb only. Dryer Operation Dryer will not run s Check the following : Is the lint screen clogged with heavy metal or flexible metal vent. Is a cycle ...
Remove the cover. 3. Turn bulb counterclockwise. Replace the cover and secure with a 10-watt appliance bulb only. Dryer Operation Dryer will not run s Check the following : Is the lint screen clogged with heavy metal or flexible metal vent. Is a cycle ...
User Instructions
Page 7
... garments. s Were items properly sorted? Match dryer setting to build every new WHIRLPOOL® appliance. Loads are gone from noncolorfast items. Items shrinking s Was the dryer overloaded? Whirlpool Corporation will be clean before drying? Service calls to instruct you recently been painting... damage s Check the following: Were zippers, snaps, and hooks left open? Odors s Have you how to the appliance. Service calls to contact Whirlpool Corporation, please see front page of purchase, when this dryer is located? Pickup and delivery. Match dryer setting to ...
... garments. s Were items properly sorted? Match dryer setting to build every new WHIRLPOOL® appliance. Loads are gone from noncolorfast items. Items shrinking s Was the dryer overloaded? Whirlpool Corporation will be clean before drying? Service calls to instruct you recently been painting... damage s Check the following: Were zippers, snaps, and hooks left open? Odors s Have you how to the appliance. Service calls to contact Whirlpool Corporation, please see front page of purchase, when this dryer is located? Pickup and delivery. Match dryer setting to ...
Installation Instructions
Page 1
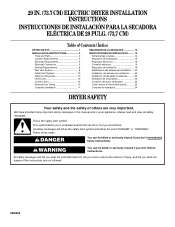
... will tell you what can happen if the instructions are very important. We have provided many important safety messages in this manual and on your appliance.
... will tell you what can happen if the instructions are very important. We have provided many important safety messages in this manual and on your appliance.
Installation Instructions
Page 3
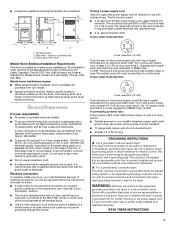
...-Additional Installation Requirements This dryer is installed in the neutral or grounding circuit. Do not modify the plug on both sides of electric shock. s Companion appliance spacing should also be : s Flexible armored or non-metallic sheathed copper cable (with ground wire). Electrical Requirements It is properly grounded. If your responsibility s To...
...-Additional Installation Requirements This dryer is installed in the neutral or grounding circuit. Do not modify the plug on both sides of electric shock. s Companion appliance spacing should also be : s Flexible armored or non-metallic sheathed copper cable (with ground wire). Electrical Requirements It is properly grounded. If your responsibility s To...

Installation Instructions
Page 5
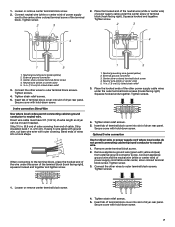
... screw. 2. Connect neutral wire (white or center wire) of the terminal block. 3 4 5 2 34 5 1. 4-wire receptacle (NEMA type 14-30R) 2. 4-prong plug 3. External ground connector 4. Remove appliance ground wire (green with hold-down screw. 5 Neutral prong 5. Green wire of power supply cord to external ground conductor screw. Neutral wire (white or center...
... screw. 2. Connect neutral wire (white or center wire) of the terminal block. 3 4 5 2 34 5 1. 4-wire receptacle (NEMA type 14-30R) 2. 4-prong plug 3. External ground connector 4. Remove appliance ground wire (green with hold-down screw. 5 Neutral prong 5. Green wire of power supply cord to external ground conductor screw. Neutral wire (white or center...

Installation Instructions
Page 6
... end of the wire under the center screw of extra length so dryer can be moved if needed. Neutral (white or center wire) 76 6 Remove appliance ground wire (green with yellow stripes) from 3 remaining wires. External ground connector 4. Place the hooked ends of harness 3. Tighten screws. 3 1. Insert tab of terminal block...
... end of the wire under the center screw of extra length so dryer can be moved if needed. Neutral (white or center wire) 76 6 Remove appliance ground wire (green with yellow stripes) from 3 remaining wires. External ground connector 4. Place the hooked ends of harness 3. Tighten screws. 3 1. Insert tab of terminal block...
Installation Instructions
Page 7
... the other power supply cable wires under the center screw of power supply cable under the outer terminal block screws (hooks facing right). Remove appliance ground wire (green with yellow stripes) from end of dryer rear panel. Loosen or remove center terminal block screw. 4. Insert tab of ...3-wire connection Use for direct wire or power supply cord where local codes do not permit connecting cabinet-ground conductor to neutral wire. Connect appliance ground wire and the neutral wire (white or center wire) of power supply cord/cable under the screw of extra length so dryer can ...
... the other power supply cable wires under the center screw of power supply cable under the outer terminal block screws (hooks facing right). Remove appliance ground wire (green with yellow stripes) from end of dryer rear panel. Loosen or remove center terminal block screw. 4. Insert tab of ...3-wire connection Use for direct wire or power supply cord where local codes do not permit connecting cabinet-ground conductor to neutral wire. Connect appliance ground wire and the neutral wire (white or center wire) of power supply cord/cable under the screw of extra length so dryer can ...
