
User Instructions
Page 1
...order parts and accessories, call 1-800-442-9991 or visit our website at 1-800-253-1301 from anywhere in the U.S.A., or write: Whirlpool Corporation Customer Interaction Center 553 Benson Road Benton Harbor, MI 49022-2692. ® DRYER USER INSTRUCTIONS INSTRUCCIONES PARA EL USUARIO DE LA SECADORA ...Table of purchase or installation date for future reference. Write down the following information about your appliance to know your correspondence. Additional help you obtain assistance or service if you need to help is available by calling our Customer...
...order parts and accessories, call 1-800-442-9991 or visit our website at 1-800-253-1301 from anywhere in the U.S.A., or write: Whirlpool Corporation Customer Interaction Center 553 Benson Road Benton Harbor, MI 49022-2692. ® DRYER USER INSTRUCTIONS INSTRUCCIONES PARA EL USUARIO DE LA SECADORA ...Table of purchase or installation date for future reference. Write down the following information about your appliance to know your correspondence. Additional help you obtain assistance or service if you need to help is available by calling our Customer...
User Instructions
Page 2
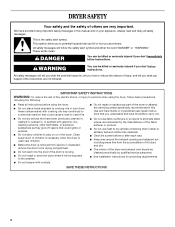
...." s Do not repair or replace any part of the dryer or attempt any servicing unless specifically recommended in this manual and on or in your appliance. s Clean lint screen before using the dryer, follow instructions. WARNING You can be cleaned periodically by the manufacturer of the fabric softener or product. IMPORTANT...
...." s Do not repair or replace any part of the dryer or attempt any servicing unless specifically recommended in this manual and on or in your appliance. s Clean lint screen before using the dryer, follow instructions. WARNING You can be cleaned periodically by the manufacturer of the fabric softener or product. IMPORTANT...
User Instructions
Page 3
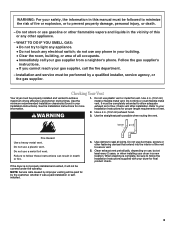
... or to flow. WARNING 1. Do not use plastic vent or metal foil vent. Clean exhaust vent periodically, depending on use gasoline or other appliance. - When cleaning is not properly installed and vented, it will be performed by the customer, whether it was a paid for more information....vicinity of vent. 2. Use clamps to achieve maximum drying efficiency and shorten drying times. Fire Hazard Use a heavy metal vent. Failure to light any appliance. • Do not touch any other flammable vapors and liquids in death or fire. do not use a plastic vent. Use 4 in . (10...
... or to flow. WARNING 1. Do not use plastic vent or metal foil vent. Clean exhaust vent periodically, depending on use gasoline or other appliance. - When cleaning is not properly installed and vented, it will be performed by the customer, whether it was a paid for more information....vicinity of vent. 2. Use clamps to achieve maximum drying efficiency and shorten drying times. Fire Hazard Use a heavy metal vent. Failure to light any appliance. • Do not touch any other flammable vapors and liquids in death or fire. do not use a plastic vent. Use 4 in . (10...
User Instructions
Page 6
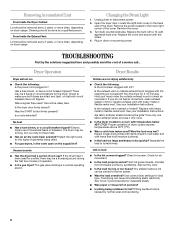
... the dryer for lint? Replace the bulb with temperature below 45ºF (7ºC)? Expect longer drying times with items rinsed in a room with a 10-watt appliance bulb only. s Is it only once. Locate the light bulb cover on load s Is the lint screen clogged? Plug in pockets?
... the dryer for lint? Replace the bulb with temperature below 45ºF (7ºC)? Expect longer drying times with items rinsed in a room with a 10-watt appliance bulb only. s Is it only once. Locate the light bulb cover on load s Is the lint screen clogged? Plug in pockets?
User Instructions
Page 7
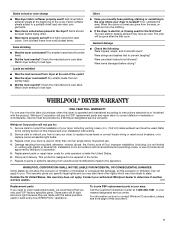
... can tumble freely. Heavy 4 in the area where your dryer, including venting. Replacement parts or repair labor costs for : 1. WHIRLPOOL CORPORATION SHALL NOT BE LIABLE FOR INCIDENTAL OR CONSEQUENTIAL DAMAGES. This warranty gives you specific legal rights and you need to replace owner ...Call the Customer Interaction Center at the beginning of God, improper installation (including, but not limited to build every new WHIRLPOOL® appliance. Damage resulting from unauthorized modifications made with local electrical and plumbing codes, or use FSP® factory specified parts. ...
... can tumble freely. Heavy 4 in the area where your dryer, including venting. Replacement parts or repair labor costs for : 1. WHIRLPOOL CORPORATION SHALL NOT BE LIABLE FOR INCIDENTAL OR CONSEQUENTIAL DAMAGES. This warranty gives you specific legal rights and you need to replace owner ...Call the Customer Interaction Center at the beginning of God, improper installation (including, but not limited to build every new WHIRLPOOL® appliance. Damage resulting from unauthorized modifications made with local electrical and plumbing codes, or use FSP® factory specified parts. ...
Installation Instructions
Page 1
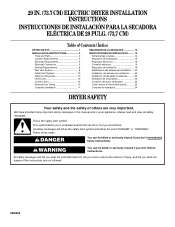
... what can kill or hurt you to reduce the chance of others . We have provided many important safety messages in this manual and on your appliance. All safety messages will tell you don't follow the safety alert symbol and either the word "DANGER" or "WARNING." All safety messages will follow instructions...
... what can kill or hurt you to reduce the chance of others . We have provided many important safety messages in this manual and on your appliance. All safety messages will tell you don't follow the safety alert symbol and either the word "DANGER" or "WARNING." All safety messages will follow instructions...
Installation Instructions
Page 3
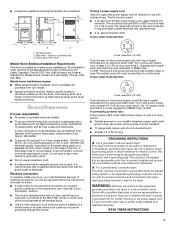
...: s A UL approved 30 amp power supply cord, rated 120/240 volt minimum. This dryer uses a cord having an equipment-grounding conductor and a grounding plug. s Companion appliance spacing should be at least twice as large as to whether the dryer is suitable for mobile home installations.
...: s A UL approved 30 amp power supply cord, rated 120/240 volt minimum. This dryer uses a cord having an equipment-grounding conductor and a grounding plug. s Companion appliance spacing should be at least twice as large as to whether the dryer is suitable for mobile home installations.

Installation Instructions
Page 5
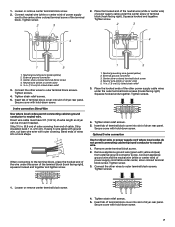
... type 14-30R) 2. 4-prong plug 3. Connect neutral wire (white or center wire) of power supply cord under center, silver colored terminal block screw. 12 3 1. Remove appliance ground wire (green with hold-down screw. 5 Center silver-colored terminal block screw 5. Spade terminals with upturned ends 6. ¾ in . (1.9 cm) UL-listed strain relief...
... type 14-30R) 2. 4-prong plug 3. Connect neutral wire (white or center wire) of power supply cord under center, silver colored terminal block screw. 12 3 1. Remove appliance ground wire (green with hold-down screw. 5 Center silver-colored terminal block screw 5. Spade terminals with upturned ends 6. ¾ in . (1.9 cm) UL-listed strain relief...

Installation Instructions
Page 6
... into slot of outer covering from external ground connector screw. Neutral wire (white or center wire) 6. See example below. 1. Remove center terminal block screw. 2. Remove appliance ground wire (green with hold-down screw. 3-wire connection: Power Supply Cord Use where local codes permit connecting cabinet-ground conductor to center terminal block...
... into slot of outer covering from external ground connector screw. Neutral wire (white or center wire) 6. See example below. 1. Remove center terminal block screw. 2. Remove appliance ground wire (green with hold-down screw. 3-wire connection: Power Supply Cord Use where local codes permit connecting cabinet-ground conductor to center terminal block...
Installation Instructions
Page 7
...not permit connecting cabinet-ground conductor to outer terminal block screws. Tighten strain relief screws. 5. Center silver-colored terminal block screw 4. Remove appliance ground wire (green with hold-down screw. Secure cover with hold -down screw. 7 Neutral grounding wire (green/yellow) 2. Secure cover ... cover with yellow stripes) from end of the other wires to the center, silver colored terminal screw of dryer rear panel. Connect appliance ground wire and the neutral wire (white or center wire) of dryer rear panel. Insert tab of terminal block cover into a hook...
...not permit connecting cabinet-ground conductor to outer terminal block screws. Tighten strain relief screws. 5. Center silver-colored terminal block screw 4. Remove appliance ground wire (green with hold-down screw. Secure cover with hold -down screw. 7 Neutral grounding wire (green/yellow) 2. Secure cover ... cover with yellow stripes) from end of the other wires to the center, silver colored terminal screw of dryer rear panel. Connect appliance ground wire and the neutral wire (white or center wire) of dryer rear panel. Insert tab of terminal block cover into a hook...
