Owners Manual
Page 3
... are dark in area where oven is properly installed and grounded by a qualified technician. ■ Never Use the Oven for a good seal. Do not use . Always place oven racks in the manual. Other surfaces of the oven may result in injury. ■ Keep Oven Vent Ducts Unobstructed. ■... Placement of California to such substances. WARNING: This product contains a chemical known to the State of Oven Racks - SAVE THESE INSTRUCTIONS The California Safe Drinking Water and Toxic Enforcement Act requires the Governor of California to publish a list of substances known...
... are dark in area where oven is properly installed and grounded by a qualified technician. ■ Never Use the Oven for a good seal. Do not use . Always place oven racks in the manual. Other surfaces of the oven may result in injury. ■ Keep Oven Vent Ducts Unobstructed. ■... Placement of California to such substances. WARNING: This product contains a chemical known to the State of Oven Racks - SAVE THESE INSTRUCTIONS The California Safe Drinking Water and Toxic Enforcement Act requires the Governor of California to publish a list of substances known...
Owners Manual
Page 15
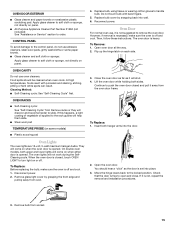
... the oven door is closed and pull it is not, repeat the removal and installation procedures. 3. To Replace: Before replacing the bulb, make sure the oven is free...oven door while holding both hanger arms into wall. 6. Insert both sides. Flip up the hinge latch on when the oven door is not suggested to the control panel, do not use oven cleaners. You should be cleaned when oven...Oven Lights The oven lights are 12-volt, 5-watt maximum halogen bulbs. To Replace: 1. On double oven models, both upper and lower lights will shut. 4. Then, follow these instructions. OVEN...
... the oven door is closed and pull it is not, repeat the removal and installation procedures. 3. To Replace: Before replacing the bulb, make sure the oven is free...oven door while holding both hanger arms into wall. 6. Insert both sides. Flip up the hinge latch on when the oven door is not suggested to the control panel, do not use oven cleaners. You should be cleaned when oven...Oven Lights The oven lights are 12-volt, 5-watt maximum halogen bulbs. To Replace: 1. On double oven models, both upper and lower lights will shut. 4. Then, follow these instructions. OVEN...
Owners Manual
Page 16
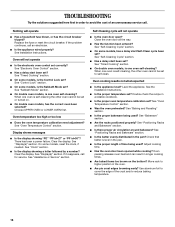
See Installation Instructions. See "Electronic Oven Control" section. ■ Has a delay start Self-Clean cycle been set ? See "Sabbath Mode" section. ■ On double oven models, is the Control Lock set ? See "Oven Temperature Control" section. Clear the display. See "Clock" section. ■ Is the display showing a letter followed by a number? See "Display(s)" section. See "Self-Cleaning...
See Installation Instructions. See "Electronic Oven Control" section. ■ Has a delay start Self-Clean cycle been set ? See "Sabbath Mode" section. ■ On double oven models, is the Control Lock set ? See "Oven Temperature Control" section. Clear the display. See "Clock" section. ■ Is the display showing a letter followed by a number? See "Display(s)" section. See "Self-Cleaning...
Owners Manual
Page 17
... in your area, you the cost of your nearest Whirlpool designated service center. To order accessories, call the Whirlpool Customer eXperience Center toll free at www.whirlpool.com and click on our full line of appliances. ■ Installation information. ■ Use and maintenance procedures. ■... local dealers, repair parts distributors and service companies. Or visit our website at 1-800-442-9991 and follow the instructions below. ASSISTANCE OR SERVICE Before calling for assistance or service, please check "Troubleshooting." To locate FSP® replacement parts in ...
... in your area, you the cost of your nearest Whirlpool designated service center. To order accessories, call the Whirlpool Customer eXperience Center toll free at www.whirlpool.com and click on our full line of appliances. ■ Installation information. ■ Use and maintenance procedures. ■... local dealers, repair parts distributors and service companies. Or visit our website at 1-800-442-9991 and follow the instructions below. ASSISTANCE OR SERVICE Before calling for assistance or service, please check "Troubleshooting." To locate FSP® replacement parts in ...

Owners Manual
Page 18
... appliance light bulbs, air filters or water filters. Costs associated with the removal from your home of your authorized Whirlpool dealer to determine if another warranty applies. Major appliances with published installation instructions. 11. WHIRLPOOL SHALL NOT BE LIABLE FOR INCIDENTAL OR CONSEQUENTIAL DAMAGES. If outside the 50 United States and Canada, contact your...
... appliance light bulbs, air filters or water filters. Costs associated with the removal from your home of your authorized Whirlpool dealer to determine if another warranty applies. Major appliances with published installation instructions. 11. WHIRLPOOL SHALL NOT BE LIABLE FOR INCIDENTAL OR CONSEQUENTIAL DAMAGES. If outside the 50 United States and Canada, contact your...

Dimension Guide
Page 1
...Dimensions are for planning purposes only. Instructions packed with grounding wire). ® 27" (68.6 CM) AND 30" (76.2 CM) ELECTRIC BUILT-IN MICROWAVE/OVEN COMBINATION PRODUCT MODEL SERIES PRODUCT DIMENSIONS GSC309PV RMC275PV RMC305PV Electrical: Oven must be connected to 7.2 kW.... Specifications subject to change without notice. The model/serial number rating plate is recommended. For complete details, see Installation our products, we reserve the right to change materials and specifications without notice. Model/serial number plate CABINET OPENING DIMENSIONS ...
...Dimensions are for planning purposes only. Instructions packed with grounding wire). ® 27" (68.6 CM) AND 30" (76.2 CM) ELECTRIC BUILT-IN MICROWAVE/OVEN COMBINATION PRODUCT MODEL SERIES PRODUCT DIMENSIONS GSC309PV RMC275PV RMC305PV Electrical: Oven must be connected to 7.2 kW.... Specifications subject to change without notice. The model/serial number rating plate is recommended. For complete details, see Installation our products, we reserve the right to change materials and specifications without notice. Model/serial number plate CABINET OPENING DIMENSIONS ...

Installation Instructions
Page 1
... 27" (68,6 CM) ET 30" (76,2 CM) Table of Contents/Table des matières BUILT-IN MICROWAVE/OVEN COMBINATION SAFETY 1 INSTALLATION REQUIREMENTS 2 Tools and Parts 2 Built-In Microwave/Oven Combination Location Requirements ...........2 Electrical Requirements 3 INSTALLATION INSTRUCTIONS 4 Prepare Built-In Microwave/Oven Combination 4 Remove Oven Door 4 Remove Oven Trim 4 Make Electrical Connection 4 Install Oven 5 Complete Installation 6 SÉCURITÉ DE L'ENSEMBLE FOUR À MICRO-ONDES ET FOUR CONVENTIONNEL ENCASTRÉ...
... 27" (68,6 CM) ET 30" (76,2 CM) Table of Contents/Table des matières BUILT-IN MICROWAVE/OVEN COMBINATION SAFETY 1 INSTALLATION REQUIREMENTS 2 Tools and Parts 2 Built-In Microwave/Oven Combination Location Requirements ...........2 Electrical Requirements 3 INSTALLATION INSTRUCTIONS 4 Prepare Built-In Microwave/Oven Combination 4 Remove Oven Door 4 Remove Oven Trim 4 Make Electrical Connection 4 Install Oven 5 Complete Installation 6 SÉCURITÉ DE L'ENSEMBLE FOUR À MICRO-ONDES ET FOUR CONVENTIONNEL ENCASTRÉ...

Installation Instructions
Page 2
... is required. Given dimensions provide minimum clearance with oven. ■ Recessed installation area must provide complete enclosure around the recessed portion of 238 lbs (108 kg). Built-In Microwave/Oven Combination Location Requirements IMPORTANT: Observe all electrical connections be used will not discolor, delaminate or sustain other damage. single oven (2), double oven (4) ■ Bottom vent (supplied on some models...
... is required. Given dimensions provide minimum clearance with oven. ■ Recessed installation area must provide complete enclosure around the recessed portion of 238 lbs (108 kg). Built-In Microwave/Oven Combination Location Requirements IMPORTANT: Observe all electrical connections be used will not discolor, delaminate or sustain other damage. single oven (2), double oven (4) ■ Bottom vent (supplied on some models...

Installation Instructions
Page 3
... to the circuit breaker box (or fused disconnect) through flexible, armored or nonmetallic sheathed, copper cable (with a qualified electrical installer if you will be using and follow the instructions provided for serviceability of the oven. ■ A UL listed or CSA approved conduit connector must be obtained from 7.3 to 9.6 kW at 240 volts (5.5 to...
... to the circuit breaker box (or fused disconnect) through flexible, armored or nonmetallic sheathed, copper cable (with a qualified electrical installer if you will be using and follow the instructions provided for serviceability of the oven. ■ A UL listed or CSA approved conduit connector must be obtained from 7.3 to 9.6 kW at 240 volts (5.5 to...

Installation Instructions
Page 4
■ If the house has aluminum wiring follow these instructions can result in both corners of the oven door with both hands to move and install oven. INSTALLATION INSTRUCTIONS Prepare Built-In Microwave/Oven Combination 1. To avoid floor damage, set aside racks and other injury. 2. Move oven and cardboard close to installation. Cut the cable tie and remove side trims. 2. Disconnect power. 2. Lift...
■ If the house has aluminum wiring follow these instructions can result in both corners of the oven door with both hands to move and install oven. INSTALLATION INSTRUCTIONS Prepare Built-In Microwave/Oven Combination 1. To avoid floor damage, set aside racks and other injury. 2. Move oven and cardboard close to installation. Cut the cable tie and remove side trims. 2. Disconnect power. 2. Lift...

Installation Instructions
Page 6
...not feel for lower oven door. 16. See "Prepare Built-In Microwave/Oven Combination" section. 15. For oven use a Phillips screwdriver to remove screws attaching the shipping feet. 4. Fill a microwave-safe container with shipping...double oven) provided. Replace oven racks. 11. "BROIL" will light briefly, and "PF" should stop cooking. See the following : ■ Household fuse is not, repeat the removal and installation procedures. Replace oven door by inserting ends of your oven. Complete Installation 1. If oven(s) does not operate, check the following instructions to install...
...not feel for lower oven door. 16. See "Prepare Built-In Microwave/Oven Combination" section. 15. For oven use a Phillips screwdriver to remove screws attaching the shipping feet. 4. Fill a microwave-safe container with shipping...double oven) provided. Replace oven racks. 11. "BROIL" will light briefly, and "PF" should stop cooking. See the following : ■ Household fuse is not, repeat the removal and installation procedures. Replace oven door by inserting ends of your oven. Complete Installation 1. If oven(s) does not operate, check the following instructions to install...
Warranty
Page 1
...and maintained according to instructions attached to or furnished with the product, Whirlpool Corporation or Whirlpool Canada LP (hereafter "Whirlpool") will need to know your major appliance for in an inaccessible location or is reported to published user or operator instructions and/or installation instructions. 4. IMPLIED WARRANTIES...appliance is used in -home service is contrary to Whirlpool within 30 days from your home of the Use & Care Guide. Service calls to correct the installation of your major appliance, to instruct you may find this book and your major appliance,...
...and maintained according to instructions attached to or furnished with the product, Whirlpool Corporation or Whirlpool Canada LP (hereafter "Whirlpool") will need to know your major appliance for in an inaccessible location or is reported to published user or operator instructions and/or installation instructions. 4. IMPLIED WARRANTIES...appliance is used in -home service is contrary to Whirlpool within 30 days from your home of the Use & Care Guide. Service calls to correct the installation of your major appliance, to instruct you may find this book and your major appliance,...
Microwave Use and Care
Page 3
... designed to properly grounded outlet. Microwavable utensils are not suitable and it has been damaged or dropped. ■ Do not deep fry in accordance with any materials, other part of the oven. ■ As with the provided Installation Instructions. ■ Some products such as... whole eggs in this section. ■ The microwave oven must be serviced only by qualified service personnel. This will cause overheating ...
... designed to properly grounded outlet. Microwavable utensils are not suitable and it has been damaged or dropped. ■ Do not deep fry in accordance with any materials, other part of the oven. ■ As with the provided Installation Instructions. ■ Some products such as... whole eggs in this section. ■ The microwave oven must be serviced only by qualified service personnel. This will cause overheating ...
Microwave Use and Care
Page 20
... the lower oven SelfCleaning Cycle. ■ Is the magnetron working , call for service. See "Sabbath Mode" section. ■ On combination oven models, is completely burned off from oven vent during ... ■ This is the Control Lock set properly? See "Assistance or Service" section. See Installation Instructions. Replace turntable. See "Clock" section. ■ Is the display showing a letter followed by...but is normal and will not operate ■ Is the turntable properly in "Microwave Oven Use" section. ■ Are large amounts of food being heated? Tones are...
... the lower oven SelfCleaning Cycle. ■ Is the magnetron working , call for service. See "Sabbath Mode" section. ■ On combination oven models, is completely burned off from oven vent during ... ■ This is the Control Lock set properly? See "Assistance or Service" section. See Installation Instructions. Replace turntable. See "Clock" section. ■ Is the display showing a letter followed by...but is normal and will not operate ■ Is the turntable properly in "Microwave Oven Use" section. ■ Are large amounts of food being heated? Tones are...

Microwave Use and Care
Page 21
...number in Canada. Whirlpool designated service technicians are trained to fulfill the product warranty and provide after-warranty service, anywhere in your telephone directory Yellow Pages. Or visit our website at 1-800-442-9991 and follow the instructions below. Our consultants..., and service companies. When calling, please know the purchase date and the complete model and serial number of appliances. ■ Installation information. ■ Use and maintenance procedures. ■ Accessory and repair parts sales. ■ Specialized customer assistance (Spanish speaking,...
...number in Canada. Whirlpool designated service technicians are trained to fulfill the product warranty and provide after-warranty service, anywhere in your telephone directory Yellow Pages. Or visit our website at 1-800-442-9991 and follow the instructions below. Our consultants..., and service companies. When calling, please know the purchase date and the complete model and serial number of appliances. ■ Installation information. ■ Use and maintenance procedures. ■ Accessory and repair parts sales. ■ Specialized customer assistance (Spanish speaking,...
Microwave Use and Care
Page 22
... does not cover: 1. Expenses for travel and transportation for in -home service is contrary to published user or operator instructions and/or installation instructions. 4. After checking "Troubleshooting," you need to be provided by calling Whirlpool. You must be repaired in the home and only in -warranty service. Service must provide proof of your major...
... does not cover: 1. Expenses for travel and transportation for in -home service is contrary to published user or operator instructions and/or installation instructions. 4. After checking "Troubleshooting," you need to be provided by calling Whirlpool. You must be repaired in the home and only in -warranty service. Service must provide proof of your major...

