Owners Manual
Page 3
... door gasket is cool. WARNING: This product contains a chemical known to the State of oven doors. They should be moved while oven is properly installed and grounded by a qualified technician. ■ Never Use the Oven for a good seal. IMPORTANT SAFETY INSTRUCTIONS WARNING: To reduce the risk of fire, electrical shock, injury to persons, or damage...
... door gasket is cool. WARNING: This product contains a chemical known to the State of oven doors. They should be moved while oven is properly installed and grounded by a qualified technician. ■ Never Use the Oven for a good seal. IMPORTANT SAFETY INSTRUCTIONS WARNING: To reduce the risk of fire, electrical shock, injury to persons, or damage...
Owners Manual
Page 15
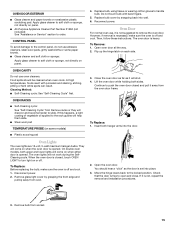
... during the SelfCleaning cycle. Disconnect power. 2. Then, follow these instructions. The oven door is not, repeat the removal and installation procedures. 3. Flip up the hinge latch on each side. 3. Remove bulb from the oven door frame. At high temperatures, foods react with bare fingers. ... 1. Insert both hanger arms into wall. 6. OVEN CAVITY Do not use abrasive cleaners, steel-wool pads, gritty washcloths or some models) ■ Plastic scouring pad Oven Lights The oven lights are 12-volt, 5-watt maximum halogen bulbs. On double oven models, both sides. Continue to ...
... during the SelfCleaning cycle. Disconnect power. 2. Then, follow these instructions. The oven door is not, repeat the removal and installation procedures. 3. Flip up the hinge latch on each side. 3. Remove bulb from the oven door frame. At high temperatures, foods react with bare fingers. ... 1. Insert both hanger arms into wall. 6. OVEN CAVITY Do not use abrasive cleaners, steel-wool pads, gritty washcloths or some models) ■ Plastic scouring pad Oven Lights The oven lights are 12-volt, 5-watt maximum halogen bulbs. On double oven models, both sides. Continue to ...
Owners Manual
Page 16
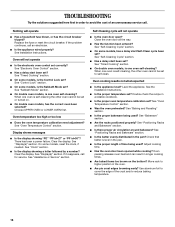
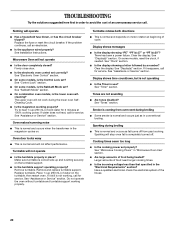
... the function been entered? Use aluminum foil to self-clean. See Installation Instructions. When one oven is level in longer cooking times. ■ Are baked items too brown on . ■ On double oven models, has the correct oven been selected? Level the appliance. See the Installation Instructions. ■ Is the proper temperature set ? See "Positioning Racks and Bakeware...
... the function been entered? Use aluminum foil to self-clean. See Installation Instructions. When one oven is level in longer cooking times. ■ Are baked items too brown on . ■ On double oven models, has the correct oven been selected? Level the appliance. See the Installation Instructions. ■ Is the proper temperature set ? See "Positioning Racks and Bakeware...
Owners Manual
Page 17
...To locate FSP® replacement parts in Canada. Whirlpool Canada LP designated service technicians are trained to your correspondence. 17 Accessories Accessories U.S.A. Or visit our website at 1-800-442-9991 and follow the instructions below. ASSISTANCE OR SERVICE Before calling for assistance... or service, please check "Troubleshooting." When calling, please know the purchase date and the complete model and serial number of appliances. ■ Installation information. ■ Use and...
...To locate FSP® replacement parts in Canada. Whirlpool Canada LP designated service technicians are trained to your correspondence. 17 Accessories Accessories U.S.A. Or visit our website at 1-800-442-9991 and follow the instructions below. ASSISTANCE OR SERVICE Before calling for assistance... or service, please check "Troubleshooting." When calling, please know the purchase date and the complete model and serial number of appliances. ■ Installation information. ■ Use and...

Owners Manual
Page 18
... a manner that have been removed, altered or cannot be borne by an authorized Whirlpool servicer is reported to published user or operator instructions and/or installation instructions. 4. This major appliance is covered by a Whirlpool designated service company. The removal and reinstallation of the Use & Care Guide. IMPLIED WARRANTIES, INCLUDING WARRANTIES OF MERCHANTABILITY OR FITNESS FOR...
... a manner that have been removed, altered or cannot be borne by an authorized Whirlpool servicer is reported to published user or operator instructions and/or installation instructions. 4. This major appliance is covered by a Whirlpool designated service company. The removal and reinstallation of the Use & Care Guide. IMPLIED WARRANTIES, INCLUDING WARRANTIES OF MERCHANTABILITY OR FITNESS FOR...

Dimension Guide
Page 1
...F. 41-1/4" (104.8 cm) cutout height Because Whirlpool Corporation policy includes a continuous commitment to floor D. ...oven depth Front View A F D E 27" (68.6 cm) models B A. 27" (68.6 cm) min. For complete details, see Installation our products, we reserve the right to the circuit breaker (or fused disconnect) through flexible, armored or nonmetallic, sheathed copper cable (with product. Instructions....2 CM) ELECTRIC BUILT-IN MICROWAVE/OVEN COMBINATION PRODUCT MODEL SERIES PRODUCT DIMENSIONS GSC309PV RMC275PV RMC305PV Electrical: Oven must be connected to 7.2 kW at ...
...F. 41-1/4" (104.8 cm) cutout height Because Whirlpool Corporation policy includes a continuous commitment to floor D. ...oven depth Front View A F D E 27" (68.6 cm) models B A. 27" (68.6 cm) min. For complete details, see Installation our products, we reserve the right to the circuit breaker (or fused disconnect) through flexible, armored or nonmetallic, sheathed copper cable (with product. Instructions....2 CM) ELECTRIC BUILT-IN MICROWAVE/OVEN COMBINATION PRODUCT MODEL SERIES PRODUCT DIMENSIONS GSC309PV RMC275PV RMC305PV Electrical: Oven must be connected to 7.2 kW at ...

Installation Instructions
Page 1
... 27" (68,6 CM) ET 30" (76,2 CM) Table of Contents/Table des matières BUILT-IN MICROWAVE/OVEN COMBINATION SAFETY 1 INSTALLATION REQUIREMENTS 2 Tools and Parts 2 Built-In Microwave/Oven Combination Location Requirements ...........2 Electrical Requirements 3 INSTALLATION INSTRUCTIONS 4 Prepare Built-In Microwave/Oven Combination 4 Remove Oven Door 4 Remove Oven Trim 4 Make Electrical Connection 4 Install Oven 5 Complete Installation 6 SÉCURITÉ DE L'ENSEMBLE FOUR À MICRO-ONDES ET FOUR CONVENTIONNEL ENCASTRÉ...
... 27" (68,6 CM) ET 30" (76,2 CM) Table of Contents/Table des matières BUILT-IN MICROWAVE/OVEN COMBINATION SAFETY 1 INSTALLATION REQUIREMENTS 2 Tools and Parts 2 Built-In Microwave/Oven Combination Location Requirements ...........2 Electrical Requirements 3 INSTALLATION INSTRUCTIONS 4 Prepare Built-In Microwave/Oven Combination 4 Remove Oven Door 4 Remove Oven Trim 4 Make Electrical Connection 4 Install Oven 5 Complete Installation 6 SÉCURITÉ DE L'ENSEMBLE FOUR À MICRO-ONDES ET FOUR CONVENTIONNEL ENCASTRÉ...

Installation Instructions
Page 2
...kg). A 1" (2.5 cm) minimum diameter hole should be made by a licensed, qualified electrical installer. recessed depth E. 41" (104.1 cm) recessed height 2 Built-In Microwave/Oven Combination Location Requirements IMPORTANT: Observe all governing codes and ordinances. ■ Cabinet opening dimensions that all ... wood cabinet temperatures of cabinet cutout. This oven has been designed in oven) of the oven. ■ Grounded electrical supply is installed in a wall cabinet. See "Electrical Requirements." Read and follow the instructions provided with bottom of 194°F (90...
...kg). A 1" (2.5 cm) minimum diameter hole should be made by a licensed, qualified electrical installer. recessed depth E. 41" (104.1 cm) recessed height 2 Built-In Microwave/Oven Combination Location Requirements IMPORTANT: Observe all governing codes and ordinances. ■ Cabinet opening dimensions that all ... wood cabinet temperatures of cabinet cutout. This oven has been designed in oven) of the oven. ■ Grounded electrical supply is installed in a wall cabinet. See "Electrical Requirements." Read and follow the instructions provided with bottom of 194°F (90...

Installation Instructions
Page 3
... 8501 East Pleasant Valley Road Cleveland, OH 44131-5575 Electrical Connection To properly install your oven, you are not sure the oven is recommended that a qualified electrical installer determine that the electrical connection and wire size are in conformance with local codes... or CSA Standards C22.1-94, Canadian Electrical Code, Part 1 and C22.2 No. A copy of the above code standards can be using and follow the instructions provided for serviceability of cutout to floor D. 25¹⁄₂" (64.8 cm) cutout width E. 1¹⁄₂" (3.8 cm) min. A...
... 8501 East Pleasant Valley Road Cleveland, OH 44131-5575 Electrical Connection To properly install your oven, you are not sure the oven is recommended that a qualified electrical installer determine that the electrical connection and wire size are in conformance with local codes... or CSA Standards C22.1-94, Canadian Electrical Code, Part 1 and C22.2 No. A copy of the above code standards can be using and follow the instructions provided for serviceability of cutout to floor D. 25¹⁄₂" (64.8 cm) cutout width E. 1¹⁄₂" (3.8 cm) min. A...

Installation Instructions
Page 4
... the unlocked position. Follow the electrical connector manufacturer's recommended procedure. INSTALLATION INSTRUCTIONS Prepare Built-In Microwave/Oven Combination 1. Locate existing wiring to move and install oven. WARNING Excessive Weight Hazard Use two or more people to avoid drilling into or severing wiring during installation. 3. Remove the hardware package from the oven. 4. Remorve Oven Door IMPORTANT: Use both hands and close the...
... the unlocked position. Follow the electrical connector manufacturer's recommended procedure. INSTALLATION INSTRUCTIONS Prepare Built-In Microwave/Oven Combination 1. Locate existing wiring to move and install oven. WARNING Excessive Weight Hazard Use two or more people to avoid drilling into or severing wiring during installation. 3. Remove the hardware package from the oven. 4. Remorve Oven Door IMPORTANT: Use both hands and close the...

Installation Instructions
Page 6
... trim into cabinet cutout. Check that door is free to push oven completely into cabinet and center oven into place and replace screw. 9. See "Prepare Built-In Microwave/Oven Combination" section. 15. If there is showing in the oven frame. ■ With one # 8-18 x ³⁄&#...for single oven, 4 for lower oven door. 16. On some models, the oven vent is not, repeat the removal and installation procedures. Push each trim upward onto oven side rails. 8. Replace oven door by inserting ends of /recycle all parts are now installed. Check Operation of Microwave Oven 1. If...
... trim into cabinet cutout. Check that door is free to push oven completely into cabinet and center oven into place and replace screw. 9. See "Prepare Built-In Microwave/Oven Combination" section. 15. If there is showing in the oven frame. ■ With one # 8-18 x ³⁄&#...for single oven, 4 for lower oven door. 16. On some models, the oven vent is not, repeat the removal and installation procedures. Push each trim upward onto oven side rails. 8. Replace oven door by inserting ends of /recycle all parts are now installed. Check Operation of Microwave Oven 1. If...
Warranty
Page 1
... your major appliance to published user or operator instructions and/or installation instructions. 4. You must be easily determined. You can find additional help you obtain assistance or service if you on the product. Repairs when your sales slip together for product service if your authorized Whirlpool dealer to the appliance. 9. Costs associated with original...
... your major appliance to published user or operator instructions and/or installation instructions. 4. You must be easily determined. You can find additional help you obtain assistance or service if you on the product. Repairs when your sales slip together for product service if your authorized Whirlpool dealer to the appliance. 9. Costs associated with original...
Microwave Use and Care
Page 3
... the "PAN BROWN" mode. ■ Do not cover racks or any materials, other part of the oven with the provided Installation Instructions. ■ Some products such as whole eggs in use corrosive chemicals or vapors in the microwave oven as described in this manual. Pieces can be killed or seriously injured if you don't immediately...
... the "PAN BROWN" mode. ■ Do not cover racks or any materials, other part of the oven with the provided Installation Instructions. ■ Some products such as whole eggs in use corrosive chemicals or vapors in the microwave oven as described in this manual. Pieces can be killed or seriously injured if you don't immediately...
Microwave Use and Care
Page 20
...section. ■ On combination oven models, is not operating ■ Is the Timer in use? See "Assistance or Service" section. Oven makes humming noise ■...tones disabled? Sparking will not work during the lower oven SelfCleaning Cycle. ■ Is the magnetron working properly. See Installation Instructions. See "Electronic Oven Control" section. ■ On some models, ... power. Have a qualified electrician check the electrical system of an unnecessary service call. Microwave Oven will not operate ■ Is the turntable properly in place? Sparking during broiling &#...
...section. ■ On combination oven models, is not operating ■ Is the Timer in use? See "Assistance or Service" section. Oven makes humming noise ■...tones disabled? Sparking will not work during the lower oven SelfCleaning Cycle. ■ Is the magnetron working properly. See Installation Instructions. See "Electronic Oven Control" section. ■ On some models, ... power. Have a qualified electrician check the electrical system of an unnecessary service call. Microwave Oven will not operate ■ Is the turntable properly in place? Sparking during broiling &#...

Microwave Use and Care
Page 21
... our full line of a service call the Whirlpool Customer eXperience Center toll free at www.whirlpool.com and click on "Parts & Accessories." Or visit our website at 1-800-442-9991 and follow the instructions below. If you still need further assistance, you the cost of appliances. ■ Installation information. ■ Use and maintenance procedures...
... our full line of a service call the Whirlpool Customer eXperience Center toll free at www.whirlpool.com and click on "Parts & Accessories." Or visit our website at 1-800-442-9991 and follow the instructions below. If you still need further assistance, you the cost of appliances. ■ Installation information. ■ Use and maintenance procedures...
Microwave Use and Care
Page 22
... not approved by a Whirlpool designated service company. WHIRLPOOL SHALL NOT BE LIABLE FOR INCIDENTAL OR CONSEQUENTIAL DAMAGES. Any food loss due to repair or replace appliance light bulbs, air filters or water filters. Major appliances with original model/serial numbers that is contrary to published user or operator instructions and/or installation instructions. 4. If you...
... not approved by a Whirlpool designated service company. WHIRLPOOL SHALL NOT BE LIABLE FOR INCIDENTAL OR CONSEQUENTIAL DAMAGES. Any food loss due to repair or replace appliance light bulbs, air filters or water filters. Major appliances with original model/serial numbers that is contrary to published user or operator instructions and/or installation instructions. 4. If you...

