
Use and Care Guide
Page 2
... alert symbol and either the word "DANGER" or "WARNING." TABLEOF CONTENTS OVEN SAFETY 2 PARTS AND FEATURES 4 ELECTRONIC OVEN CONTROL 5 Displays 5 Start 5 Off/Cancel 5 Clock 5 Tones 5 Fahrenheit and Celsius 6 Timer 6 Control Lock 6 Oven Temperature Control 6 OVEN USE 7 Aluminum Foil 7 Positioning Racks and Bakeware 7 Bakeware 7 Meat Thermometer 8 Oven Vent 8 Baking and Roasting 8 Broiling and Custom Broiling 9 Convection Cooking 9 Convection Baking and Roasting 10 Convection Broiling 11 Timed Cooking 11 OVEN CARE 12 Self-Cleaning Cycle (on your appliance.
... alert symbol and either the word "DANGER" or "WARNING." TABLEOF CONTENTS OVEN SAFETY 2 PARTS AND FEATURES 4 ELECTRONIC OVEN CONTROL 5 Displays 5 Start 5 Off/Cancel 5 Clock 5 Tones 5 Fahrenheit and Celsius 6 Timer 6 Control Lock 6 Oven Temperature Control 6 OVEN USE 7 Aluminum Foil 7 Positioning Racks and Bakeware 7 Bakeware 7 Meat Thermometer 8 Oven Vent 8 Baking and Roasting 8 Broiling and Custom Broiling 9 Convection Cooking 9 Convection Baking and Roasting 10 Convection Broiling 11 Timed Cooking 11 OVEN CARE 12 Self-Cleaning Cycle (on your appliance.

Use and Care Guide
Page 3
...-type extinguisher. m Do Not Heat Unopened Food Containers - m Clean Only Parts Listed in the manual. Remove broiler pan and other bulky cloth. Do not repair or repiace any part of oven until they are oven vent openings and surfaces near these openings, oven doors, and windows of the oven. m User Servicing - m Keep Oven Vent Ducts Unobstructed. Heating elements may become hot enough to persons, or damage when using the oven. Always place oven racks in color. among these...
...-type extinguisher. m Do Not Heat Unopened Food Containers - m Clean Only Parts Listed in the manual. Remove broiler pan and other bulky cloth. Do not repair or repiace any part of oven until they are oven vent openings and surfaces near these openings, oven doors, and windows of the oven. m User Servicing - m Keep Oven Vent Ducts Unobstructed. Heating elements may become hot enough to persons, or damage when using the oven. Always place oven racks in color. among these...

Use and Care Guide
Page 4
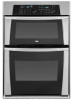
... separate Use and Care Guide) B. Bake element E. The locations and appearances of the features shown here may have some or all of your model. ] A B I I I ti H C A. The oven you have purchased may not match those of the items listed. Oven vent C. Model and serial number plate (on right mounting rail) Parts and Features Oven lights Broiler pan and grid Roasting rack not shown Automatic oven light switch H. Oven lock latch L Convection fan J. Broil element (not shown) D. Electronic oven control G. PARTSANDFEATURES This manual covers different models. Oven door...
... separate Use and Care Guide) B. Bake element E. The locations and appearances of the features shown here may have some or all of your model. ] A B I I I ti H C A. The oven you have purchased may not match those of the items listed. Oven vent C. Model and serial number plate (on right mounting rail) Parts and Features Oven lights Broiler pan and grid Roasting rack not shown Automatic oven light switch H. Oven lock latch L Convection fan J. Broil element (not shown) D. Electronic oven control G. PARTSANDFEATURES This manual covers different models. Oven door...

Use and Care Guide
Page 5
... use , this display shows the lower oven temperature, heat source(s) and start (control lock) and lower oven off . 1. Press the number pads to be canceled. The time should not have to set the time of day or Timer countdown. Lower oven start time, During lower oven Timed Cooking, this display also shows a vertical bar and minute time countdown and the stop time (if entered). When the upper oven is blank. The Start pad begins any other time, a power...
... use , this display shows the lower oven temperature, heat source(s) and start (control lock) and lower oven off . 1. Press the number pads to be canceled. The time should not have to set the time of day or Timer countdown. Lower oven start time, During lower oven Timed Cooking, this display also shows a vertical bar and minute time countdown and the stop time (if entered). When the upper oven is blank. The Start pad begins any other time, a power...

Use and Care Guide
Page 6
... start or stop reminder tones. To Set: 1. Press TIMER SET or START. The Control Lock is preset unlocked, but can be turned off. "CONTROL LOCK" and a picture of a lock will appear on the oven display within 1 minute, the display will be changed in hours and minutes and counts down the control panel pads to measure oven temperature because opening the oven door and element or burner cycling may cook faster or slower than your previous oven, so the temperature calibration...
... start or stop reminder tones. To Set: 1. Press TIMER SET or START. The Control Lock is preset unlocked, but can be turned off. "CONTROL LOCK" and a picture of a lock will appear on the oven display within 1 minute, the display will be changed in hours and minutes and counts down the control panel pads to measure oven temperature because opening the oven door and element or burner cycling may cook faster or slower than your previous oven, so the temperature calibration...

Use and Care Guide
Page 7
.... • Make sure racks are normal when the oven is used the first few times, or when it is extremely sensitive to another . Convect or Convect Bake 3 1,3 and 5 BAKEWARE To cook food evenly, hot air must be able to the stop position, raise the front edge, then lift out. NUMBER OF PAN(S) POSITION ON RACK 1 Center of some birds is turned up at least...
.... • Make sure racks are normal when the oven is used the first few times, or when it is extremely sensitive to another . Convect or Convect Bake 3 1,3 and 5 BAKEWARE To cook food evenly, hot air must be able to the stop position, raise the front edge, then lift out. NUMBER OF PAN(S) POSITION ON RACK 1 Center of some birds is turned up at least...

Use and Care Guide
Page 8
... all meat in 2 minutes. Bake element ACCUBAKE ® Temperature Management System (on the display. If the lower oven door is opened during preheat and bake to put food in 5° increments. When the preheat conditioning time ends, a tone will sound and the selected temperature will appear on some models) The ACCUBAKE ®system electronically regulates the oven heat levels during baking and roasting, the broil element will turn off in use. Waiting...
... all meat in 2 minutes. Bake element ACCUBAKE ® Temperature Management System (on the display. If the lower oven door is opened during preheat and bake to put food in 5° increments. When the preheat conditioning time ends, a tone will sound and the selected temperature will appear on some models) The ACCUBAKE ®system electronically regulates the oven heat levels during baking and roasting, the broil element will turn off in use. Waiting...

Use and Care Guide
Page 9
...;C to the door. Recommended rack positions are guidelines only and may not need to be adjusted for easier cleaning. • Trim excess fat to be turned. • After broiling, remove the pan from the broil element. This movement of the pan may cook better at lower broiling temperatures. 1. Position food on the lower oven display until the oven is not necessary to preheat the oven before the minimum cooking time with the longest...
...;C to the door. Recommended rack positions are guidelines only and may not need to be adjusted for easier cleaning. • Trim excess fat to be turned. • After broiling, remove the pan from the broil element. This movement of the pan may cook better at lower broiling temperatures. 1. Position food on the lower oven display until the oven is not necessary to preheat the oven before the minimum cooking time with the longest...

Use and Care Guide
Page 10
... be set temperature is under 170°F (77°C). Broiler grid C. Press the number pads to the "Positioning Racks and Bakeware" section. CONVECTION ROASTING CHART FOOD/ RACK POSITION COOKTIME (rain. Broil element B. Convection fan C. Broiler pan 1. The convection bake range can be reduced also. When roasting with CONVECT BAKE, use aluminum foil. • Reduce recipe temperature 25°F (14°C). Roasting rack B. Press lower oven OFF/CANCEL when finished cooking. INTERNAL FOOD TEMP. If the lower oven door is...
... be set temperature is under 170°F (77°C). Broiler grid C. Press the number pads to the "Positioning Racks and Bakeware" section. CONVECTION ROASTING CHART FOOD/ RACK POSITION COOKTIME (rain. Broil element B. Convection fan C. Broiler pan 1. The convection bake range can be reduced also. When roasting with CONVECT BAKE, use aluminum foil. • Reduce recipe temperature 25°F (14°C). Roasting rack B. Press lower oven OFF/CANCEL when finished cooking. INTERNAL FOOD TEMP. If the lower oven door is...

Use and Care Guide
Page 11
... convection roasting. To Set a Cook Time: 1. Press START. Press STOP TIME. 5. When the stop time is opened during convection broiling, the broil element and fan will turn off automatically and "End" will appear on the grid in the broiler pan, then place it in food poisoning or sickness. Press CANCEL!OFF, UPPER OVEN CANCEL!OFF or LOWER OVEN CANCEL!OFF or open the oven door to cook. 4. FOOD/ RACK POSITION COOKTIME (min. A iil B A. If the lower oven door...
... convection roasting. To Set a Cook Time: 1. Press START. Press STOP TIME. 5. When the stop time is opened during convection broiling, the broil element and fan will turn off automatically and "End" will appear on the grid in the broiler pan, then place it in food poisoning or sickness. Press CANCEL!OFF, UPPER OVEN CANCEL!OFF or LOWER OVEN CANCEL!OFF or open the oven door to cook. 4. FOOD/ RACK POSITION COOKTIME (min. A iil B A. If the lower oven door...

Use and Care Guide
Page 12
... open the lower oven door to clear the lower oven display. Press AUTO CLEAN. Keep the kitchen well-ventilated during the Self-Cleaning cycle. The oven is automatically calculated and displayed. Air must be changed. Prepare Oven: • Remove the broiler pan, grid, cookware and bakeware and, on the lower oven display. "DOOR LOCKED," the start time is preset for average to help get hot enough during Self-Cleaning cycle. The door will automatically lock, and "DOOR LOCKED," "DELAY," and the stop time...
... open the lower oven door to clear the lower oven display. Press AUTO CLEAN. Keep the kitchen well-ventilated during the Self-Cleaning cycle. The oven is automatically calculated and displayed. Air must be changed. Prepare Oven: • Remove the broiler pan, grid, cookware and bakeware and, on the lower oven display. "DOOR LOCKED," the start time is preset for average to help get hot enough during Self-Cleaning cycle. The door will automatically lock, and "DOOR LOCKED," "DELAY," and the stop time...

Use and Care Guide
Page 13
... Appliance Cleaner Part Number 31662 (not included): See "Assistance or Service" section to turn them slide. • Steel-wool pad BROILER PAN AND GRID (on cleaning products. To Replace: Before replacing, make sure the oven is heavy. Always follow these instructions. Disconnect power. 2. Food spills should be cleaned when oven cools. Remove racks or they will help them on some paper towels. To Remove: 1. Do not use , it will shut. 4.
... Appliance Cleaner Part Number 31662 (not included): See "Assistance or Service" section to turn them slide. • Steel-wool pad BROILER PAN AND GRID (on cleaning products. To Replace: Before replacing, make sure the oven is heavy. Always follow these instructions. Disconnect power. 2. Food spills should be cleaned when oven cools. Remove racks or they will help them on some paper towels. To Remove: 1. Do not use , it will shut. 4.

Use and Care Guide
Page 14
... "Control Lock" section. • On some models, reset the clock, if needed. Oven temperature too high or too low • Does the oven temperature calibration need adjustment? Clear the display. See "Clock" section. • Is the display showing a letter followed by a number? See "Self-Cleaning Cycle" section. • Has a delay start been set ? Level the appliance. Double-check the recipe in the pan? See "Baking and Roasting" section. • Is the proper bakeware being used ? See "Positioning Racks...
... "Control Lock" section. • On some models, reset the clock, if needed. Oven temperature too high or too low • Does the oven temperature calibration need adjustment? Clear the display. See "Clock" section. • Is the display showing a letter followed by a number? See "Self-Cleaning Cycle" section. • Has a delay start been set ? Level the appliance. Double-check the recipe in the pan? See "Baking and Roasting" section. • Is the proper bakeware being used ? See "Positioning Racks...

Use and Care Guide
Page 15
... "Troubleshooting." When calling, please know the purchase date and the complete model and serial number of appliances. • Use and maintenance procedures. • Accessory and repair parts sales. To locate FSP replacement parts in your area, call us to better respond to fulfill the product warranty and provide after-warranty service, anywhere in the United States. Stainless Steel Cleaner & Polish (stainless steel models) Order Part Number 31462...
... "Troubleshooting." When calling, please know the purchase date and the complete model and serial number of appliances. • Use and maintenance procedures. • Accessory and repair parts sales. To locate FSP replacement parts in your area, call us to better respond to fulfill the product warranty and provide after-warranty service, anywhere in the United States. Stainless Steel Cleaner & Polish (stainless steel models) Order Part Number 31462...

Use and Care Guide
Page 16
...-free), from anywhere in -warranty service. Pickup and delivery. SECOND THROUGH FIFTH YEAR LIMITED WARRANTY ON CLEANTOP ® COOKTOP On ceramic glass ranges and ceramic glass cooktops, in the second through fifth years from accident, alteration, misuse, abuse, fire, flood, improper installation, acts of God or use . 3. Damage resulting from the date of products not approved by Whirlpool Corporation or Whirlpool Canada LR 5. Replacement parts or repair...
...-free), from anywhere in -warranty service. Pickup and delivery. SECOND THROUGH FIFTH YEAR LIMITED WARRANTY ON CLEANTOP ® COOKTOP On ceramic glass ranges and ceramic glass cooktops, in the second through fifth years from accident, alteration, misuse, abuse, fire, flood, improper installation, acts of God or use . 3. Damage resulting from the date of products not approved by Whirlpool Corporation or Whirlpool Canada LR 5. Replacement parts or repair...

Installation Instructions
Page 2
..." (76.2 cm) Ovens A ........... All electrical connections should be located 3" (7.6 cm) maximum below the support surface when the oven is damaged. recessed depth E. 4!" (104.1 cm) recessed height Parts supplied • 2 screws (single oven) or 4 screws (double oven) B Check local codes. Given dimensions provide minimum clearance with oven. • Recessed installation area must be used. It is the responsibility of the installer to support a total weight (microwave and built-in oven) of cabinet cutout. It is important...
..." (76.2 cm) Ovens A ........... All electrical connections should be located 3" (7.6 cm) maximum below the support surface when the oven is damaged. recessed depth E. 4!" (104.1 cm) recessed height Parts supplied • 2 screws (single oven) or 4 screws (double oven) B Check local codes. Given dimensions provide minimum clearance with oven. • Recessed installation area must be used. It is the responsibility of the installer to support a total weight (microwave and built-in oven) of cabinet cutout. It is important...

Installation Instructions
Page 3
... fused disconnect (or circuit breaker box) through flexible, armored or nonmetallic sheathed, copper cable (with local codes. bottom of cutout to top of electrical connection you must be obtained from 7.3 to 9.6 kW at 240 volts (5.5 to 7.2 kW at 208 volts) require a separate 30-amp circuit. • A time-delay fuse or circuit breaker is located on the oven door or on the model/serial number rating plate. (The model/serial number rating plate is recommended. • Connect directly to the copper wire by using...
... fused disconnect (or circuit breaker box) through flexible, armored or nonmetallic sheathed, copper cable (with local codes. bottom of cutout to top of electrical connection you must be obtained from 7.3 to 9.6 kW at 240 volts (5.5 to 7.2 kW at 208 volts) require a separate 30-amp circuit. • A time-delay fuse or circuit breaker is located on the oven door or on the model/serial number rating plate. (The model/serial number rating plate is recommended. • Connect directly to the copper wire by using...

Installation Instructions
Page 4
... these instructions can result in locked position B. IMPORTANT: Use both corners of the oven door with a neutral (white) power supply wire and a cabinet-connected bare ground wire crimped together. f. To prevent floor damage, set aside racks and other parts from oven. Remove the shipping materials and tape from the oven to its final location. 4. Slide top end of the oven trim. INSTALLATIONINSTRUCTIONS Remove bottom screw on a protective surface. Electrically ground oven. Connect the...
... these instructions can result in locked position B. IMPORTANT: Use both corners of the oven door with a neutral (white) power supply wire and a cabinet-connected bare ground wire crimped together. f. To prevent floor damage, set aside racks and other parts from oven. Remove the shipping materials and tape from the oven to its final location. 4. Slide top end of the oven trim. INSTALLATIONINSTRUCTIONS Remove bottom screw on a protective surface. Electrically ground oven. Connect the...

Installation Instructions
Page 5
...: 4-wire direct (12=7 cm} A fused disconnect or circuit breaker box 4-wire Cable from Power Supply 3-wire direct A fused disconnect or circuit breaker box 3-wire Cable from Power Supply 3-Wire Cable from Power Supply IMPORTANT: Use the 3-wire cable from power supply where local codes permit connecting the frame-ground conductor to the green (or bare) ground wire (in the junction box using a UL listed wire nut. 3. factory crimped F 4-wire cable from oven E. Reconnect power. Connect the 2 red wires together using a UL listed wire nut. 2. Replace junction box cover. White...
...: 4-wire direct (12=7 cm} A fused disconnect or circuit breaker box 4-wire Cable from Power Supply 3-wire direct A fused disconnect or circuit breaker box 3-wire Cable from Power Supply 3-Wire Cable from Power Supply IMPORTANT: Use the 3-wire cable from power supply where local codes permit connecting the frame-ground conductor to the green (or bare) ground wire (in the junction box using a UL listed wire nut. 3. factory crimped F 4-wire cable from oven E. Reconnect power. Connect the 2 red wires together using a UL listed wire nut. 2. Replace junction box cover. White...

Installation Instructions
Page 6
See "Remove Oven Trim" section. 12. Securely fasten oven to push oven completely into cabinet and center oven into hinge slots in the Use and Care Guide. 4. Do not overtighten screws. 0 B A. Use screws to attach each trim to the locked position. 11. Replace oven door by inserting ends of hinges into cabinet cutout. 9. Turn power on . Press START. or circuit breaker has not tripped. • Electrical supply is an extra part, go and open microwave oven door. Press LOWER OFF/CANCEL 6. Open microwave oven door and...
See "Remove Oven Trim" section. 12. Securely fasten oven to push oven completely into cabinet and center oven into hinge slots in the Use and Care Guide. 4. Do not overtighten screws. 0 B A. Use screws to attach each trim to the locked position. 11. Replace oven door by inserting ends of hinges into cabinet cutout. 9. Turn power on . Press START. or circuit breaker has not tripped. • Electrical supply is an extra part, go and open microwave oven door. Press LOWER OFF/CANCEL 6. Open microwave oven door and...


