Use and Care Manual
Page 1
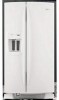
... the model and serial number label, located on the inside wall of the refrigerator compartment. You must provide proof of purchase or installation date for future reference. ® REFRIGERATOR USE & CARE GUIDE MANUAL DE USO Y CUIDADO DEL REFRIGERADOR GUIDE D'UTILISATION ET D'ENTRETIEN DU RÉFRIGÉRATEUR Table of Contents / Índice / Table des matières ASSISTANCE OR SERVICE 1 REFRIGERATOR SAFETY 2 INSTALLATION INSTRUCTIONS 3 REFRIGERATOR USE 5 REFRIGERATOR CARE 9 TROUBLESHOOTING 9 WATER FILTER CERTIFICATIONS 12 PRODUCT DATA SHEETS 13 WARRANTY...
... the model and serial number label, located on the inside wall of the refrigerator compartment. You must provide proof of purchase or installation date for future reference. ® REFRIGERATOR USE & CARE GUIDE MANUAL DE USO Y CUIDADO DEL REFRIGERADOR GUIDE D'UTILISATION ET D'ENTRETIEN DU RÉFRIGÉRATEUR Table of Contents / Índice / Table des matières ASSISTANCE OR SERVICE 1 REFRIGERATOR SAFETY 2 INSTALLATION INSTRUCTIONS 3 REFRIGERATOR USE 5 REFRIGERATOR CARE 9 TROUBLESHOOTING 9 WATER FILTER CERTIFICATIONS 12 PRODUCT DATA SHEETS 13 WARRANTY...

Use and Care Manual
Page 2
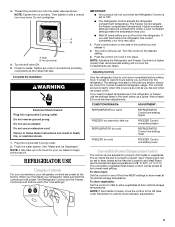
... water (on ice maker kit ready models only). s Leave the shelves in death or brain damage. s Remove doors from your old refrigerator, please follow instructions. s Disconnect power before installing ice maker (on some models). If you don't immediately follow instructions. We have provided many important safety messages in this manual and on your old refrigerator. s Use nonflammable cleaner. s Do not use an extension cord. Always read and obey all parts and panels...
... water (on ice maker kit ready models only). s Leave the shelves in death or brain damage. s Remove doors from your old refrigerator, please follow instructions. s Disconnect power before installing ice maker (on some models). If you don't immediately follow instructions. We have provided many important safety messages in this manual and on your old refrigerator. s Use nonflammable cleaner. s Do not use an extension cord. Always read and obey all parts and panels...
Use and Care Manual
Page 3
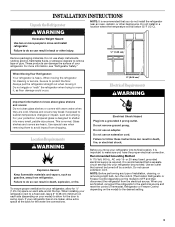
... only 15- When installing your refrigerator next to a fixed wall, leave 2" (5.08 cm) minimum on your refrigerator. NOTE: Before performing any type of your model) to follow these instructions can damage the surface of installation, cleaning, or removing a light bulb, turn the control (Thermostat, Refrigerator or Freezer Control depending on the model) to know about glass shelves and covers: Do not clean glass shelves or covers with warm water when they are heavy. Shelves and covers may break if exposed...
... only 15- When installing your refrigerator next to a fixed wall, leave 2" (5.08 cm) minimum on your refrigerator. NOTE: Before performing any type of your model) to follow these instructions can damage the surface of installation, cleaning, or removing a light bulb, turn the control (Thermostat, Refrigerator or Freezer Control depending on the model) to know about glass shelves and covers: Do not clean glass shelves or covers with warm water when they are heavy. Shelves and covers may break if exposed...
Use and Care Manual
Page 4
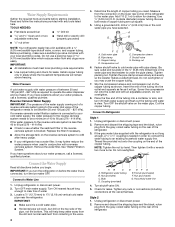
.... Cold water pipe B. Copper tubing D. Compression sleeve F. Place the free end of copper tubing you may further reduce the water pressure when used in the valve. 4 4. Do not overtighten. Coupling (provided) D EFG E. Check for cleaning. Unplug refrigerator or disconnect power. 2. Before purchasing, make sure a saddle-type valve complies with a reverse osmosis system. See "Water Filtration System." Connect to 1¹⁄₄" (3.18 cm) vertical cold water pipe near the refrigerator. Locate...
.... Cold water pipe B. Copper tubing D. Compression sleeve F. Place the free end of copper tubing you may further reduce the water pressure when used in the valve. 4 4. Do not overtighten. Coupling (provided) D EFG E. Check for cleaning. Unplug refrigerator or disconnect power. 2. Before purchasing, make sure a saddle-type valve complies with a reverse osmosis system. See "Water Filtration System." Connect to 1¹⁄₄" (3.18 cm) vertical cold water pipe near the refrigerator. Locate...
Use and Care Manual
Page 5
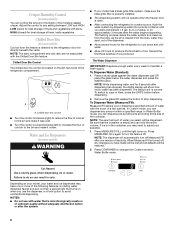
... Freezer Controls to the "mid-settings." The settings indicated in the chart below as shown. Failure to cool down completely before you put food into the refrigerator. Flush the water system. s The Refrigerator Control adjusts the refrigerator compartment temperature. Higher numbered settings make the temperature less cold. Adjusting Controls Give the refrigerator time to follow these instructions can result in to the left (less cold). To store vegetables: Set the control to VEG to OFF. Turn shutoff valve...
... Freezer Controls to the "mid-settings." The settings indicated in the chart below as shown. Failure to cool down completely before you put food into the refrigerator. Flush the water system. s The Refrigerator Control adjusts the refrigerator compartment temperature. Higher numbered settings make the temperature less cold. Adjusting Controls Give the refrigerator time to follow these instructions can result in to the left (less cold). To store vegetables: Set the control to VEG to OFF. Turn shutoff valve...
Use and Care Manual
Page 6
... light turns on. In Water Bottle mode, you draw and discard 1.5 gal. (5.4 L) of inactivity. Press MEASURED FILL again to change from the lines. Press CONTAINER to turn off . Chilled Door Bin (on some models) Cool air from the lines, water may spurt out of ice. To Dispense Water (Standard): 1. To Dispense Water (Measured Fill): Measured Fill allows you can dispense pre-set amounts according to avoid unintentional dispensing. Remove the glass OR release the button...
... light turns on. In Water Bottle mode, you draw and discard 1.5 gal. (5.4 L) of inactivity. Press MEASURED FILL again to change from the lines. Press CONTAINER to turn off . Chilled Door Bin (on some models) Cool air from the lines, water may spurt out of ice. To Dispense Water (Standard): 1. To Dispense Water (Measured Fill): Measured Fill allows you can dispense pre-set amounts according to avoid unintentional dispensing. Remove the glass OR release the button...
Use and Care Manual
Page 7
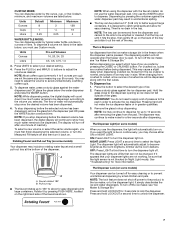
... CUBED or CRUSHED button. Press a sturdy glass against the ice dispenser pad. You may vary in Night Light mode). The Ice Dispenser Ice dispenses from the ice crusher is pressed. Before dispensing ice, select which type of ice. 2. For crushed ice, cubes are listed below the water dispenser and press the WATER button. IMPORTANT: You do not use the dispenser, the light will turn off the ice maker, see "Ice Maker & Storage Bin." NOTE: While dispensing water, the digital display will automatically stop dispensing. To Dispense Ice: 1.
... CUBED or CRUSHED button. Press a sturdy glass against the ice dispenser pad. You may vary in Night Light mode). The Ice Dispenser Ice dispenses from the ice crusher is pressed. Before dispensing ice, select which type of ice. 2. For crushed ice, cubes are listed below the water dispenser and press the WATER button. IMPORTANT: You do not use the dispenser, the light will turn off the ice maker, see "Ice Maker & Storage Bin." NOTE: While dispensing water, the digital display will automatically stop dispensing. To Dispense Ice: 1.
Use and Care Manual
Page 8
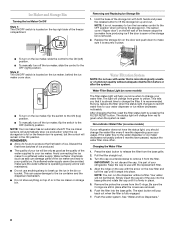
... from producing ice if the door is open or the storage bin is removed. 2. After changing the filter, reset the filter status light by pressing the FILTER RESET button. If the water flow to the ON (top) position. Remove the protective covers from the base grille. 2. Push the filter into place. Ice Maker and Storage Bin Turning the Ice Maker On/Off Style 1: The ON/OFF switch is located on the ice maker, behind the ice maker cover door. Hold the...
... from producing ice if the door is open or the storage bin is removed. 2. After changing the filter, reset the filter status light by pressing the FILTER RESET button. If the water flow to the ON (top) position. Remove the protective covers from the base grille. 2. Push the filter into place. Ice Maker and Storage Bin Turning the Ice Maker On/Off Style 1: The ON/OFF switch is located on the ice maker, behind the ice maker cover door. Hold the...
Use and Care Manual
Page 9
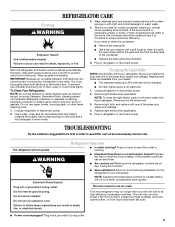
... petroleum products on plastic parts, interior and door liners or gaskets. Explosion Hazard s Use a vacuum cleaner with one section will not operate Refrigerator Operation s Is outlet working . Both the refrigerator and freezer sections defrost automatically. Do not use an adapter. Remove light bulb and replace with warm water and liquid detergent. Electrical Shock Hazard Plug into a grounded 3 prong outlet. 9 If you need for the refrigerator to coldest setting will fit your refrigerator. TROUBLESHOOTING Try the solutions...
... petroleum products on plastic parts, interior and door liners or gaskets. Explosion Hazard s Use a vacuum cleaner with one section will not operate Refrigerator Operation s Is outlet working . Both the refrigerator and freezer sections defrost automatically. Do not use an adapter. Remove light bulb and replace with warm water and liquid detergent. Electrical Shock Hazard Plug into a grounded 3 prong outlet. 9 If you need for the refrigerator to coldest setting will fit your refrigerator. TROUBLESHOOTING Try the solutions...
Use and Care Manual
Page 10
... low water pressure. s Bin or shelf in either the Installation Instruction booklet or the Use & Care Guide. Push bin or shelf back in the ice maker ejector arm? The lights do so can reduce water flow. Allows warm air to your cold water supply? s Humid room? Connect refrigerator to optimize performance s Rattling - Wait 72 hours for refrigerator to return to cool completely. Turn the water shutoff valve fully open ? Straighten the water source line. fans/compressor adjusting to water supply and turn water shutoff valve fully open ? Move...
... low water pressure. s Bin or shelf in either the Installation Instruction booklet or the Use & Care Guide. Push bin or shelf back in the ice maker ejector arm? The lights do so can reduce water flow. Allows warm air to your cold water supply? s Humid room? Connect refrigerator to optimize performance s Rattling - Wait 72 hours for refrigerator to return to cool completely. Turn the water shutoff valve fully open ? Straighten the water source line. fans/compressor adjusting to water supply and turn water shutoff valve fully open ? Move...
Use and Care Manual
Page 11
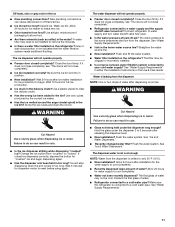
... hours for dispenser motor to make new ice. New plumbing connections can result in the home water source line? s Ice stored too long? Discard ice. Allow 24 hours for full ice production. Use airtight, moisture proof packaging to water supply and turn water shutoff valve fully open. s Are there minerals (such as sulfur) in either the Installation Instructions or the Use & Care Guide. Gray or dark discoloration in position. The ice dispenser will not operate properly s Freezer door closed...
... hours for dispenser motor to make new ice. New plumbing connections can result in the home water source line? s Ice stored too long? Discard ice. Allow 24 hours for full ice production. Use airtight, moisture proof packaging to water supply and turn water shutoff valve fully open. s Are there minerals (such as sulfur) in either the Installation Instructions or the Use & Care Guide. Gray or dark discoloration in position. The ice dispenser will not operate properly s Freezer door closed...
Use and Care Manual
Page 12
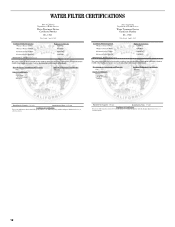
WATER FILTER CERTIFICATIONS 12
WATER FILTER CERTIFICATIONS 12
Use and Care Manual
Page 13
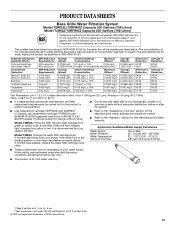
... that operational, maintenance, and filter replacement requirements be carried out for the reduction of unknown quality without notice. Model T2WG2: Change the water filter cartridge every 6 months depending upon your water supply. This system has been tested according to NSF/ANSI 42/53 for the reduction of $34.99 U.S.A./ $43.99 Canada. In Canada, use only. *Class II particle size: 1 um to Model T2WG2L...
... that operational, maintenance, and filter replacement requirements be carried out for the reduction of unknown quality without notice. Model T2WG2: Change the water filter cartridge every 6 months depending upon your water supply. This system has been tested according to NSF/ANSI 42/53 for the reduction of $34.99 U.S.A./ $43.99 Canada. In Canada, use only. *Class II particle size: 1 um to Model T2WG2L...
Use and Care Manual
Page 14
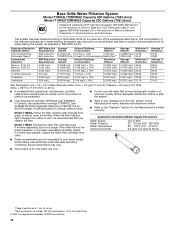
... a new filter. This system has been tested according to the "Assistance or Service" section for the Manufacturer's name, address and telephone number. Flow = 0.5 gpm (1.9 Lpm). Model T1WG2L: When the filter indicator light changes from yellow to red, it is for cold water use only. *Class II particle size: 1 um to the water dispenser or ice maker decreases noticeably before or after the system. Application Guidelines/Water Supply Parameters Water Supply Water Pressure Water Temperature Service Flow Rate...
... a new filter. This system has been tested according to the "Assistance or Service" section for the Manufacturer's name, address and telephone number. Flow = 0.5 gpm (1.9 Lpm). Model T1WG2L: When the filter indicator light changes from yellow to red, it is for cold water use only. *Class II particle size: 1 um to the water dispenser or ice maker decreases noticeably before or after the system. Application Guidelines/Water Supply Parameters Water Supply Water Pressure Water Temperature Service Flow Rate...
Use and Care Manual
Page 15
...-6777. 8/05 15 Service calls to correct house wiring or plumbing. 2. Repairs when your major appliance, to replace or repair house fuses or to correct the installation of the Use & Care Guide. The removal and reinstallation of your authorized Whirlpool dealer to refrigerator or freezer product failures. 6. Service calls to the appliance. 9. Any food loss due to determine if another warranty applies. WHIRLPOOL SHALL NOT BE...
...-6777. 8/05 15 Service calls to correct house wiring or plumbing. 2. Repairs when your major appliance, to replace or repair house fuses or to correct the installation of the Use & Care Guide. The removal and reinstallation of your authorized Whirlpool dealer to refrigerator or freezer product failures. 6. Service calls to the appliance. 9. Any food loss due to determine if another warranty applies. WHIRLPOOL SHALL NOT BE...


