

Use and Care Guide
Page 3
RANGE SAFETY Your safety and the safety of injury, and tell you what the potential hazard is, tell you how to reduce the chance of others . ...
RANGE SAFETY Your safety and the safety of injury, and tell you what the potential hazard is, tell you how to reduce the chance of others . ...

Use and Care Guide
Page 4
...Tip Over Hazard A child or adult can tip if you apply too much force or weight to persons, or damage when using the range, follow these instructions can result in accordance with materials such as stepping, leaning, or sitting on the backguard of appliance doors or drawers ...an entire rack with Canadian Electrical Code. s WARNING: NEVER use . Do not cut or remove the grounding prong from the misuse of a range - Keep range area clear and free from combustible materials, gasoline, and other utensils. Wipe off all excessive spillage before servicing. Connect anti-tip bracket to ...
...Tip Over Hazard A child or adult can tip if you apply too much force or weight to persons, or damage when using the range, follow these instructions can result in accordance with materials such as stepping, leaning, or sitting on the backguard of appliance doors or drawers ...an entire rack with Canadian Electrical Code. s WARNING: NEVER use . Do not cut or remove the grounding prong from the misuse of a range - Keep range area clear and free from combustible materials, gasoline, and other utensils. Wipe off all excessive spillage before servicing. Connect anti-tip bracket to ...
Use and Care Guide
Page 5
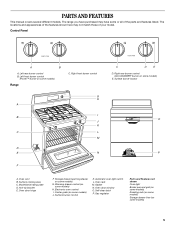
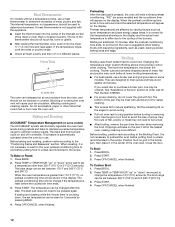
... have some or all of your model. Left front burner control (Power™ burner on some models) Range C. Oven vent B. Surface cooking area C. Anti-tip bracket E. Warming drawer control (on some models) H. Automatic oven light switch L. Gasket N. Right rear burner control (ACCUSIMMER® ...
... have some or all of your model. Left front burner control (Power™ burner on some models) Range C. Oven vent B. Surface cooking area C. Anti-tip bracket E. Warming drawer control (on some models) H. Automatic oven light switch L. Gasket N. Right rear burner control (ACCUSIMMER® ...
Use and Care Guide
Page 6
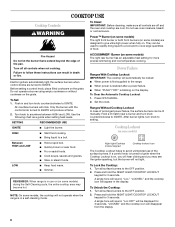
... and to cook large quantities of prolonged power failure, the surface burners can be locked: s When power is on the display. Press OFF/CANCEL. 2. Ranges Without Cooktop Lockout In case of food. s Quickly brown or sear food. s Cook soups, sauces and gravies. If a control knob is turned to...and turn knob to IGNITE. Press and hold the NIGHT LIGHT/COOKTOP LOCKOUT keypad for 3 seconds. All 4 surface burners will not operate when the range is in a self-cleaning mode. To Lock the Cooktop: 1. Turn all surface burners to give ultra-high power when fully on some models, ...
... and to cook large quantities of prolonged power failure, the surface burners can be locked: s When power is on the display. Press OFF/CANCEL. 2. Ranges Without Cooktop Lockout In case of food. s Quickly brown or sear food. s Cook soups, sauces and gravies. If a control knob is turned to...and turn knob to IGNITE. Press and hold the NIGHT LIGHT/COOKTOP LOCKOUT keypad for 3 seconds. All 4 surface burners will not operate when the range is in a self-cleaning mode. To Lock the Cooktop: 1. Turn all surface burners to give ultra-high power when fully on some models, ...
Use and Care Guide
Page 8
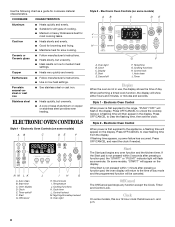
... the Start is not in the display. Cast iron s Heats slowly and evenly. Ceramic or Ceramic glass s Follow manufacturer's instructions. s Use on low to the range, "PUSH"/"OFF" will then appear in use, the display shows the time of cooking. Clock On some models) AB C DE F NM L K A. Timer Display When the...
... the Start is not in the display. Cast iron s Heats slowly and evenly. Ceramic or Ceramic glass s Follow manufacturer's instructions. s Use on low to the range, "PUSH"/"OFF" will then appear in use, the display shows the time of cooking. Clock On some models) AB C DE F NM L K A. Timer Display When the...
Use and Care Guide
Page 9
Range Lights Oven light Night light Oven Light While the oven door is locked, only the CLOCK, OVEN LIGHT and TIMER keypads will function. Press and ...
Range Lights Oven light Night light Oven Light While the oven door is locked, only the CLOCK, OVEN LIGHT and TIMER keypads will function. Press and ...
Use and Care Guide
Page 12
...ACCUBAKE® Temperature Management (on the edges to be turned. Before baking and roasting, position racks according to maintain a precise temperature range for the oven preheat conditioning time to set a temperature other items that could melt or burn near the oven vent. When the...ends. 3. Meat Thermometer On models without a temperature probe, use a meat thermometer to reduce spattering. The tip of poultry. The bake range can be blocked or covered. When the preheat conditioning time ends, a tone will sound and the selected temperature will cause poor air circulation,...
...ACCUBAKE® Temperature Management (on the edges to be turned. Before baking and roasting, position racks according to maintain a precise temperature range for the oven preheat conditioning time to set a temperature other items that could melt or burn near the oven vent. When the...ends. 3. Meat Thermometer On models without a temperature probe, use a meat thermometer to reduce spattering. The tip of poultry. The bake range can be blocked or covered. When the preheat conditioning time ends, a tone will sound and the selected temperature will cause poor air circulation,...
Use and Care Guide
Page 13
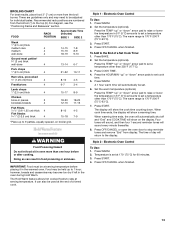
... numbered from display. Food may become too dry if left in the oven during Hold Warm. Press WARM. Set the warm temperature (optional). The warm range is 170°F-200°F (75°C-93°C). 3. Press START. Four tones will sound, and then four 1-second reminder tones will show on broiler... CHART For best results, place food 3" (7 cm) or more than one hour before placing it in the warmed oven. Set the temperature (optional). The warm range is 170°F-200°F (75°C-93°C). 7. Temperature is set cook time. 5. Press START. 4.
... numbered from display. Food may become too dry if left in the oven during Hold Warm. Press WARM. Set the warm temperature (optional). The warm range is 170°F-200°F (75°C-93°C). 3. Press START. Four tones will sound, and then four 1-second reminder tones will show on broiler... CHART For best results, place food 3" (7 cm) or more than one hour before placing it in the warmed oven. Set the temperature (optional). The warm range is 170°F-200°F (75°C-93°C). 7. Temperature is set cook time. 5. Press START. 4.
Use and Care Guide
Page 15
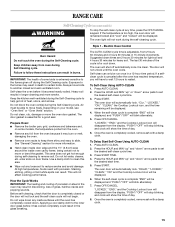
... door will remained locked and "cool" and "locked" will be displayed. Press AUTO-CLEAN. 2. Press START. s Wipe out any time, press the OFF/CANCEL keypad. RANGE CARE Self-Cleaning Cycle (onsomemodels) WARNING To stop the self-clean cycle at any loose soil to set the desired start time. 5. If the temperature...
... door will remained locked and "cool" and "locked" will be displayed. Press AUTO-CLEAN. 2. Press START. s Wipe out any time, press the OFF/CANCEL keypad. RANGE CARE Self-Cleaning Cycle (onsomemodels) WARNING To stop the self-clean cycle at any loose soil to set the desired start time. 5. If the temperature...
Use and Care Guide
Page 17
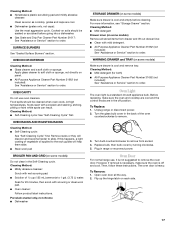
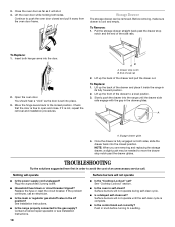
...DRAWER and TRAY (on some models) Make sure drawer is off position. Turn the glass bulb cover in range or reconnect power. Oven Door For normal range use oven cleaners. Then, follow these instructions. Food spills should be cleaned when oven cools. Replace bulb...first. Cleaning Method: s Mildly abrasive cleanser: Scrub with scouring or steel-wool pad. For more information, see "Storage Drawer" section. Unplug range or disconnect power. 2. Turn bulb counterclockwise to order. SURFACE BURNERS See "Sealed Surface Burners" section. To Replace: 1. Remove racks or they...
...DRAWER and TRAY (on some models) Make sure drawer is off position. Turn the glass bulb cover in range or reconnect power. Oven Door For normal range use oven cleaners. Then, follow these instructions. Food spills should be cleaned when oven cools. Replace bulb...first. Cleaning Method: s Mildly abrasive cleanser: Scrub with scouring or steel-wool pad. For more information, see "Storage Drawer" section. Unplug range or disconnect power. 2. Turn bulb counterclockwise to order. SURFACE BURNERS See "Sealed Surface Burners" section. To Replace: 1. Remove racks or they...
Use and Care Guide
Page 18
...service call an electrician. s Is the main or regulator gas shutoff valve in the drawer glides. s Is a delayed self-clean set into the range until the self-clean cycle is free to the gas supply? Check that the door is complete. Slowly push the drawer into place. 3. s ... door as far as the door is not, repeat the removal and installation procedures. Continue to a setting. 18 If it inside the range in order to the locked position. Nothing will operate Surface burners will not operate during self-clean cycle. Replace the fuse or reset the...
...service call an electrician. s Is the main or regulator gas shutoff valve in the drawer glides. s Is a delayed self-clean set into the range until the self-clean cycle is free to the gas supply? Check that the door is complete. Slowly push the drawer into place. 3. s ... door as far as the door is not, repeat the removal and installation procedures. Continue to a setting. 18 If it inside the range in order to the locked position. Nothing will operate Surface burners will not operate during self-clean cycle. Replace the fuse or reset the...


