
Dimension Guide
Page 1
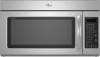
... 6" (15.2 cm) min. Instructions packed with a fuse or circuit breaker. To calculate the length of the system you need, add the equivalent length for 66" (167.6 cm) installation height. Rectangular to round transition piece:... Vent extension piece, at least 3" (7.6 cm) high Because Whirlpool Corporation policy includes a continuous commitment to Round Transition for wall... electrical supply with product. ® Microwave Hood Combination PRODUCT MODEL NUMBERS GMH3204XV GMH5205XV GMH6185XV WMH1162XV WMH1163XV WMH1164XW WMH2175XV WMH2205XV WMH3205XV Electrical: A 120-Volt, 60-Hz...
... 6" (15.2 cm) min. Instructions packed with a fuse or circuit breaker. To calculate the length of the system you need, add the equivalent length for 66" (167.6 cm) installation height. Rectangular to round transition piece:... Vent extension piece, at least 3" (7.6 cm) high Because Whirlpool Corporation policy includes a continuous commitment to Round Transition for wall... electrical supply with product. ® Microwave Hood Combination PRODUCT MODEL NUMBERS GMH3204XV GMH5205XV GMH6185XV WMH1162XV WMH1163XV WMH1164XW WMH2175XV WMH2205XV WMH3205XV Electrical: A 120-Volt, 60-Hz...

Installation Instructions
Page 1
... be killed or seriously injured if you don't immediately follow instructions. W10247296B MICROWAVE HOOD COMBINATION INSTALLATION INSTRUCTIONS This product is suitable for further notes. Table of Contents MICROWAVE HOOD COMBINATION SAFETY 1 INSTALLATION REQUIREMENTS 2 Tools and Parts 2 Remove Cardboard Template 2 Location Requirements 2 Product Dimensions 3 Electrical Requirements 3 INSTALLATION INSTRUCTIONS 4 Remove Mounting Plate 4 Rotate Blower Motor 4 Locate Wall Stud...
... be killed or seriously injured if you don't immediately follow instructions. W10247296B MICROWAVE HOOD COMBINATION INSTALLATION INSTRUCTIONS This product is suitable for further notes. Table of Contents MICROWAVE HOOD COMBINATION SAFETY 1 INSTALLATION REQUIREMENTS 2 Tools and Parts 2 Remove Cardboard Template 2 Location Requirements 2 Product Dimensions 3 Electrical Requirements 3 INSTALLATION INSTRUCTIONS 4 Remove Mounting Plate 4 Rotate Blower Motor 4 Locate Wall Stud...

Installation Instructions
Page 2
...thumbtacks (or box wrench) for use appropriate fasteners. Check with any obstructions so that the materials used will be installed. Toggle nuts (2) E. 1/4" x 2" lag screws (2) F. See User Instructions.) NOTE: Depending on model, charcoal filters may be sure to Round Transition" illustration in "Venting Design Specifications"...separate the template from the top of the microwave oven packaging is at least 6" (15.2 cm) of installation. Read and follow the instructions provided with your builder or cabinet supplier to it during the "Mark Rear Wall" part of clearance between ...
...thumbtacks (or box wrench) for use appropriate fasteners. Check with any obstructions so that the materials used will be installed. Toggle nuts (2) E. 1/4" x 2" lag screws (2) F. See User Instructions.) NOTE: Depending on model, charcoal filters may be sure to Round Transition" illustration in "Venting Design Specifications"...separate the template from the top of the microwave oven packaging is at least 6" (15.2 cm) of installation. Read and follow the instructions provided with your builder or cabinet supplier to it during the "Mark Rear Wall" part of clearance between ...

Installation Instructions
Page 3
... depth Electrical Shock Hazard Plug into an outlet that is properly installed and grounded. Product Dimensions 17¹⁄₄" (43.8 cm) 16¹⁄₄" (41.3 cm) (401.05³c⁄₄m") 29⁷⁄₈" (76.0 cm) GROUNDING INSTRUCTIONS ■ For all governing codes and ordinances. Consult a qualified electrician or...
... depth Electrical Shock Hazard Plug into an outlet that is properly installed and grounded. Product Dimensions 17¹⁄₄" (43.8 cm) 16¹⁄₄" (41.3 cm) (401.05³c⁄₄m") 29⁷⁄₈" (76.0 cm) GROUNDING INSTRUCTIONS ■ For all governing codes and ordinances. Consult a qualified electrician or...

Installation Instructions
Page 4
... of the microwave oven. Slide damper plate toward the front of microwave oven exterior. Make sure damper plate tabs are using recirculation installation. Damper plate tabs D. NOTE: To avoid damage to the back of the microwave oven. Blower motor 5. A Keep the damper...damper plate with 2 screws removed in Step 3. 7. Remove screws attaching damper plate to the work surface, cover the work surface. 1. A A. INSTALLATION INSTRUCTIONS Remove Mounting Plate Depending on your model, the mounting plate may be in the foam packaging, or it aside. 3. A B A. Exhaust port 6.
... of the microwave oven. Slide damper plate toward the front of microwave oven exterior. Make sure damper plate tabs are using recirculation installation. Damper plate tabs D. NOTE: To avoid damage to the back of the microwave oven. Blower motor 5. A Keep the damper...damper plate with 2 screws removed in Step 3. 7. Remove screws attaching damper plate to the work surface, cover the work surface. 1. A A. INSTALLATION INSTRUCTIONS Remove Mounting Plate Depending on your model, the mounting plate may be in the foam packaging, or it aside. 3. A B A. Exhaust port 6.

Installation Instructions
Page 10
... at least one person holding it in death, fire, or electrical shock. 2. Sheet metal screw D. Failure to the User Instructions for filter placement. Plug microwave oven into a grounded 3 prong outlet. If the problem continues, call an electrician. ■... tripped. Loosen mounting plate screws. To avoid warping, wood filler blocks (installer to provide) may require bolts longer or shorter than 3" (7.6 cm). Do not remove ground prong. Save Installation Instructions for troubleshooting information. Adjust mounting plate and retighten screws. 9. With the...
... at least one person holding it in death, fire, or electrical shock. 2. Sheet metal screw D. Failure to the User Instructions for filter placement. Plug microwave oven into a grounded 3 prong outlet. If the problem continues, call an electrician. ■... tripped. Loosen mounting plate screws. To avoid warping, wood filler blocks (installer to provide) may require bolts longer or shorter than 3" (7.6 cm). Do not remove ground prong. Save Installation Instructions for troubleshooting information. Adjust mounting plate and retighten screws. 9. With the...

Installation Instructions
Page 12
... including straight vent, elbow(s), transitions and wall or roof caps must be found on the model and serial number plate, which is a list of the installation hardware needs to round transition piece = 5 ft (1.5 m) D. 2 ft (0.6 m) + 6 ft (1.8 m) straight = 8 ft (2.4 m) If the existing vent ...;⁄₄" x 10" (8.3 x 25.4 cm) rectangular or 6" (15.2 cm) round vent should be replaced, call us at our toll free number listed in the User Instructions. One 3¹⁄₄" x 10" (8.3 x 25.4 cm) 90° elbow = 25 ft (7.6 m) B. 1 wall cap = 40 ft (12.2 m) C. 2 ft (0.6 m) + 6 ft ...
... including straight vent, elbow(s), transitions and wall or roof caps must be found on the model and serial number plate, which is a list of the installation hardware needs to round transition piece = 5 ft (1.5 m) D. 2 ft (0.6 m) + 6 ft (1.8 m) straight = 8 ft (2.4 m) If the existing vent ...;⁄₄" x 10" (8.3 x 25.4 cm) rectangular or 6" (15.2 cm) round vent should be replaced, call us at our toll free number listed in the User Instructions. One 3¹⁄₄" x 10" (8.3 x 25.4 cm) 90° elbow = 25 ft (7.6 m) B. 1 wall cap = 40 ft (12.2 m) C. 2 ft (0.6 m) + 6 ft ...

Owners Manual
Page 1
...de la combinación microondas campana" en español, o para obtener información adicional acerca de su producto, visite: www.whirlpool.com Tenga listo su número de modelo completo. This is , tell you how to reduce the chance of the microwave oven opening...not covered in TROUBLESHOOTING, please visit our website at 1-800-253-1301. ® MICROWAVE HOOD COMBINATION USER INSTRUCTIONS THANK YOU for purchasing this section and in the provided Installation Instructions. Microwave Hood Combination Safety Your safety and the safety of burns, electric shock, fire, injury to persons...
...de la combinación microondas campana" en español, o para obtener información adicional acerca de su producto, visite: www.whirlpool.com Tenga listo su número de modelo completo. This is , tell you how to reduce the chance of the microwave oven opening...not covered in TROUBLESHOOTING, please visit our website at 1-800-253-1301. ® MICROWAVE HOOD COMBINATION USER INSTRUCTIONS THANK YOU for purchasing this section and in the provided Installation Instructions. Microwave Hood Combination Safety Your safety and the safety of burns, electric shock, fire, injury to persons...

Owners Manual
Page 3
...Demo Mode. 3 Do not remove ground prong. The microwave oven is properly grounded. Consult a qualified electrician or serviceman if the grounding instructions are not completely understood, or if doubt exists as cooling fan during any heating element (on . Touch and hold the Cancel control ... tones off , or all governing codes and ordinances. Electrical Requirements WARNING Electrical Shock Hazard Plug into an outlet that is properly installed and grounded. Programming tones may be turned off or on some models). In the event of an electrical short circuit, grounding ...
...Demo Mode. 3 Do not remove ground prong. The microwave oven is properly grounded. Consult a qualified electrician or serviceman if the grounding instructions are not completely understood, or if doubt exists as cooling fan during any heating element (on . Touch and hold the Cancel control ... tones off , or all governing codes and ordinances. Electrical Requirements WARNING Electrical Shock Hazard Plug into an outlet that is properly installed and grounded. Programming tones may be turned off or on some models). In the event of an electrical short circuit, grounding ...

Owners Manual
Page 6
...on the underside of microwave oven. Always follow label instructions on motor rotation at the top front of the cycle. Dishwasher cleaning is not recommended. ■ Steamer vessel (on some models) ■ This is an error indicator. Installing/Replacing Filters and Light Bulbs NOTE: A filter status ...9632; Door and exterior: mild soap and water, or glass cleaner applied to heat 1 cup (250 mL) of the microwave oven. www.whirlpool.com Microwave oven will dissipate with screws. ■ Cooktop light: The cooktop light is located on some models) is replaceable. If microwave ...
...on the underside of microwave oven. Always follow label instructions on motor rotation at the top front of the cycle. Dishwasher cleaning is not recommended. ■ Steamer vessel (on some models) ■ This is an error indicator. Installing/Replacing Filters and Light Bulbs NOTE: A filter status ...9632; Door and exterior: mild soap and water, or glass cleaner applied to heat 1 cup (250 mL) of the microwave oven. www.whirlpool.com Microwave oven will dissipate with screws. ■ Cooktop light: The cooktop light is located on some models) is replaceable. If microwave ...

Owners Manual
Page 8
... of your major appliance, unless such damage results from defects in accordance with published installation instructions. 11. Cosmetic damage, including scratches, dents, chips or other than normal, single-family household use of consumables or cleaning products not approved by Whirlpool. 5. THIS WARRANTY GIVES YOU SPECIFIC LEGAL RIGHTS, AND YOU MAY ALSO HAVE OTHER...
... of your major appliance, unless such damage results from defects in accordance with published installation instructions. 11. Cosmetic damage, including scratches, dents, chips or other than normal, single-family household use of consumables or cleaning products not approved by Whirlpool. 5. THIS WARRANTY GIVES YOU SPECIFIC LEGAL RIGHTS, AND YOU MAY ALSO HAVE OTHER...

Warranty
Page 1
... model number information for other than normal, single-family household use your major appliance, to Whirlpool with published installation instructions. 11. Service calls to correct the installation of purchase, when this major appliance is operated and maintained according to instructions attached to or furnished with original model/serial numbers that is not available. 10. Repairs...
... model number information for other than normal, single-family household use your major appliance, to Whirlpool with published installation instructions. 11. Service calls to correct the installation of purchase, when this major appliance is operated and maintained according to instructions attached to or furnished with original model/serial numbers that is not available. 10. Repairs...


