User Instructions
Page 1
... "WARNING." Tenga listo su número de modelo completo. Always read and obey all safety messages. This is , tell you should experience a problem not covered in this high-quality product. Table of Contents / Table des matières REFRIGERATOR SAFETY 1 INSTALLATION INSTRUCTIONS 2 REFRIGERATOR USE 8 REFRIGERATOR CARE 12 TROUBLESHOOTING 13 WATER FILTER CERTIFICATIONS 15 PRODUCT DATA SHEETS 16 WARRANTY 17 SÉCURITÉ DU RÉFRIG...
... "WARNING." Tenga listo su número de modelo completo. Always read and obey all safety messages. This is , tell you should experience a problem not covered in this high-quality product. Table of Contents / Table des matières REFRIGERATOR SAFETY 1 INSTALLATION INSTRUCTIONS 2 REFRIGERATOR USE 8 REFRIGERATOR CARE 12 TROUBLESHOOTING 13 WATER FILTER CERTIFICATIONS 15 PRODUCT DATA SHEETS 16 WARRANTY 17 SÉCURITÉ DU RÉFRIG...
User Instructions
Page 2
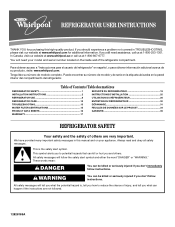
... Old Refrigerator or Freezer: ■ Take off the doors. ■ Leave the shelves in "Refrigerator Care." Rub a small amount of your refrigerator before installing ice maker (on ice maker kit ready models only). ■ Use a sturdy glass when dispensing ice (on the refrigerator. See the cleaning instructions in place so that children may break if exposed to sudden temperature changes or impact, such as gasoline, away from dropping. 2 Shelves and covers may not easily climb inside...
... Old Refrigerator or Freezer: ■ Take off the doors. ■ Leave the shelves in "Refrigerator Care." Rub a small amount of your refrigerator before installing ice maker (on ice maker kit ready models only). ■ Use a sturdy glass when dispensing ice (on the refrigerator. See the cleaning instructions in place so that children may break if exposed to sudden temperature changes or impact, such as gasoline, away from dropping. 2 Shelves and covers may not easily climb inside...
User Instructions
Page 3
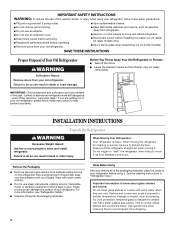
... 20-amp fused, grounded electrical supply is recommended that cannot be provided. It is required. Water Supply Requirements Gather the required tools and parts before starting installation. Failure to follow the instructions provided with any type of installation, cleaning, or removing a light bulb, turn Cooling ON. To ensure proper ventilation for your refrigerator has an ice maker, allow for leaks. Do not remove ground prong. TOOLS NEEDED: ■ Flat-blade screwdriver Nut driver...
... 20-amp fused, grounded electrical supply is recommended that cannot be provided. It is required. Water Supply Requirements Gather the required tools and parts before starting installation. Failure to follow the instructions provided with any type of installation, cleaning, or removing a light bulb, turn Cooling ON. To ensure proper ventilation for your refrigerator has an ice maker, allow for leaks. Do not remove ground prong. TOOLS NEEDED: ■ Flat-blade screwdriver Nut driver...
User Instructions
Page 4
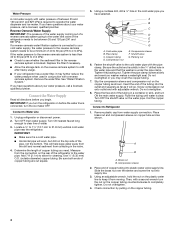
... plumber. IMPORTANT: ■ Make sure it may crush the copper tubing. 7. Measure from moving. Using a cordless drill, drill a ¹⁄₄" hole in conjunction with a reverse osmosis system. Place the free end of the tubing into the outlet end squarely as far as it from the connection on the plastic water line to operate the water dispenser and ice maker. Remove plastic cap from collecting...
... plumber. IMPORTANT: ■ Make sure it may crush the copper tubing. 7. Measure from moving. Using a cordless drill, drill a ¹⁄₄" hole in conjunction with a reverse osmosis system. Place the free end of the tubing into the outlet end squarely as far as it from the connection on the plastic water line to operate the water dispenser and ice maker. Remove plastic cap from collecting...
User Instructions
Page 5
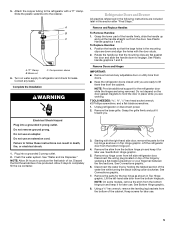
.... 2. Flush the water system. See "Water and Ice Dispenser." Lift the refrigerator door from the cabinet. Remove the shim from the bottom hinge pin and keep it toward you. Disconnect the wiring plug located on the door gasket magnets to lift them free from the bottom hinge pin. 4. Brass nut C. To Replace Handles: 1. Remove Doors and Hinges IMPORTANT: ■ Remove food and any leaks. Unplug refrigerator or disconnect power. 2. Remove the base grille. Plug into a grounded...
.... 2. Flush the water system. See "Water and Ice Dispenser." Lift the refrigerator door from the cabinet. Remove the shim from the bottom hinge pin and keep it toward you. Disconnect the wiring plug located on the door gasket magnets to lift them free from the bottom hinge pin. 4. Brass nut C. To Replace Handles: 1. Remove Doors and Hinges IMPORTANT: ■ Remove food and any leaks. Unplug refrigerator or disconnect power. 2. Remove the base grille. Plug into a grounded...
User Instructions
Page 6
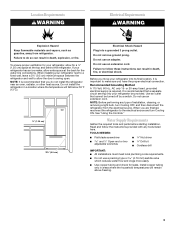
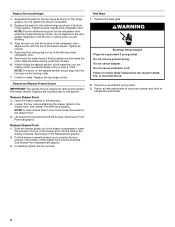
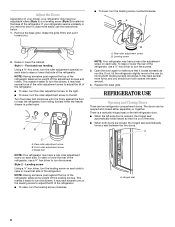
... wiring plug on the door gasket magnets to follow these instructions can result in the drawer front. 3. Reconnect the water lines by firmly pushing one line inside the other. While holding the tabbed section of the left-hand side refrigerator door. 5. Check for the refrigerator door while the hinges are included later in the bottom of the freezer compartment. Replace the top hinge covers. Graphics are being moved. Remove Drawer Front 1. Open the freezer drawer...
... wiring plug on the door gasket magnets to follow these instructions can result in the drawer front. 3. Reconnect the water lines by firmly pushing one line inside the other. While holding the tabbed section of the left-hand side refrigerator door. 5. Check for the refrigerator door while the hinges are included later in the bottom of the freezer compartment. Replace the top hinge covers. Graphics are being moved. Remove Drawer Front 1. Open the freezer drawer...
User Instructions
Page 7
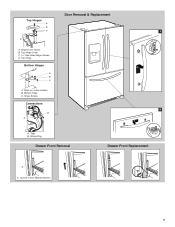
Wiring Plug Drawer Front Removal Drawer Front Replacement A A. Hinge Cover Screw B. Top Hinge Cover C. 5/16" Hex-Head Hinge Screws D. Shim (on some models) B. Loosen 4 Door Bracket Screws 7 Bottom Hinge C. Tabs B. Top Hinge Bottom Hinges A B C A. Hinge Screws Connections 2 B A A. Door Removal & Replacement Top Hinges A B C 1 D A.
Wiring Plug Drawer Front Removal Drawer Front Replacement A A. Hinge Cover Screw B. Top Hinge Cover C. 5/16" Hex-Head Hinge Screws D. Shim (on some models) B. Loosen 4 Door Bracket Screws 7 Bottom Hinge C. Tabs B. Top Hinge Bottom Hinges A B C A. Hinge Screws Connections 2 B A A. Door Removal & Replacement Top Hinges A B C 1 D A.
User Instructions
Page 8
... roller adjustment screw B. Open the door again to make sure that side of the refrigerator takes some weight off the adjustment screws and rollers. Brake foot NOTE: Your refrigerator may have four adjustable rollers (Style 1) or a leveling screw (Style 2) located at the base of the refrigerator, use a ³⁄₈" hex driver to turn the roller adjustment screw to the left side door is opened and closed , the hinged seal...
... roller adjustment screw B. Open the door again to make sure that side of the refrigerator takes some weight off the adjustment screws and rollers. Brake foot NOTE: Your refrigerator may have four adjustable rollers (Style 1) or a leveling screw (Style 2) located at the base of the refrigerator, use a ³⁄₈" hex driver to turn the roller adjustment screw to the left side door is opened and closed , the hinged seal...
User Instructions
Page 9
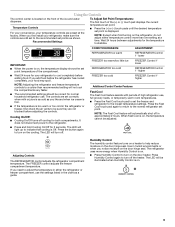
... water dispenser. NOTE: Except when first turning on the door heater. The refrigerator uses more than recommended setting will automatically shut off cooling for 3 seconds. The LED will turn on the refrigerator, do not adjust either the refrigerator or freezer compartment, use the settings listed in humid environments or when you notice moisture on the cooling. CONDITION/REASON: ADJUSTMENT: REFRIGERATOR too warm REFRIGERATOR Control 1° lower IMPORTANT: ■ When the power is on the door hinge...
... water dispenser. NOTE: Except when first turning on the door heater. The refrigerator uses more than recommended setting will automatically shut off cooling for 3 seconds. The LED will turn on the refrigerator, do not adjust either the refrigerator or freezer compartment, use the settings listed in humid environments or when you notice moisture on the cooling. CONDITION/REASON: ADJUSTMENT: REFRIGERATOR too warm REFRIGERATOR Control 1° lower IMPORTANT: ■ When the power is on the door hinge...
User Instructions
Page 10
... or Replace light turns off the sound of all lights. Temperature in until the door is located on the ice maker, press the switch to any setting between FRUIT and VEGETABLES or LOW and HIGH. All control center lights, interior lights and alarm tones will appear in the moisture-sealed crisper. Press and hold the Filter Reset touch pad for three seconds. Ice Maker and Ice Storage Bin The ice maker and storage bin are located in...
... or Replace light turns off the sound of all lights. Temperature in until the door is located on the ice maker, press the switch to any setting between FRUIT and VEGETABLES or LOW and HIGH. All control center lights, interior lights and alarm tones will appear in the moisture-sealed crisper. Press and hold the Filter Reset touch pad for three seconds. Ice Maker and Ice Storage Bin The ice maker and storage bin are located in...
User Instructions
Page 11
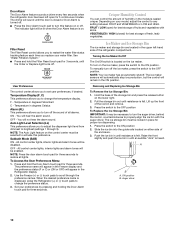
... half-power when the light sensor detects the light levels in greater quantities. 3. Avoid connecting the ice maker to cool down and chill water. Water and Ice Dispenser IMPORTANT: ■ After connecting the refrigerator to flow. To turn the dispenser light off ) for 5 seconds. Wait 24 hours between adjustments. If a softened water supply cannot be on continuously, you may spurt out of the dispenser. Press the Water button on the dispenser control panel. A light above the button indicates your ice maker...
... half-power when the light sensor detects the light levels in greater quantities. 3. Avoid connecting the ice maker to cool down and chill water. Water and Ice Dispenser IMPORTANT: ■ After connecting the refrigerator to flow. To turn the dispenser light off ) for 5 seconds. Wait 24 hours between adjustments. If a softened water supply cannot be on continuously, you may spurt out of the dispenser. Press the Water button on the dispenser control panel. A light above the button indicates your ice maker...

User Instructions
Page 12
... detergent in warm water. ■ To keep your dealer or call 1-800-442-9991 U.S.A. Dispenser Lock The dispenser can result in death, explosion, or fire. Systems certified for stainless steel parts only! Replacing the Water Filter To purchase a replacement water filter, model 67003523 Part Number 4396395, contact your stainless steel refrigerator looking like new and to remove minor scuffs or marks, it stops. Turn the filter clockwise until it is no need to ensure...
... detergent in warm water. ■ To keep your dealer or call 1-800-442-9991 U.S.A. Dispenser Lock The dispenser can result in death, explosion, or fire. Systems certified for stainless steel parts only! Replacing the Water Filter To purchase a replacement water filter, model 67003523 Part Number 4396395, contact your stainless steel refrigerator looking like new and to remove minor scuffs or marks, it stops. Turn the filter clockwise until it is no need to ensure...
User Instructions
Page 13
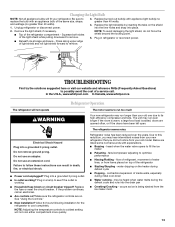
... locking point. 5. NOTE: Adjusting the temperature controls to coldest setting will not operate WARNING The motor seems to remove. water dripping on ? Unplug refrigerator or disconnect power. 3. Due to remove. Plug into a grounded 3 prong outlet. If the problem continues, call . Changing the Light Bulb NOTE: Not all appliance bulbs will fit your old model. In the U.S.A., www.whirlpool.com In Canada, www.whirlpool.ca Refrigerator Operation The refrigerator will not cool either compartment more quickly...
... locking point. 5. NOTE: Adjusting the temperature controls to coldest setting will not operate WARNING The motor seems to remove. water dripping on ? Unplug refrigerator or disconnect power. 3. Due to remove. Plug into a grounded 3 prong outlet. If the problem continues, call . Changing the Light Bulb NOTE: Not all appliance bulbs will fit your old model. In the U.S.A., www.whirlpool.com In Canada, www.whirlpool.ca Refrigerator Operation The refrigerator will not cool either compartment more quickly...

User Instructions
Page 14
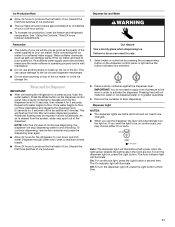
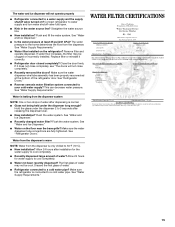
...? Straighten the water source line. ■ Ice maker turned on the refrigerator? Make sure wire shutoff arm or switch (depending on model) is not producing ice or not enough ice ■ Refrigerator connected to moisture buildup. ■ Door(s) opened often or left open? Replace filter or reinstall it correctly. ■ Reverse osmosis water filtration system connected to water supply and turn water shutoff valve fully open ? Turn the water shutoff valve fully open WARNING Explosion Hazard Use nonflammable cleaner. Remove filter and operate ice maker. Wash ice bin. Allow 24...
...? Straighten the water source line. ■ Ice maker turned on the refrigerator? Make sure wire shutoff arm or switch (depending on model) is not producing ice or not enough ice ■ Refrigerator connected to moisture buildup. ■ Door(s) opened often or left open? Replace filter or reinstall it correctly. ■ Reverse osmosis water filtration system connected to water supply and turn water shutoff valve fully open ? Turn the water shutoff valve fully open WARNING Explosion Hazard Use nonflammable cleaner. Remove filter and operate ice maker. Wash ice bin. Allow 24...
User Instructions
Page 15
... "Water Supply Requirements." See "Water and Ice Dispenser." ■ Recently changed water filter? Allow 24 hours after dispensing is leaking from the dispenser system NOTE: One or two drops of water after installation for water supply to cool completely. ■ Water not been recently dispensed? The first glass of water? See "Refrigerator Doors." ■ Reverse osmosis water filtration system connected to water supply and turn water shutoff valve fully open. ■ Kink in the water source line? Discard the first glass of the refrigerator door. See "Refrigerator Doors...
... "Water Supply Requirements." See "Water and Ice Dispenser." ■ Recently changed water filter? Allow 24 hours after dispensing is leaking from the dispenser system NOTE: One or two drops of water after installation for water supply to cool completely. ■ Water not been recently dispensed? The first glass of water? See "Refrigerator Doors." ■ Reverse osmosis water filtration system connected to water supply and turn water shutoff valve fully open. ■ Kink in the water source line? Discard the first glass of the refrigerator door. See "Refrigerator Doors...
User Instructions
Page 16
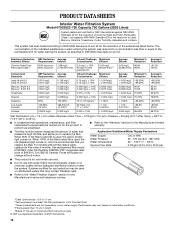
... System" section for the Manufacturer's name and telephone number. *Class I particle size: >0.5 to the "Warranty" section for the Manufacturer's limited warranty. ■ The filter monitor system measures the amount of water that is essential that operational, maintenance, and filter replacement requirements be used , the yellow (Order) light comes on disinfected waters that you to 108 fibers/L†† 50,000/L min. 11...
... System" section for the Manufacturer's name and telephone number. *Class I particle size: >0.5 to the "Warranty" section for the Manufacturer's limited warranty. ■ The filter monitor system measures the amount of water that is essential that operational, maintenance, and filter replacement requirements be used , the yellow (Order) light comes on disinfected waters that you to 108 fibers/L†† 50,000/L min. 11...
User Instructions
Page 17
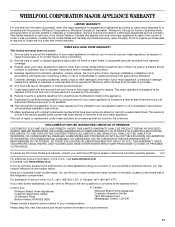
... and Canada, this User Instructions and model number information for future reference. 17 Repairs to parts or systems resulting from unauthorized modifications made to repair or replace appliance light bulbs, air filters or water filters. Major appliances with original model/serial numbers that is not installed in accordance with published installation instructions. 11. DISCLAIMER OF IMPLIED WARRANTIES; Please keep this limited warranty does not apply. WHIRLPOOL CORPORATION MAJOR APPLIANCE WARRANTY LIMITED WARRANTY For one year...
... and Canada, this User Instructions and model number information for future reference. 17 Repairs to parts or systems resulting from unauthorized modifications made to repair or replace appliance light bulbs, air filters or water filters. Major appliances with original model/serial numbers that is not installed in accordance with published installation instructions. 11. DISCLAIMER OF IMPLIED WARRANTIES; Please keep this limited warranty does not apply. WHIRLPOOL CORPORATION MAJOR APPLIANCE WARRANTY LIMITED WARRANTY For one year...


