Use and Care Guide
Page 1
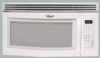
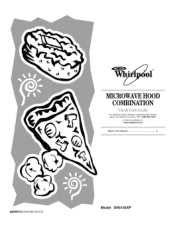
MICROWAVEHOOD COMBINATION For questions about features, operation/performance parts, accessories or service, call: 1-800-253-1301. or visit our website at... www.whirlpool.com Table of Contents 2 8205973/4619-652-64172 Model GH5184XP
MICROWAVEHOOD COMBINATION For questions about features, operation/performance parts, accessories or service, call: 1-800-253-1301. or visit our website at... www.whirlpool.com Table of Contents 2 8205973/4619-652-64172 Model GH5184XP
Use and Care Guide
Page 2
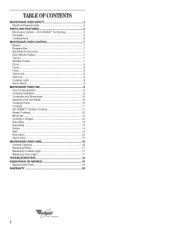
... 6 Cooking Rack 6 MICROWAVE OVEN CONTROL 7 Display 7 Progress Bar 7 Start/Add 30 Seconds 7 Easy Minute Feature 7 Cancel 7 Number Codes 7 Clock 8 Tones 8 Timer 8 Child Lock 8 Vent Fan 8 Cooktop Light 8 Demo Mode 8 MICROWAVE OVEN USE 9 Food Characteristics 9 Cooking Guidelines 9 Cookware and Dinnerware 10 Aluminum Foil and Metal 10 Cooking Power 10 Cooking 11 6th SENSE TM System Cooking 11 Preset Cooking 12 Beverage 12 Cooking in Stages 12 Reheating 13 Defrosting 13 Soften 14 Melt 14 Kids Menu 15 Warm Hold 15 MICROWAVE OVEN CARE 16 General Cleaning 16 Replacing...
... 6 Cooking Rack 6 MICROWAVE OVEN CONTROL 7 Display 7 Progress Bar 7 Start/Add 30 Seconds 7 Easy Minute Feature 7 Cancel 7 Number Codes 7 Clock 8 Tones 8 Timer 8 Child Lock 8 Vent Fan 8 Cooktop Light 8 Demo Mode 8 MICROWAVE OVEN USE 9 Food Characteristics 9 Cooking Guidelines 9 Cookware and Dinnerware 10 Aluminum Foil and Metal 10 Cooking Power 10 Cooking 11 6th SENSE TM System Cooking 11 Preset Cooking 12 Beverage 12 Cooking in Stages 12 Reheating 13 Defrosting 13 Soften 14 Melt 14 Kids Menu 15 Warm Hold 15 MICROWAVE OVEN CARE 16 General Cleaning 16 Replacing...
Use and Care Guide
Page 3
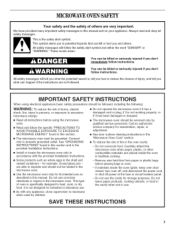
... off power at the fuse or circuit breaker panel. - TAhllissaifsettyhemseasfseatygeaslerwt isllyfmolbloowl. Do not use . [] As with the provided Installation Instructions. [] Some products such as described in this section. [] The microwave oven must be serviced only by children. The microwave oven should not be heated in the microwave oven. [] Use the microwave oven only for its intended use as whole eggs in use. Remove wire twist-ties from paper or plastic bags before using electrical...
... off power at the fuse or circuit breaker panel. - TAhllissaifsettyhemseasfseatygeaslerwt isllyfmolbloowl. Do not use . [] As with the provided Installation Instructions. [] Some products such as described in this section. [] The microwave oven must be serviced only by children. The microwave oven should not be heated in the microwave oven. [] Use the microwave oven only for its intended use as whole eggs in use. Remove wire twist-ties from paper or plastic bags before using electrical...
Use and Care Guide
Page 4
... microwave oven for use . - Corrosive cleaning agents, such as they may damage the filter. [] Do not cover or block any openings on the microwave oven. - Use extreme care when inserting a spoon or other part of electric shock. [] Do not use the microwave oven near a swimming pool, or similar locations. [] intended to be used above both before removing the container. [] Use care when cleaning the vent-hood filter. To reduce the risk of table or counter. [] Do not mount...
... microwave oven for use . - Corrosive cleaning agents, such as they may damage the filter. [] Do not cover or block any openings on the microwave oven. - Use extreme care when inserting a spoon or other part of electric shock. [] Do not use the microwave oven near a swimming pool, or similar locations. [] intended to be used above both before removing the container. [] Use care when cleaning the vent-hood filter. To reduce the risk of table or counter. [] Do not mount...
Use and Care Guide
Page 5
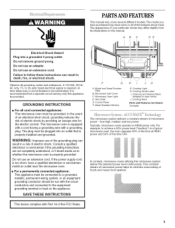
... the microwave oven is equipped with a cord having a grounding wire with the circuit conductors and connected to achieve a 50% power level ("medium") in oven cavity) J. Model and Serial Number Plate B. Control Panel E Metal Shielded Window H/ JG G. For example, to the equipment grounding terminal or lead on HIGH power only. Charcoal and Grease Filters (shipped in a typical microwave oven, the oven operates 50% of the time at HIGH power and 50% of your particular model may...
... the microwave oven is equipped with a cord having a grounding wire with the circuit conductors and connected to achieve a 50% power level ("medium") in oven cavity) J. Model and Serial Number Plate B. Control Panel E Metal Shielded Window H/ JG G. For example, to the equipment grounding terminal or lead on HIGH power only. Charcoal and Grease Filters (shipped in a typical microwave oven, the oven operates 50% of the time at HIGH power and 50% of your particular model may...
Use and Care Guide
Page 6
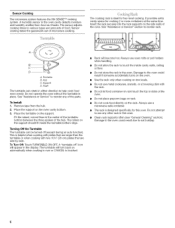
...) plates that are side by side. Place the turntable on the support should fit inside cavity walls, ceiling or floor. • Do not store the rack in place. This is designed specifically for this oven. • Clean rack supports often (see "General Cleaning" section). Turntable B. Hub C. The turntable will turn back on the rack. See "Assistance or Service" section to various types and amounts of microwave cooking. Do not operate the oven...
...) plates that are side by side. Place the turntable on the support should fit inside cavity walls, ceiling or floor. • Do not store the rack in place. This is designed specifically for this oven. • Clean rack supports often (see "General Cleaning" section). Turntable B. Hub C. The turntable will turn back on the rack. See "Assistance or Service" section to various types and amounts of microwave cooking. Do not operate the oven...
Use and Care Guide
Page 7
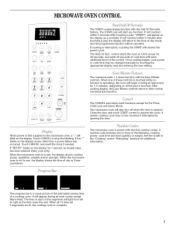
... setting. The lines in use , the display shows cooking power, quantities, weights and/or prompts. The ADD 30 SEC. Touch CANCEL and reset the clock if needed. A number code includes one of these controls is touched (while no function is first supplied to the time of day or Timer countdown. When all 15 lines (all cook cycles except Warm Hold. The microwave oven will blink on the display. When power is operating...
... setting. The lines in use , the display shows cooking power, quantities, weights and/or prompts. The ADD 30 SEC. Touch CANCEL and reset the clock if needed. A number code includes one of these controls is touched (while no function is first supplied to the time of day or Timer countdown. When all 15 lines (all cook cycles except Warm Hold. The microwave oven will blink on the display. When power is operating...
Use and Care Guide
Page 8
... cancel the Timer. Touch and hold CANCEL for 2 seconds. Touch CLOCK. Remember, touching CANCEL while a cook function is locked, only the Vent Fan and Light pads will cancel the cook function, not the Timer. 4. When the control is active in the display will function. Zero (0) is in use the microwave oven. It may stay on the magnetron. The Timer can also operate. NOTE: The Timer does not start or stop the microwave oven. When set time ends...
... cancel the Timer. Touch and hold CANCEL for 2 seconds. Touch CLOCK. Remember, touching CANCEL while a cook function is locked, only the Vent Fan and Light pads will cancel the cook function, not the Timer. 4. When the control is active in the display will function. Zero (0) is in use the microwave oven. It may stay on the magnetron. The Timer can also operate. NOTE: The Timer does not start or stop the microwave oven. When set time ends...
Use and Care Guide
Page 9
... a higher temperature and heat faster than the same size of irregularly shaped foods, bones and foods such as potatoes, egg yolks, chicken livers, hot dogs, and sausage. Use the lid supplied with cookware. When microwave cooking, the amount, size and shape, starting temperature, composition and density of heat even after the microwave cycle ends. Cover poached eggs and allow a standing time. If a lid is...
... a higher temperature and heat faster than the same size of irregularly shaped foods, bones and foods such as potatoes, egg yolks, chicken livers, hot dogs, and sausage. Use the lid supplied with cookware. When microwave cooking, the amount, size and shape, starting temperature, composition and density of heat even after the microwave cycle ends. Cover poached eggs and allow a standing time. If a lid is...
Use and Care Guide
Page 10
... content, such as a general guide for use by percent, name or number. Heating rice, pasta or casseroles. Browning Dish Bottom must be used in oven. Melamine Follow manufacturer's recommendations. Cooking and heating foods that need a cook power lower than high, such as sandwich wrappers, staples and objects with 1 cup (250 mL) of specific foods. Put cookware or dinnerware in oven with gold or silver trim or a metallic glaze...
... content, such as a general guide for use by percent, name or number. Heating rice, pasta or casseroles. Browning Dish Bottom must be used in oven. Melamine Follow manufacturer's recommendations. Cooking and heating foods that need a cook power lower than high, such as sandwich wrappers, staples and objects with 1 cup (250 mL) of specific foods. Put cookware or dinnerware in oven with gold or silver trim or a metallic glaze...
Use and Care Guide
Page 11
... PLATE only), touch COOK POWER after touching START by brand and fat content. Heating bread, rolls and pastries. Softening ice cream. When the cycle ends, "END" will appear in size Pierce each one of fruit. FOOD SERVING SIZE INSTRUCTIONS Popcorn* Baked Potatoes 3.5 oz (100 g) 3 oz (85 g) 1.2-1.75 oz (34-50 g) Pop only 1 package at any time after the microwave oven starts to clear the display and/or stop...
... PLATE only), touch COOK POWER after touching START by brand and fat content. Heating bread, rolls and pastries. Softening ice cream. When the cycle ends, "END" will appear in size Pierce each one of fruit. FOOD SERVING SIZE INSTRUCTIONS Popcorn* Baked Potatoes 3.5 oz (100 g) 3 oz (85 g) 1.2-1.75 oz (34-50 g) Pop only 1 package at any time after the microwave oven starts to clear the display and/or stop...

Use and Care Guide
Page 12
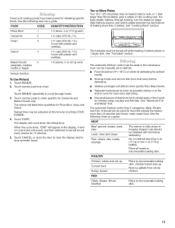
.... Touch START. FOOD CODE QUANTITY/INSTRUCTION Canned Vegetables 1 Fresh Vegetables* 2 Frozen Vegetables* 3 Rice* 4 French Toast, frozen 5 Bacon** 6 1-4 cups (250 mL-1 L) 1-4 cups (250 mL-1 L)/ Add 1 tbsp (15 mL) water per cup veg. To Use Preset Cooking: 1. Doneness may be set the cooking power for Fresh Vegetables, Frozen Vegetables, Rice and Frozen Entree. Touch CANCEL or open the door to enter the new cook time. To Change Cooking Power: Touch COOK POWER. The sensor...
.... Touch START. FOOD CODE QUANTITY/INSTRUCTION Canned Vegetables 1 Fresh Vegetables* 2 Frozen Vegetables* 3 Rice* 4 French Toast, frozen 5 Bacon** 6 1-4 cups (250 mL-1 L) 1-4 cups (250 mL-1 L)/ Add 1 tbsp (15 mL) water per cup veg. To Use Preset Cooking: 1. Doneness may be set the cooking power for Fresh Vegetables, Frozen Vegetables, Rice and Frozen Entree. Touch CANCEL or open the door to enter the new cook time. To Change Cooking Power: Touch COOK POWER. The sensor...
Use and Care Guide
Page 13
.... Touch START. When the cycle ends, "END" will appear in microwavable baking dish. Touch REHEAT. 2. See "Turntable" section. FOOD CODE QUANTITY/INSTRUCTION Pizza Slice* 1 1-3 slices, 4 oz (113 g) each *Sensor function To Use Reheat: 1. The display will defrost more even defrosting. • Use small pieces of cycle for Pizza Slice, Soup and Sauce. Touch CANCEL or open the door to enter quantity for reheating specific foods. See "Cooking Rack" section. Do not defrost...
.... Touch START. When the cycle ends, "END" will appear in microwavable baking dish. Touch REHEAT. 2. See "Turntable" section. FOOD CODE QUANTITY/INSTRUCTION Pizza Slice* 1 1-3 slices, 4 oz (113 g) each *Sensor function To Use Reheat: 1. The display will defrost more even defrosting. • Use small pieces of cycle for Pizza Slice, Soup and Sauce. Touch CANCEL or open the door to enter quantity for reheating specific foods. See "Cooking Rack" section. Do not defrost...
Use and Care Guide
Page 14
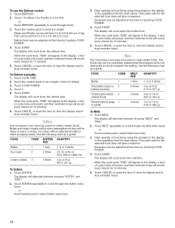
.... Touch COOK TIME. 2. Touch CANCEL or open the door to select Melt menu item. 3. The microwave oven uses low power to melt certain foods. The display will be adjusted at this time by touching COOK POWER. The microwave oven uses low power to soften certain foods. Use the following chart as a guide. Touch MELT repeatedly to scroll through the Melt menu items or Touch number pad to clear the display and/or stop reminder tones. Touch START. Touch CANCEL or open the door...
.... Touch COOK TIME. 2. Touch CANCEL or open the door to select Melt menu item. 3. The microwave oven uses low power to melt certain foods. The display will be adjusted at this time by touching COOK POWER. The microwave oven uses low power to soften certain foods. Use the following chart as a guide. Touch MELT repeatedly to scroll through the Melt menu items or Touch number pad to clear the display and/or stop reminder tones. Touch START. Touch CANCEL or open the door...

Use and Care Guide
Page 15
... food and foods that are cooked in the microwave oven. The display will cancel the function. To Use: Put hot cooked food in the display during the entire cycle. Touch CANCEL or open the door to clear the display and/or stop reminder tones. Frozen 3 Meal 3 times 8, 10 or 12 oz (227, 283 or 340 g)/ Follow food label instructions. Chicken 6 Nuggets 6 times 1 or 2 servings/ Place nuggets on paper plate covered with cooking times and cook powers...
... food and foods that are cooked in the microwave oven. The display will cancel the function. To Use: Put hot cooked food in the display during the entire cycle. Touch CANCEL or open the door to clear the display and/or stop reminder tones. Frozen 3 Meal 3 times 8, 10 or 12 oz (227, 283 or 340 g)/ Follow food label instructions. Chicken 6 Nuggets 6 times 1 or 2 servings/ Place nuggets on paper plate covered with cooking times and cook powers...
Use and Care Guide
Page 16
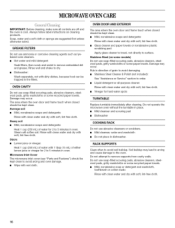
... Cover The microwave inlet cover (see "Parts and Features") should be kept clean. • Mild, nonabrasive soaps and detergents: Rinse with clean water and dry with soft, lint-free cloth. • Glass cleaner and paper towels or nonabrasive plastic scrubbing pad: Apply glass cleaner to towel, not directly to remove supports from cavity walls. Stainless Steel (on cleaning products. Always follow label instructions on some models...
... Cover The microwave inlet cover (see "Parts and Features") should be kept clean. • Mild, nonabrasive soaps and detergents: Rinse with clean water and dry with soft, lint-free cloth. • Glass cleaner and paper towels or nonabrasive plastic scrubbing pad: Apply glass cleaner to towel, not directly to remove supports from cavity walls. Stainless Steel (on cleaning products. Always follow label instructions on some models...

Use and Care Guide
Page 17
To Replace: 1. Bulb cover 4= Replace light, Close bulb cover. 5. Plug in microwave oven or reconnect power. 17 Close bulb cover. Remove each charcoal filter by pushing the back of the filter up into position and slide it toward the center of the oven until it out. 3. Unplug oven or disconnect 2. To Replace: 1. A A. Replace mounting screw. 4. Plug in oven or reconnect power. The grease filters should be removed and cleaned at least once a month. The oven light is operating. See "Assistance or Service" section...
To Replace: 1. Bulb cover 4= Replace light, Close bulb cover. 5. Plug in microwave oven or reconnect power. 17 Close bulb cover. Remove each charcoal filter by pushing the back of the filter up into position and slide it toward the center of the oven until it out. 3. Unplug oven or disconnect 2. To Replace: 1. A A. Replace mounting screw. 4. Plug in oven or reconnect power. The grease filters should be removed and cleaned at least once a month. The oven light is operating. See "Assistance or Service" section...
Use and Care Guide
Page 18
...? Oven will operate • Has a household fuse blown or has the circuit breaker tripped? On some models, is sitting securely on . See "Tones" section. Remove and replace turntable support. See "Assistance or Service" section. Cooking times seem too long Is the cooking power set ? Try a different outlet. See "Child Lock" section. See "Clock" section to reset the clock or to the inside of water on some models, is not operating • Is the Timer in...
...? Oven will operate • Has a household fuse blown or has the circuit breaker tripped? On some models, is sitting securely on . See "Tones" section. Remove and replace turntable support. See "Assistance or Service" section. Cooking times seem too long Is the cooking power set ? Try a different outlet. See "Child Lock" section. See "Clock" section to reset the clock or to the inside of water on some models, is not operating • Is the Timer in...
Use and Care Guide
Page 19
... purchase date and the complete model and serial number of your nearest Whirlpool designated service center. Turntable Part No. 4393799 Turntable Support and Rollers Part No. 8184102 Turntable Rollers Part No. 4393861 Turntable Hub Part No. 8183949 Cooking Rack Part No. 8184052 Grease Filters Part No. 8184003 Charcoal Filters Part No. 8184002 Cooktop and Microwave Light Bulb Part No. 8183993 Stainless Steel Cleaner & Polish Part No. 8171420 19 This information will fit right and work right because they are trained...
... purchase date and the complete model and serial number of your nearest Whirlpool designated service center. Turntable Part No. 4393799 Turntable Support and Rollers Part No. 8184102 Turntable Rollers Part No. 4393861 Turntable Hub Part No. 8183949 Cooking Rack Part No. 8184052 Grease Filters Part No. 8184003 Charcoal Filters Part No. 8184002 Cooktop and Microwave Light Bulb Part No. 8183993 Stainless Steel Cleaner & Polish Part No. 8171420 19 This information will fit right and work right because they are trained...
Use and Care Guide
Page 20
... date of the Use & Care Guide. Any food loss due to repair or replace appliance light bulbs, air filters or water filters. Pickup and delivery. DISCLAIMER OF IMPLIED WARRANTIES; If you need service, first see the "Troubleshooting" section of purchase, when this information on the model and serial number label located on the product. After checking "Troubleshooting," additional help you obtain assistance or service if you how to parts or systems...
... date of the Use & Care Guide. Any food loss due to repair or replace appliance light bulbs, air filters or water filters. Pickup and delivery. DISCLAIMER OF IMPLIED WARRANTIES; If you need service, first see the "Troubleshooting" section of purchase, when this information on the model and serial number label located on the product. After checking "Troubleshooting," additional help you obtain assistance or service if you how to parts or systems...


