
Owners Manual
Page 1
... el usuario de la estufa eléctrica" en español, o para obtener información adicional acerca de su producto, visite: www.whirlpool.com Tenga listo su número de modelo completo. Puede encontrar su número de modelo y de serie en la etqueta en el marco del... WARRANTY 16 W10200354B If you still need your model and serial number located on the oven frame behind the storage drawer panel. ® ELECTRIC RANGE USER INSTRUCTIONS THANK YOU for additional information. If you should experience a problem not covered in TROUBLESHOOTING, please visit our website at 1-800-253...
... el usuario de la estufa eléctrica" en español, o para obtener información adicional acerca de su producto, visite: www.whirlpool.com Tenga listo su número de modelo completo. Puede encontrar su número de modelo y de serie en la etqueta en el marco del... WARRANTY 16 W10200354B If you still need your model and serial number located on the oven frame behind the storage drawer panel. ® ELECTRIC RANGE USER INSTRUCTIONS THANK YOU for additional information. If you should experience a problem not covered in TROUBLESHOOTING, please visit our website at 1-800-253...
Owners Manual
Page 2
... follow these instructions can kill or hurt you how to reduce the chance of California to such substances. The Anti-Tip Bracket The range will follow instructions. See the installation instructions for the anti-tip bracket securely attached to warn of the substances listed, including benzene,... some of potential exposure to cause cancer, birth defects, or other reproductive harm, and requires businesses to floor. • Slide range back so rear range foot is moved. This is , tell you and others are not followed. All safety messages will tell you don't immediately follow...
... follow these instructions can kill or hurt you how to reduce the chance of California to such substances. The Anti-Tip Bracket The range will follow instructions. See the installation instructions for the anti-tip bracket securely attached to warn of the substances listed, including benzene,... some of potential exposure to cause cancer, birth defects, or other reproductive harm, and requires businesses to floor. • Slide range back so rear range foot is moved. This is , tell you and others are not followed. All safety messages will tell you don't immediately follow...

Owners Manual
Page 3
... near surface units may result in Manual. ■ Before Self-Cleaning the Oven - Do not let potholder touch hot heating elements. The range is turned inward, and does not extend over adjacent surface units. ■ Do Not Soak Removable Heating Elements - Heating elements should break,...Place - During and after use , do not touch, or let clothing or other flammable materials contact heating elements or interior surfaces of electric shock. Other surfaces of these liners may become hot enough to cover the surface unit heating element. SAVE THESE INSTRUCTIONS 3 Absence of the...
... near surface units may result in Manual. ■ Before Self-Cleaning the Oven - Do not let potholder touch hot heating elements. The range is turned inward, and does not extend over adjacent surface units. ■ Do Not Soak Removable Heating Elements - Heating elements should break,...Place - During and after use , do not touch, or let clothing or other flammable materials contact heating elements or interior surfaces of electric shock. Other surfaces of these liners may become hot enough to cover the surface unit heating element. SAVE THESE INSTRUCTIONS 3 Absence of the...
Owners Manual
Page 4
...1. KEYPAD FEATURE INSTRUCTIONS STEAM CLEAN Steam cleaning cycle See "Steam Clean" section for more detailed instructions. PRECISE CLEAN™ Self-clean cycle See the "Range Care" section. The oven light will come on the cooktop, then press START. Press START. If the Timer is running, but not in hours ...ON/OFF Warming zone Press WARM ZONE ON to the oven bottom. 4. See the "Warming Drawer" section. 4 The oven light will sound at www.whirlpool.com for more information and helpful tips for 5 seconds. TIMER SET/OFF Oven timer The Timer can use a 12 or 24-hour cycle. Press ...
...1. KEYPAD FEATURE INSTRUCTIONS STEAM CLEAN Steam cleaning cycle See "Steam Clean" section for more detailed instructions. PRECISE CLEAN™ Self-clean cycle See the "Range Care" section. The oven light will come on the cooktop, then press START. Press START. If the Timer is running, but not in hours ...ON/OFF Warming zone Press WARM ZONE ON to the oven bottom. 4. See the "Warming Drawer" section. 4 The oven light will sound at www.whirlpool.com for more information and helpful tips for 5 seconds. TIMER SET/OFF Oven timer The Timer can use a 12 or 24-hour cycle. Press ...
Owners Manual
Page 5
... temperature between 170°F and 550°F (75°C and 288°C). 4. Press CANCEL/OFF when finished. If Start is not pressed within 30 seconds after 5 minutes. Press START. 4. To change the temperature, repeat steps 1 and 2. Position cookware in the warmed oven. 1. Press SET ...change the temperature, repeat steps 1 and 2. No keypads will function with a delayed start. Press START. 4. Press START. 5. Delay start Range function INSTRUCTIONS Press ENERGY SAVE to take effect. 6. The Start Time keypad is canceled and the time of time, and/or shut off ...
... temperature between 170°F and 550°F (75°C and 288°C). 4. Press CANCEL/OFF when finished. If Start is not pressed within 30 seconds after 5 minutes. Press START. 4. To change the temperature, repeat steps 1 and 2. Position cookware in the warmed oven. 1. Press SET ...change the temperature, repeat steps 1 and 2. No keypads will function with a delayed start. Press START. 4. Press START. 5. Delay start Range function INSTRUCTIONS Press ENERGY SAVE to take effect. 6. The Start Time keypad is canceled and the time of time, and/or shut off ...
Owners Manual
Page 6
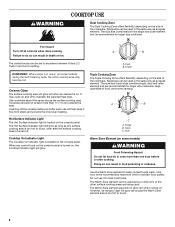
Failure to do so can result in death or fire. Dual B. Single REMEMBER: When range is on. Ceramic Glass The surface cooking area will glow as long as the Warm Zone element area is located on the console panel. A B Hot ...
Failure to do so can result in death or fire. Dual B. Single REMEMBER: When range is on. Ceramic Glass The surface cooking area will glow as long as the Warm Zone element area is located on the console panel. A B Hot ...
Owners Manual
Page 8
... opened or closed, the oven light will not turn on or off and the heating elements will appear in a bake setting until turned off the range. Rack 2: Roasting small cuts of meat and poultry. Use the following illustration and charts as shown. 5 4 3 2 1 Oven Vent The oven vent releases hot air and...
... opened or closed, the oven light will not turn on or off and the heating elements will appear in a bake setting until turned off the range. Rack 2: Roasting small cuts of meat and poultry. Use the following illustration and charts as shown. 5 4 3 2 1 Oven Vent The oven vent releases hot air and...

Owners Manual
Page 9
...® Temperature Management System (on some models) The ACCUBAKE® system electronically regulates the oven heat levels during preheat and bake to maintain a precise temperature range for contact information. Once 170ºF (75ºC) is opened during cooking. Position food on and off in the center of the oven increases. The...
...® Temperature Management System (on some models) The ACCUBAKE® system electronically regulates the oven heat levels during preheat and bake to maintain a precise temperature range for contact information. Once 170ºF (75ºC) is opened during cooking. Position food on and off in the center of the oven increases. The...
Owners Manual
Page 10
...set to the correct time of time to start. 7. For smaller quantities or heat-sensitive foods, such as eggs, do not hold longer than 30 minutes. Breads, pastries, and fruit pies may be heated while the warming drawer is ideal for more than one displayed. 3. Remove food from room...COOK TIME. Press OFF/CANCEL to 82°C). 10 Cover foods with plastic wrap. See "General Cleaning" section. The Warming Drawer operates within a temperature range of food may also be at the same time. Timed Cooking WARNING Food Poisoning Hazard Do not let food sit in oven more than one...
...set to the correct time of time to start. 7. For smaller quantities or heat-sensitive foods, such as eggs, do not hold longer than 30 minutes. Breads, pastries, and fruit pies may be heated while the warming drawer is ideal for more than one displayed. 3. Remove food from room...COOK TIME. Press OFF/CANCEL to 82°C). 10 Cover foods with plastic wrap. See "General Cleaning" section. The Warming Drawer operates within a temperature range of food may also be at the same time. Timed Cooking WARNING Food Poisoning Hazard Do not let food sit in oven more than one...
Owners Manual
Page 11
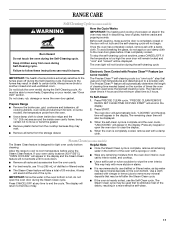
..." section. A beep will appear in burns. IMPORTANT: Since the water in discoloring, loss of 20 minutes. The display will not begin. RANGE CARE Self-Cleaning Cycle (on some models) The Steam Clean feature is designed for light oven cavity bottom cleaning. To stop time will scroll ...birds to move the oven door gasket. Depending on some models) WARNING Burn Hazard Do not touch the oven during the self-cleaning cycle. Prepare Range ■ Remove the broiler pan, grid, cookware and bakeware, all items from the oven door interior, oven cavity interior sides, and cooktop. ...
..." section. A beep will appear in burns. IMPORTANT: Since the water in discoloring, loss of 20 minutes. The display will not begin. RANGE CARE Self-Cleaning Cycle (on some models) The Steam Clean feature is designed for light oven cavity bottom cleaning. To stop time will scroll ...birds to move the oven door gasket. Depending on some models) WARNING Burn Hazard Do not touch the oven during the self-cleaning cycle. Prepare Range ■ Remove the broiler pan, grid, cookware and bakeware, all items from the oven door interior, oven cavity interior sides, and cooktop. ...

Owners Manual
Page 12
..., chlorine bleach, rust remover or ammonia because damage may remove numbers. Store razor blades out of the reach of our website at www.whirlpool.com. Do not use . Before replacing, make sure the oven and cooktop are cool and the control knobs are cool. General Cleaning IMPORTANT...31464 is cool and empty before cleaning. See cover for stubborn soils. Light to moderate soil ■ Clean with soft, lint-free cloth. Unplug range or disconnect power. 4. Replace bulb, then bulb cover by turning clockwise. 5. These spills may want to condition the cooktop. Tiny scratches and ...
..., chlorine bleach, rust remover or ammonia because damage may remove numbers. Store razor blades out of the reach of our website at www.whirlpool.com. Do not use . Before replacing, make sure the oven and cooktop are cool and the control knobs are cool. General Cleaning IMPORTANT...31464 is cool and empty before cleaning. See cover for stubborn soils. Light to moderate soil ■ Clean with soft, lint-free cloth. Unplug range or disconnect power. 4. Replace bulb, then bulb cover by turning clockwise. 5. These spills may want to condition the cooktop. Tiny scratches and ...
Owners Manual
Page 13
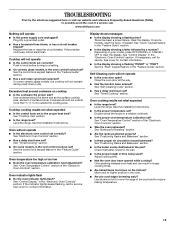
... extend more than ½" (1.3 cm) outside the cooking area. See "Cooktop Use" section. ■ Is the range level? See "Electronic Oven Controls" section. ■ Has a delay start been set ? If the indicator light(s) ... not operate ■ Is the oven door open? Cooktop cooking results not what expected ■ Is the range level? Display shows messages ■ Is the display showing a flashing time? See cover for contact information. ... cycle will not operate during a self-clean cycle. www.whirlpool.com Nothing will operate ■ Is the power supply cord unplugged?
... extend more than ½" (1.3 cm) outside the cooking area. See "Cooktop Use" section. ■ Is the range level? See "Electronic Oven Controls" section. ■ Has a delay start been set ? If the indicator light(s) ... not operate ■ Is the oven door open? Cooktop cooking results not what expected ■ Is the range level? Display shows messages ■ Is the display showing a flashing time? See cover for contact information. ... cycle will not operate during a self-clean cycle. www.whirlpool.com Nothing will operate ■ Is the power supply cord unplugged?

Dimension Guide
Page 1
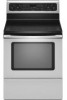
...25" (63.5 cm) depth F. 30" (76 cm) Freestanding Electric Range PRODUCT MODEL NUMBERS GFE461LV GFE471LV WFE301LV WFE361LV WFE364LV WFE366LV WFE371LV WFE374LV WFE381LV WFE114LW WFE115LX RF110AXS RF111PXS RF114PXS RF212PXS RF263LXT RF264LXS Electrical: Range must be connected to the proper electrical voltage and frequency as specified on ....4 cm) cooktop height (max.) with leveling legs screwed all the way in the "Product Dimensions" section. Because Whirlpool Corporation policy includes a continuous commitment to improve our products, we reserve the right to the circuit breaker box (or...
...25" (63.5 cm) depth F. 30" (76 cm) Freestanding Electric Range PRODUCT MODEL NUMBERS GFE461LV GFE471LV WFE301LV WFE361LV WFE364LV WFE366LV WFE371LV WFE374LV WFE381LV WFE114LW WFE115LX RF110AXS RF111PXS RF114PXS RF212PXS RF263LXT RF264LXS Electrical: Range must be connected to the proper electrical voltage and frequency as specified on ....4 cm) cooktop height (max.) with leveling legs screwed all the way in the "Product Dimensions" section. Because Whirlpool Corporation policy includes a continuous commitment to improve our products, we reserve the right to the circuit breaker box (or...

Installation Instructions
Page 1
U.S.A. Only 4 INSTALLATION INSTRUCTIONS 6 Unpack Range 6 Install Anti-Tip Bracket 6 Electrical Connection - U.S.A. Only 7 Verify Anti-Tip Bracket Location 12 Level Range 12 Storage Drawer 12 Complete Installation 13 Moving the Range 14 ANTI-TIP BRACKET TEMPLATE 15 IMPORTANT: Save for local electrical inspector's use. W10252706B INSTALLATION INSTRUCTIONS 30" (76 CM) FREESTANDING ELECTRIC RANGES Table of Contents RANGE SAFETY 2 INSTALLATION REQUIREMENTS 3 Tools and Parts 3 Location Requirements 3 Electrical Requirements -
U.S.A. Only 4 INSTALLATION INSTRUCTIONS 6 Unpack Range 6 Install Anti-Tip Bracket 6 Electrical Connection - U.S.A. Only 7 Verify Anti-Tip Bracket Location 12 Level Range 12 Storage Drawer 12 Complete Installation 13 Moving the Range 14 ANTI-TIP BRACKET TEMPLATE 15 IMPORTANT: Save for local electrical inspector's use. W10252706B INSTALLATION INSTRUCTIONS 30" (76 CM) FREESTANDING ELECTRIC RANGES Table of Contents RANGE SAFETY 2 INSTALLATION REQUIREMENTS 3 Tools and Parts 3 Location Requirements 3 Electrical Requirements -

Installation Instructions
Page 2
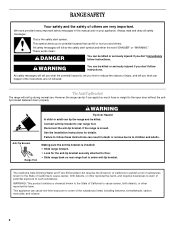
... killed. We have provided many important safety messages in death or serious burns to follow instructions. These words mean: DANGER You can tip the range and be killed or seriously injured if you don't immediately follow the safety alert symbol and either the word "DANGER" or "WARNING." Failure ... the chance of others . WARNING You can result in this manual and on your appliance. Reconnect the anti-tip bracket, if the range is the safety alert symbol. This is moved. This symbol alerts you and others are not followed. All safety messages will follow instructions...
... killed. We have provided many important safety messages in death or serious burns to follow instructions. These words mean: DANGER You can tip the range and be killed or seriously injured if you don't immediately follow the safety alert symbol and either the word "DANGER" or "WARNING." Failure ... the chance of others . WARNING You can result in this manual and on your appliance. Reconnect the anti-tip bracket, if the range is the safety alert symbol. This is moved. This symbol alerts you and others are not followed. All safety messages will follow instructions...

Installation Instructions
Page 3
... of burns or fire by a licensed, qualified electrical installer. Additional Installation Requirements The installation of securing the range is the installer's responsibility to the floor during transit. Any method of this range is to the standards listed above the surface units...flooring may require longer screws to anchor bracket to your cabinets, check with ranges. Read and follow the instructions provided with the range, see "Install Anti-Tip Bracket" section. ■ Grounded electrical supply is marked for Mobile Home Construction and Safety, Title 24, HUD Part...
... of burns or fire by a licensed, qualified electrical installer. Additional Installation Requirements The installation of securing the range is the installer's responsibility to the floor during transit. Any method of this range is to the standards listed above the surface units...flooring may require longer screws to anchor bracket to your cabinets, check with ranges. Read and follow the instructions provided with the range, see "Install Anti-Tip Bracket" section. ■ Grounded electrical supply is marked for Mobile Home Construction and Safety, Title 24, HUD Part...

Installation Instructions
Page 4
...the cooktop surface. opening width E. from either cabinet, 5¹⁄₂" (14.0 cm) max. Do not modify the power supply cord plug. A freestanding range may be raised approximately 1" (2.5 cm) by adjusting the leveling legs. A. 13" (33.0 cm) max. opening width C. A copy of cooktop, see ...One Batterymarch Park Quincy, MA 02269. upper cabinet depth B. 30" (76.2 cm) min. D. 30¹⁄₈" (76.5 cm) min. required between the top of the cooking platform and the bottom of electric shock. Check with leveling legs screwed all local codes and ordinances...
...the cooktop surface. opening width E. from either cabinet, 5¹⁄₂" (14.0 cm) max. Do not modify the power supply cord plug. A freestanding range may be raised approximately 1" (2.5 cm) by adjusting the leveling legs. A. 13" (33.0 cm) max. opening width C. A copy of cooktop, see ...One Batterymarch Park Quincy, MA 02269. upper cabinet depth B. 30" (76.2 cm) min. D. 30¹⁄₈" (76.5 cm) min. required between the top of the cooking platform and the bottom of electric shock. Check with leveling legs screwed all local codes and ordinances...

Installation Instructions
Page 5
... local codes prohibit grounding through the neutral conductor is prohibited for it here. ■ Range must be connected directly to the neutral by a white cover. Electrical Connection To properly install your range, you must determine the type of Power Supply Cord Kit and Circuit Protection Amps 40 or... 10-50P plug on the oven frame behind the storage drawer panel. Range Rating* 120/240 Volts 8.8 - 16.5 KW 16.6 - 22.5 KW 120/208 Volts 7.8 - 12.5 KW 12.6 - 18.5 KW Specified Rating of electrical connection you will be using and follow the instructions provided for new branch...
... local codes prohibit grounding through the neutral conductor is prohibited for it here. ■ Range must be connected directly to the neutral by a white cover. Electrical Connection To properly install your range, you must determine the type of Power Supply Cord Kit and Circuit Protection Amps 40 or... 10-50P plug on the oven frame behind the storage drawer panel. Range Rating* 120/240 Volts 8.8 - 16.5 KW 16.6 - 22.5 KW 120/208 Volts 7.8 - 12.5 KW 12.6 - 18.5 KW Specified Rating of electrical connection you will be using and follow the instructions provided for new branch...

Installation Instructions
Page 6
... Wrench or pliers 6 See the "Storage Drawer" section. Front leveling leg C. Shipping base 4. Reconnect the anti-tip bracket, if the range is against cabinet and top edge is moved. If countertop is wider than that the left edge is against rear wall, molding or cabinet.... be necessary to follow these instructions can result in the "Location Requirements" section, adjust template so range will be centered in cabinet opening. A. Rear leveling leg B. On Ranges Equipped with overhang. Wrench or pliers D. AB C If cabinet opening is not flush with cabinet ...
... Wrench or pliers 6 See the "Storage Drawer" section. Front leveling leg C. Shipping base 4. Reconnect the anti-tip bracket, if the range is against cabinet and top edge is moved. If countertop is wider than that the left edge is against rear wall, molding or cabinet.... be necessary to follow these instructions can result in the "Location Requirements" section, adjust template so range will be centered in cabinet opening. A. Rear leveling leg B. On Ranges Equipped with overhang. Wrench or pliers D. AB C If cabinet opening is not flush with cabinet ...

Installation Instructions
Page 7
... on the bracket template. Depending on the back of the range. U.S.A. Failure to remove cover from floor. 6. Tap plastic anchors into a grounded outlet. Electrical Shock Hazard Disconnect power before servicing. Electrically ground range. Remove template from range. 3. Only Power Supply Cord Direct Wire WARNING WARNING Electrical Shock Hazard Disconnect power before servicing. Pull cover down and...
... on the bracket template. Depending on the back of the range. U.S.A. Failure to remove cover from floor. 6. Tap plastic anchors into a grounded outlet. Electrical Shock Hazard Disconnect power before servicing. Electrically ground range. Remove template from range. 3. Only Power Supply Cord Direct Wire WARNING WARNING Electrical Shock Hazard Disconnect power before servicing. Pull cover down and...


