
Use and Care Guide
Page 1
85281480 GoLd ® ELECTRONIC ELECTRIC AND GAS DRYERS For questions about features, operation/performance, parts accessories or service call: 1-800-253-1301 In Canada, for assistance, call 1-800-461-5681 for installation and service, call 1-800-807-7777 or visit our website at._www.whirlpool.com or www.whirlpooLcom/canada # SECHEUSES ELECTRIQUESETA GAZELECTRONIQUES Pour assistance, composez le 1-800-461-5681, pour installation ou service le 1-800-807-6777 ou visitez notre site web & www.whirlpool.com/canada Table of Contents/Table des matieres 2
85281480 GoLd ® ELECTRONIC ELECTRIC AND GAS DRYERS For questions about features, operation/performance, parts accessories or service call: 1-800-253-1301 In Canada, for assistance, call 1-800-461-5681 for installation and service, call 1-800-807-7777 or visit our website at._www.whirlpool.com or www.whirlpooLcom/canada # SECHEUSES ELECTRIQUESETA GAZELECTRONIQUES Pour assistance, composez le 1-800-461-5681, pour installation ou service le 1-800-807-6777 ou visitez notre site web & www.whirlpool.com/canada Table of Contents/Table des matieres 2

Use and Care Guide
Page 2
... safety messages. TABLEOF CONTENTS TABLEDES MATIERES DRYER SAFETY 2 PARTS AND FEATURES 4 CHECKING YOUR VENT 5 DRYER USE 5 Starting Your Dryer 5 Stopping, Pausing and Restarting 6 Loading 6 Drying, Cycle and Temperature Tips 6 CYCLES 7 Automatic Cycles 7 Timed Cycles 7 Air Only Setting 8 Dryer Features 8 Additional Features 8 DRYER CARE 9 Cleaning the Dryer Location 9 Cleaning the Lint Screen 9 Cleaning the Dryer Interior 9 Removing Accumulated Lint 10 Changing the Drum Light 10 TROUBLESHOOTING 10 ASSISTANCE OR SERVICE 11 WAR RAN TY 12 SI_CURITI_ DE...
... safety messages. TABLEOF CONTENTS TABLEDES MATIERES DRYER SAFETY 2 PARTS AND FEATURES 4 CHECKING YOUR VENT 5 DRYER USE 5 Starting Your Dryer 5 Stopping, Pausing and Restarting 6 Loading 6 Drying, Cycle and Temperature Tips 6 CYCLES 7 Automatic Cycles 7 Timed Cycles 7 Air Only Setting 8 Dryer Features 8 Additional Features 8 DRYER CARE 9 Cleaning the Dryer Location 9 Cleaning the Lint Screen 9 Cleaning the Dryer Interior 9 Removing Accumulated Lint 10 Changing the Drum Light 10 TROUBLESHOOTING 10 ASSISTANCE OR SERVICE 11 WAR RAN TY 12 SI_CURITI_ DE...
Use and Care Guide
Page 3
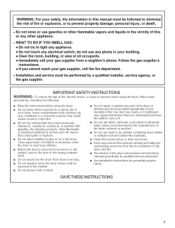
... out. Before the dryer is removed from service or dis= carded, remove the door to the weather. Do not install or store the dryer where it wiii be exposed to the drying compart ment. Clean lint screen before using the dryer. Keep area around the exhaust opening and adjacent surrounding areas free from a neighbor's phone. m The interior of this Use and Care Guide or in published user=repair instructions that have the...
... out. Before the dryer is removed from service or dis= carded, remove the door to the weather. Do not install or store the dryer where it wiii be exposed to the drying compart ment. Clean lint screen before using the dryer. Keep area around the exhaust opening and adjacent surrounding areas free from a neighbor's phone. m The interior of this Use and Care Guide or in published user=repair instructions that have the...
Use and Care Guide
Page 4
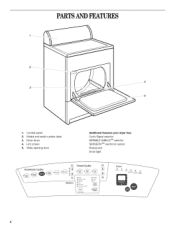
Dryer drum 4. Wide-opening door Additional features your dryer has: Cycle Signal selector WRINKLE SHIELD TM selector SENSEON TM electronic sensor Drying rack Drum light PARTSANDFEATURES 1. Lint screen 5. Model and serial number label 3. Control panel 2.
Dryer drum 4. Wide-opening door Additional features your dryer has: Cycle Signal selector WRINKLE SHIELD TM selector SENSEON TM electronic sensor Drying rack Drum light PARTSANDFEATURES 1. Lint screen 5. Model and serial number label 3. Control panel 2.
Use and Care Guide
Page 5
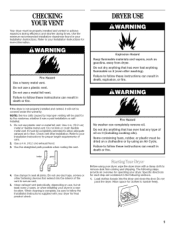
... for operating your Installation Instructions for final product check. Failure to follow these instructions death or fire. Before using an Air Cycte. Specific directions for by the customer, whether it (incJuding cooking cite). Use 4 in death or fire. 4. Use the straightest path possible when routing the vent. Do not dry anything that has ever had anything that extend into the dryer and close the door...
... for operating your Installation Instructions for final product check. Failure to follow these instructions death or fire. Before using an Air Cycte. Specific directions for by the customer, whether it (incJuding cooking cite). Use 4 in death or fire. 4. Use the straightest path possible when routing the vent. Do not dry anything that has ever had anything that extend into the dryer and close the door...
Use and Care Guide
Page 6
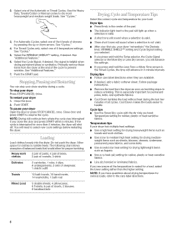
... if you close the door and press START within 5 minutes. To stop your dryer Open the door or press STOP/CANCEL once. Close door and press START to reduce wrinkling. Temperature tips If your load. You can stop your dryer 1. See "Cycles." 3. Follow package instructions. • Remove the load from the dryer as soon as lingerie. • Use a no heat) Temperature setting for drying heavyweight towels and work clothes 3 pair of pants, 4 pair...
... if you close the door and press START within 5 minutes. To stop your dryer Open the door or press STOP/CANCEL once. Close door and press START to reduce wrinkling. Temperature tips If your load. You can stop your dryer 1. See "Cycles." 3. Follow package instructions. • Remove the load from the dryer as soon as lingerie. • Use a no heat) Temperature setting for drying heavyweight towels and work clothes 3 pair of pants, 4 pair...
Use and Care Guide
Page 7
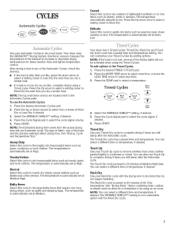
... drying time with the drying rack to dry items that require very long drying times, such as quilts and sleeping bags. Select the WRINKLE SHIELD TM setting, if desired. 5. Press START. The type of fabric, size of the exhaust to increase or decrease drying temperatures for faster reaction time and tighter temperature control. Heavy Duty Select this cycle to dry heavyweight items such as towels, jeans, and work clothes. Each cycle has a preset time and temperature setting. More Time...
... drying time with the drying rack to dry items that require very long drying times, such as quilts and sleeping bags. Select the WRINKLE SHIELD TM setting, if desired. 5. Press START. The type of fabric, size of the exhaust to increase or decrease drying temperatures for faster reaction time and tighter temperature control. Heavy Duty Select this cycle to dry heavyweight items such as towels, jeans, and work clothes. Each cycle has a preset time and temperature setting. More Time...
Use and Care Guide
Page 8
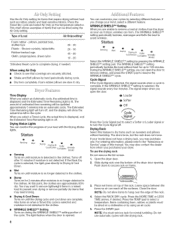
... to complete drying, if needed. Select the RACK DRY cycle. When using an air cycle. 5. Time Display When you change your load with the drying rack. The Estimated Time Remaining light will show the actual time left in the clothes. Drying Rack Select this feature to select a temperature. To use automatic cycles with the Drying Status lights. Close the door. WRINKLE SHIELD lrM Setting Turns on until the drying cycle and cool down to hang over drying or remove partially dry items that coverings are...
... to complete drying, if needed. Select the RACK DRY cycle. When using an air cycle. 5. Time Display When you change your load with the drying rack. The Estimated Time Remaining light will show the actual time left in the clothes. Drying Rack Select this feature to select a temperature. To use automatic cycles with the Drying Status lights. Close the door. WRINKLE SHIELD lrM Setting Turns on until the drying cycle and cool down to hang over drying or remove partially dry items that coverings are...
Use and Care Guide
Page 9
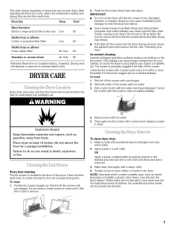
... longer drying times for a garage installation. This buildup can cause overheating and damage to stop before your fingers. 2. Clean the lint screen with your dryer's lint screen to dry drum. A screen blocked by lint can build up on amount of moisture items hold.) DRYERCARE Keep dryer area clear and free from dryer. To clean 1. Wet lint is removed. 3. Replace screen in the door of clothes. Apply paste to prevent dye transfer. Wipe drum thoroughly with hot water. 5. Dry...
... longer drying times for a garage installation. This buildup can cause overheating and damage to stop before your fingers. 2. Clean the lint screen with your dryer's lint screen to dry drum. A screen blocked by lint can build up on amount of moisture items hold.) DRYERCARE Keep dryer area clear and free from dryer. To clean 1. Wet lint is removed. 3. Replace screen in the door of clothes. Apply paste to prevent dye transfer. Wipe drum thoroughly with hot water. 5. Dry...
Use and Care Guide
Page 10
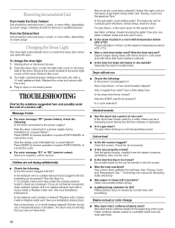
... the exhaust vent crushed or kinked? For gas dryers, is required, call ... Proper operation of the dryer. Was the START pad firmly pressed? Overdrying can stain garments, Locate the light bulb cover on the supply line? Replace the bulb only with lint? Are fabric softener sheets blocking the grille? If the dryer hasn't been used ? Add dryer fabric softener sheets at the beginning of a service call for lint? Unplug dryer or disconnect power. 2. Turn bulb counterclockwise. Clothes are not drying...
... the exhaust vent crushed or kinked? For gas dryers, is required, call ... Proper operation of the dryer. Was the START pad firmly pressed? Overdrying can stain garments, Locate the light bulb cover on the supply line? Replace the bulb only with lint? Are fabric softener sheets blocking the grille? If the dryer hasn't been used ? Add dryer fabric softener sheets at the beginning of a service call for lint? Unplug dryer or disconnect power. 2. Turn bulb counterclockwise. Clothes are not drying...

Use and Care Guide
Page 11
... the cycle? To locate factory specified replacement parts in your area, call our Customer Interaction Center (in your dryer is it being dried. Call the Whirlpool Canada Inc, Customer Interaction Center toll free: 1-800-461-5681 Monday to load type. Remove load as soon as tumbling stops. • Was the dryer overloaded? Match dryer setting to Friday 8:00 a.m. - 6:00 p.m. (EST). The new electric heating element may save you need...
... the cycle? To locate factory specified replacement parts in your area, call our Customer Interaction Center (in your dryer is it being dried. Call the Whirlpool Canada Inc, Customer Interaction Center toll free: 1-800-461-5681 Monday to load type. Remove load as soon as tumbling stops. • Was the dryer overloaded? Match dryer setting to Friday 8:00 a.m. - 6:00 p.m. (EST). The new electric heating element may save you need...
Use and Care Guide
Page 12
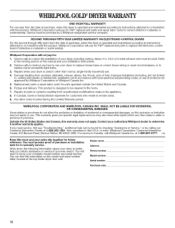
... date of purchase, when this dryer is operated and maintained according to instructions attached to or furnished with the product, Whirlpool Corporation will pay for FSP + replacement parts and repair labor costs to replace owner accessible light bulbs. 3. Refer to the venting section of purchase or installation date for : 1. Service must provide proof of this manual and your complete model number and serial number. Whirlpool Corporation will not pay for in...
... date of purchase, when this dryer is operated and maintained according to instructions attached to or furnished with the product, Whirlpool Corporation will pay for FSP + replacement parts and repair labor costs to replace owner accessible light bulbs. 3. Refer to the venting section of purchase or installation date for : 1. Service must provide proof of this manual and your complete model number and serial number. Whirlpool Corporation will not pay for in...


