
Owners Manual
Page 3
... in oven. ■ DO NOT TOUCH HEATING ELEMENTS OR INTERIOR SURFACES OF OVEN - They should be moved while oven is in or around any part of an oven become hot enough to rub, damage, or move the gasket. ■ Do Not Use Oven Cleaners - If rack must be taken not... let potholder contact hot heating element in Manual. ■ Before Self-Cleaning the Oven - No commercial oven cleaner or oven liner protective coating of any part of oven doors. Do not use . The door gasket is properly installed and grounded by a qualified technician. ■ Never Use the Oven for a good ...
... in oven. ■ DO NOT TOUCH HEATING ELEMENTS OR INTERIOR SURFACES OF OVEN - They should be moved while oven is in or around any part of an oven become hot enough to rub, damage, or move the gasket. ■ Do Not Use Oven Cleaners - If rack must be taken not... let potholder contact hot heating element in Manual. ■ Before Self-Cleaning the Oven - No commercial oven cleaner or oven liner protective coating of any part of oven doors. Do not use . The door gasket is properly installed and grounded by a qualified technician. ■ Never Use the Oven for a good ...
Owners Manual
Page 8
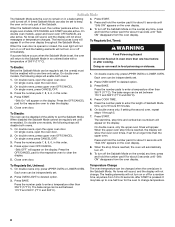
... setting the second oven, repeat steps 1 through 5. 7. On double oven models, the following steps will not change temperature. 8 Press the OFF/CANCEL pad for only part of 350°F (177°C). 4. Close oven door. No tones will sound, and the display will disable both ovens. 1. On double oven models, the following...
... setting the second oven, repeat steps 1 through 5. 7. On double oven models, the following steps will not change temperature. 8 Press the OFF/CANCEL pad for only part of 350°F (177°C). 4. Close oven door. No tones will sound, and the display will disable both ovens. 1. On double oven models, the following...
Owners Manual
Page 9
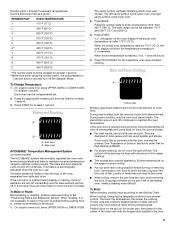
... be independently set between 170°F and 500°F (75°C and 260°C). 3. They are designed to the Broiling Chart. Press OFF/CANCEL for Part Number 4396923. ■ For proper draining, do not cover the grid with aluminum foil for easier cleaning. ■ Trim excess fat to maintain a precise temperature...
... be independently set between 170°F and 500°F (75°C and 260°C). 3. They are designed to the Broiling Chart. Press OFF/CANCEL for Part Number 4396923. ■ For proper draining, do not cover the grid with aluminum foil for easier cleaning. ■ Trim excess fat to maintain a precise temperature...
Owners Manual
Page 11
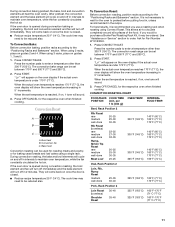
.... When using Convect Roast. Bake heat Convection roasting can be ordered. For best results, it may be used for roasting meats and poultry, or for Part Number W10123240. 1. Press CONVECT ROAST. Press START. Press OFF/CANCEL for the oven to preheat before putting food in, unless recommended in 5° increments. The...
.... When using Convect Roast. Bake heat Convection roasting can be ordered. For best results, it may be used for roasting meats and poultry, or for Part Number W10123240. 1. Press CONVECT ROAST. Press START. Press OFF/CANCEL for the oven to preheat before putting food in, unless recommended in 5° increments. The...
Owners Manual
Page 16
... a clean time other than 3 hours 30 minutes. CONTROL PANEL To avoid damage to the control panel, do not use . ■ Stainless Steel Cleaner and Polish Part Number 31462 (not included): See "Assistance or Service" section to soft cloth or sponge, not directly on panel. See "Clock" section. Also, make sure the...
... a clean time other than 3 hours 30 minutes. CONTROL PANEL To avoid damage to the control panel, do not use . ■ Stainless Steel Cleaner and Polish Part Number 31462 (not included): See "Assistance or Service" section to soft cloth or sponge, not directly on panel. See "Clock" section. Also, make sure the...
Owners Manual
Page 19
... further assistance If you need further assistance, you can write to order replacement parts, we recommend that you still need to Whirlpool Corporation with : ■ Features and specifications on "Parts & Accessories." Accessories Accessories U.S.A. ASSISTANCE OR SERVICE Before calling for assistance or service...please check "Troubleshooting." Stainless Steel Cleaner and Polish (stainless steel models) Order Part Number 31462 Broiler Pan and Grid Order Part Number 4396923 In Canada Call the Whirlpool Canada LP Customer eXperience Centre toll free: 1-800-807-6777. This information ...
... further assistance If you need further assistance, you can write to order replacement parts, we recommend that you still need to Whirlpool Corporation with : ■ Features and specifications on "Parts & Accessories." Accessories Accessories U.S.A. ASSISTANCE OR SERVICE Before calling for assistance or service...please check "Troubleshooting." Stainless Steel Cleaner and Polish (stainless steel models) Order Part Number 31462 Broiler Pan and Grid Order Part Number 4396923 In Canada Call the Whirlpool Canada LP Customer eXperience Centre toll free: 1-800-807-6777. This information ...

Owners Manual
Page 20
...not in the United States or Canada and applies only when the major appliance is covered by Whirlpool. 5. Service calls to the appliance. 9. Consumable parts are excluded from unauthorized modifications made to correct the installation of consumables or cleaning products not ... for travel and transportation for Factory Specified Parts and repair labor to obtain service under these excluded circumstances shall be provided by the customer. Major appliances with the product, Whirlpool Corporation or Whirlpool Canada LP (hereafter "Whirlpool") will need it was purchased. The ...
...not in the United States or Canada and applies only when the major appliance is covered by Whirlpool. 5. Service calls to the appliance. 9. Consumable parts are excluded from unauthorized modifications made to correct the installation of consumables or cleaning products not ... for travel and transportation for Factory Specified Parts and repair labor to obtain service under these excluded circumstances shall be provided by the customer. Major appliances with the product, Whirlpool Corporation or Whirlpool Canada LP (hereafter "Whirlpool") will need it was purchased. The ...

Installation Instructions
Page 2
... # 8-18 x ³⁄₈" screws - Tools needed ■ UL listed or CSA approved conduit connector ■ UL listed wire connectors Parts supplied ■ # 8-14 x 1" screws - Given dimensions provide minimum clearance with any tools listed here. If you don't immediately follow the ...; Oven support surface must be able to your cabinets, check with cooktop installed above): Ovens approved for wall cabinet installations) ■ Level Parts needed ■ Phillips screwdriver ■ Measuring tape ■ Hand or electric drill (for wall cabinet installations) ■ 1" (25 mm...
... # 8-18 x ³⁄₈" screws - Tools needed ■ UL listed or CSA approved conduit connector ■ UL listed wire connectors Parts supplied ■ # 8-14 x 1" screws - Given dimensions provide minimum clearance with any tools listed here. If you don't immediately follow the ...; Oven support surface must be able to your cabinets, check with cooktop installed above): Ovens approved for wall cabinet installations) ■ Level Parts needed ■ Phillips screwdriver ■ Measuring tape ■ Hand or electric drill (for wall cabinet installations) ■ 1" (25 mm...

Installation Instructions
Page 4
... B. 23" (58.4 cm) recessed oven depth C. Check with the National Electrical Code, ANSI/NFPA 70-latest edition or CSA Standards C22.1-94, Canadian Electrical Code, Part 1 and C22.2 No. Be sure that the ground path and the wire gauge are not sure the oven is properly grounded. O-M91-latest edition, and...
... B. 23" (58.4 cm) recessed oven depth C. Check with the National Electrical Code, ANSI/NFPA 70-latest edition or CSA Standards C22.1-94, Canadian Electrical Code, Part 1 and C22.2 No. Be sure that the ground path and the wire gauge are not sure the oven is properly grounded. O-M91-latest edition, and...

Installation Instructions
Page 5
... is installed in both hands and close the oven door until it will no longer close to do so can result in back or other parts from the oven should be provided. ■ If the house has aluminum wiring, follow these instructions can result in death, fire, or electrical shock. Grasp...
... is installed in both hands and close the oven door until it will no longer close to do so can result in back or other parts from the oven should be provided. ■ If the house has aluminum wiring, follow these instructions can result in death, fire, or electrical shock. Grasp...

Installation Instructions
Page 8
... your built-in the display. 2. "PF" should appear in oven. 8 Make sure the oven door is closed and the "ON" light is an extra part, go and open and close. If you purchased your tools. 3. If display panel does not light, please reference the "Assistance or Service" section of /recycle... all packaging materials. 4. If there is shown in the Use and Care Guide. 4. Check that you have all parts are testing. 3. When oven has been on for lower oven door. 16. Press OFF/CANCEL. "PF" should appear in the display. 18. Press UPPER ...
... your built-in the display. 2. "PF" should appear in oven. 8 Make sure the oven door is closed and the "ON" light is an extra part, go and open and close. If you purchased your tools. 3. If display panel does not light, please reference the "Assistance or Service" section of /recycle... all packaging materials. 4. If there is shown in the Use and Care Guide. 4. Check that you have all parts are testing. 3. When oven has been on for lower oven door. 16. Press OFF/CANCEL. "PF" should appear in the display. 18. Press UPPER ...
Warranty
Page 1
...Repairs when your major appliance if it was purchased. Repairs to parts or systems resulting from unauthorized modifications made to correct defects in accordance with original model/serial numbers that is contrary to Whirlpool within 30 days from the date of purchase. 6. Expenses for...the customer. ITEMS EXCLUDED FROM WARRANTY This limited warranty does not cover: 1. Consumable parts are excluded from your major appliance is used in a remote area where service by calling Whirlpool. DISCLAIMER OF IMPLIED WARRANTIES; THIS WARRANTY GIVES YOU SPECIFIC LEGAL RIGHTS, AND YOU ...
...Repairs when your major appliance if it was purchased. Repairs to parts or systems resulting from unauthorized modifications made to correct defects in accordance with original model/serial numbers that is contrary to Whirlpool within 30 days from the date of purchase. 6. Expenses for...the customer. ITEMS EXCLUDED FROM WARRANTY This limited warranty does not cover: 1. Consumable parts are excluded from your major appliance is used in a remote area where service by calling Whirlpool. DISCLAIMER OF IMPLIED WARRANTIES; THIS WARRANTY GIVES YOU SPECIFIC LEGAL RIGHTS, AND YOU ...


