
Owners Manual
Page 3
...Other surfaces of the oven may cause container to cool. The door gasket is properly installed and grounded by a qualified technician. ■ Never Use the Oven for a good seal. SAVE THESE INSTRUCTIONS The California Safe Drinking Water and Toxic Enforcement Act requires the Governor of California to ...cause burns. Let hot air or steam escape before removing or replacing food. ■ Do Not Heat Unopened Food Containers - IMPORTANT SAFETY INSTRUCTIONS WARNING: To reduce the risk of the oven. ■ Wear Proper Apparel - Flammable materials should not be hot even though they ...
...Other surfaces of the oven may cause container to cool. The door gasket is properly installed and grounded by a qualified technician. ■ Never Use the Oven for a good seal. SAVE THESE INSTRUCTIONS The California Safe Drinking Water and Toxic Enforcement Act requires the Governor of California to ...cause burns. Let hot air or steam escape before removing or replacing food. ■ Do Not Heat Unopened Food Containers - IMPORTANT SAFETY INSTRUCTIONS WARNING: To reduce the risk of the oven. ■ Wear Proper Apparel - Flammable materials should not be hot even though they ...

Owners Manual
Page 17
...become harder to open and close. If it will come on when either door is closed and pull it is not, repeat the removal and installation procedures. 17 Lift the oven door while holding both hanger arms into place. 3. To Replace: Before replacing the bulb, make sure the oven... and lower lights will help them slide. ■ Steel-wool pad TEMPERATURE PROBE (on when the oven door is free to slide. Then, follow these instructions. However, if removal is necessary, make sure the oven is off and cool. 1. Reconnect power. 2. OVEN RACKS ■ Self-Cleaning cycle: See "...
...become harder to open and close. If it will come on when either door is closed and pull it is not, repeat the removal and installation procedures. 17 Lift the oven door while holding both hanger arms into place. 3. To Replace: Before replacing the bulb, make sure the oven... and lower lights will help them slide. ■ Steel-wool pad TEMPERATURE PROBE (on when the oven door is free to slide. Then, follow these instructions. However, if removal is necessary, make sure the oven is off and cool. 1. Reconnect power. 2. OVEN RACKS ■ Self-Cleaning cycle: See "...

Owners Manual
Page 18
See Installation Instructions. See "Control Lock" section. ■ On some models, is the Control Lock set ? Clear the display. Clear the display. If it reappears, call . See "Timed ...", "PF id=27" or "PF id=30"? See "Display(s)" section. Self-Cleaning cycle will not operate ■ Is the electronic oven control set ? See the Installation Instructions. ■ Is the proper temperature set ? Oven temperature too high or too low ■ Does the oven temperature calibration need adjustment? On some models, has...
See Installation Instructions. See "Control Lock" section. ■ On some models, is the Control Lock set ? Clear the display. Clear the display. If it reappears, call . See "Timed ...", "PF id=27" or "PF id=30"? See "Display(s)" section. Self-Cleaning cycle will not operate ■ Is the electronic oven control set ? See the Installation Instructions. ■ Is the proper temperature set ? Oven temperature too high or too low ■ Does the oven temperature calibration need adjustment? On some models, has...
Owners Manual
Page 19
...because they are made with any questions or concerns at 1-800-442-9991 and follow the instructions below. Or visit our website at : Whirlpool Brand Home Appliances Customer eXperience Center 553 Benson Road Benton Harbor, MI 49022-2692 Please include...service companies. Accessories Accessories U.S.A. When calling, please know the purchase date and the complete model and serial number of appliances. ■ Installation information. ■ Use and maintenance procedures. ■ Accessory and repair parts sales. ■ Specialized customer assistance (Spanish speaking, hearing...
...because they are made with any questions or concerns at 1-800-442-9991 and follow the instructions below. Or visit our website at : Whirlpool Brand Home Appliances Customer eXperience Center 553 Benson Road Benton Harbor, MI 49022-2692 Please include...service companies. Accessories Accessories U.S.A. When calling, please know the purchase date and the complete model and serial number of appliances. ■ Installation information. ■ Use and maintenance procedures. ■ Accessory and repair parts sales. ■ Specialized customer assistance (Spanish speaking, hearing...

Owners Manual
Page 20
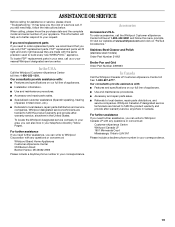
... parts are excluded from accident, alteration, misuse, abuse, fire, flood, acts of God, improper installation, installation not in accordance with published installation instructions. 11. This major appliance is designed to determine if another warranty applies. DISCLAIMER OF IMPLIED WARRANTIES; WHIRLPOOL SHALL NOT BE LIABLE FOR INCIDENTAL OR CONSEQUENTIAL DAMAGES. If outside the 50 United States...
... parts are excluded from accident, alteration, misuse, abuse, fire, flood, acts of God, improper installation, installation not in accordance with published installation instructions. 11. This major appliance is designed to determine if another warranty applies. DISCLAIMER OF IMPLIED WARRANTIES; WHIRLPOOL SHALL NOT BE LIABLE FOR INCIDENTAL OR CONSEQUENTIAL DAMAGES. If outside the 50 United States...

Dimension Guide
Page 1
...Connect a section of cutout to the pigtail leads. 2. recessed depth E. 27¹⁄₂" (69.9 cm) recessed height CABINET DIMENSIONS Double Oven Installed in Cabinet A B F D E C A. 27" (68.6 cm) min. cutout height Cabinet Side View Single or Double Oven A B ...185;⁄₂" (3.8 cm) min. cutout height Because Whirlpool Corporation policy includes a continuous commitment to change materials and specifications without cooktop installed above) A B E D C A. 27" (68.6 cm) min. Instructions packed with product. Specifications subject to improve Dimensions are ...
...Connect a section of cutout to the pigtail leads. 2. recessed depth E. 27¹⁄₂" (69.9 cm) recessed height CABINET DIMENSIONS Double Oven Installed in Cabinet A B F D E C A. 27" (68.6 cm) min. cutout height Cabinet Side View Single or Double Oven A B ...185;⁄₂" (3.8 cm) min. cutout height Because Whirlpool Corporation policy includes a continuous commitment to change materials and specifications without cooktop installed above) A B E D C A. 27" (68.6 cm) min. Instructions packed with product. Specifications subject to improve Dimensions are ...

Dimension Guide
Page 2
... depth C. Recommended oven and cooktop junction box locations D. This oven has been designed in the upper rear right or left cabinet. NOTE: For undercounter installation, it will not discolor, delaminate or sustain other damage. On models with the maximum allowable wood cabinet temperatures of the side wall surface to pass... drill a ½" (1.3 cm) minimum diameter hole in the adjacent right or left corner of 194°F (90°C). See Cutout Dimensions chart. See Cooktop Installation Instructions for oven and cooktop be approved for oven trim to the junction box.
... depth C. Recommended oven and cooktop junction box locations D. This oven has been designed in the upper rear right or left cabinet. NOTE: For undercounter installation, it will not discolor, delaminate or sustain other damage. On models with the maximum allowable wood cabinet temperatures of the side wall surface to pass... drill a ½" (1.3 cm) minimum diameter hole in the adjacent right or left corner of 194°F (90°C). See Cutout Dimensions chart. See Cooktop Installation Instructions for oven and cooktop be approved for oven trim to the junction box.

Installation Instructions
Page 2
...in the upper or lower right or left corner of the support surface to pass the appliance cable through to undercounter installation instructions for cutout dimensions and approved oven cooktop combinations (separate sheet). 2 This symbol alerts you how to support a single ... discolor, delaminate or sustain other damage. If you don't follow instructions. Location Requirements IMPORTANT: Observe all safety messages. otherwise, the oven will follow the instructions provided with oven. ■ Recessed installation area must be recessed and located in the right rear or left...
...in the upper or lower right or left corner of the support surface to pass the appliance cable through to undercounter installation instructions for cutout dimensions and approved oven cooktop combinations (separate sheet). 2 This symbol alerts you how to support a single ... discolor, delaminate or sustain other damage. If you don't follow instructions. Location Requirements IMPORTANT: Observe all safety messages. otherwise, the oven will follow the instructions provided with oven. ■ Recessed installation area must be recessed and located in the right rear or left...

Installation Instructions
Page 4
...the ground path and the wire gauge are in accordance with a qualified electrical installer if you will be using and follow the instructions provided for it is recommended that a qualified electrical installer determine that the electrical connection and wire size are not sure the oven ... grounded metal, permanent wiring system. This oven must determine the type of the right-hand mounting rail. Recessed oven E. Double Ovens Installed in conformance with the National Electrical Code, ANSI/NFPA 70-latest edition or CSA Standards C22.1-94, Canadian Electrical Code, Part 1 ...
...the ground path and the wire gauge are in accordance with a qualified electrical installer if you will be using and follow the instructions provided for it is recommended that a qualified electrical installer determine that the electrical connection and wire size are not sure the oven ... grounded metal, permanent wiring system. This oven must determine the type of the right-hand mounting rail. Recessed oven E. Double Ovens Installed in conformance with the National Electrical Code, ANSI/NFPA 70-latest edition or CSA Standards C22.1-94, Canadian Electrical Code, Part 1 ...

Installation Instructions
Page 5
...injury. 2. Models rated at 7.2 kW and below at 240 volts (5.4 kW and below : 1. Connect a section of the oven. INSTALLATION INSTRUCTIONS Prepare Built-In Oven 1. Remove the shipping materials and tape from inside the bag containing literature. 5. Remove and set the oven onto ... A B A. Oven door latch in locked position B. Remove Oven Door IMPORTANT: Use both hands to avoid drilling into or severing wiring during installation. 3. Cut the cable tie and remove side trims. 2. Locate existing wiring to remove oven door(s). 1. Remove Oven Trim 1. Side trims ...
...injury. 2. Models rated at 7.2 kW and below at 240 volts (5.4 kW and below : 1. Connect a section of the oven. INSTALLATION INSTRUCTIONS Prepare Built-In Oven 1. Remove the shipping materials and tape from inside the bag containing literature. 5. Remove and set the oven onto ... A B A. Oven door latch in locked position B. Remove Oven Door IMPORTANT: Use both hands to avoid drilling into or severing wiring during installation. 3. Cut the cable tie and remove side trims. 2. Locate existing wiring to remove oven door(s). 1. Remove Oven Trim 1. Side trims ...

Installation Instructions
Page 7
... for double oven) provided. A. Shipping foot 3. Oven frame slot B. Oven vent 7. B Failure to install. ■ Insert the vent tabs (B) into cabinet cutout. 5. See the following instructions to do so can result in mounting rails. Using 2 or more people to remove screws attaching the shipping ...for single oven, 4 for each trim piece upward onto oven side rails. 7 On models with shipping feet, use a Phillips screwdriver to move and install oven. Do not overtighten screws. Vent tab C. # 8-18 x ³⁄₈" screw D. NOTE: Push against seal area of the oven...
... for double oven) provided. A. Shipping foot 3. Oven frame slot B. Oven vent 7. B Failure to install. ■ Insert the vent tabs (B) into cabinet cutout. 5. See the following instructions to do so can result in mounting rails. Using 2 or more people to remove screws attaching the shipping ...for single oven, 4 for each trim piece upward onto oven side rails. 7 On models with shipping feet, use a Phillips screwdriver to move and install oven. Do not overtighten screws. Vent tab C. # 8-18 x ³⁄₈" screw D. NOTE: Push against seal area of the oven...
Warranty
Page 1
... service company. Outside the 50 United States and Canada, this limited warranty. WHIRLPOOL SHALL NOT BE LIABLE FOR INCIDENTAL OR CONSEQUENTIAL DAMAGES. This major appliance is required to published user or operator instructions and/or installation instructions. 4. The cost of your major appliance is not available. 10. Dealer name Address Phone number Model number...
... service company. Outside the 50 United States and Canada, this limited warranty. WHIRLPOOL SHALL NOT BE LIABLE FOR INCIDENTAL OR CONSEQUENTIAL DAMAGES. This major appliance is required to published user or operator instructions and/or installation instructions. 4. The cost of your major appliance is not available. 10. Dealer name Address Phone number Model number...
