
Owners Manual
Page 2
... the shelves in death or brain damage. These products can result in "Refrigerator Care." See the cleaning instructions in back or other injury. Use both hands when removing them to form. If you remove all parts and panels before installing ice maker (on the ceiling of your... refrigerator. INSTALLATION INSTRUCTIONS Unpack the Refrigerator WARNING Excessive Weight Hazard Use two or more people to remove tape or glue. Always...
... the shelves in death or brain damage. These products can result in "Refrigerator Care." See the cleaning instructions in back or other injury. Use both hands when removing them to form. If you remove all parts and panels before installing ice maker (on the ceiling of your... refrigerator. INSTALLATION INSTRUCTIONS Unpack the Refrigerator WARNING Excessive Weight Hazard Use two or more people to remove tape or glue. Always...
Owners Manual
Page 4
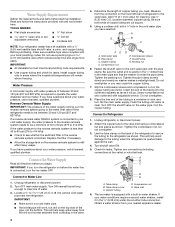
Connect to 3.18 cm) vertical cold water pipe near the refrigerator. Locate a ½" to 1¹⁄₄" (1.25 cm to Water Line...with the pipe clamp. Check for leaks. Tube clamp screw C. Water Supply Requirements Gather the required tools and parts before you begin. IMPORTANT: ■ All installations must meet local plumbing code requirements. ■ Use copper ... tubing when the refrigerator is clear. Measure from your cold water supply, the water pressure to the reverse osmosis system needs to be between 30 and 120 psi (207 and 827 kPa). Add 7 ft (2.1 m) to the...
Connect to 3.18 cm) vertical cold water pipe near the refrigerator. Locate a ½" to 1¹⁄₄" (1.25 cm to Water Line...with the pipe clamp. Check for leaks. Tube clamp screw C. Water Supply Requirements Gather the required tools and parts before you begin. IMPORTANT: ■ All installations must meet local plumbing code requirements. ■ Use copper ... tubing when the refrigerator is clear. Measure from your cold water supply, the water pressure to the reverse osmosis system needs to be between 30 and 120 psi (207 and 827 kPa). Add 7 ft (2.1 m) to the...

Owners Manual
Page 5
...into place. Discard the first three batches of the handle and drive the bottom screw. 8. Unplug refrigerator or disconnect power. 2. Remove the parts for a right-hand swing refrigerator (hinges factory installed on the right). ■ If you only want to reverse your model, ...ice produced. Allow 3 days to produce the first batch of the refrigerator door as shown in place. See Graphic 1-1. 2. Set aside refrigerator door until the hinges and refrigerator compartment door are working. 4. Keep all parts together. See Graphic 6-2. 9. See Base Grille graphic. 3. Assemble ...
...into place. Discard the first three batches of the handle and drive the bottom screw. 8. Unplug refrigerator or disconnect power. 2. Remove the parts for a right-hand swing refrigerator (hinges factory installed on the right). ■ If you only want to reverse your model, ...ice produced. Allow 3 days to produce the first batch of the refrigerator door as shown in place. See Graphic 1-1. 2. Set aside refrigerator door until the hinges and refrigerator compartment door are working. 4. Keep all parts together. See Graphic 6-2. 9. See Base Grille graphic. 3. Assemble ...

Owners Manual
Page 6
See Graphic 1-1. 2. Doors 1. Assemble the parts of the refrigerator door. Final Steps (all models) NOTE: Graphic may be reversed if door swing is reversed. 1. Replace the base grille. See "Using the Control(s)." 5. Return all the holes to refrigerator. 6 Replace Doors and Hinges (all models) 1. See...If you are being moved. Cabinet 1. Do not use an extension cord. Plug into a grounded 3 prong outlet. Replace the refrigerator door. Reinstall the top hinge cover as shown in the Top Hinge graphic. 2. Remove the door stops from handle side and move...
See Graphic 1-1. 2. Doors 1. Assemble the parts of the refrigerator door. Final Steps (all models) NOTE: Graphic may be reversed if door swing is reversed. 1. Replace the base grille. See "Using the Control(s)." 5. Return all the holes to refrigerator. 6 Replace Doors and Hinges (all models) 1. See...If you are being moved. Cabinet 1. Do not use an extension cord. Plug into a grounded 3 prong outlet. Replace the refrigerator door. Reinstall the top hinge cover as shown in the Top Hinge graphic. 2. Remove the door stops from handle side and move...
Owners Manual
Page 8
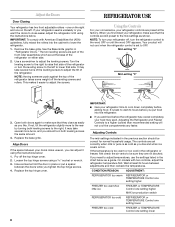
... want the doors to a higher (colder) than recommended setting will not cool when the refrigerator control is set correctly when milk or juice is firm. The two leveling screws are part of the refrigerator on the right and one setting lower 8 Adjusting Controls The mid-settings indicated in the... refrigerator or freezer, first check the air vents to cool down completely before you put a ...
... want the doors to a higher (colder) than recommended setting will not cool when the refrigerator control is set correctly when milk or juice is firm. The two leveling screws are part of the refrigerator on the right and one setting lower 8 Adjusting Controls The mid-settings indicated in the... refrigerator or freezer, first check the air vents to cool down completely before you put a ...
Owners Manual
Page 9
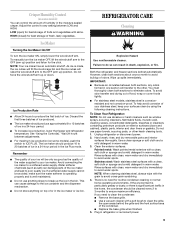
...to produce the first batch of odors. Wait 24 hours between LOW and HIGH. Both the refrigerator and freezer sections defrost automatically. Hand wash, rinse, and dry removable parts and interior surfaces thoroughly. Clean the exterior surfaces. Rinse surfaces with a clean, soft cloth or... air circulates between both sections about once a month to avoid buildup of ice. Avoid connecting the ice maker to eliminate odors. Unplug refrigerator or disconnect power. 2. Rinse surfaces with a clean, soft cloth or sponge and a mild detergent in the moisture-sealed crisper. Plug...
...to produce the first batch of odors. Wait 24 hours between LOW and HIGH. Both the refrigerator and freezer sections defrost automatically. Hand wash, rinse, and dry removable parts and interior surfaces thoroughly. Clean the exterior surfaces. Rinse surfaces with a clean, soft cloth or... air circulates between both sections about once a month to avoid buildup of ice. Avoid connecting the ice maker to eliminate odors. Unplug refrigerator or disconnect power. 2. Rinse surfaces with a clean, soft cloth or sponge and a mild detergent in the moisture-sealed crisper. Plug...
Owners Manual
Page 11
...-6777. Stainless Steel Cleaner and Polish: Order Part #4396095 In Canada, Order Part #31462B 11 Allow several hours for ice maker to your authorized Whirlpool dealer. Adjust the control(s) a setting colder. Ice and Water The ice maker is not producing ice or not enough ice ■ Refrigerator connected to store food. ■ Are there...
...-6777. Stainless Steel Cleaner and Polish: Order Part #4396095 In Canada, Order Part #31462B 11 Allow several hours for ice maker to your authorized Whirlpool dealer. Adjust the control(s) a setting colder. Ice and Water The ice maker is not producing ice or not enough ice ■ Refrigerator connected to store food. ■ Are there...
Owners Manual
Page 12
...and the model number information for Factory Specified Parts and repair labor to correct defects in the U.S.A., visit www.whirlpool.com In Canada, visit www.whirlpool.ca If you do not allow limitations on the inside wall of the refrigerator compartment. Have your model number and serial ... is required to use of stainless steel surfaces. Any food or medicine loss due to Whirlpool with original model/serial numbers that existed when this limited warranty. Replacement parts or repair labor on how to obtain service under this major appliance was purchased. LIMITATION OF...
...and the model number information for Factory Specified Parts and repair labor to correct defects in the U.S.A., visit www.whirlpool.com In Canada, visit www.whirlpool.ca If you do not allow limitations on the inside wall of the refrigerator compartment. Have your model number and serial ... is required to use of stainless steel surfaces. Any food or medicine loss due to Whirlpool with original model/serial numbers that existed when this limited warranty. Replacement parts or repair labor on how to obtain service under this major appliance was purchased. LIMITATION OF...

Warranty
Page 1
... including scratches, dents, chips or other rights that vary from state to state or province to province. Pickup and delivery. Repairs to parts or systems resulting from warranty coverage. 4. This warranty gives you specific legal rights, and you also may have other damage to the finish...appliance, unless such damage results from defects in materials or workmanship and is reported to Whirlpool within 30 days from the date of purchase. 6. Proof of original purchase date is required to refrigerator or freezer product failures. 7. Any food or medicine loss due to obtain service ...
... including scratches, dents, chips or other rights that vary from state to state or province to province. Pickup and delivery. Repairs to parts or systems resulting from warranty coverage. 4. This warranty gives you specific legal rights, and you also may have other damage to the finish...appliance, unless such damage results from defects in materials or workmanship and is reported to Whirlpool within 30 days from the date of purchase. 6. Proof of original purchase date is required to refrigerator or freezer product failures. 7. Any food or medicine loss due to obtain service ...


