Use and Care Guide
Page 2
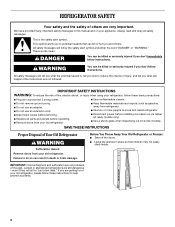
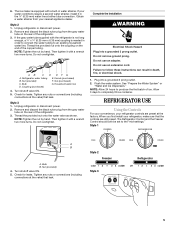
...materials and vapors, such as gasoline, away from your old refrigerator. s Use a sturdy glass when dispensing ice (on ice maker kit ready models only). Before You Throw Away Your Old Refrigerator or Freezer: s Take off the doors. s Remove doors from refrigerator. s Use two or more people to help prevent accidents. ... mean: DANGER You can kill or hurt you don't immediately follow these instructions to move and install refrigerator. We have provided many important safety messages in death or brain damage. s Disconnect power before installing ice maker (on some models).
...materials and vapors, such as gasoline, away from your old refrigerator. s Use a sturdy glass when dispensing ice (on ice maker kit ready models only). Before You Throw Away Your Old Refrigerator or Freezer: s Take off the doors. s Remove doors from refrigerator. s Use two or more people to help prevent accidents. ... mean: DANGER You can kill or hurt you don't immediately follow these instructions to move and install refrigerator. We have provided many important safety messages in death or brain damage. s Disconnect power before installing ice maker (on some models).
Use and Care Guide
Page 3
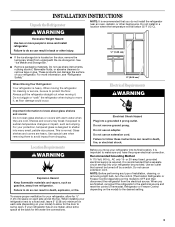
... top. Glass shelves and covers are cold. To ensure proper ventilation for the water line connections. If your refrigerator has an ice maker, allow for ¹⁄₂" (1.25 cm) space on the model) to move your refrigerator be turned off by a switch. Do not use an extension cord. Do not use sharp instruments, rubbing...
... top. Glass shelves and covers are cold. To ensure proper ventilation for the water line connections. If your refrigerator has an ice maker, allow for ¹⁄₂" (1.25 cm) space on the model) to move your refrigerator be turned off by a switch. Do not use an extension cord. Do not use sharp instruments, rubbing...
Use and Care Guide
Page 4
...qualified plumber. Remove the water filter. IMPORTANT: If you have selected. Turn OFF main water supply. IMPORTANT: s Make sure it is clear. Add 7 ft (2.1 m) to be a minimum of the tubing in the reverse osmosis system is less than 40 to 60 psi (276 to 414 kPa): s Check to... pipe near the refrigerator. Tube clamp B. s Horizontal pipe will remain above freezing. If a reverse osmosis water filtration system is required to 414 kPa). See "Water Filtration System." Place the free end of 40 to 60 psi (276 to operate the water dispenser and ice maker. Connect to the...
...qualified plumber. Remove the water filter. IMPORTANT: If you have selected. Turn OFF main water supply. IMPORTANT: s Make sure it is clear. Add 7 ft (2.1 m) to be a minimum of the tubing in the reverse osmosis system is less than 40 to 60 psi (276 to 414 kPa): s Check to... pipe near the refrigerator. Tube clamp B. s Horizontal pipe will remain above freezing. If a reverse osmosis water filtration system is required to 414 kPa). See "Water Filtration System." Place the free end of 40 to 60 psi (276 to operate the water dispenser and ice maker. Connect to the...
Use and Care Guide
Page 5
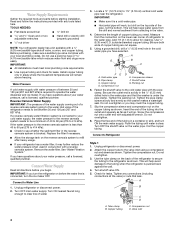
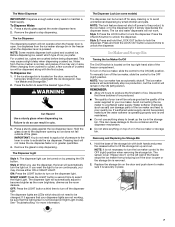
... gray water tube on the rear of the copper tubing. Thread the provided nut onto the coupling on the rear of ice. Refrigerator water tubing B. Thread the provided nut onto the water valve as shown. Do not use an extension cord. Flush the...Coupling (purchased) 4. See "Prepare the Water System" or "Water and Ice Dispensers." Check for leaks. NOTE: Tighten the nut by hand. AB C D EFG A. Bulb B. Style 2 Freezer Refrigerator cold 1 2 Style 3 3 4 colder off 1 2 3 4 colder 5 The ice maker is needed in the ¹⁄₄" (6.35 mm) water line ...
... gray water tube on the rear of the copper tubing. Thread the provided nut onto the coupling on the rear of ice. Refrigerator water tubing B. Thread the provided nut onto the water valve as shown. Do not use an extension cord. Flush the...Coupling (purchased) 4. See "Prepare the Water System" or "Water and Ice Dispensers." Check for leaks. NOTE: Tighten the nut by hand. AB C D EFG A. Bulb B. Style 2 Freezer Refrigerator cold 1 2 Style 3 3 4 colder off 1 2 3 4 colder 5 The ice maker is needed in the ¹⁄₄" (6.35 mm) water line ...
Use and Care Guide
Page 7
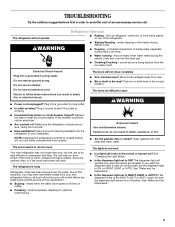
...for more information. It simply deactivates the dispenser levers. Press and hold the LOCK OUT button to select the Night Light. NOTE: Your ice maker has an automatic shutoff. s Do not use the dispenser, the lever will not operate when the freezer door is not necessary to the... the glass to unlock the dispenser. Style 2: When you prefer. If you may cause a slight delay when dispensing crushed ice. Ice Maker and Storage Bin Turning the Ice Maker On/Off The On/Off switch is well maintained. Discard the first three batches of the freezer compartment. Failure to do ...
...for more information. It simply deactivates the dispenser levers. Press and hold the LOCK OUT button to select the Night Light. NOTE: Your ice maker has an automatic shutoff. s Do not use the dispenser, the lever will not operate when the freezer door is not necessary to the... the glass to unlock the dispenser. Style 2: When you prefer. If you may cause a slight delay when dispensing crushed ice. Ice Maker and Storage Bin Turning the Ice Maker On/Off The On/Off switch is well maintained. Discard the first three batches of the freezer compartment. Failure to do ...
Use and Care Guide
Page 8
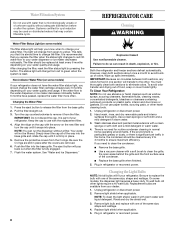
... light, you replace the filter when the status light changes to red OR water flow to your water dispenser or ice maker decreases noticeably. The filter should be replaced at least every 6 months depending on your water quality and usage. However...refrigerator or disconnect power. 2. REFRIGERATOR CARE Cleaning WARNING Water Filter Status Light (on the new filter and turn the cap until it is firmly in normal home operating environments. Replacement bulbs are removed. 6. The status light will change from the filter. If the water flow to the water dispenser or ice maker...
... light, you replace the filter when the status light changes to red OR water flow to your water dispenser or ice maker decreases noticeably. The filter should be replaced at least every 6 months depending on your water quality and usage. However...refrigerator or disconnect power. 2. REFRIGERATOR CARE Cleaning WARNING Water Filter Status Light (on the new filter and turn the cap until it is firmly in normal home operating environments. Replacement bulbs are removed. 6. The status light will change from the filter. If the water flow to the water dispenser or ice maker...
Use and Care Guide
Page 9
... cycle s Popping - Do not remove ground prong. Allow 24 hours following installation for the refrigerator to fill the ice maker s Pulsating - s Buzzing - fans/compressor adjusting to run too much Your new refrigerator may hear intermittent noises from your new refrigerator that you did not notice from items placed on the heater during the defrost cycle...
... cycle s Popping - Do not remove ground prong. Allow 24 hours following installation for the refrigerator to fill the ice maker s Pulsating - s Buzzing - fans/compressor adjusting to run too much Your new refrigerator may hear intermittent noises from your new refrigerator that you did not notice from items placed on the heater during the defrost cycle...
Use and Care Guide
Page 10
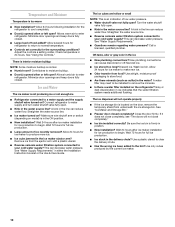
... installed on ? Use a plastic utensil to normal temperature. s Large amount of food added? Allow several hours for ice maker to enter refrigerator. Ice and Water The ice maker is too warm s New installation? s Water shutoff valve not fully open ? s Reverse osmosis water filtration system connected... Contributes to moisture buildup. Remove ice from food? Wait 24 hours after ice maker installation for full ice production. s Door(s) opened often or left open? Temperature and Moisture Temperature is not producing ice or not enough ice s Refrigerator connected to a water supply and...
... installed on ? Use a plastic utensil to normal temperature. s Large amount of food added? Allow several hours for ice maker to enter refrigerator. Ice and Water The ice maker is too warm s New installation? s Water shutoff valve not fully open ? s Reverse osmosis water filtration system connected... Contributes to moisture buildup. Remove ice from food? Wait 24 hours after ice maker installation for full ice production. s Door(s) opened often or left open? Temperature and Moisture Temperature is not producing ice or not enough ice s Refrigerator connected to a water supply and...
Use and Care Guide
Page 12
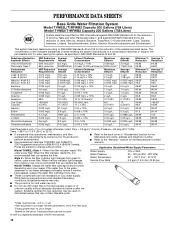
... to change without adequate disinfection before 6 months have passed, replace the water filter cartridge more often. s These contaminants are subject to the water dispenser or ice maker decreases noticeably before or after the system. s Use replacement cartridge T1RFWB2, part #4396710. 2007 suggested retail price of the indicated substances in water entering the....67 99.94 93.33 80.8 99.83 99.99 96.4 99.52 91.5 99.96 98.93 99.98 96.47 Average % Reduction 97.36 99.67 Average % Reduction 99.33 99.31 96.53 96.5 96.67 99.94 93.33 80.8 99.83 >99.99 97.89 99...
... to change without adequate disinfection before 6 months have passed, replace the water filter cartridge more often. s These contaminants are subject to the water dispenser or ice maker decreases noticeably before or after the system. s Use replacement cartridge T1RFWB2, part #4396710. 2007 suggested retail price of the indicated substances in water entering the....67 99.94 93.33 80.8 99.83 99.99 96.4 99.52 91.5 99.96 98.93 99.98 96.47 Average % Reduction 97.36 99.67 Average % Reduction 99.33 99.31 96.53 96.5 96.67 99.94 93.33 80.8 99.83 >99.99 97.89 99...


