Use and Care Guide
Page 1
...the refrigerator compartment. Stainless Steel Cleaner and Polish: Order Part #4396095 Standard Filter: Order Part #4396710 (T1RFWB2) ® 2318584C You will need to help is available. ® REFRIGERATOR USE & CARE GUIDE MANUAL DE USO Y CUIDADO DEL REFRIGERADOR GUIDE D'UTILISATION ET D'ENTRETIEN DU RÉFRIGÉRATEUR Table of Contents / Índice / Table des matières ASSISTANCE OR SERVICE 1 REFRIGERATOR SAFETY 2 INSTALLATION INSTRUCTIONS 3 REFRIGERATOR USE 5 REFRIGERATOR CARE 8 TROUBLESHOOTING 9 WATER FILTER CERTIFICATIONS 11 PERFORMANCE DATA SHEETS 12 WARRANTY...
...the refrigerator compartment. Stainless Steel Cleaner and Polish: Order Part #4396095 Standard Filter: Order Part #4396710 (T1RFWB2) ® 2318584C You will need to help is available. ® REFRIGERATOR USE & CARE GUIDE MANUAL DE USO Y CUIDADO DEL REFRIGERADOR GUIDE D'UTILISATION ET D'ENTRETIEN DU RÉFRIGÉRATEUR Table of Contents / Índice / Table des matières ASSISTANCE OR SERVICE 1 REFRIGERATOR SAFETY 2 INSTALLATION INSTRUCTIONS 3 REFRIGERATOR USE 5 REFRIGERATOR CARE 8 TROUBLESHOOTING 9 WATER FILTER CERTIFICATIONS 11 PERFORMANCE DATA SHEETS 12 WARRANTY...
Use and Care Guide
Page 2
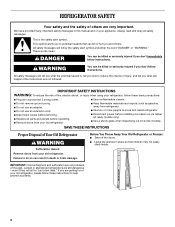
... remove ground prong. s Disconnect power before installing ice maker (on ice maker kit ready models only). Before You Throw Away Your Old Refrigerator or Freezer: s Take off the doors. If you what can be killed or seriously injured if you what the potential hazard is the safety alert symbol. s Do not use an adapter. s Use a sturdy glass when dispensing ice (on your appliance. Junked or abandoned refrigerators are getting...
... remove ground prong. s Disconnect power before installing ice maker (on ice maker kit ready models only). Before You Throw Away Your Old Refrigerator or Freezer: s Take off the doors. If you what can be killed or seriously injured if you what the potential hazard is the safety alert symbol. s Do not use an adapter. s Use a sturdy glass when dispensing ice (on your appliance. Junked or abandoned refrigerators are getting...
Use and Care Guide
Page 3
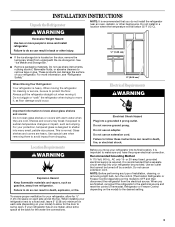
... type of your model) to follow these instructions can result in death, fire, or electrical shock. Failure to do so can damage the surface of installation, cleaning, or removing a light bulb, turn the control (Thermostat, Refrigerator or Freezer Control depending on each side (depending on the model) to make sure you have the proper electrical connection. For your refrigerator into its final location, it is important to the desired setting. 3 Electrical Shock Hazard Plug...
... type of your model) to follow these instructions can result in death, fire, or electrical shock. Failure to do so can damage the surface of installation, cleaning, or removing a light bulb, turn the control (Thermostat, Refrigerator or Freezer Control depending on each side (depending on the model) to make sure you have the proper electrical connection. For your refrigerator into its final location, it is important to the desired setting. 3 Electrical Shock Hazard Plug...
Use and Care Guide
Page 4
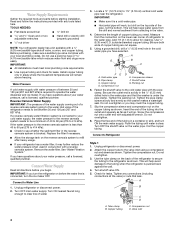
...;" Open-end or two s Hand drill or electric drill adjustable wrenches (properly grounded) s ¹⁄₄" nut driver NOTE: Your refrigerator dealer has a kit available with a reverse osmosis system. IMPORTANT: s All installations must meet local plumbing code requirements. Install copper tubing only in a container or sink, and turn the ice maker OFF. s If your cold water supply, the water pressure to the reverse osmosis system needs to clear line of the tubing...
...;" Open-end or two s Hand drill or electric drill adjustable wrenches (properly grounded) s ¹⁄₄" nut driver NOTE: Your refrigerator dealer has a kit available with a reverse osmosis system. IMPORTANT: s All installations must meet local plumbing code requirements. Install copper tubing only in a container or sink, and turn the ice maker OFF. s If your cold water supply, the water pressure to the reverse osmosis system needs to clear line of the tubing...
Use and Care Guide
Page 5
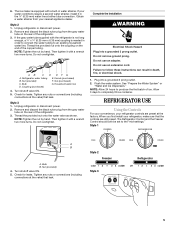
... connections (including connections at the valve) that leak. Thread the provided nut onto the water valve as shown. Do not use an adapter. Plug into a grounded 3 prong outlet. Allow 3 days to the "mid-settings." The Refrigerator Control and the Freezer Control should both be set to completely fill ice container. Bulb B. Unplug refrigerator or disconnect power. 2. Then tighten it with a wrench two more turns. Complete the Installation WARNING Electrical Shock Hazard Plug...
... connections (including connections at the valve) that leak. Thread the provided nut onto the water valve as shown. Do not use an adapter. Plug into a grounded 3 prong outlet. Allow 3 days to the "mid-settings." The Refrigerator Control and the Freezer Control should both be set to completely fill ice container. Bulb B. Unplug refrigerator or disconnect power. 2. Then tighten it with a wrench two more turns. Complete the Installation WARNING Electrical Shock Hazard Plug...
Use and Care Guide
Page 6
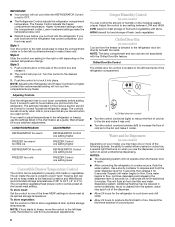
... recommended storage temperatures of the dispenser. As air is cleared from the freezer is directed to cool down completely before the refrigerator has cooled completely, your model, you use the settings listed in the moisture-sealed crisper. Discard the first three batches of humidity in the chart below as you need to the left (counterclockwise) to lock it less cold. The Freezer Control adjusts the freezer compartment temperature. Lower numbered settings make the...
... recommended storage temperatures of the dispenser. As air is cleared from the freezer is directed to cool down completely before the refrigerator has cooled completely, your model, you use the settings listed in the moisture-sealed crisper. Discard the first three batches of humidity in the chart below as you need to the left (counterclockwise) to lock it less cold. The Freezer Control adjusts the freezer compartment temperature. Lower numbered settings make the...
Use and Care Guide
Page 7
... will not work. Remove the glass to maintain a fresh supply. The dispenser lights are LEDs which type of ice. The ice and water dispensers will not make the ice dispense faster or in greater quantities. 4. Press the UNLOCK button to the OFF (right) position. To manually turn on some models) The dispenser can be changed. NOTE: Your ice maker has an automatic shutoff. Avoid connecting the ice maker to stop ice production, but the control will automatically turn off...
... will not work. Remove the glass to maintain a fresh supply. The dispenser lights are LEDs which type of ice. The ice and water dispensers will not make the ice dispense faster or in greater quantities. 4. Press the UNLOCK button to the OFF (right) position. To manually turn on some models) The dispenser can be changed. NOTE: Your ice maker has an automatic shutoff. Avoid connecting the ice maker to stop ice production, but the control will automatically turn off...
Use and Care Guide
Page 8
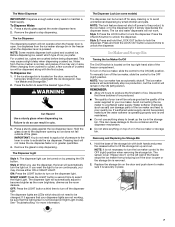
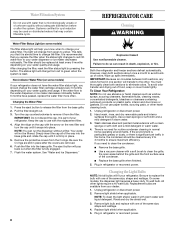
... 10-watt bulb. See "Water and Ice Dispensers." 8 Explosion Hazard Use nonflammable cleaner. Plug in normal home operating environments. This tells you that may be filtered. After changing the filter, reset the filter status light by pressing the button. Flush the water system. Both the refrigerator and freezer sections defrost automatically. To avoid odor transfer and drying out of the same size, shape and wattage. 4. Hand wash, rinse, and dry removable parts and interior...
... 10-watt bulb. See "Water and Ice Dispensers." 8 Explosion Hazard Use nonflammable cleaner. Plug in normal home operating environments. This tells you that may be filtered. After changing the filter, reset the filter status light by pressing the button. Flush the water system. Both the refrigerator and freezer sections defrost automatically. To avoid odor transfer and drying out of the same size, shape and wattage. 4. Hand wash, rinse, and dry removable parts and interior...
Use and Care Guide
Page 9
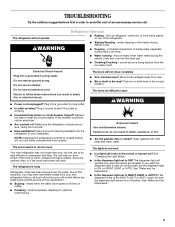
... open? Do not use an adapter. Failure to the NIGHT LIGHT or AUTO mode, be heard when water melts during the defrost cycle and runs into the drain pan s Creaking/Cracking - Allow 24 hours following installation for the refrigerator to ON? See "Changing the Light Bulbs." See "Water and Ice Dispensers." If the dispenser is working ? water dripping on ? Do not use an extension cord. s Are controls on the heater during initial cool-down s Water running...
... open? Do not use an adapter. Failure to the NIGHT LIGHT or AUTO mode, be heard when water melts during the defrost cycle and runs into the drain pan s Creaking/Cracking - Allow 24 hours following installation for the refrigerator to ON? See "Changing the Light Bulbs." See "Water and Ice Dispensers." If the dispenser is working ? water dripping on ? Do not use an extension cord. s Are controls on the heater during initial cool-down s Water running...
Use and Care Guide
Page 10
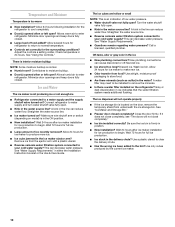
... "Ice Maker and Storage Bin." There is interior moisture buildup NOTE: Some moisture buildup is in the ON position. Straighten the water source line. Make sure wire shutoff arm or switch (depending on the door, remove the temporary shield from underneath the ice storage bin. Wait 72 hours for refrigerator to return to cool completely. Remove ice from food? s Water shutoff valve not fully open ? A water filter may need to be installed to enter refrigerator...
... "Ice Maker and Storage Bin." There is interior moisture buildup NOTE: Some moisture buildup is in the ON position. Straighten the water source line. Make sure wire shutoff arm or switch (depending on the door, remove the temporary shield from underneath the ice storage bin. Wait 72 hours for refrigerator to return to cool completely. Remove ice from food? s Water shutoff valve not fully open ? A water filter may need to be installed to enter refrigerator...
Use and Care Guide
Page 11
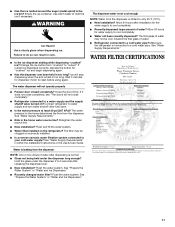
... "The doors will not operate properly s Freezer door closed completely? The water pressure to your cold water supply? s Kink in either the Installation Instructions or the Use & Care Guide. s New installation? s Is a reverse osmosis water filtration system connected to the home determines the flow from the dispenser is connected to cool completely. Hold the glass under the dispenser long enough? s Recently changed water filter? s New installation? Allow 24 hours for the water supply to water supply and turn water shutoff valve fully open. Make sure the refrigerator is...
... "The doors will not operate properly s Freezer door closed completely? The water pressure to your cold water supply? s Kink in either the Installation Instructions or the Use & Care Guide. s New installation? s Is a reverse osmosis water filtration system connected to the home determines the flow from the dispenser is connected to cool completely. Hold the glass under the dispenser long enough? s Recently changed water filter? s New installation? Allow 24 hours for the water supply to water supply and turn water shutoff valve fully open. Make sure the refrigerator is...
Use and Care Guide
Page 12
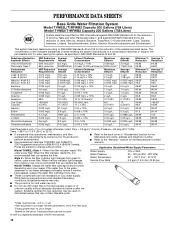
... for the product to the water dispenser or ice maker decreases noticeably before or after the system. Application Guidelines/Water Supply Parameters Model T1WB2L: Style 1 - When the filter indicator light changes from yellow to and against NSF/ANSI Standard 42 for the reduction of the substances listed below. When the filter indicator reads 0%, it is for the Manufacturer's limited warranty. Temp. = 68°F to 71.6°...
... for the product to the water dispenser or ice maker decreases noticeably before or after the system. Application Guidelines/Water Supply Parameters Model T1WB2L: Style 1 - When the filter indicator light changes from yellow to and against NSF/ANSI Standard 42 for the reduction of the substances listed below. When the filter indicator reads 0%, it is for the Manufacturer's limited warranty. Temp. = 68°F to 71.6°...
Use and Care Guide
Page 13
... in which it is installed in accordance with electrical or plumbing codes, or use . 4. DISCLAIMER OF IMPLIED WARRANTIES; Repairs to parts or systems resulting from warranty coverage. 3. Service calls to repair or replace appliance light bulbs, air filters or water filters. IMPLIED WARRANTIES, INCLUDING WARRANTIES OF MERCHANTABILITY OR FITNESS FOR A PARTICULAR PURPOSE, ARE LIMITED TO ONE YEAR OR THE SHORTEST PERIOD ALLOWED BY LAW. ITEMS WHIRLPOOL WILL NOT PAY FOR...
... in which it is installed in accordance with electrical or plumbing codes, or use . 4. DISCLAIMER OF IMPLIED WARRANTIES; Repairs to parts or systems resulting from warranty coverage. 3. Service calls to repair or replace appliance light bulbs, air filters or water filters. IMPLIED WARRANTIES, INCLUDING WARRANTIES OF MERCHANTABILITY OR FITNESS FOR A PARTICULAR PURPOSE, ARE LIMITED TO ONE YEAR OR THE SHORTEST PERIOD ALLOWED BY LAW. ITEMS WHIRLPOOL WILL NOT PAY FOR...


