
User Manual
Page 7
... can use your PC to the computer system, so the computer system can automatically adjust the LCD monitor. 5 Plug & Play VESA Plug and Play eliminates the complicated and time-consuming installation process. FEATURES • HD-Grade resolution at 1680 x 1050 native • Ultra Bright Display Image • Wide Viewing Angles • Super Fast...
... can use your PC to the computer system, so the computer system can automatically adjust the LCD monitor. 5 Plug & Play VESA Plug and Play eliminates the complicated and time-consuming installation process. FEATURES • HD-Grade resolution at 1680 x 1050 native • Ultra Bright Display Image • Wide Viewing Angles • Super Fast...

User Manual
Page 8
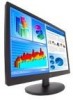
...notebook Package Contents Your product package includes: • 22" Westinghouse widescreen LCD Monitor • Detachable Base Stand • AC Power Cord • VGA Male - INSTALLATION Congratulations on the bottom of a Westinghouse 22" widescreen LCD Monitor. Press in and snap the base into place. ...Speakers 6 Attaching the Base Stand to the LCD Monitor Attach the base stand to this lightweight LCD monitor delivers a bright and clear display optimized for 1680 x 1050 display resolution from your...
...notebook Package Contents Your product package includes: • 22" Westinghouse widescreen LCD Monitor • Detachable Base Stand • AC Power Cord • VGA Male - INSTALLATION Congratulations on the bottom of a Westinghouse 22" widescreen LCD Monitor. Press in and snap the base into place. ...Speakers 6 Attaching the Base Stand to the LCD Monitor Attach the base stand to this lightweight LCD monitor delivers a bright and clear display optimized for 1680 x 1050 display resolution from your...

User Manual
Page 10
4. To do that, you may need to 1680 x 1050. The LED light will turn green if a signal input is detected or it will be orange if no input is detected. Turn the Power On Press the power button at the front of your graphic card and reboot your PC or notebook. NOTE: If your desktop image looks fuzzy, adjust the computer's resolution to download, install the latest drivers of the LCD monitor first, and then power on your computer. ʳ 8
4. To do that, you may need to 1680 x 1050. The LED light will turn green if a signal input is detected or it will be orange if no input is detected. Turn the Power On Press the power button at the front of your graphic card and reboot your PC or notebook. NOTE: If your desktop image looks fuzzy, adjust the computer's resolution to download, install the latest drivers of the LCD monitor first, and then power on your computer. ʳ 8

User Manual
Page 12
...the sub-function. • To go back to the previous menu, press the button. Source Image Menu Audio Menu Color Menu Miscellaneous Menu Info Menu Resolution & Frequency NOTES: • Any changes are saved automatically. • To exit the OSD menu press "Menu" again. Turning off . It ...button to select the function to be made . Except for each individual signal timing. OSD Menu Functions All the function settings for this LCD monitor are controlled via the control keys located on the control panel. (Note: The OSD menu display will save any changes that have only ...
...the sub-function. • To go back to the previous menu, press the button. Source Image Menu Audio Menu Color Menu Miscellaneous Menu Info Menu Resolution & Frequency NOTES: • Any changes are saved automatically. • To exit the OSD menu press "Menu" again. Turning off . It ...button to select the function to be made . Except for each individual signal timing. OSD Menu Functions All the function settings for this LCD monitor are controlled via the control keys located on the control panel. (Note: The OSD menu display will save any changes that have only ...

User Manual
Page 20
... 511 (w) x 410 (h) x 206 (d) mm 22.8" (w) x 19.3" (h) x 5.5" (d) in 580 (w) x 490 (h) x 140 (d) mm Unit 10.6 lbs / 4.8 Kgs FCC-B, UL, CUL, CCC, & Plug & Play AC On Appendix Specifications Item Panel Size Optimum Resolution Response Time Contrast Ratio Brightness Viewing Angles Wall Mount... PC Compatibility Audio Features Input connections Power Operating Conditions Storage Conditions Dimensions Weight Regulations Power consumption Lamp Life Type Specification 22" (diagonal) Color TFT...
... 511 (w) x 410 (h) x 206 (d) mm 22.8" (w) x 19.3" (h) x 5.5" (d) in 580 (w) x 490 (h) x 140 (d) mm Unit 10.6 lbs / 4.8 Kgs FCC-B, UL, CUL, CCC, & Plug & Play AC On Appendix Specifications Item Panel Size Optimum Resolution Response Time Contrast Ratio Brightness Viewing Angles Wall Mount... PC Compatibility Audio Features Input connections Power Operating Conditions Storage Conditions Dimensions Weight Regulations Power consumption Lamp Life Type Specification 22" (diagonal) Color TFT...

User Manual
Page 21
...your PC to 1680 x 1050 at 60 Hz. • Perform Auto Adjust on the monitor "Out Of Range" • Set screen resolution to panel native at 1680 x 1050 at 60 Hz Cannot find 1680 x 1050 under screen resolution on . • Make sure the video cable is securely connected to download and install the... verify that the outlet is supplying the proper voltage. Troubleshooting No Power • Make sure the AC cord is plugged into the back of the LCD monitor. • Make sure the AC power cord is securely connected to an AC outlet. • Plug another electrical device (like a radio) to the power ...
...your PC to 1680 x 1050 at 60 Hz. • Perform Auto Adjust on the monitor "Out Of Range" • Set screen resolution to panel native at 1680 x 1050 at 60 Hz Cannot find 1680 x 1050 under screen resolution on . • Make sure the video cable is securely connected to download and install the... verify that the outlet is supplying the proper voltage. Troubleshooting No Power • Make sure the AC cord is plugged into the back of the LCD monitor. • Make sure the AC power cord is securely connected to an AC outlet. • Plug another electrical device (like a radio) to the power ...