
User Manual
Page 4
..., these openings must not be walked on or pinched by placing the LCD Monitor on the Monitor. 2 2 Precautions • Avoid touching the screen. Periodically inspect the cords and each end of time, unplug the LCD Monitor. The LCD Monitor shall be installed near a wall socket outlet and the plug on power... Center. • WARNING - Your warranty does not cover repairs or attempted repairs by anyone not authorized by Westinghouse Digital. • If your LCD Monitor that they are not likely to moisture or high humidity. • Do not attempt repairs yourself. Skin oils are provided...
..., these openings must not be walked on or pinched by placing the LCD Monitor on the Monitor. 2 2 Precautions • Avoid touching the screen. Periodically inspect the cords and each end of time, unplug the LCD Monitor. The LCD Monitor shall be installed near a wall socket outlet and the plug on power... Center. • WARNING - Your warranty does not cover repairs or attempted repairs by anyone not authorized by Westinghouse Digital. • If your LCD Monitor that they are not likely to moisture or high humidity. • Do not attempt repairs yourself. Skin oils are provided...

User Manual
Page 5
... receiver is connected. • Consult the Westinghouse Service Center or an experienced radio/Monitor technician for a Class B digital device, pursuant to part 15 of the cord set is not enclosed. If a BNC cable used . For LCD Monitors that interference will void the user's authority to operate this LCD Monitor is enclosed and has been selected according...
... receiver is connected. • Consult the Westinghouse Service Center or an experienced radio/Monitor technician for a Class B digital device, pursuant to part 15 of the cord set is not enclosed. If a BNC cable used . For LCD Monitors that interference will void the user's authority to operate this LCD Monitor is enclosed and has been selected according...
User Manual
Page 6
...based cleaners on the LCD Monitor screen or case. Disclaimer Westinghouse Digital does not recommend the use of non-ammonia, non-alcohol based glass cleaner onto a clean, soft, lint-free cloth, and wipe the screen. CLEANING THE LCD MONITOR ʳ • MAKE SURE THE LCD MONITOR IS TURNED OFF &#... removes dust and other particles. 2. To clean the case: 1. Some chemical cleaners have been reported to damage the screen and/or LCD Monitor case. Westinghouse Digital will not be liable for damage resulting from the use of water onto a clean, soft, lint-free cloth, then wipe the...
...based cleaners on the LCD Monitor screen or case. Disclaimer Westinghouse Digital does not recommend the use of non-ammonia, non-alcohol based glass cleaner onto a clean, soft, lint-free cloth, and wipe the screen. CLEANING THE LCD MONITOR ʳ • MAKE SURE THE LCD MONITOR IS TURNED OFF &#... removes dust and other particles. 2. To clean the case: 1. Some chemical cleaners have been reported to damage the screen and/or LCD Monitor case. Westinghouse Digital will not be liable for damage resulting from the use of water onto a clean, soft, lint-free cloth, then wipe the...

User Manual
Page 7
...to save electrical power. Plug & Play VESA Plug and Play eliminates the complicated and time-consuming installation process. If the LCD monitor has not been used for a certain period of the mouse or pressing any key on the keyboard will identify and automatically adjust the... LCD monitor. You can automatically adjust the LCD monitor. 5 5 FEATURES • Beyond full HD resolution at 1920 x 1200 native • Multiple A/V connectivity with the latest HDMI-HDCP ...
...to save electrical power. Plug & Play VESA Plug and Play eliminates the complicated and time-consuming installation process. If the LCD monitor has not been used for a certain period of the mouse or pressing any key on the keyboard will identify and automatically adjust the... LCD monitor. You can automatically adjust the LCD monitor. 5 5 FEATURES • Beyond full HD resolution at 1920 x 1200 native • Multiple A/V connectivity with the latest HDMI-HDCP ...

User Manual
Page 8
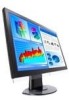
... and remove the base. 6 6 Package Contents Your product package includes: • 24" Westinghouse widescreen multifunctional LCD Monitor • Detachable Base Stand • AC Power Cord • VGA Male - Attaching the Base Stand to the LCD Monitor Place the base on the bottom of a Westinghouse 24" widescreen multifunctional LCD Monitor. Male Cable • 3.5 mm Mini-Stereo Cable • User's Manual •...
... and remove the base. 6 6 Package Contents Your product package includes: • 24" Westinghouse widescreen multifunctional LCD Monitor • Detachable Base Stand • AC Power Cord • VGA Male - Attaching the Base Stand to the LCD Monitor Place the base on the bottom of a Westinghouse 24" widescreen multifunctional LCD Monitor. Male Cable • 3.5 mm Mini-Stereo Cable • User's Manual •...

User Manual
Page 9
Inputs on the right side (not supplied) Inputs on the left side (not supplied) (not supplied) (not supplied) 7 7 2. Connect Inputs Connect one or all of the following into the back of this multifunctional LCD Monitor: IMPORTANT: Before beginning, make sure this monitor, PC or A/V apparatus that connects to are all turned off.
Inputs on the right side (not supplied) Inputs on the left side (not supplied) (not supplied) (not supplied) 7 7 2. Connect Inputs Connect one or all of the following into the back of this multifunctional LCD Monitor: IMPORTANT: Before beginning, make sure this monitor, PC or A/V apparatus that connects to are all turned off.

User Manual
Page 10
Option only if needed: For wall mount option, first carefully pull from both end of the back cover, as shown in Picture A below; Place monitor screen on a flat but soft surface and refer to the connector labeled "AC-IN") and then connect the cord into a properly grounded AC outlet. then slide down to remove the cover as shown in Picture B. 3. Connect Power Cable Connect the AC power cord to the LCD Monitor (to your wall mount instructions for further details. 8 8
Option only if needed: For wall mount option, first carefully pull from both end of the back cover, as shown in Picture A below; Place monitor screen on a flat but soft surface and refer to the connector labeled "AC-IN") and then connect the cord into a properly grounded AC outlet. then slide down to remove the cover as shown in Picture B. 3. Connect Power Cable Connect the AC power cord to the LCD Monitor (to your wall mount instructions for further details. 8 8

User Manual
Page 11
Press the power button on the side of the LCD monitor first, and then power on if a signal input is detected or it will turn on the rest of your graphic card and reboot your desktop image looks fuzzy, adjust the computer's resolution to download, install the latest drivers of your PC and A/V apparatus. The LED light will be blinking if no input is detected. 4. Turn the Power On Remove the protective films on the monitor bezel. To do that, you may need to 1920 x 1200. NOTE: If your computer. ʳ Speakers 9 9
Press the power button on the side of the LCD monitor first, and then power on if a signal input is detected or it will turn on the rest of your graphic card and reboot your desktop image looks fuzzy, adjust the computer's resolution to download, install the latest drivers of your PC and A/V apparatus. The LED light will be blinking if no input is detected. 4. Turn the Power On Remove the protective films on the monitor bezel. To do that, you may need to 1920 x 1200. NOTE: If your computer. ʳ Speakers 9 9

User Manual
Page 12
... when the OSD is displayed. • Move a selection left when the OSD is displayed. • Move a selection right when the OSD is a list of the LCD Monitor to enter or exit the OSD menu • Power On and Off button • LED Power Indicator Light • White: Normal • Blinking: Standby •...
... when the OSD is displayed. • Move a selection left when the OSD is displayed. • Move a selection right when the OSD is a list of the LCD Monitor to enter or exit the OSD menu • Power On and Off button • LED Power Indicator Light • White: Normal • Blinking: Standby •...
User Manual
Page 13
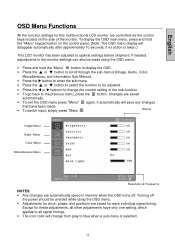
... OSD turns off the power should be adjusted. • Press the or buttons to change from gray to blue when a sub-menu is taken.) This LCD monitor has been adjusted to optimal settings before shipment. Turning off . To display the OSD main menu, press and hold the "Menu" button to display the... of the sub-function. • To go back to the previous menu, press the button. OSD Menu Functions All the function settings for this multifunctional LCD monitor are controlled via the control keys located on the control panel. (Note: The OSD menu display will change the current setting of the...
... OSD turns off the power should be adjusted. • Press the or buttons to change from gray to blue when a sub-menu is taken.) This LCD monitor has been adjusted to optimal settings before shipment. Turning off . To display the OSD main menu, press and hold the "Menu" button to display the... of the sub-function. • To go back to the previous menu, press the button. OSD Menu Functions All the function settings for this multifunctional LCD monitor are controlled via the control keys located on the control panel. (Note: The OSD menu display will change the current setting of the...

User Manual
Page 14
The following is a list of the OSD sub-menus for this multifunctional LCD monitor: Image Menu (while in A/V inputs, including HDMI input) Function Brightness Contrast Sharpness Color Hue DLC Back Light Description Adjust the black level of the picture Adjust the contrast of the picture Soften or sharpen the picture Adjust color saturation of the screen, range between 0-100 12 12 Adjust color phase, either more green or red Turn Dynamic Luminance Control On or Off Backlight adjustment of the picture.
The following is a list of the OSD sub-menus for this multifunctional LCD monitor: Image Menu (while in A/V inputs, including HDMI input) Function Brightness Contrast Sharpness Color Hue DLC Back Light Description Adjust the black level of the picture Adjust the contrast of the picture Soften or sharpen the picture Adjust color saturation of the screen, range between 0-100 12 12 Adjust color phase, either more green or red Turn Dynamic Luminance Control On or Off Backlight adjustment of the picture.

User Manual
Page 17
OSD time-out Adjust OSD display time. Sleep Set the time for monitor to go to its factory default settings. Miscellaneous Menu (while in A/V inputs including HDMI input) Function Description Language Select OSD languages between Normal/Full/Zoom modes. 15 15 OSD position Move OSD display position to any one of the OSD menu. Aspect Ratio Set video aspect ratio between : English, French, Spanish, Chinese OSD Transparency Adjust the transparency of the following 5 positions within the overall screen. 1 2 3 4 5 Reset Restore this LCD monitor to "sleep".
OSD time-out Adjust OSD display time. Sleep Set the time for monitor to go to its factory default settings. Miscellaneous Menu (while in A/V inputs including HDMI input) Function Description Language Select OSD languages between Normal/Full/Zoom modes. 15 15 OSD position Move OSD display position to any one of the OSD menu. Aspect Ratio Set video aspect ratio between : English, French, Spanish, Chinese OSD Transparency Adjust the transparency of the following 5 positions within the overall screen. 1 2 3 4 5 Reset Restore this LCD monitor to "sleep".

User Manual
Page 18
Position Move the image left or right on the screen. (VGA only) Auto-Config Select to automatically fine tune the screen image 16 16 Position Move the image up or down on the screen. (VGA only) V. Image Menu (while in PC inputs including DVI when using DVI-HDMI cable) Function Description Brightness Adjust the black level of the image. Sharpness Soften or sharpen the image Clock Adjust the LCD monitor clock. (VGA only) Phase Adjust the LCD monitor phase. (VGA only) H. Contrast Adjust the contrast of the image.
Position Move the image left or right on the screen. (VGA only) Auto-Config Select to automatically fine tune the screen image 16 16 Position Move the image up or down on the screen. (VGA only) V. Image Menu (while in PC inputs including DVI when using DVI-HDMI cable) Function Description Brightness Adjust the black level of the image. Sharpness Soften or sharpen the image Clock Adjust the LCD monitor clock. (VGA only) Phase Adjust the LCD monitor phase. (VGA only) H. Contrast Adjust the contrast of the image.

User Manual
Page 19
... Setting Set to keep input aspect ratio 17 17 OSD Transparency Adjust the transparency of the following 5 positions within the overall screen. 1 2 3 4 5 Reset Restore this LCD monitor to any one of the OSD menu. OSD time-out Adjust OSD display time. Miscellaneous Menu (while in PC Inputs including DVI when using DVI...
... Setting Set to keep input aspect ratio 17 17 OSD Transparency Adjust the transparency of the following 5 positions within the overall screen. 1 2 3 4 5 Reset Restore this LCD monitor to any one of the OSD menu. OSD time-out Adjust OSD display time. Miscellaneous Menu (while in PC Inputs including DVI when using DVI...

User Manual
Page 22
Troubleshooting No Power • Make sure the AC cord is plugged into the back of the LCD monitor. • Make sure the AC power cord is securely connected to an AC outlet. • Plug another electrical device (like a radio) to the power outlet ... video input source • Adjust the brightness and contrast levels. Distorted Image • Reset the LCD monitor by performing the "Reset" function using the OSD. • Check image size setting. 20 20 No Screen Image • Make sure monitor is turned on your PC. Fuzzy Image • Set desktop resolution on . • Make...
Troubleshooting No Power • Make sure the AC cord is plugged into the back of the LCD monitor. • Make sure the AC power cord is securely connected to an AC outlet. • Plug another electrical device (like a radio) to the power outlet ... video input source • Adjust the brightness and contrast levels. Distorted Image • Reset the LCD monitor by performing the "Reset" function using the OSD. • Check image size setting. 20 20 No Screen Image • Make sure monitor is turned on your PC. Fuzzy Image • Set desktop resolution on . • Make...


