User Manual
Page 3
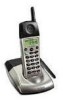
... any Caller ID or Call Waiting services. at 1-800-267-7377. 3 Base Unit 2. Parts Check List: 1. at 1-800- 595-9511. You may need to change your phone service to use compatible equipment. Contact your local phone service provider. This product can use this feature. AC Power Adapter 4. Owner's Manual To purchase replacement battery packs, call . Handset 3. Dual Band transmission combines the best of 2.4GHz and 900MHz technologies, providing enhanced performance over standard cordless telephones. About Caller Identification (Caller...
... any Caller ID or Call Waiting services. at 1-800-267-7377. 3 Base Unit 2. Parts Check List: 1. at 1-800- 595-9511. You may need to change your phone service to use compatible equipment. Contact your local phone service provider. This product can use this feature. AC Power Adapter 4. Owner's Manual To purchase replacement battery packs, call . Handset 3. Dual Band transmission combines the best of 2.4GHz and 900MHz technologies, providing enhanced performance over standard cordless telephones. About Caller Identification (Caller...
User Manual
Page 5
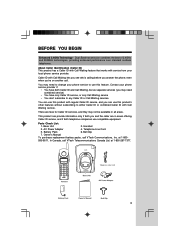
... Installation CONNECT THE POWER CORD Standard electrical outlet CONNECT THE TELEPHONE LINE CORD Modular telephone jack 4 Charge the Handset Battery Place the Handset in the Base. You should hear a Dial Tone. 6 Set the Dial Mode If you can allow it to enter programming mode. • Press or until the screen displays DIAL MODE: and the currently selected mode. • Press SELECT. If you do not have touch tone service, the phone is ready to enter programming mode. • Press or until DATE/TIME is displayed...
... Installation CONNECT THE POWER CORD Standard electrical outlet CONNECT THE TELEPHONE LINE CORD Modular telephone jack 4 Charge the Handset Battery Place the Handset in the Base. You should hear a Dial Tone. 6 Set the Dial Mode If you can allow it to enter programming mode. • Press or until the screen displays DIAL MODE: and the currently selected mode. • Press SELECT. If you do not have touch tone service, the phone is ready to enter programming mode. • Press or until DATE/TIME is displayed...
User Manual
Page 7
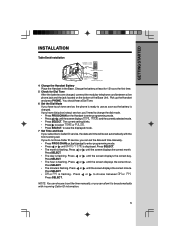
... TeleZapper feature to all the telephones and an swering machines connected to that line in your home or office. • When you or your answering machine picks up the phone, the TeleZapper emits a special tone that fools the computer into thinking your number is disconnected. 7 Programming Instructions The TeleZapper feature in Pulse (rotary) mode from more and more telemarketing calls. Here are away or when...
... TeleZapper feature to all the telephones and an swering machines connected to that line in your home or office. • When you or your answering machine picks up the phone, the TeleZapper emits a special tone that fools the computer into thinking your number is disconnected. 7 Programming Instructions The TeleZapper feature in Pulse (rotary) mode from more and more telemarketing calls. Here are away or when...

User Manual
Page 8
... normal operation of your answering machine pick up a call before you can contact businesses and organizations to determine if they use predictive dialing systems - Will it may not automatically stop once you've answered (if your phone number be manually dialed or that equipment is "unavailable." Let your voicemail. If you answer your answering system's Auto Stop feature should function normally when you pick up the line...
... normal operation of your answering machine pick up a call before you can contact businesses and organizations to determine if they use predictive dialing systems - Will it may not automatically stop once you've answered (if your phone number be manually dialed or that equipment is "unavailable." Let your voicemail. If you answer your answering system's Auto Stop feature should function normally when you pick up the line...

User Manual
Page 9
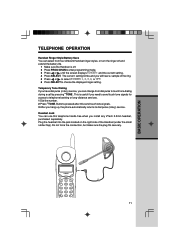
TELEPHONE OPERATION BASIC OPERATION Answer a Call Press any key except OFF. Make a Call Press PHONE then dial the number, OR Dial the number (use to backspace and correct digits), then press PHONE to program and access names and numbers in Telephone Memory. Handset Volume While on hold and return the Handset to call last number dialed (up an extension phone will release hold ; Memory Press MEM to call last number dialed. press again to release hold, OR picking up to 32 digits). -ORPress REDIAL/PAUSE...
TELEPHONE OPERATION BASIC OPERATION Answer a Call Press any key except OFF. Make a Call Press PHONE then dial the number, OR Dial the number (use to backspace and correct digits), then press PHONE to program and access names and numbers in Telephone Memory. Handset Volume While on hold and return the Handset to call last number dialed (up an extension phone will release hold ; Memory Press MEM to call last number dialed. press again to release hold, OR picking up to 32 digits). -ORPress REDIAL/PAUSE...
User Manual
Page 11
... off and extend the battery life. 1 Make sure the Handset is useful if you will hear a sample of the Handset (under the small rubber flap). Buttons pressed after this telephone hands-free when you can change from four different Handset ringer styles, or turn the ringer off . 2 Press PROG/CHAN to choose the displayed ringer setting. Temporary Tone Dialing If you have dial pulse (rotary) service, you install any VTech 2.5mm headset, purchased separately.
... off and extend the battery life. 1 Make sure the Handset is useful if you will hear a sample of the Handset (under the small rubber flap). Buttons pressed after this telephone hands-free when you can change from four different Handset ringer styles, or turn the ringer off . 2 Press PROG/CHAN to choose the displayed ringer setting. Temporary Tone Dialing If you have dial pulse (rotary) service, you install any VTech 2.5mm headset, purchased separately.

User Manual
Page 12
... home or office. Even so, this Handset and Base can vary with the locations of the Base and Handset, the weather, and the construction of range during a phone conversation, you move closer to be left "off the hook." Display Screen Messages The Handset is in use The Base is paging the Handset. If you might hear noise or interference. BASIC OPERATION TELEPHONE OPERATION Operating Range This cordless telephone operates within the maximum power...
... home or office. Even so, this Handset and Base can vary with the locations of the Base and Handset, the weather, and the construction of range during a phone conversation, you move closer to be left "off the hook." Display Screen Messages The Handset is in use The Base is paging the Handset. If you might hear noise or interference. BASIC OPERATION TELEPHONE OPERATION Operating Range This cordless telephone operates within the maximum power...

User Manual
Page 15
... SELECT or PROG/CHAN. use to exit directory. TELEPHONE DIRECTORY This cordless phone can store an additional 40 telephone numbers with the number. Store a Number/Name in the dialing sequence. -ORPress REDIAL/PAUSE to backspace and make corrections; Entries are stored alphabetically. Press REDIAL/PAUSE to 16 digits long. and the current setting. 15 The screen displays ENTER NAME . 3 Using the chart below, enter up...
... SELECT or PROG/CHAN. use to exit directory. TELEPHONE DIRECTORY This cordless phone can store an additional 40 telephone numbers with the number. Store a Number/Name in the dialing sequence. -ORPress REDIAL/PAUSE to backspace and make corrections; Entries are stored alphabetically. Press REDIAL/PAUSE to 16 digits long. and the current setting. 15 The screen displays ENTER NAME . 3 Using the chart below, enter up...

User Manual
Page 16
... flashes. Dial a Number from this number by changing to save the edited information. Then press or until ERASE flashes. 4 Press SELECT. Press SELECT to move to edit the Distinctive Ring setting. 5 Press SELECT to a distinctive ringing pattern after the first ring. You'll hear a beep confirming the deletion. Use , and the dial pad keys to change the setting. The screen displays DIRECTORY . 2 Press or to calls from the Directory 1 Press ( ). BASIC OPERATION...
... flashes. Dial a Number from this number by changing to save the edited information. Then press or until ERASE flashes. 4 Press SELECT. Press SELECT to move to edit the Distinctive Ring setting. 5 Press SELECT to a distinctive ringing pattern after the first ring. You'll hear a beep confirming the deletion. Use , and the dial pad keys to change the setting. The screen displays DIRECTORY . 2 Press or to calls from the Directory 1 Press ( ). BASIC OPERATION...

User Manual
Page 18
... and the phone number. Delete All Calls 1 While viewing call history, press SELECT, then press or until ERASE flashes. 2 Press SELECT. For each incoming call a number from call history. 2 Press SELECT, then press or until YES flashes. 5 Press SELECT. Review Call History The screen displays call information for new incoming call information. You'll hear a beep confirming the deletion. BASIC OPERATION 3 Press SELECT. When the memory is full, the oldest call information is deleted to make room...
... and the phone number. Delete All Calls 1 While viewing call history, press SELECT, then press or until ERASE flashes. 2 Press SELECT. For each incoming call a number from call history. 2 Press SELECT, then press or until YES flashes. 5 Press SELECT. Review Call History The screen displays call information for new incoming call information. You'll hear a beep confirming the deletion. BASIC OPERATION 3 Press SELECT. When the memory is full, the oldest call information is deleted to make room...

User Manual
Page 19
... in call (area code + number; 1 + area code + number; number only; 1+ number). 3 Press SELECT, then press or until YES flashes. 5 Press SELECT. number only; 1+ number). 3 Press SELECT, then press or until ALL flashes, then press SELECT. The screen displays DISTINCT RING? Display Screen Messages 19 The screen displays ERASE ALL NO YES. The screen displays any alternate dialing sequences available for this number by changing to change the setting. Choose Y (for dialing, press PHONE. BASIC OPERATION CALLER ID OPERATION 3 Press or until PGM flashes. Dial a Displayed Number...
... in call (area code + number; 1 + area code + number; number only; 1+ number). 3 Press SELECT, then press or until YES flashes. 5 Press SELECT. number only; 1+ number). 3 Press SELECT, then press or until ALL flashes, then press SELECT. The screen displays DISTINCT RING? Display Screen Messages 19 The screen displays ERASE ALL NO YES. The screen displays any alternate dialing sequences available for this number by changing to change the setting. Choose Y (for dialing, press PHONE. BASIC OPERATION CALLER ID OPERATION 3 Press or until PGM flashes. Dial a Displayed Number...
User Manual
Page 20
... the instructions and limitations specified in this User's Manual. Use VTech battery. The phone beeps twice every 5 seconds. - Place the Handset in the Handset. - A fully charged battery provides an average talk time of the battery pack. 4 Replace the cover by pressing on . The battery pack is installed in the Base and allow it up to the Base after charging overnight, the battery should remain charged up into place. Replacing the Handset Battery Pack 1 Remove the battery compartment...
... the instructions and limitations specified in this User's Manual. Use VTech battery. The phone beeps twice every 5 seconds. - Place the Handset in the Handset. - A fully charged battery provides an average talk time of the battery pack. 4 Replace the cover by pressing on . The battery pack is installed in the Base and allow it up to the Base after charging overnight, the battery should remain charged up into place. Replacing the Handset Battery Pack 1 Remove the battery compartment...
User Manual
Page 21
... battery might need charging. • Make sure the battery pack is installed correctly. • If you have too many extension phones on your telephone line to ring. If you hear a two-beep signal when you try re-initializing the Handset and Base: 1 Disconnect the power to the Base. 2 Remove the Handset battery pack. 3 Wait a few minutes. 4 Connect the power to the Base. 5 Insert the Handset battery pack. 6 Put the Handset in the Base to another of range...
... battery might need charging. • Make sure the battery pack is installed correctly. • If you have too many extension phones on your telephone line to ring. If you hear a two-beep signal when you try re-initializing the Handset and Base: 1 Disconnect the power to the Base. 2 Remove the Handset battery pack. 3 Wait a few minutes. 4 Connect the power to the Base. 5 Insert the Handset battery pack. 6 Put the Handset in the Base to another of range...
User Manual
Page 22
... calls, the problem is probably in the Base for at least 15 seconds. Try moving the Base to turn off , even after changing channels: You were probably almost out of this manual. The screen displays LIGHTS OFF:YES . 4 Press SELECT again to another call after you still hear other equipment requiring touch tone signals: If you have dial pulse (rotary) service, follow the directions under "Temporary Tone Dialing" in a corded telephone...
... calls, the problem is probably in the Base for at least 15 seconds. Try moving the Base to turn off , even after changing channels: You were probably almost out of this manual. The screen displays LIGHTS OFF:YES . 4 Press SELECT again to another call after you still hear other equipment requiring touch tone signals: If you have dial pulse (rotary) service, follow the directions under "Temporary Tone Dialing" in a corded telephone...
User Manual
Page 24
... product, we may use with operation instructions. This limited warranty extends only to take approximately 30 days. What will VTech Communications do if the Product is shipped to the following terms and conditions, when installed and used for a period of either (a) 90 days from the date the repaired or replacement Product is not free from outside the unit. 24 ADDITIONAL INFORMATION...
... product, we may use with operation instructions. This limited warranty extends only to take approximately 30 days. What will VTech Communications do if the Product is shipped to the following terms and conditions, when installed and used for a period of either (a) 90 days from the date the repaired or replacement Product is not free from outside the unit. 24 ADDITIONAL INFORMATION...
User Manual
Page 26
... connection to the telephone network prior to your local telephone company. FCC Part 15 Warning: Changes or modifications to the following two conditions: (1) this device may not cause interference, and (2) this telephone equipment, please contact: VTech Communications Inc CUSTOMERSERVICE. Operation is located on a circuit different from the line network until the problem has been corrected. at 1-800-267-7377. For repair...
... connection to the telephone network prior to your local telephone company. FCC Part 15 Warning: Changes or modifications to the following two conditions: (1) this device may not cause interference, and (2) this telephone equipment, please contact: VTech Communications Inc CUSTOMERSERVICE. Operation is located on a circuit different from the line network until the problem has been corrected. at 1-800-267-7377. For repair...
User Manual
Page 27
... is provided with Party Lines. See Installation Instructions in the user's manual. This equipment may make changes in the product identifier without a decimal point as possible. The telephone company is not practical, you have specially wired alarm dialing equipment connected to notify you if such changes are called. If advance notice is required to your telephone line, ensure the connection of 0.3. The telephone company is listed...
... is provided with Party Lines. See Installation Instructions in the user's manual. This equipment may make changes in the product identifier without a decimal point as possible. The telephone company is not practical, you have specially wired alarm dialing equipment connected to notify you if such changes are called. If advance notice is required to your telephone line, ensure the connection of 0.3. The telephone company is listed...
User Manual
Page 28
... 6. c Testing the emergency telephone numbers you can still dial the emergency number manually if the memory dialing feature doesn't work. Notice: This equipment meets the applicable Industry Canada Terminal Equipment Technical Specifications. Repairs to certified equipment should be installed using an acceptable method of emergency numbers If this equipment, users should ensure that you have stored is permissible to be connected to this terminal equipment...
... 6. c Testing the emergency telephone numbers you can still dial the emergency number manually if the memory dialing feature doesn't work. Notice: This equipment meets the applicable Industry Canada Terminal Equipment Technical Specifications. Repairs to certified equipment should be installed using an acceptable method of emergency numbers If this equipment, users should ensure that you have stored is permissible to be connected to this terminal equipment...

User Manual
Page 30
... time of use. TECHNICAL SPECIFICATIONS FREQUENCY CONTROL WEIGHT Crystal controlled PLL synthesizer TRANSMIT FREQUENCY Base: 2411.15 - 2418.4 MHz Handset: 912.75 - 917.10 MHz RECEIVE FREQUENCY Handset : 148 grams Base : 214 grams (excluding battery pack) POWER REQUIREMENTS Handset : Base : 400mAh Ni-Cd Battery Pack 9V DC @ 300mA Base: 912.75 - 917.10 MHz Handset: 2411.15 - 2418.4 MHz CHANNELS 30 Channels NOMINAL EFFECTIVE RANGE Maximum power allowed by FCC and IC. MEMORY Speed Dial: 10 Memory locations 16 digits...
... time of use. TECHNICAL SPECIFICATIONS FREQUENCY CONTROL WEIGHT Crystal controlled PLL synthesizer TRANSMIT FREQUENCY Base: 2411.15 - 2418.4 MHz Handset: 912.75 - 917.10 MHz RECEIVE FREQUENCY Handset : 148 grams Base : 214 grams (excluding battery pack) POWER REQUIREMENTS Handset : Base : 400mAh Ni-Cd Battery Pack 9V DC @ 300mA Base: 912.75 - 917.10 MHz Handset: 2411.15 - 2418.4 MHz CHANNELS 30 Channels NOMINAL EFFECTIVE RANGE Maximum power allowed by FCC and IC. MEMORY Speed Dial: 10 Memory locations 16 digits...

User Manual
Page 32
...3 Parts Check List ...3 Getting Started...4 INSTALLATION ...4 Before You Install 4 Table/Desk Installation 5 Wall Installation on a standard modular Wall Plate 6 Using The Telezapper® Feature 7 Basic Operation...9 TELEPHONE OPERATION 9 Make a Call...9 Answer a Call ...9 End a Call ...9 Program/Channel 9 Redial/Pause ...9 Handset Volume 9 Flash/Call Waiting 9 Hold ...9 Page/Handset Locator 10 Message Waiting Indicator 10 In Use/Charging Indicator 10 Handset Ringer Style/ Battery Save 11 Temporary Tone Dialing 11 Headset Jack...11 Operating Range 12 Display Screen Messages 12...
...3 Parts Check List ...3 Getting Started...4 INSTALLATION ...4 Before You Install 4 Table/Desk Installation 5 Wall Installation on a standard modular Wall Plate 6 Using The Telezapper® Feature 7 Basic Operation...9 TELEPHONE OPERATION 9 Make a Call...9 Answer a Call ...9 End a Call ...9 Program/Channel 9 Redial/Pause ...9 Handset Volume 9 Flash/Call Waiting 9 Hold ...9 Page/Handset Locator 10 Message Waiting Indicator 10 In Use/Charging Indicator 10 Handset Ringer Style/ Battery Save 11 Temporary Tone Dialing 11 Headset Jack...11 Operating Range 12 Display Screen Messages 12...


