

Download
Page 2
.... Manufactured under license from Dolby Laboratories. For DTS patents, see http://patents.dts.com. All Rights Reserved. Changing the factory default picture settings or enabling other features will be achieved. Dolby and the double-D symbol are trademarks or registered trademarks of DTS, Inc. ©... DTS, Inc. This product qualifies for ENERGY STAR in the "factory default" setting and this is the setting in which power savings will increase power consumption that could exceed the limits necessary to qualify for ENERGY STAR rating.
.... Manufactured under license from Dolby Laboratories. For DTS patents, see http://patents.dts.com. All Rights Reserved. Changing the factory default picture settings or enabling other features will be achieved. Dolby and the double-D symbol are trademarks or registered trademarks of DTS, Inc. ©... DTS, Inc. This product qualifies for ENERGY STAR in the "factory default" setting and this is the setting in which power savings will increase power consumption that could exceed the limits necessary to qualify for ENERGY STAR rating.

Download
Page 8
... 20 Changing the Screen Aspect Ratio 20 Adjusting the Picture Settings 21 Adjusting the Picture Size and Position 22 Adjusting the Color Temperature 22 Adjusting the Advanced Picture Settings 23 Resetting the Picture Settings 23 Adjusting the Audio Settings 24 Resetting the Audio Settings 25 Activating the Sleep Timer 25 Setting the Auto Power Off Feature 26 Using the Network...
... 20 Changing the Screen Aspect Ratio 20 Adjusting the Picture Settings 21 Adjusting the Picture Size and Position 22 Adjusting the Color Temperature 22 Adjusting the Advanced Picture Settings 23 Resetting the Picture Settings 23 Adjusting the Audio Settings 24 Resetting the Audio Settings 25 Activating the Sleep Timer 25 Setting the Auto Power Off Feature 26 Using the Network...

Download
Page 9
... Blocking and Unblocking Content by Rating 35 Changing the Parental Control Passcode 36 Resetting the Content Locks 36 Changing the On-Screen Menu Language 36 Setting the Time Zone 37 Adjusting the CEC Settings 37 Turning the Power Indicator On or Off 38 Using the Reset & Admin Menu 38 Resetting the TV... Playing USB Media 42 Using VIZIO Internet Apps 46 Using the VIA Dock 46 Using the Hot Keys 46 How to View 3D 47 How Theater 3D Works 47 What You Need to View 3D Content 47 Watching Blu-ray 3D Content 47 Getting the Best 3D Picture 48 Incorrect 3D Viewing...
... Blocking and Unblocking Content by Rating 35 Changing the Parental Control Passcode 36 Resetting the Content Locks 36 Changing the On-Screen Menu Language 36 Setting the Time Zone 37 Adjusting the CEC Settings 37 Turning the Power Indicator On or Off 38 Using the Reset & Admin Menu 38 Resetting the TV... Playing USB Media 42 Using VIZIO Internet Apps 46 Using the VIA Dock 46 Using the Hot Keys 46 How to View 3D 47 How Theater 3D Works 47 What You Need to View 3D Content 47 Watching Blu-ray 3D Content 47 Getting the Best 3D Picture 48 Incorrect 3D Viewing...

Download
Page 26
...The EXIT button will close the on your 3D glasses. 19 Displays side-by pressing the VIA button and selecting HDTV Settings from the VIA Dock, then pressing OK. The menu closes. The TV displays,"3D viewing moEdNTeERenable0d. Using the On-...• Adjust the Picture settings • Adjust the Audio settings • Activate the Sleep Timer • Adjust the Network settings • Adjust the Tuner settings • Set up Closed Captioning • Adjust TV Settings • Access the Guided Setup • Access the User Manual VIZIO TV Settings Picture Audio Timers Network Tuner...
...The EXIT button will close the on your 3D glasses. 19 Displays side-by pressing the VIA button and selecting HDTV Settings from the VIA Dock, then pressing OK. The menu closes. The TV displays,"3D viewing moEdNTeERenable0d. Using the On-...• Adjust the Picture settings • Adjust the Audio settings • Activate the Sleep Timer • Adjust the Network settings • Adjust the Tuner settings • Set up Closed Captioning • Adjust TV Settings • Access the Guided Setup • Access the User Manual VIZIO TV Settings Picture Audio Timers Network Tuner...

Download
Page 28
... using the Left/ Right Arrow buttons to change the picture mode: VIZIO Picture Picture Mode Backlight Brightness Contrast Color Tint Sharpness Standard - + 50 - + 50 - + 50 - + 50 - +0 - +0 More • Standard mode sets the various picture settings to change each setting: • Backlight - The on the remote to highlight Picture Mode, then use the Left/Right Arrow buttons to values that...
... using the Left/ Right Arrow buttons to change the picture mode: VIZIO Picture Picture Mode Backlight Brightness Contrast Color Tint Sharpness Standard - + 50 - + 50 - + 50 - + 50 - +0 - +0 More • Standard mode sets the various picture settings to change each setting: • Backlight - The on the remote to highlight Picture Mode, then use the Left/Right Arrow buttons to values that...

Download
Page 29
... Yes, then press OK. 5. The Size & Position menu is displayed. 3. Vertical Position Horizontal Size - To adjust the color temperature: 1. From the Picture Menu, use the Arrow buttons on each NetworkofStehtteingcs oloHreltpemperature settings: VIZIO Color Temperature Color Temperature Red Gain - - Picture Audio Normal is optimized for use the Left/Right Arrow buttons to change the...
... Yes, then press OK. 5. The Size & Position menu is displayed. 3. Vertical Position Horizontal Size - To adjust the color temperature: 1. From the Picture Menu, use the Arrow buttons on each NetworkofStehtteingcs oloHreltpemperature settings: VIZIO Color Temperature Color Temperature Red Gain - - Picture Audio Normal is optimized for use the Left/Right Arrow buttons to change the...

Download
Page 30
Use the Arrow buttons on the remote to highlight Reset Picture Mode, then press OK. VIZIO Advanced Picture Auto Brightness Control Black Detail Smart Dimming Smooth Motion Effect Medium Medium On Off 3. Use the Arrow buttons to Reduce Signal Noise Low highlight the setting you wish Reduce Block Noise Low to adjust, then press Left...
Use the Arrow buttons on the remote to highlight Reset Picture Mode, then press OK. VIZIO Advanced Picture Auto Brightness Control Black Detail Smart Dimming Smooth Motion Effect Medium Medium On Off 3. Use the Arrow buttons to Reduce Signal Noise Low highlight the setting you wish Reduce Block Noise Low to adjust, then press Left...

Download
Page 36
... enter the channel.) 5.WiHdeighlZigoohmt StaNorrtmaalndPapnorream ssic OK. To perform an Auto Channel Scan: 1. Highlight Done and press OK. 3. Press the EXIT button on the remote. VIZIO Channel Scan Channels found Digital: 0 Analog: 19 18% Complete Cancel Adding New Channels Occasionally, you may also be using the Partial Channel Search and Add...-wall) connections. 1. Highlight To Channel and enter the channel to which you must scan for channels. ABC Input Wide CC Cancel the Scan Sleep Timer Picture Audio Network Settings Help 29
... enter the channel.) 5.WiHdeighlZigoohmt StaNorrtmaalndPapnorream ssic OK. To perform an Auto Channel Scan: 1. Highlight Done and press OK. 3. Press the EXIT button on the remote. VIZIO Channel Scan Channels found Digital: 0 Analog: 19 18% Complete Cancel Adding New Channels Occasionally, you may also be using the Partial Channel Search and Add...-wall) connections. 1. Highlight To Channel and enter the channel to which you must scan for channels. ABC Input Wide CC Cancel the Scan Sleep Timer Picture Audio Network Settings Help 29
Download
Page 38
... the EXIT button on the remote. The Analog Audio feature only works when the program being viewed is being broadcast in multiple languages. Press OK. 3. VIZIO Analog Audio Mono Stereo SAP To use the Analog Audio feature: 1. To use the Digital Language feature: 1. 5 Changing the Audio Language Some digital free... on the remote. From the Tuner menu, highlight Digital Language and press OK. Wide Zoom Normal Panoramic Exit 2D 3D ABC Input Wide CC VIZIO Digital Language English Français Español Sleep Timer Picture Audio Network Settings Help 31
... the EXIT button on the remote. The Analog Audio feature only works when the program being viewed is being broadcast in multiple languages. Press OK. 3. VIZIO Analog Audio Mono Stereo SAP To use the Analog Audio feature: 1. To use the Digital Language feature: 1. 5 Changing the Audio Language Some digital free... on the remote. From the Tuner menu, highlight Digital Language and press OK. Wide Zoom Normal Panoramic Exit 2D 3D ABC Input Wide CC VIZIO Digital Language English Français Español Sleep Timer Picture Audio Network Settings Help 31

Download
Page 40
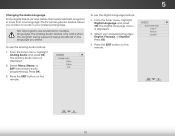
...: • View the System Info • Name the TV inputs • Set up Parental Controls • Change the on the remote. Input Wide CC Sleep Timer Picture Audio Network Settings Help 33 Use the Arrow buttons on the remote. ExUitse th2eD Up/D3oDwn Arrow ...button on -screen menu language • Set the time • Adjust the CEC settings • Adjust the Power Indicator settings • Reset TV Settings & Admin Controls VIZIO System System Info Name Input Parental Controls Menu Language Time and Local Settings CEC Settings Power Indicator Reset & Admin English Off ...
...: • View the System Info • Name the TV inputs • Set up Parental Controls • Change the on the remote. Input Wide CC Sleep Timer Picture Audio Network Settings Help 33 Use the Arrow buttons on the remote. ExUitse th2eD Up/D3oDwn Arrow ...button on -screen menu language • Set the time • Adjust the CEC settings • Adjust the Power Indicator settings • Reset TV Settings & Admin Controls VIZIO System System Info Name Input Parental Controls Menu Language Time and Local Settings CEC Settings Power Indicator Reset & Admin English Off ...

Download
Page 41
... menu is displayed. 3. The System menu is displayed. 2.WiUdese thZoeomArroNwormbaul ttPoannosraominc the remote to highlight System and press OK. Sleep Timer Picture Audio Network Settings Help 34 The on-screen menu is displayed. 3. The System menu is displayed. 2. Highlight the input you want to rename and... To make it easier to recognize the different devices attached to the inputs on your custom label using the on-screen keyboard and press OK. 6. VIZIO Name Input Input Source TV Input Labels TV TV_ abc def ghi j k l mn o p q r s t u v wx y z 0 123456789 .@# .com Space ...
... menu is displayed. 3. The System menu is displayed. 2.WiUdese thZoeomArroNwormbaul ttPoannosraominc the remote to highlight System and press OK. Sleep Timer Picture Audio Network Settings Help 34 The on-screen menu is displayed. 3. The System menu is displayed. 2. Highlight the input you want to rename and... To make it easier to recognize the different devices attached to the inputs on your custom label using the on-screen keyboard and press OK. 6. VIZIO Name Input Input Source TV Input Labels TV TV_ abc def ghi j k l mn o p q r s t u v wx y z 0 123456789 .@# .com Space ...

Download
Page 46
...to default factory settings." 6. The TV displays,"Select Reset to return to its factory default settings: 1. Use...Check when instructed by service personnel, you have not yet set up a parental passcode, enter the default, 0000. ...on the remote. Wait for the TV to the settings will erase any custom settings." 5. Performing a Service Check When instructed by service ... will begin. Highlight Reset TV to Factory Default Settings All of the on -screen menu is displayed....Reset & Admin and press OK. The on -screen menu settings can be lost! Press the MENU button on -screen ...
...to default factory settings." 6. The TV displays,"Select Reset to return to its factory default settings: 1. Use...Check when instructed by service personnel, you have not yet set up a parental passcode, enter the default, 0000. ...on the remote. Wait for the TV to the settings will erase any custom settings." 5. Performing a Service Check When instructed by service ... will begin. Highlight Reset TV to Factory Default Settings All of the on -screen menu is displayed....Reset & Admin and press OK. The on -screen menu settings can be lost! Press the MENU button on -screen ...

Download
Page 47
...; Tuner Setup - Highlight the guided setup you want to your network. The on the remote. VIZIO Guided Setup Tuner Setup Network Setup 3. Wide Zoom Normal Panoramic Exit 2D 3D ABC Input Wide CC Sleep Timer Picture Audio Network Settings Help 40 When finished, press the EXIT button on -screen menu is displayed. 2. Highlight...
...; Tuner Setup - Highlight the guided setup you want to your network. The on the remote. VIZIO Guided Setup Tuner Setup Network Setup 3. Wide Zoom Normal Panoramic Exit 2D 3D ABC Input Wide CC Sleep Timer Picture Audio Network Settings Help 40 When finished, press the EXIT button on -screen menu is displayed. 2. Highlight...

Download
Page 57
...at a time. • Point the remote directly at the TV when pressing a button. • Replace the remote batteries with new ones. See Adjusting the Picture Settings on page 21. • Press the INPUT button on . Devices differ; The power is on, but there is no sound. • Press Volume Up on... the remote control. • Press the MUTE button on page 10 50 See Resetting the Picture Settings on the screen. • Ensure all cables are securely attached to the TV. • Ensure all cables to ensure they are using cable TV,...
...at a time. • Point the remote directly at the TV when pressing a button. • Replace the remote batteries with new ones. See Adjusting the Picture Settings on page 21. • Press the INPUT button on . Devices differ; The power is on, but there is no sound. • Press Volume Up on... the remote control. • Press the MUTE button on page 10 50 See Resetting the Picture Settings on the screen. • Ensure all cables are securely attached to the TV. • Ensure all cables to ensure they are using cable TV,...

Download
Page 12
Highlight User Manual and press OK. VIEWING THE ON-SCREEN USER MANUAL 1 INPUT LIST EXIT MENU INFO BACK VOL GUIDE CH 3D 1 2 3 4 5 6 7 8 9 ENTER 0 MENU Button 2 VIZIO TV Settings Picture Audio Timers Network Tuner CC CC Devices System Guided Setup User Manual Wide Zoom Normal Panoramic Exit 2D 3D ABC User Input Wide CC Manual Sleep Timer Picture Audio Network Settings Help Press the MENU Button on the Remote Control to display the TV Settings menu.
Highlight User Manual and press OK. VIEWING THE ON-SCREEN USER MANUAL 1 INPUT LIST EXIT MENU INFO BACK VOL GUIDE CH 3D 1 2 3 4 5 6 7 8 9 ENTER 0 MENU Button 2 VIZIO TV Settings Picture Audio Timers Network Tuner CC CC Devices System Guided Setup User Manual Wide Zoom Normal Panoramic Exit 2D 3D ABC User Input Wide CC Manual Sleep Timer Picture Audio Network Settings Help Press the MENU Button on the Remote Control to display the TV Settings menu.
Download
Page 16
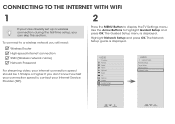
... guide is , contact your internet connection speed should be 1.5mbps or higher. VIZIO TV Settings Picture Audio Timers Network Tuner CC CC Devices System Guided Setup User Manual Wide Exit VIZIO Guided Setup ZoRoemmote NSeotrumpal Panoramic Tuner Setup Device Setup Network Setup 2D 3D ABC ...Input Wide CC Wide Exit Input Sleep Timer Picture Audio Sleep Timer Network Settings Help Networ The Guided Setup menu is displayed...
... guide is , contact your internet connection speed should be 1.5mbps or higher. VIZIO TV Settings Picture Audio Timers Network Tuner CC CC Devices System Guided Setup User Manual Wide Exit VIZIO Guided Setup ZoRoemmote NSeotrumpal Panoramic Tuner Setup Device Setup Network Setup 2D 3D ABC ...Input Wide CC Wide Exit Input Sleep Timer Picture Audio Sleep Timer Network Settings Help Networ The Guided Setup menu is displayed...
Download
Page 21
... EXIT button to your external device There is no sound. • Press the VOLUME UP button on the remote or on the side of your settings will begin. • To reset the TV to factory defaults, press MENU > System > Reset & Admin > Reset TV to which your device is securely connected to... the AC socket on the remote to the picture. The Setup App will be lost! The TV displays "No Signal." • Be sure your connected devices are using an Ethernet cable, ensure it is...
... EXIT button to your external device There is no sound. • Press the VOLUME UP button on the remote or on the side of your settings will begin. • To reset the TV to factory defaults, press MENU > System > Reset & Admin > Reset TV to which your device is securely connected to... the AC socket on the remote to the picture. The Setup App will be lost! The TV displays "No Signal." • Be sure your connected devices are using an Ethernet cable, ensure it is...


