Camera Manual
Page 2
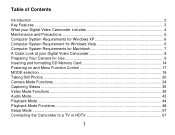
... 4 Maintenance and Precautions 5 Computer System Requirements for Windows XP 6 Computer System Requirement for Windows Vista 6 Computer System Requirements for Macintosh 7 A Quick Look at your Digital Video Camcorder 8 Preparing Your Camera for Use 9 Inserting and formatting SD Memory Card 14 Powering on and Menu Function Control 17 MODE selection ...18 Taking Still Photos ...20 Camera Mode Functions ...24 Capturing Videos ...36 Video Mode Functions ...38 Audio Mode...43 Playback Mode ...44 Playback Mode Functions 48 Setup Mode ...57 Connecting the Camcorder to a TV or HDTV 67 1
... 4 Maintenance and Precautions 5 Computer System Requirements for Windows XP 6 Computer System Requirement for Windows Vista 6 Computer System Requirements for Macintosh 7 A Quick Look at your Digital Video Camcorder 8 Preparing Your Camera for Use 9 Inserting and formatting SD Memory Card 14 Powering on and Menu Function Control 17 MODE selection ...18 Taking Still Photos ...20 Camera Mode Functions ...24 Capturing Videos ...36 Video Mode Functions ...38 Audio Mode...43 Playback Mode ...44 Playback Mode Functions 48 Setup Mode ...57 Connecting the Camcorder to a TV or HDTV 67 1
Camera Manual
Page 3
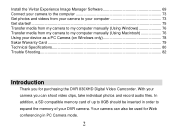
... be inserted in PC Camera mode. 2 Your camera can shoot video clips, take individual photos and record audio files. Install the Vivitar Experience Image Manager Software 69 Connect your camera to the computer 73 Get photos and videos from your camera to your computer 73 Get started! ...75 Transfer media from my camera to my computer manually (Using Windows 76 Transfer media from my camera to expand the memory of up to 8GB should be used for purchasing the DVR 830XHD Digital Video Camcorder.
... be inserted in PC Camera mode. 2 Your camera can shoot video clips, take individual photos and record audio files. Install the Vivitar Experience Image Manager Software 69 Connect your camera to the computer 73 Get photos and videos from your camera to your computer 73 Get started! ...75 Transfer media from my camera to my computer manually (Using Windows 76 Transfer media from my camera to expand the memory of up to 8GB should be used for purchasing the DVR 830XHD Digital Video Camcorder.
Camera Manual
Page 4
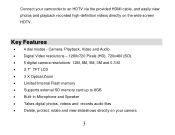
..., 5M, 3M and 0.3 M 2.7" TFT LCD 3 X Optical Zoom Limited Internal Flash memory Supports external SD memory card up to an HDTV via the provided HDMI cable, and easily view photos and playback recorded high-definition videos directly on your camera 3 Connect your camcorder to 8GB Built-in Microphone and Speaker Takes digital photos, videos and records audio files Delete, protect, rotate and view slideshows directly on the wide screen HDTV. Key Features 4 dial...
..., 5M, 3M and 0.3 M 2.7" TFT LCD 3 X Optical Zoom Limited Internal Flash memory Supports external SD memory card up to an HDTV via the provided HDMI cable, and easily view photos and playback recorded high-definition videos directly on your camera 3 Connect your camcorder to 8GB Built-in Microphone and Speaker Takes digital photos, videos and records audio files Delete, protect, rotate and view slideshows directly on the wide screen HDTV. Key Features 4 dial...
Camera Manual
Page 9
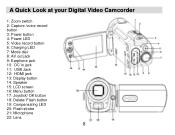
A Quick Look at your Digital Video Camcorder 1: Zoom switch 2: Capture /voice record button 3: Power button 4: Power LED 5: Video record button 6: Charging LED 7: Mode dial 8: AV out jack 9: Earphone jack 10: DC in jack 11: USB Jack 12: HDMI jack 13: Display button 14: Speaker 15: LCD screen 16: Menu button 17: Joystick/ OK button 18: Delete/ Flash button 19: Compensating LED 20: Flash strobe 21: Microphone 22: Lens 8
A Quick Look at your Digital Video Camcorder 1: Zoom switch 2: Capture /voice record button 3: Power button 4: Power LED 5: Video record button 6: Charging LED 7: Mode dial 8: AV out jack 9: Earphone jack 10: DC in jack 11: USB Jack 12: HDMI jack 13: Display button 14: Speaker 15: LCD screen 16: Menu button 17: Joystick/ OK button 18: Delete/ Flash button 19: Compensating LED 20: Flash strobe 21: Microphone 22: Lens 8
Camera Manual
Page 12
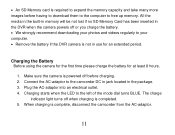
.... 5. Charging the Battery Before using the camera for the first time please charge the battery for an extended period. Connect the AC-adaptor to your photos and videos regularly to the camcorder DC in jack located in use for at least 8 hours. 1. The charge indicator light turns off before having to download them to the computer to the left of the mode dial turns BLUE. An SD Memory card...
.... 5. Charging the Battery Before using the camera for the first time please charge the battery for an extended period. Connect the AC-adaptor to your photos and videos regularly to the camcorder DC in jack located in use for at least 8 hours. 1. The charge indicator light turns off before having to download them to the computer to the left of the mode dial turns BLUE. An SD Memory card...
Camera Manual
Page 13
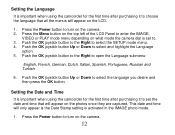
... select the SETUP mode menu. 4. This date and time will only appear is the Date Stamp setting is set the date and time that all the menus will appear on the LCD. 1. Press the Power button to turn on the camera. 12 Setting the Language It is important when using the camcorder for the first time after purchasing it to choose the language that will appear on the photos once they are captured. Push...
... select the SETUP mode menu. 4. This date and time will only appear is the Date Stamp setting is set the date and time that all the menus will appear on the LCD. 1. Press the Power button to turn on the camera. 12 Setting the Language It is important when using the camcorder for the first time after purchasing it to choose the language that will appear on the photos once they are captured. Push...
Camera Manual
Page 15
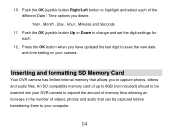
... change and set the digit settings for each of videos, photos and audio that allows you to your camera. Press the OK button when you desire. An SD compatible memory card of up to 8GB (not included) should to be captured before transferring them to capture photos, videos and audio files. 10. Push the OK joystick button Right/Left button to save the new date and time setting on your computer. 14 Inserting and formatting SD Memory Card...
... change and set the digit settings for each of videos, photos and audio that allows you to your camera. Press the OK button when you desire. An SD compatible memory card of up to 8GB (not included) should to be captured before transferring them to capture photos, videos and audio files. 10. Push the OK joystick button Right/Left button to save the new date and time setting on your computer. 14 Inserting and formatting SD Memory Card...
Camera Manual
Page 17
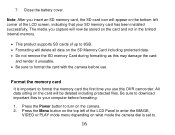
... Memory Card including protected data. Do not remove the SD memory Card during formatting as this DVR camcorder. Be sure to download important files to format the card with the camera before formatting. 1. Note: After you use . 7. Close the battery cover. The media you capture will be stored on the card and not in the limited internal memory. This product supports SD cards of the LCD Panel to enter the IMAGE, VIDEO or PLAY mode menu depending on what mode...
... Memory Card including protected data. Do not remove the SD memory Card during formatting as this DVR camcorder. Be sure to download important files to format the card with the camera before formatting. 1. Note: After you use . 7. Close the battery cover. The media you capture will be stored on the card and not in the limited internal memory. This product supports SD cards of the LCD Panel to enter the IMAGE, VIDEO or PLAY mode menu depending on what mode...
Camera Manual
Page 18
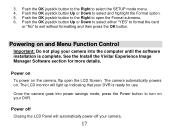
... select the SETUP mode menu. 4. Power on To power on . See the Install the Vivitar Experience Image Manager Software section for use. The camera automatically powers on the camera, flip open the Format submenu. 6. Push the OK joystick button to the Right to open the LCD Screen. Powering on and Menu Function Control Important: Do not plug your camera into power savings mode, press the Power button to turn on your DVR is complete. Once the camera goes into the computer until the software installation is...
... select the SETUP mode menu. 4. Power on To power on . See the Install the Vivitar Experience Image Manager Software section for use. The camera automatically powers on the camera, flip open the Format submenu. 6. Push the OK joystick button to the Right to open the LCD Screen. Powering on and Menu Function Control Important: Do not plug your camera into power savings mode, press the Power button to turn on your DVR is complete. Once the camera goes into the computer until the software installation is...
Camera Manual
Page 19
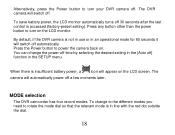
.... MODE selection The DVR camcorder has four record modes. You can change to the different modes you need to turn your DVR camera off 30 seconds after the last control is not in use or in an operational mode for 60 seconds it will automatically power off . The camera will switch off ] function in line with the red dot outside the dial. 18 By default, if the DVR camera is accessed (factory-preset setting). Press...
.... MODE selection The DVR camcorder has four record modes. You can change to the different modes you need to turn your DVR camera off 30 seconds after the last control is not in use or in an operational mode for 60 seconds it will automatically power off . The camera will switch off ] function in line with the red dot outside the dial. 18 By default, if the DVR camera is accessed (factory-preset setting). Press...
Camera Manual
Page 21
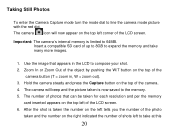
... left of the camera button (T = zoom in the LCD to take many more images. 1. Important: The camera`s internal memory is taken the number on the left tells you the number of the photo taken and the number on the right indicated the number of shots left corner of photos that appears in , W = zoom out). 3. The number of the LCD screen. Taking Still Photos To enter the Camera Capture mode turn the mode dial to 64MB...
... left of the camera button (T = zoom in the LCD to take many more images. 1. Important: The camera`s internal memory is taken the number on the left tells you the number of the photo taken and the number on the right indicated the number of shots left corner of photos that appears in , W = zoom out). 3. The number of the LCD screen. Taking Still Photos To enter the Camera Capture mode turn the mode dial to 64MB...
Camera Manual
Page 22
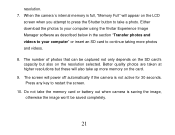
resolution. 7. Either download the photos to your computer using the Vivitar Experience Image Manager software as described below in the section "Transfer photos and videos to your computer" or insert an SD card to continue taking more memory on the resolution selected. Press any key to take a photo. The number of photos that can be saved completely. 21 Do not take up more photos and videos. 8. The screen will...
resolution. 7. Either download the photos to your computer using the Vivitar Experience Image Manager software as described below in the section "Transfer photos and videos to your computer" or insert an SD card to continue taking more memory on the resolution selected. Press any key to take a photo. The number of photos that can be saved completely. 21 Do not take up more photos and videos. 8. The screen will...

Camera Manual
Page 24
Digital Zoom You may affect the quality of your object. 2. Using the Flash in bright light environments will not work while in Burst Snapshot mode or if the battery power level is low. Note: The flash will cause the image to zoom out of the image as the higher the zoom multiple the lower the image quality will remain blank while the flash recharges. Press the Zoom Out ( W ) function button to...
Digital Zoom You may affect the quality of your object. 2. Using the Flash in bright light environments will not work while in Burst Snapshot mode or if the battery power level is low. Note: The flash will cause the image to zoom out of the image as the higher the zoom multiple the lower the image quality will remain blank while the flash recharges. Press the Zoom Out ( W ) function button to...

Camera Manual
Page 44
... camera to be recorded without audio Audio Mode Your camera has limited internal memory of recording time available as a WAV audio file in the LCD screen with the red dot. 1. Turn the mode dial so that the video will appear on your SD memory card. 43 Press the Capture/Voice record button to record test audio WAV files. An SD card of up with the amount of a few minutes to stop and save other media files). The Audio graphics appears in your internal memory...
... camera to be recorded without audio Audio Mode Your camera has limited internal memory of recording time available as a WAV audio file in the LCD screen with the red dot. 1. Turn the mode dial so that the video will appear on your SD memory card. 43 Press the Capture/Voice record button to record test audio WAV files. An SD card of up with the amount of a few minutes to stop and save other media files). The Audio graphics appears in your internal memory...
Camera Manual
Page 66
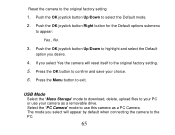
... options submenu to the PC. 65 Push the OK joystick button Up/Down to exit. Press the OK button to use your choice. 6. Select the "PC Camera" mode to confirm and save your camera as a PC Camera. USB Mode Select the "Mass Storage" mode to download, delete, upload files to the original factory setting 1. Press the Menu button to select the Default mode. 2. Reset the camera to your PC or use this camera as a removable drive.
... options submenu to the PC. 65 Push the OK joystick button Up/Down to exit. Press the OK button to use your choice. 6. Select the "PC Camera" mode to confirm and save your camera as a PC Camera. USB Mode Select the "Mass Storage" mode to download, delete, upload files to the original factory setting 1. Press the Menu button to select the Default mode. 2. Reset the camera to your PC or use this camera as a removable drive.
Camera Manual
Page 69
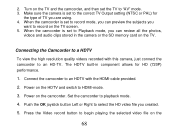
... the camcorder, and then set to "AV" mode. 3. Press the Video record button to playback mode. 4. Make sure the camera is set the TV to the correct TV Output setting (NTSC or PAL) for HD (720P) performance. 1. Turn on the 68 The HDTV built-in the camera or the SD memory card on the TV screen. 5. Power on the HDTV and switch to select the HD video file you are using. 4. Connecting the Camcorder to...
... the camcorder, and then set to "AV" mode. 3. Press the Video record button to playback mode. 4. Make sure the camera is set the TV to the correct TV Output setting (NTSC or PAL) for HD (720P) performance. 1. Turn on the 68 The HDTV built-in the camera or the SD memory card on the TV screen. 5. Power on the HDTV and switch to select the HD video file you are using. 4. Connecting the Camcorder to...
Camera Manual
Page 70
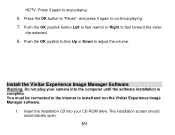
... OK button to "Pause", and press it again to stop playing. 6. Install the Vivitar Experience Image Manager Software Warning: Do not plug your CD-ROM drive. Press it again to fast forward the video clip selected. 8. You must be connected to the internet to adjust the volume. Push the OK joystick button Up or Down to install and run the Vivitar Experience Image Manager software. 1. Push the OK joystick button Left...
... OK button to "Pause", and press it again to stop playing. 6. Install the Vivitar Experience Image Manager Software Warning: Do not plug your CD-ROM drive. Press it again to fast forward the video clip selected. 8. You must be connected to the internet to adjust the volume. Push the OK joystick button Up or Down to install and run the Vivitar Experience Image Manager software. 1. Push the OK joystick button Left...
Camera Manual
Page 71
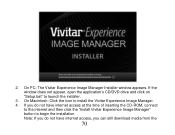
2. If the window does not appear, open the application's CD/DVD drive and click on "Setup.bat" to install the Vivitar Experience Image Manager. 4. On Macintosh: Click the icon to launch the installer. 3. If you do not have internet access at the time of inserting the CD-ROM, connect to the internet and then click the "Install Vivitar Experience Image Manager" button to begin the installation Note: If you do not have internet access, you can still download media from the 70 On PC: The Vivitar Experience Image Manager Installer window appears.
2. If the window does not appear, open the application's CD/DVD drive and click on "Setup.bat" to install the Vivitar Experience Image Manager. 4. On Macintosh: Click the icon to launch the installer. 3. If you do not have internet access at the time of inserting the CD-ROM, connect to the internet and then click the "Install Vivitar Experience Image Manager" button to begin the installation Note: If you do not have internet access, you can still download media from the 70 On PC: The Vivitar Experience Image Manager Installer window appears.

Camera Manual
Page 78
... videos into the Movies folder. 8. The camera's device icon appears on all the while it is plugged into your camera appears in PC Camera mode, press the OK button to change it won't be switched off . 77 Optionally, select the files and choose Copy from the Edit menu. 7. Do not disconnect the cable during transfer. Select the files and drag them into the USB and it back to view...
... videos into the Movies folder. 8. The camera's device icon appears on all the while it is plugged into your camera appears in PC Camera mode, press the OK button to change it won't be switched off . 77 Optionally, select the files and choose Copy from the Edit menu. 7. Do not disconnect the cable during transfer. Select the files and drag them into the USB and it back to view...

Camera Manual
Page 79
... source of the software you to them. 78 You can use . Press the OK button to PC Camera, please wait until the PC recognizes the camera`s driver. Connect the camera to the PC with the USB cable provided and change the camera mode to select "PC Camera" if it is recognized and ready to use this PC cam to video conference using Window Vista a screen may appear asking you are installing.
... source of the software you to them. 78 You can use . Press the OK button to PC Camera, please wait until the PC recognizes the camera`s driver. Connect the camera to the PC with the USB cable provided and change the camera mode to select "PC Camera" if it is recognized and ready to use this PC cam to video conference using Window Vista a screen may appear asking you are installing.


