8324 Users Manual
Page 11
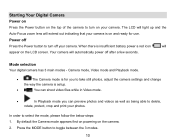
... 3 modes. 10 When there is on and ready for you to take still photos, adjust the camera settings and change the way the camera is setup. • You can shoot video files while in Video mode. • In Playback mode you can preview photos and videos as well as being able...
... 3 modes. 10 When there is on and ready for you to take still photos, adjust the camera settings and change the way the camera is setup. • You can shoot video files while in Video mode. • In Playback mode you can preview photos and videos as well as being able...
8324 Users Manual
Page 21
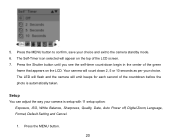
... the camera will count down begin in the center of the green frame that appears on the top of the countdown before the photo is setup with 11 setup option: Exposure, ISO, White Balance, Sharpness, Quality, Date, Auto Power off, Digital Zoom, Language, Format, Default Setting and Cancel...
... the camera will count down begin in the center of the green frame that appears on the top of the countdown before the photo is setup with 11 setup option: Exposure, ISO, White Balance, Sharpness, Quality, Date, Auto Power off, Digital Zoom, Language, Format, Default Setting and Cancel...
8324 Users Manual
Page 22
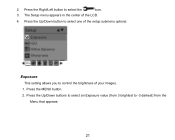
The Setup menu appears in the center of your images. 1. Press the Up/Down button to select one of the setup submenu options: Exposure This setting allows you to control the brightness of the LCD. 4. Press the MENU button. 2. Press the Right/Left button to -3 darkest) from the Menu that appears: 21 Press the Up/Down buttons to select an Exposure value (from 3 brightest to select the icon. 3. 2.
The Setup menu appears in the center of your images. 1. Press the Up/Down button to select one of the setup submenu options: Exposure This setting allows you to control the brightness of the LCD. 4. Press the MENU button. 2. Press the Right/Left button to -3 darkest) from the Menu that appears: 21 Press the Up/Down buttons to select an Exposure value (from 3 brightest to select the icon. 3. 2.

8324 Users Manual
Page 23
... the Up/Down buttons to the camera standby mode. 4. Press the MENU button to confirm, save and exit to select the ISO option in the Setup menu. 2. The Exposure icon for the option you also specifically do not wish to prevent spots or blotches appearing on the bottom of the LCD...
... the Up/Down buttons to the camera standby mode. 4. Press the MENU button to confirm, save and exit to select the ISO option in the Setup menu. 2. The Exposure icon for the option you also specifically do not wish to prevent spots or blotches appearing on the bottom of the LCD...
8324 Users Manual
Page 24
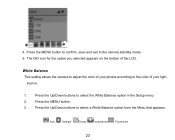
Press the MENU button. 3. The ISO icon for the option you selected appears on the bottom of your light source. 1. Press the MENU button to confirm, save and exit to the color of your photos according to the camera standby mode. 5. White Balance This setting allows the camera to adjust the color of the LCD. Press the Up/Down buttons to select the White Balance option in the Setup menu 2. Press the Up/Down buttons to select a White Balance option from the Menu that appears: Auto Daylight Cloudy Incandescent Fluorescent 23 4.
Press the MENU button. 3. The ISO icon for the option you selected appears on the bottom of your light source. 1. Press the MENU button to confirm, save and exit to the color of your photos according to the camera standby mode. 5. White Balance This setting allows the camera to adjust the color of the LCD. Press the Up/Down buttons to select the White Balance option in the Setup menu 2. Press the Up/Down buttons to select a White Balance option from the Menu that appears: Auto Daylight Cloudy Incandescent Fluorescent 23 4.

8324 Users Manual
Page 25
Press the MENU button to confirm, save and exit to select a Sharpness option from the Menu that appears: 24 The LCD screen will be adjusted as per the White Balance option you to select the Sharpness option in the Setup menu 2. Sharpness This setting allows you selected. Press the Up/Down buttons to the camera standby mode. 5. Press the Up/Down buttons to adjust the sharpness of your images, making edges more or less distinct. 1. 4. Press the MENU button. 3.
Press the MENU button to confirm, save and exit to select a Sharpness option from the Menu that appears: 24 The LCD screen will be adjusted as per the White Balance option you to select the Sharpness option in the Setup menu 2. Sharpness This setting allows you selected. Press the Up/Down buttons to the camera standby mode. 5. Press the Up/Down buttons to adjust the sharpness of your images, making edges more or less distinct. 1. 4. Press the MENU button. 3.
8324 Users Manual
Page 26
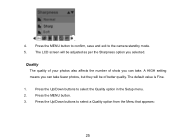
A HIGH setting means you can take fewer photos, but they will be of shots you selected. The LCD screen will be adjusted as per the Sharpness option you can take . 4. Press the MENU button. 3. Press the Up/Down buttons to select the Quality option in the Setup menu. 2. Quality The quality of your photos also affects the number of better quality. Press the Up/Down buttons to select a Quality option from the Menu that appears: 25 Press the MENU button to confirm, save and exit to the camera standby mode. 5. The default value is Fine. 1.
A HIGH setting means you can take fewer photos, but they will be of shots you selected. The LCD screen will be adjusted as per the Sharpness option you can take . 4. Press the MENU button. 3. Press the Up/Down buttons to select the Quality option in the Setup menu. 2. Quality The quality of your photos also affects the number of better quality. Press the Up/Down buttons to select a Quality option from the Menu that appears: 25 Press the MENU button to confirm, save and exit to the camera standby mode. 5. The default value is Fine. 1.
8324 Users Manual
Page 27
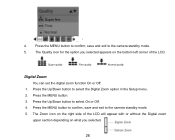
... set the digital zoom function On or Off. 1. Press the MENU button. 3. Press the Up/Down button to select the Digital Zoom option in the Setup menu. 2. The Quality icon for the option you selected. 26 Press the Up/Down button to select On or Off. 4. Press the MENU button to...
... set the digital zoom function On or Off. 1. Press the MENU button. 3. Press the Up/Down button to select the Digital Zoom option in the Setup menu. 2. The Quality icon for the option you selected. 26 Press the Up/Down button to select On or Off. 4. Press the MENU button to...
8324 Users Manual
Page 28
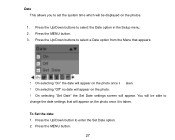
... will appear. Press the Up/Down button to select a Date option from the Menu that will be able to select the Date option in the Setup menu. 2. Press the Up/Down buttons to enter the Set Date option. 2. On selecting "Set Date" the Set Date settings screen will appear on the...
... will appear. Press the Up/Down button to select a Date option from the Menu that will be able to select the Date option in the Setup menu. 2. Press the Up/Down buttons to enter the Set Date option. 2. On selecting "Set Date" the Set Date settings screen will appear on the...
8324 Users Manual
Page 29
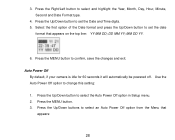
... the Auto Power Off option to set the Date and Time digits. 5. Press the Right/Left button to select the Auto Power Off option in Setup menu. 2. Press the Up/Down button to select and highlight the Year, Month, Day, Hour, Minute, Second and Date Format type. 4. Press the MENU button...
... the Auto Power Off option to set the Date and Time digits. 5. Press the Right/Left button to select the Auto Power Off option in Setup menu. 2. Press the Up/Down button to select and highlight the Year, Month, Day, Hour, Minute, Second and Date Format type. 4. Press the MENU button...
8324 Users Manual
Page 31
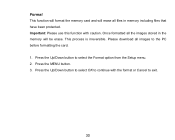
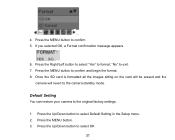
Press the Up/Down button to select OK to the PC before formatting the card. 1. Please download all files in the memory will erase all images to continue with caution. This process is irreversible. Press the MENU button. 3. Press the Up/Down button to exit. 30 Format This function will format the memory card and will be erase. Important: Please use this function with the format or Cancel to select the Format option from the Setup menu. 2. Once formatted all the images stored in memory including files that have been protected.
Press the Up/Down button to select OK to the PC before formatting the card. 1. Please download all files in the memory will erase all images to continue with caution. This process is irreversible. Press the MENU button. 3. Press the Up/Down button to exit. 30 Format This function will format the memory card and will be erase. Important: Please use this function with the format or Cancel to select the Format option from the Setup menu. 2. Once formatted all the images stored in memory including files that have been protected.
8324 Users Manual
Page 32
..." to the original factory settings. 1. Default Setting You can restore your camera to exit. 7. Press the Up/Down button to select Default Setting in the Setup menu. 2. Press the Up/Down button to select OK 31 Press the MENU button to confirm. 5. Press the MENU button. 3. If you selected OK, a Format...
..." to the original factory settings. 1. Default Setting You can restore your camera to exit. 7. Press the Up/Down button to select Default Setting in the Setup menu. 2. Press the Up/Down button to select OK 31 Press the MENU button to confirm. 5. Press the MENU button. 3. If you selected OK, a Format...

8324 Users Manual
Page 35
Download the test file from the internal memory to the PC or delete them to select a White Balance option from the Menu that appears: Auto Daylight Cloudy Incandescent Fluorescent 34 Press the Up/Down buttons to shoot more videos. Press the Right/Left button to record longer videos. White Balance, Size and Macro White Balance You can insert a SD memory card to expand the memory to select the option. 3. Press the MENU button. 2. Alternatively, you can select 5 different White Balance light conditions for shooting videos. 1. In Video mode there are 3 setup options -
Download the test file from the internal memory to the PC or delete them to select a White Balance option from the Menu that appears: Auto Daylight Cloudy Incandescent Fluorescent 34 Press the Up/Down buttons to shoot more videos. Press the Right/Left button to record longer videos. White Balance, Size and Macro White Balance You can insert a SD memory card to expand the memory to select the option. 3. Press the MENU button. 2. Alternatively, you can select 5 different White Balance light conditions for shooting videos. 1. In Video mode there are 3 setup options -