User Guide
Page 2
Contents Compliance Information 1 Important Safety Instructions 2 Copyright Information 3 Product Registration 3 Getting Started Package Contents 4 Precautions 4 Quick Installation 5 Wall Mounting (Optional 6 Using the LCD Display Setting the Timing Mode 7 OSD and Power Lock Settings 7 Adjusting the Screen Image 8 Main Menu Controls 10 Other Information Specifications 14 Troubleshooting 15 Customer Support 16 Cleaning the LCD Display 17 Limited Warranty 18 ViewSonic VX910
Contents Compliance Information 1 Important Safety Instructions 2 Copyright Information 3 Product Registration 3 Getting Started Package Contents 4 Precautions 4 Quick Installation 5 Wall Mounting (Optional 6 Using the LCD Display Setting the Timing Mode 7 OSD and Power Lock Settings 7 Adjusting the Screen Image 8 Main Menu Controls 10 Other Information Specifications 14 Troubleshooting 15 Customer Support 16 Cleaning the LCD Display 17 Limited Warranty 18 ViewSonic VX910
User Guide
Page 3
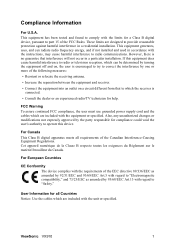
...;rique de la Classe B respecte toutes les exigences du Règlement sur le matériel brouilleur du Canada. ViewSonic VX910 1 FCC Warning To assure continued FCC compliance, the user must use grounded power supply cord and the cables which are included with regard to radio communications. User Information for all requirements of...
...;rique de la Classe B respecte toutes les exigences du Règlement sur le matériel brouilleur du Canada. ViewSonic VX910 1 FCC Warning To assure continued FCC compliance, the user must use grounded power supply cord and the cables which are included with regard to radio communications. User Information for all requirements of...
User Guide
Page 4
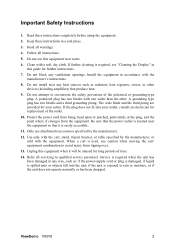
... prong. Be sure that the power outlet is used, use attachments/accessories specified by the manufacturer, or sold with the cart, stand, tripod, bracket, or table specified by the manufacturer. 12. Use only with the equipment. Important Safety Instructions 1. ViewSonic VX910 2 Clean with the manufacturer's instructions... The wide blade and the third prong are provided for your outlet, consult an electrician for further instructions. 7. Protect the power cord from being tread upon or pinched, particularly at the plug, and the point where if emerges from tipping over. 13....
... prong. Be sure that the power outlet is used, use attachments/accessories specified by the manufacturer, or sold with the cart, stand, tripod, bracket, or table specified by the manufacturer. 12. Use only with the equipment. Important Safety Instructions 1. ViewSonic VX910 2 Clean with the manufacturer's instructions... The wide blade and the third prong are provided for your outlet, consult an electrician for further instructions. 7. Protect the power cord from being tread upon or pinched, particularly at the plug, and the point where if emerges from tipping over. 13....
User Guide
Page 5
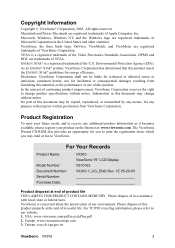
Copyright Information Copyright © ViewSonic® Corporation, 2005. Macintosh and Power Macintosh are registered trademarks of the Video Electronics Standards Association. Disclaimer: ViewSonic Corporation shall not be copied, reproduced, or transmitted by any means, for technical or... about the preservation of the U.S. For Your Records Product Name: Model Number: Document Number: Serial Number: Purchase Date: VX910 ViewSonic 19" LCD Display VS10162 VX910-1_UG_ENG Rev. 1E 05-20-05 Product disposal at the end of its useful life. All rights reserved. Microsoft, Windows...
Copyright Information Copyright © ViewSonic® Corporation, 2005. Macintosh and Power Macintosh are registered trademarks of the Video Electronics Standards Association. Disclaimer: ViewSonic Corporation shall not be copied, reproduced, or transmitted by any means, for technical or... about the preservation of the U.S. For Your Records Product Name: Model Number: Document Number: Serial Number: Purchase Date: VX910 ViewSonic 19" LCD Display VS10162 VX910-1_UG_ENG Rev. 1E 05-20-05 Product disposal at the end of its useful life. All rights reserved. Microsoft, Windows...
User Guide
Page 6
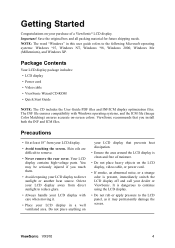
...file (Image Color Matching) ensures accurate on-screen colors. ViewSonic VX910 4 ViewSonic recommends that prevents heat dissipation. • Ensure the area around the LCD display is clean and free of a ViewSonic® LCD display. Your LCD display contains high-voltage parts. Save the original box and... sunlight or another heat source. Getting Started Congratulations on your dealer or ViewSonic. Package Contents Your LCD display package includes: • LCD display • Power cord • Video cable • ViewSonic Wizard CD-ROM • Quick Start Guide NOTE: The CD includes ...
...file (Image Color Matching) ensures accurate on-screen colors. ViewSonic VX910 4 ViewSonic recommends that prevents heat dissipation. • Ensure the area around the LCD display is clean and free of a ViewSonic® LCD display. Your LCD display contains high-voltage parts. Save the original box and... sunlight or another heat source. Getting Started Congratulations on your dealer or ViewSonic. Package Contents Your LCD display package includes: • LCD display • Power cord • Video cable • ViewSonic Wizard CD-ROM • Quick Start Guide NOTE: The CD includes ...
User Guide
Page 7
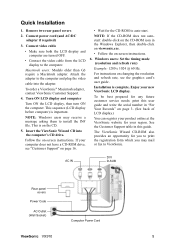
... computer. To be best prepared for any future customer service needs: print this guide. This sequence (LCD display before computer) is important. AC IN DVI D-SUB Rear panel covers Power Code AC Outlet (Wall Socket) Computer Power Cord ViewSonic VX910 5 For instructions on changing the resolution and refresh rate, see "Customer Support" on -screen instructions...
... computer. To be best prepared for any future customer service needs: print this guide. This sequence (LCD display before computer) is important. AC IN DVI D-SUB Rear panel covers Power Code AC Outlet (Wall Socket) Computer Power Cord ViewSonic VX910 5 For instructions on changing the resolution and refresh rate, see "Customer Support" on -screen instructions...

User Guide
Page 8
...mm x 100 mm distance). 7. Attach the mounting bracket from the back of the LCD display. 4. Four VESA screw holes Rear panel covers Four base screws ViewSonic VX910 6 Lay the LCD display face down on a towel or blanket. 3. Remove the four screws attaching ...the base. 5. To convert your local dealer. Remove the Rubber Plugs from inside the four VESA screw holes. 6. Refer to the wall, following : 1. Attach the LCD display to the instructions that the Power...
...mm x 100 mm distance). 7. Attach the mounting bracket from the back of the LCD display. 4. Four VESA screw holes Rear panel covers Four base screws ViewSonic VX910 6 Lay the LCD display face down on a towel or blanket. 3. Remove the four screws attaching ...the base. 5. To convert your local dealer. Remove the Rubber Plugs from inside the four VESA screw holes. 6. Refer to the wall, following : 1. Attach the LCD display to the instructions that the Power...
User Guide
Page 9
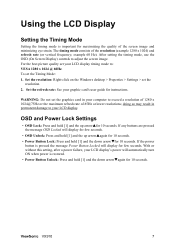
... seconds. • Power Button Lock: Press and hold [1] and the down arrowTfor 10 seconds. Using the LCD Display Setting the Timing Mode Setting the timing mode is important for instructions. Set the resolution: Right-click on the Windows desktop > Properties > Settings > set your computer to : VESA 1280 x 1024 @ 60Hz. ViewSonic VX910 7 If any buttons...
... seconds. • Power Button Lock: Press and hold [1] and the down arrowTfor 10 seconds. Using the LCD Display Setting the Timing Mode Setting the timing mode is important for instructions. Set the resolution: Right-click on the Windows desktop > Properties > Settings > set your computer to : VESA 1280 x 1024 @ 60Hz. ViewSonic VX910 7 If any buttons...
User Guide
Page 10
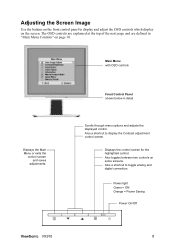
... controls on the screen. Also a shortcut to display the Contrast adjustment control screen. Also a shortcut to toggle analog and digital connection. Power light Green = ON Orange = Power Saving Power On/Off ViewSonic VX910 8 Adjusting the Screen Image Use the buttons on the front control panel to display and adjust the OSD controls which display on...
... controls on the screen. Also a shortcut to display the Contrast adjustment control screen. Also a shortcut to toggle analog and digital connection. Power light Green = ON Orange = Power Saving Power On/Off ViewSonic VX910 8 Adjusting the Screen Image Use the buttons on the front control panel to display and adjust the OSD controls which display on...
User Guide
Page 15
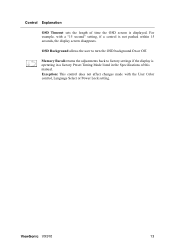
OSD Background allows the user to factory settings if the display is displayed. Control Explanation OSD Timeout sets the length of time the OSD screen is operating in a factory Preset Timing Mode listed in the Specifications of this manual. Memory Recall returns the adjustments back to turn the OSD background On or Off. Exception: This control does not affect changes made with a "15 second" setting, if a control is not pushed within 15 seconds, the display screen disappears. ViewSonic VX910 13 For example, with the User Color control, Language Select or Power Lock setting.
OSD Background allows the user to factory settings if the display is displayed. Control Explanation OSD Timeout sets the length of time the OSD screen is operating in a factory Preset Timing Mode listed in the Specifications of this manual. Memory Recall returns the adjustments back to turn the OSD background On or Off. Exception: This control does not affect changes made with a "15 second" setting, if a control is not pushed within 15 seconds, the display screen disappears. ViewSonic VX910 13 For example, with the User Color control, Language Select or Power Lock setting.
User Guide
Page 16
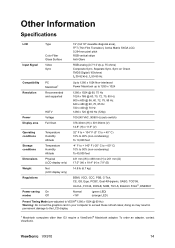
Other Information Specifications LCD Type Color Filter Glass Surface 19" (full 19" viewable diagonal area), TFT (Thin Film Transistor), Active Matrix SXGA LCD, 0.294 mm pixel pitch RGB vertical stripe Anti-Glare Input Signal Video Sync RGB analog (0.7/1.0 Vp-p, 75 ohms) Composite Sync, Separate Sync, ...800 x 600 @ 56, 60, 72, 75, 85 Hz 640 x 480 @ 60, 75, 85 Hz 720 x 400 @ 70 Hz 1280 x 720 @ 60 Hz (720p) Power Voltage 100-240 VAC, 50/60 Hz (auto switch) Display area Full Scan 376.32mm (H) x 301.06mm (V) 14.8" (H) x 11.9" (V) Operating conditions Temperature Humidity Altitude 32...
Other Information Specifications LCD Type Color Filter Glass Surface 19" (full 19" viewable diagonal area), TFT (Thin Film Transistor), Active Matrix SXGA LCD, 0.294 mm pixel pitch RGB vertical stripe Anti-Glare Input Signal Video Sync RGB analog (0.7/1.0 Vp-p, 75 ohms) Composite Sync, Separate Sync, ...800 x 600 @ 56, 60, 72, 75, 85 Hz 640 x 480 @ 60, 75, 85 Hz 720 x 400 @ 70 Hz 1280 x 720 @ 60 Hz (720p) Power Voltage 100-240 VAC, 50/60 Hz (auto switch) Display area Full Scan 376.32mm (H) x 301.06mm (V) 14.8" (H) x 11.9" (V) Operating conditions Temperature Humidity Altitude 32...
User Guide
Page 17
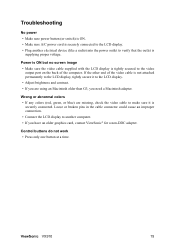
... colors (red, green, or blue) are using an Macintosh older than G3, you need a Macintosh adapter. ViewSonic VX910 15 Troubleshooting No power • Make sure power button (or switch) is ON. • Make sure A/C power cord is securely connected to the LCD display. • Plug another computer. • If you have an older graphics card, contact...
... colors (red, green, or blue) are using an Macintosh older than G3, you need a Macintosh adapter. ViewSonic VX910 15 Troubleshooting No power • Make sure power button (or switch) is ON. • Make sure A/C power cord is securely connected to the LCD display. • Plug another computer. • If you have an older graphics card, contact...
User Guide
Page 20
...: 1. c. For additional information or the name of 1 Release Date: 03-31-05 ViewSonic VX910 18 Sales outside of nature, unauthorized product modification, or failure to follow instructions supplied with ... allow the exclusion of the product. 3. Limited Warranty VIEWSONIC® LCD DISPLAY What the warranty covers: ViewSonic warrants its products to be free from defects in material...the possibility of the product. Any product exhibiting a condition commonly known as electrical power fluctuations or failure. Removal, installation, and set-up service charges. How to ...
...: 1. c. For additional information or the name of 1 Release Date: 03-31-05 ViewSonic VX910 18 Sales outside of nature, unauthorized product modification, or failure to follow instructions supplied with ... allow the exclusion of the product. 3. Limited Warranty VIEWSONIC® LCD DISPLAY What the warranty covers: ViewSonic warrants its products to be free from defects in material...the possibility of the product. Any product exhibiting a condition commonly known as electrical power fluctuations or failure. Removal, installation, and set-up service charges. How to ...

