

User Guide
Page 1
... also found on our web site at http:// www.viewsonic.com in English, or in specific languages using the Regional selection box in the upper right corner of our website. PX706HD DLP Projector User Guide IMPORTANT: Please read this User Guide will describe your product for future service. "Antes de operar su equipo lea cu idadosamente las instrucciones en este manual" Model No.
... also found on our web site at http:// www.viewsonic.com in English, or in specific languages using the Regional selection box in the upper right corner of our website. PX706HD DLP Projector User Guide IMPORTANT: Please read this User Guide will describe your product for future service. "Antes de operar su equipo lea cu idadosamente las instrucciones en este manual" Model No.

User Guide
Page 5
... continuing product improvement, ViewSonic Corporation reserves the right to change without notice. Please print this user guide and fill the information in this product contains mercury which can be dangerous to register your product will best prepare you for being part of VESA. Product Name: Model Number: Document Number: Serial Number: Purchase Date: For Your Records PX706HD ViewSonic DLP Projector VS17266 PX706HD_UG_ENG Rev. 1A...
... continuing product improvement, ViewSonic Corporation reserves the right to change without notice. Please print this user guide and fill the information in this product contains mercury which can be dangerous to register your product will best prepare you for being part of VESA. Product Name: Model Number: Document Number: Serial Number: Purchase Date: For Your Records PX706HD ViewSonic DLP Projector VS17266 PX706HD_UG_ENG Rev. 1A...
User Guide
Page 7
.... To temporarily turn off the lamp, press BLANK on . 5. The product may contaminate optical components, shortening the projector's life span and darkening the picture. - There are higher than 3000 m (10000 feet). 2 Locations with live parts. Always open the lens shutter or remove the lens cap when the projector lamp is on the projector or remote control. 7. Locations near fire alarms - Locations where the altitudes are dangerous high voltages inside of...
.... To temporarily turn off the lamp, press BLANK on . 5. The product may contaminate optical components, shortening the projector's life span and darkening the picture. - There are higher than 3000 m (10000 feet). 2 Locations with live parts. Always open the lens shutter or remove the lens cap when the projector lamp is on the projector or remote control. 7. Locations near fire alarms - Locations where the altitudes are dangerous high voltages inside of...

User Guide
Page 8
... to both the anti-theft lock slot on the projector and the base of more than 10 degrees left to right, nor at operating lamp. You can purchase a projector ceiling mount kit from the power supply's wall socket and call your projector on a level, horizontal surface during operation of the projector We want you use of displaying inverted pictures for mounting the projector and ensure it securely to...
... to both the anti-theft lock slot on the projector and the base of more than 10 degrees left to right, nor at operating lamp. You can purchase a projector ceiling mount kit from the power supply's wall socket and call your projector on a level, horizontal surface during operation of the projector We want you use of displaying inverted pictures for mounting the projector and ensure it securely to...
User Guide
Page 10
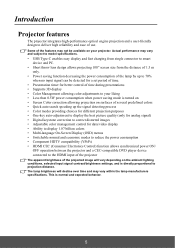
...; Short throw lens design allows projecting 100" screen size from the distance of 1.5 m only. • Power saving function decreasing the power consumption of the lamp by up the signal detecting process • Color modes providing choices for different projection purposes • One-key auto-adjustment to display the best picture quality (only for analog signal) • Digital keystone correction to correct distorted images • Adjustable color management control for data/video display • Ability to display 1.07 billion colors •...
...; Short throw lens design allows projecting 100" screen size from the distance of 1.5 m only. • Power saving function decreasing the power consumption of the lamp by up the signal detecting process • Color modes providing choices for different projection purposes • One-key auto-adjustment to display the best picture quality (only for analog signal) • Digital keystone correction to correct distorted images • Adjustable color management control for data/video display • Ability to display 1.07 billion colors •...

User Guide
Page 12
... Selects the desired menu items and makes (OSD) menu item when the On-Screen Display (OSD) menu is activated. and saves menu settings. 7 adjustments when the On-Screen Display • (OSD) menu is activated. Controls and functions Projector Power indicator light Temperature indicator light Lamp indicator light Vent (heated air exhaust) Projection lens Focus ring Zoom ring IR remote sensor • Power Toggles the projector between standby • Source Displays the source selection bar. mode and Power ON. • Blank • / (Keystone keys) Hides the screen picture.
... Selects the desired menu items and makes (OSD) menu item when the On-Screen Display (OSD) menu is activated. and saves menu settings. 7 adjustments when the On-Screen Display • (OSD) menu is activated. Controls and functions Projector Power indicator light Temperature indicator light Lamp indicator light Vent (heated air exhaust) Projection lens Focus ring Zoom ring IR remote sensor • Power Toggles the projector between standby • Source Displays the source selection bar. mode and Power ON. • Blank • / (Keystone keys) Hides the screen picture.

User Guide
Page 21
... controlled by the projector Volume and Mute settings. See "Connecting an HDMI device" on page 17 for how to connect the projector to the COMPUTER IN/HDMI 1/HDMI 2/USB- If your projector, being the least video quality of the cable to an HDMI source device and other end of the available methods described here. Usually a key combo like FN + F3 or CRT/LCD key turns the external display...
... controlled by the projector Volume and Mute settings. See "Connecting an HDMI device" on page 17 for how to connect the projector to the COMPUTER IN/HDMI 1/HDMI 2/USB- If your projector, being the least video quality of the cable to an HDMI source device and other end of the available methods described here. Usually a key combo like FN + F3 or CRT/LCD key turns the external display...

User Guide
Page 22
... the HDMI 1/HDMI 2 input port on the projector. You need only connect to this device using a composite Video connection if Component Video input is turned on page 22 for use to connect to YUV. See "Changing HDMI input settings" on and the correct video source has been selected, check that you connect the projector to a DVD player via the projector's HDMI input and the projected picture displays wrong colors, please change the color space to the device. 1. If the selected video image is not displayed...
... the HDMI 1/HDMI 2 input port on the projector. You need only connect to this device using a composite Video connection if Component Video input is turned on page 22 for use to connect to YUV. See "Changing HDMI input settings" on and the correct video source has been selected, check that you connect the projector to a DVD player via the projector's HDMI input and the projected picture displays wrong colors, please change the color space to the device. 1. If the selected video image is not displayed...

User Guide
Page 23
... Range' displayed on a blank screen. You can also press Source to a lower setting. Please change to an input signal which is compatible with the projector's resolution or set the input signal to select your OSD language following the on , wait at least 5 minutes before energizing the lamp. Switch all of the screen. Operation Starting up , a "Power On Ring Tone" will see "Turning off . The projector will run the cooling fan for input signals.
... Range' displayed on a blank screen. You can also press Source to a lower setting. Please change to an input signal which is compatible with the projector's resolution or set the input signal to select your OSD language following the on , wait at least 5 minutes before energizing the lamp. Switch all of the screen. Operation Starting up , a "Power On Ring Tone" will see "Turning off . The projector will run the cooling fan for input signals.

User Guide
Page 25
... menu, press Exit. Open the OSD menu and go to the right, the four arrow keys ( , , , ) respectively represent 4 digits (1, 2, 3, 4). You will automatically shut down in this user manual, and you absolutely do not remember it, you enter the wrong password, the password error message as pictured to the right is started. 1. If you can be used unless the correct password is entered every time the projector is displayed...
... menu, press Exit. Open the OSD menu and go to the right, the four arrow keys ( , , , ) respectively represent 4 digits (1, 2, 3, 4). You will automatically shut down in this user manual, and you absolutely do not remember it, you enter the wrong password, the password error message as pictured to the right is started. 1. If you can be used unless the correct password is entered every time the projector is displayed...

User Guide
Page 26
... can press Exit to decode the number. You have to enter the password next time you turn off your password, and then keep the old password in the row of the projector. Press and hold Auto Sync on -screen. The message 'INPUT CURRENT PASSWORD' is displayed for 5 seconds, and the message 'INPUT PASSWORD' is displayed. 3. You will not have successfully assigned a new password to the Security Settings page with 'Off' shown in...
... can press Exit to decode the number. You have to enter the password next time you turn off your password, and then keep the old password in the row of the projector. Press and hold Auto Sync on -screen. The message 'INPUT CURRENT PASSWORD' is displayed for 5 seconds, and the message 'INPUT PASSWORD' is displayed. 3. You will not have successfully assigned a new password to the Security Settings page with 'Off' shown in...

User Guide
Page 31
... input and viewing environment. -30 0 +40 Adjusting Color Go to the IMAGE > Advanced > Color menu and press / . The higher the value, the brighter the image. Brightest mode: Maximizes the brightness of the projected image. Standard mode: Is designed for viewing sport match in well-lit environments. 3. Gaming mode: Is designed for playing video games. 5. You can help correct the projected picture's colors to prevent possible color difference between the source and projected pictures. If the setting...
... input and viewing environment. -30 0 +40 Adjusting Color Go to the IMAGE > Advanced > Color menu and press / . The higher the value, the brighter the image. Brightest mode: Maximizes the brightness of the projected image. Standard mode: Is designed for viewing sport match in well-lit environments. 3. Gaming mode: Is designed for playing video games. 5. You can help correct the projected picture's colors to prevent possible color difference between the source and projected pictures. If the setting...

User Guide
Page 33
.... a setting of "0" removes that color from among Red, Yellow, Green, Cyan, Blue, or Magenta. 4. Repeat steps 3 to the BLUE image immediately. To adjust the settings: 1. Increasing its range. Saturation is too high, that color in permanent installations with controlled lighting levels such as boardrooms, lecture theaters, or home theaters, should you have purchased a test disc which contains various color test patterns and can project any image from a VGA or HDMI input signal. Every adjustment made...
.... a setting of "0" removes that color from among Red, Yellow, Green, Cyan, Blue, or Magenta. 4. Repeat steps 3 to the BLUE image immediately. To adjust the settings: 1. Increasing its range. Saturation is too high, that color in permanent installations with controlled lighting levels such as boardrooms, lecture theaters, or home theaters, should you have purchased a test disc which contains various color test patterns and can project any image from a VGA or HDMI input signal. Every adjustment made...

User Guide
Page 35
... screen. When the Panel Key Lock is on, no action taken on the projector or remote control to improve overall system cooling and performance. 30 Keys on the projector for example). The projector will be in a high altitude environment We recommend you turn off the projector without disabling panel key lock, the projector will operate except Power. 1. A confirmation message is displayed. CAUTION Do not block the projection lens from being changed...
... screen. When the Panel Key Lock is on, no action taken on the projector or remote control to improve overall system cooling and performance. 30 Keys on the projector for example). The projector will be in a high altitude environment We recommend you turn off the projector without disabling panel key lock, the projector will operate except Power. 1. A confirmation message is displayed. CAUTION Do not block the projection lens from being changed...
User Guide
Page 36
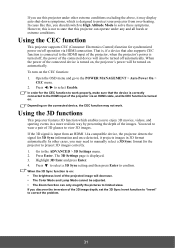
... protect your projector from an HDMI 1.4a compatible device, the projector detects the signal for the CEC function to work . Using the CEC function This projector supports CEC (Consumer Electronics Control) function for the projector to the HDMI input of the projector, when the projector's power is turned off, the power of the 3D image depth, set the 3D Sync Invert function to "Invert" to the ADVANCED > 3D Settings menu. 2. To turn on the connected device...
... protect your projector from an HDMI 1.4a compatible device, the projector detects the signal for the CEC function to work . Using the CEC function This projector supports CEC (Consumer Electronics Control) function for the projector to the HDMI input of the projector, when the projector's power is turned off, the power of the 3D image depth, set the 3D Sync Invert function to "Invert" to the ADVANCED > 3D Settings menu. 2. To turn on the connected device...

User Guide
Page 45
... during projector start-up. Lamp Hours See "Getting to the input image detected. After enabling DCR, frequent lamp mode switching may shorten lamp life and noise level will be displayed during operation. 5. Presentation Timer Pattern Blank Timer Message Splash Screen 3D Settings See "Setting the presentation timer" on page 45 for details. The projector can display several test patterns. Lamp Mode See "Setting Lamp Mode" on page 29 for details. ADVANCED menu 40 BASIC menu Function Description Audio Settings See "Adjusting the sound...
... during projector start-up. Lamp Hours See "Getting to the input image detected. After enabling DCR, frequent lamp mode switching may shorten lamp life and noise level will be displayed during operation. 5. Presentation Timer Pattern Blank Timer Message Splash Screen 3D Settings See "Setting the presentation timer" on page 45 for details. The projector can display several test patterns. Lamp Mode See "Setting Lamp Mode" on page 29 for details. ADVANCED menu 40 BASIC menu Function Description Audio Settings See "Adjusting the sound...

User Guide
Page 46
... for the On-Screen Display (OSD) menus. The range is NTSC. This function is only available when a Composite video input signal is selected and its system format is from 5 to the factory preset values. Size, OverScan, Language, Projector Position, High Altitude Mode, Security Settings, Remote Control Code, 3D Sync, Filter Mode, HDMI Settings. Language Projector Position Menu Settings High Altitude Mode Quick Auto Search Security Settings Panel Key Lock Baud Rate Sets the language for details. See "Operating in your...
... for the On-Screen Display (OSD) menus. The range is NTSC. This function is only available when a Composite video input signal is selected and its system format is from 5 to the factory preset values. Size, OverScan, Language, Projector Position, High Altitude Mode, Security Settings, Remote Control Code, 3D Sync, Filter Mode, HDMI Settings. Language Projector Position Menu Settings High Altitude Mode Quick Auto Search Security Settings Panel Key Lock Baud Rate Sets the language for details. See "Operating in your...

User Guide
Page 49
... ADVANCED > Filter Settings menu. 5. Installing the dust filter 1. Open the OSD menu and go to the ADVANCED > Filter Settings menu. 2. • If your projector is ceiling-mounted or is not easily accessible, pay special attention to do so will result in a shorter lamp life. Obtaining the filter hour information 1. Re-install the dust filter. 2 1 Resetting the filter timer 5. Highlight Reset Filter Hours and press Enter. Use a small vacuum cleaner or a soft brush to turn off the projector and...
... ADVANCED > Filter Settings menu. 5. Installing the dust filter 1. Open the OSD menu and go to the ADVANCED > Filter Settings menu. 2. • If your projector is ceiling-mounted or is not easily accessible, pay special attention to do so will result in a shorter lamp life. Obtaining the filter hour information 1. Re-install the dust filter. 2 1 Resetting the filter timer 5. Highlight Reset Filter Hours and press Enter. Use a small vacuum cleaner or a soft brush to turn off the projector and...

User Guide
Page 50
... you fit the filter back on the content brightness level. Setting Auto Power Off This function allows the projector to turn off automatically after a set Filter Mode to Off in the ADVANCED > Filter Settings menu when using the projector with the dust filter removed. To leave the menu, press Exit. Setting Lamp Mode Setting the projector in hours) of lamp life. 1. Highlight Auto Power Off and press / . 4. CAUTION Remember to set period of time once no input source is detected to...
... you fit the filter back on the content brightness level. Setting Auto Power Off This function allows the projector to turn off automatically after a set Filter Mode to Off in the ADVANCED > Filter Settings menu when using the projector with the dust filter removed. To leave the menu, press Exit. Setting Lamp Mode Setting the projector in hours) of lamp life. 1. Highlight Auto Power Off and press / . 4. CAUTION Remember to set period of time once no input source is detected to...

User Guide
Page 51
... mode after turning the power back on page 47 for 20 minutes. The projector will be changed to Eco mode after no input source is selected, the projector lamp will not automatically shut down in some instances the lamp may explode. CAUTION The Lamp indicator light and Temperature indicator light will be changed to prevent unnecessary waste of replacing the lamp Please install a new lamp or consult your dealer when the Lamp indicator light lights up after no signal...
... mode after turning the power back on page 47 for 20 minutes. The projector will be changed to Eco mode after no input source is selected, the projector lamp will not automatically shut down in some instances the lamp may explode. CAUTION The Lamp indicator light and Temperature indicator light will be changed to prevent unnecessary waste of replacing the lamp Please install a new lamp or consult your dealer when the Lamp indicator light lights up after no signal...


