
User Guide
Page 28
...57 Hard Disk Drive Recovery options 58 Hard Disk Drive Recovery using the Recovery media 63 Installing drivers and applications 64 Using the Toshiba Dual Pointing Device 64 Using the TouchPad 65 Scrolling with the TouchPad 66 Control buttons 66 Disabling or enabling the TouchPad 66 Using... devices 66 Directing the display output when you turn on the computer 67 Adjusting the quality of the external display......68 Using an external keyboard 68 Using a mouse 68 Connecting a printer 68 Setting up a printer 69 Connecting an optional external diskette drive........70 Turning off the ...
...57 Hard Disk Drive Recovery options 58 Hard Disk Drive Recovery using the Recovery media 63 Installing drivers and applications 64 Using the Toshiba Dual Pointing Device 64 Using the TouchPad 65 Scrolling with the TouchPad 66 Control buttons 66 Disabling or enabling the TouchPad 66 Using... devices 66 Directing the display output when you turn on the computer 67 Adjusting the quality of the external display......68 Using an external keyboard 68 Using a mouse 68 Connecting a printer 68 Setting up a printer 69 Connecting an optional external diskette drive........70 Turning off the ...
User Guide
Page 29
... computer 80 Moving the computer 80 Using a computer lock 80 Chapter 2: Learning the Basics 82 Computing tips 82 Using the keyboard 84 Character keys 84 Making your keyboard emulate a full-size keyboard 84 Ctrl, Fn, and Alt keys 85 Function keys 85 Special Windows® keys 85 Overlay keys 86 Using the overlay... Creating a CD/DVD 97 Removing a disc with the computer on 98 Removing a disc with the computer off 98 Caring for CD or DVD discs 98 Toshiba's online resources 99
... computer 80 Moving the computer 80 Using a computer lock 80 Chapter 2: Learning the Basics 82 Computing tips 82 Using the keyboard 84 Character keys 84 Making your keyboard emulate a full-size keyboard 84 Ctrl, Fn, and Alt keys 85 Function keys 85 Special Windows® keys 85 Overlay keys 86 Using the overlay... Creating a CD/DVD 97 Removing a disc with the computer on 98 Removing a disc with the computer off 98 Caring for CD or DVD discs 98 Toshiba's online resources 99
User Guide
Page 33
... conflicts on your own .....183 Fixing a problem with Device Manager ...........184 Memory problems 185 Power and the batteries 186 Keyboard problems 188 Display problems 188 Disk drive problems 190 Optical drive problems 192 Sound system problems 193 PC Card problems 193 ...configuration backup in the Windows® operating system 203 If you need further assistance 208 Before you contact Toshiba 208 Contacting Toshiba 208 Other Toshiba Internet Web sites 209 Toshiba's worldwide offices 209 Appendix A: Hot Keys 211 Volume Mute 211 Password security 212 Without a password ...
... conflicts on your own .....183 Fixing a problem with Device Manager ...........184 Memory problems 185 Power and the batteries 186 Keyboard problems 188 Display problems 188 Disk drive problems 190 Optical drive problems 192 Sound system problems 193 PC Card problems 193 ...configuration backup in the Windows® operating system 203 If you need further assistance 208 Before you contact Toshiba 208 Contacting Toshiba 208 Other Toshiba Internet Web sites 209 Toshiba's worldwide offices 209 Appendix A: Hot Keys 211 Volume Mute 211 Password security 212 Without a password ...
User Guide
Page 34
... Display brightness 215 Disabling or enabling wireless devices 216 Disabling or enabling the Toshiba Dual Pointing Device 216 Zooming applications in/out 216 Keyboard hot keys 217 Appendix B: Power Cord/Cable Connectors 218 Appendix C: Using ConfigFree™ with your Toshiba Computer 219 Getting Started 220 Starting ConfigFree 220 ConfigFree Utilities 222 Connectivity Doctor...
... Display brightness 215 Disabling or enabling wireless devices 216 Disabling or enabling the Toshiba Dual Pointing Device 216 Zooming applications in/out 216 Keyboard hot keys 217 Appendix B: Power Cord/Cable Connectors 218 Appendix C: Using ConfigFree™ with your Toshiba Computer 219 Getting Started 220 Starting ConfigFree 220 ConfigFree Utilities 222 Connectivity Doctor...
User Guide
Page 42
... Your Computer screen and click Next. 4 Enter the computer name and description and click Next or Skip. 5 Select how your computer. Click Next to , a mouse, keyboard, printer, memory, and PC Cards. These components include, but are not limited to continue. Your computer contains a rechargeable main battery that needs to be charged...
... Your Computer screen and click Next. 4 Enter the computer name and description and click Next or Skip. 5 Select how your computer. Click Next to , a mouse, keyboard, printer, memory, and PC Cards. These components include, but are not limited to continue. Your computer contains a rechargeable main battery that needs to be charged...
User Guide
Page 43
...your computer name and network settings. 6 Follow the remaining screen prompts to complete the setup process. Failure to the Toshiba Web site at www.register.toshiba.com at that time, you click the final screen, your desktop or go to complete Product Registration will not ...see "Adding memory (optional)" on page 49) ❖ Connect a mouse (see "Using a mouse" on page 68) ❖ Connect a full-size keyboard (see "Using an external keyboard" on page 68) ❖ Connect an external monitor (see "Using external display devices" on page 66) ❖ Connect a local printer (see "Connecting...
...your computer name and network settings. 6 Follow the remaining screen prompts to complete the setup process. Failure to the Toshiba Web site at www.register.toshiba.com at that time, you click the final screen, your desktop or go to complete Product Registration will not ...see "Adding memory (optional)" on page 49) ❖ Connect a mouse (see "Using a mouse" on page 68) ❖ Connect a full-size keyboard (see "Using an external keyboard" on page 68) ❖ Connect an external monitor (see "Using external display devices" on page 66) ❖ Connect a local printer (see "Connecting...
User Guide
Page 47
... display panel and be careful to remove any pens or other hand to hold the computer in place and use the other objects from the keyboard area before closing the display panel.
... display panel and be careful to remove any pens or other hand to hold the computer in place and use the other objects from the keyboard area before closing the display panel.

User Guide
Page 59
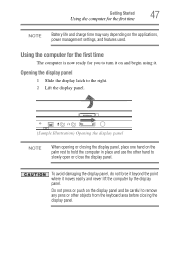
When the computer powers on the computer. The options are: ❖ Recovery of the options, and then click Next. Getting Started 59 Hard Drive Recovery Utilities To recover your hard disk drive using the utilities stored on your computer's HDD: 1 Make sure the computer is turned off. 2 Press and hold the 0 (zero) key on your keyboard while powering on , the Toshiba Recovery Wizard screen displays. (Sample Image) Toshiba Recovery Wizard screen 3 Select one of Factory Default Software ❖ Erase the hard disk
When the computer powers on the computer. The options are: ❖ Recovery of the options, and then click Next. Getting Started 59 Hard Drive Recovery Utilities To recover your hard disk drive using the utilities stored on your computer's HDD: 1 Make sure the computer is turned off. 2 Press and hold the 0 (zero) key on your keyboard while powering on , the Toshiba Recovery Wizard screen displays. (Sample Image) Toshiba Recovery Wizard screen 3 Select one of Factory Default Software ❖ Erase the hard disk
User Guide
Page 60
... be lost during the recovery process. A confirmation message displays reminding you that the HDD has been recovered. 4 Press any key on the keyboard to external media first. 1 On the Toshiba Recovery Wizard screen, select Recovery of box state deletes all data will be lost . Once complete, a message displays that all partitions on...
... be lost during the recovery process. A confirmation message displays reminding you that the HDD has been recovered. 4 Press any key on the keyboard to external media first. 1 On the Toshiba Recovery Wizard screen, select Recovery of box state deletes all data will be lost . Once complete, a message displays that all partitions on...

User Guide
Page 61
... without overwriting the HDD. ❖ Delete all partitions and overwrite all sectors on the keyboard to delete all data, then overwrites the entire HDD for security purposes. Be sure you have saved your hard disk: 1 On the Toshiba Recovery Wizard screen, select Erase the hard disk, and then click Next. 2 The next...
... without overwriting the HDD. ❖ Delete all partitions and overwrite all sectors on the keyboard to delete all data, then overwrites the entire HDD for security purposes. Be sure you have saved your hard disk: 1 On the Toshiba Recovery Wizard screen, select Erase the hard disk, and then click Next. 2 The next...
User Guide
Page 62
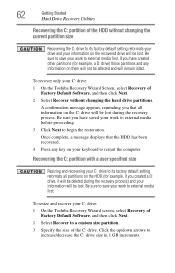
... has been recovered. 4 Press any information on them will not be affected and will be lost . To resize and recover your keyboard to external media first. 62 Getting Started Hard Drive Recovery Utilities Recovering the C: partition of the HDD without changing the hard drive partitions...message displays that all partitions on the HDD (for example, a D: drive) those partitions and any key on your C: drive: 1 On the Toshiba Recovery Wizard screen, select Recovery of Factory Default Software, and then click Next. 2 Select Recover to its factory default setting reformats your drive and ...
... has been recovered. 4 Press any information on them will not be affected and will be lost . To resize and recover your keyboard to external media first. 62 Getting Started Hard Drive Recovery Utilities Recovering the C: partition of the HDD without changing the hard drive partitions...message displays that all partitions on the HDD (for example, a D: drive) those partitions and any key on your C: drive: 1 On the Toshiba Recovery Wizard screen, select Recovery of Factory Default Software, and then click Next. 2 Select Recover to its factory default setting reformats your drive and ...
User Guide
Page 63
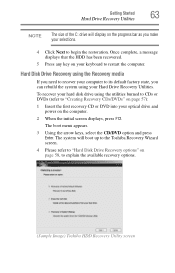
... a message displays that the HDD has been recovered. 5 Press any key on page 58, to explain the available recovery options. (Sample Image) Toshiba HDD Recovery Utility screen The boot menu appears. 3 Using the arrow keys, select the CD/DVD option and press Enter. Getting Started 63 Hard ...Drive Recovery Utilities NOTE The size of the C: drive will boot up to the Toshiba Recovery Wizard screen. 4 Please refer to "Hard Disk Drive Recovery options" on your keyboard to restart the computer. To recover your hard disk drive using your selections. 4 Click Next to ...
... a message displays that the HDD has been recovered. 5 Press any key on page 58, to explain the available recovery options. (Sample Image) Toshiba HDD Recovery Utility screen The boot menu appears. 3 Using the arrow keys, select the CD/DVD option and press Enter. Getting Started 63 Hard ...Drive Recovery Utilities NOTE The size of the C: drive will boot up to the Toshiba Recovery Wizard screen. 4 Please refer to "Hard Disk Drive Recovery options" on your keyboard to restart the computer. To recover your hard disk drive using your selections. 4 Click Next to ...
User Guide
Page 65
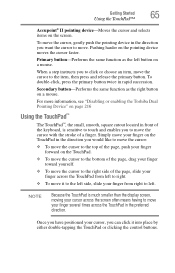
... cursor and selects items on page 216 Using the TouchPad™ The TouchPad™, the small, smooth, square cutout located in front of the keyboard, is much smaller than the display screen, moving your cursor across the screen often means having to move your cursor, you to click or choose...-Performs the same function as the right button on the pointing device moves the cursor faster. For more information, see "Disabling or enabling the Toshiba Dual Pointing Device" on the screen. Simply move it into place by either double-tapping the TouchPad or clicking the control buttons.
... cursor and selects items on page 216 Using the TouchPad™ The TouchPad™, the small, smooth, square cutout located in front of the keyboard, is much smaller than the display screen, moving your cursor across the screen often means having to move your cursor, you to click or choose...-Performs the same function as the right button on the pointing device moves the cursor faster. For more information, see "Disabling or enabling the Toshiba Dual Pointing Device" on the screen. Simply move it into place by either double-tapping the TouchPad or clicking the control buttons.
User Guide
Page 68
...Using a mouse You may need to your computer. Follow the manufacturer's instructions when connecting a printer. 68 Getting Started Using an external keyboard TECHNICAL NOTE: You can attach one of the simultaneous modes, you must support a resolution of the external display device. Adjusting the quality ... you can also change these settings using the Display Properties box. Set the option for additional configuration steps. Using an external keyboard If you do not install the software as instructed by clicking Start, Control Panel, Appearance and Themes, and then Display. ...
...Using a mouse You may need to your computer. Follow the manufacturer's instructions when connecting a printer. 68 Getting Started Using an external keyboard TECHNICAL NOTE: You can attach one of the simultaneous modes, you must support a resolution of the external display device. Adjusting the quality ... you can also change these settings using the Display Properties box. Set the option for additional configuration steps. Using an external keyboard If you do not install the software as instructed by clicking Start, Control Panel, Appearance and Themes, and then Display. ...
User Guide
Page 80
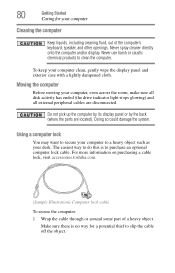
... fluid, out of a heavy object. For more information on purchasing a cable lock, visit accessories.toshiba.com. (Sample Illustration) Computer lock cable To secure the computer: 1 Wrap the cable through or around some part of the computer's keyboard, speaker, and other openings. 80 Getting Started Caring for a potential thief to slip the cable...
... fluid, out of a heavy object. For more information on purchasing a cable lock, visit accessories.toshiba.com. (Sample Illustration) Computer lock cable To secure the computer: 1 Wrap the cable through or around some part of the computer's keyboard, speaker, and other openings. 80 Getting Started Caring for a potential thief to slip the cable...
User Guide
Page 84
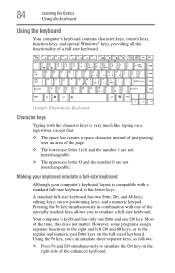
... O and the number 0 are not interchangeable. Pressing the Fn key simultaneously in combination with a standard full-size keyboard, it has fewer keys. Your computer's keyboard has only one Enter and one of the specially marked keys allows you can simulate these separate keys, as follows... and numeric pad Enter keys on the right side of the enhanced keyboard. cursor positioning keys; editing keys; and a numeric keypad. 84 Learning the Basics Using the keyboard Using the keyboard Your computer's keyboard contains character keys, control keys, function keys, and special Windows®...
... O and the number 0 are not interchangeable. Pressing the Fn key simultaneously in combination with a standard full-size keyboard, it has fewer keys. Your computer's keyboard has only one Enter and one of the specially marked keys allows you can simulate these separate keys, as follows... and numeric pad Enter keys on the right side of the enhanced keyboard. cursor positioning keys; editing keys; and a numeric keypad. 84 Learning the Basics Using the keyboard Using the keyboard Your computer's keyboard contains character keys, control keys, function keys, and special Windows®...
User Guide
Page 85
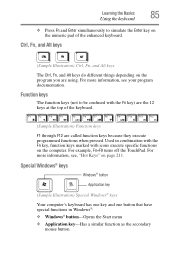
...Hot Keys" on the computer. Special Windows® keys Windows® button Application key (Sample Illustration) Special Windows® keys Your computer's keyboard has one key and one button that have special functions in combination with the Fn key, function keys marked with the Fn key) are the... 12 keys at the top of the enhanced keyboard. For more information, see your program documentation. Used in Windows®: ❖ Windows® button-Opens the Start menu ❖ Application...
...Hot Keys" on the computer. Special Windows® keys Windows® button Application key (Sample Illustration) Special Windows® keys Your computer's keyboard has one key and one button that have special functions in combination with the Fn key, function keys marked with the Fn key) are the... 12 keys at the top of the enhanced keyboard. For more information, see your program documentation. Used in Windows®: ❖ Windows® button-Opens the Start menu ❖ Application...

User Guide
Page 86
This overlay lets you enter numeric data or control the cursor as you would using the 10-key keypad on a desktop computer's keyboard. (Sample Illustration) Numeric and cursor control overlay Using the overlay to type numeric data The keys with the gray arrows and symbols on their right ... the numeric overlay keys. To disable the numeric overlay, hold down the Fn key and press F11 again. The cursor control mode light on the keyboard indicator panel goes out. Using the overlay for cursor control The keys with the numbers on . To disable the cursor control overlay, hold down the...
This overlay lets you enter numeric data or control the cursor as you would using the 10-key keypad on a desktop computer's keyboard. (Sample Illustration) Numeric and cursor control overlay Using the overlay to type numeric data The keys with the gray arrows and symbols on their right ... the numeric overlay keys. To disable the numeric overlay, hold down the Fn key and press F11 again. The cursor control mode light on the keyboard indicator panel goes out. Using the overlay for cursor control The keys with the numbers on . To disable the cursor control overlay, hold down the...
User Guide
Page 90
Use this is all the letters and numbers on the keyboard plus these characters and '. Some applications do . HINT: To make another copy of the file you want your file to give it a file name. (Sample ...
Use this is all the letters and numbers on the keyboard plus these characters and '. Some applications do . HINT: To make another copy of the file you want your file to give it a file name. (Sample ...
User Guide
Page 150
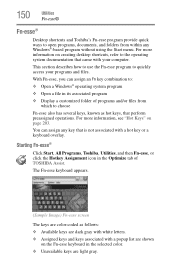
...Starting Fn-esse® Click Start, All Programs, Toshiba, Utilities, and then Fn-esse, or click the Hotkey Assignment icon in the Optimize tab of programs and/or files from within any key that is not associated with a hot key or a keyboard overlay. For more information, see "Hot Keys"... programs and files. For more information on page 203. The Fn-esse keyboard appears. (Sample Image) Fn-esse screen The keys are light gray. 150 Utilities Fn-esse® Fn-esse® Desktop shortcuts and Toshiba's Fn-esse program provide quick ways to open programs, documents, and folders...
...Starting Fn-esse® Click Start, All Programs, Toshiba, Utilities, and then Fn-esse, or click the Hotkey Assignment icon in the Optimize tab of programs and/or files from within any key that is not associated with a hot key or a keyboard overlay. For more information, see "Hot Keys"... programs and files. For more information on page 203. The Fn-esse keyboard appears. (Sample Image) Fn-esse screen The keys are light gray. 150 Utilities Fn-esse® Fn-esse® Desktop shortcuts and Toshiba's Fn-esse program provide quick ways to open programs, documents, and folders...

