
User Manual
Page 28
... display devices 60 Directing the display output when you turn on the computer 60 Adjusting the quality of the external display......61 Using an external keyboard 62 Using a mouse 62 Connecting a printer 62 Setting up a printer 63 Connecting an optional external diskette drive........63 Turning off the computer 64 Options for...
... display devices 60 Directing the display output when you turn on the computer 60 Adjusting the quality of the external display......61 Using an external keyboard 62 Using a mouse 62 Connecting a printer 62 Setting up a printer 63 Connecting an optional external diskette drive........63 Turning off the computer 64 Options for...

User Manual
Page 29
Contents 29 Chapter 2: Learning the Basics 78 Computing tips 78 Using the keyboard 80 Character keys 80 Making your keyboard emulate a full-size keyboard 80 Ctrl, Fn, and Alt keys 81 Function keys 81 Special Windows® keys 81 Overlay keys 82 Using the overlay to type...Recording optical media 93 Removing a disc with the computer on 94 Removing a disc with the computer off 94 Caring for optical discs 95 Toshiba's online resources 95 Chapter 3: Mobile Computing 96 Toshiba's energy-saver design 96 Running the computer on battery power 96 Battery Notice 97 Power management 98
Contents 29 Chapter 2: Learning the Basics 78 Computing tips 78 Using the keyboard 80 Character keys 80 Making your keyboard emulate a full-size keyboard 80 Ctrl, Fn, and Alt keys 81 Function keys 81 Special Windows® keys 81 Overlay keys 82 Using the overlay to type...Recording optical media 93 Removing a disc with the computer on 94 Removing a disc with the computer off 94 Caring for optical discs 95 Toshiba's online resources 95 Chapter 3: Mobile Computing 96 Toshiba's energy-saver design 96 Running the computer on battery power 96 Battery Notice 97 Power management 98

User Manual
Page 32
... help you 161 Resolving a hardware conflict 161 A plan of action 161 Fixing a problem with Device Manager ...........162 Memory problems 163 Power and the batteries 164 Keyboard problems 165 Display problems 166 Disk drive problems 168 Optical drive problems 170 Sound system problems 171 ExpressCard® problems 171 Printer problems 173 Wireless... good computing habits 177 Data and system configuration backup in the Windows® operating system 178 If you need further assistance 183 Before you contact Toshiba 183 Contacting Toshiba 183 Other Toshiba Internet Web sites 184
... help you 161 Resolving a hardware conflict 161 A plan of action 161 Fixing a problem with Device Manager ...........162 Memory problems 163 Power and the batteries 164 Keyboard problems 165 Display problems 166 Disk drive problems 168 Optical drive problems 170 Sound system problems 171 ExpressCard® problems 171 Printer problems 173 Wireless... good computing habits 177 Data and system configuration backup in the Windows® operating system 178 If you need further assistance 183 Before you contact Toshiba 183 Contacting Toshiba 183 Other Toshiba Internet Web sites 184

User Manual
Page 33
... offices 184 Appendix A: Hot Keys/TOSHIBA Cards 186 Hot Key Cards 186 Using the Hot Key Cards 187 Application Cards 188 Using the Application Cards 189 Card Case 189 Hot key ... mode 194 Output (Display switch 195 Display brightness 196 Disabling or enabling wireless devices............197 Disabling or enabling the TouchPad 198 Zoom (Display resolution 199 Keyboard hot key functions 200 Appendix B: Power Cord/Cable Connectors 201 Glossary 202 Index 216
... offices 184 Appendix A: Hot Keys/TOSHIBA Cards 186 Hot Key Cards 186 Using the Hot Key Cards 187 Application Cards 188 Using the Application Cards 189 Card Case 189 Hot key ... mode 194 Output (Display switch 195 Display brightness 196 Disabling or enabling wireless devices............197 Disabling or enabling the TouchPad 198 Zoom (Display resolution 199 Keyboard hot key functions 200 Appendix B: Power Cord/Cable Connectors 201 Glossary 202 Index 216

User Manual
Page 42
.... See "Connecting to your computer. 42 Getting Started Setting up your software" on page 43 before you must complete all setup steps up to , a mouse, keyboard, printer, memory, and ExpressCards®. Read the "Provide adequate ventilation" section in serious injury. Setting up your computer TECHNICAL NOTE: You must attach the AC...
.... See "Connecting to your computer. 42 Getting Started Setting up your software" on page 43 before you must complete all setup steps up to , a mouse, keyboard, printer, memory, and ExpressCards®. Read the "Provide adequate ventilation" section in serious injury. Setting up your computer TECHNICAL NOTE: You must attach the AC...

User Manual
Page 44
... memory (optional)" on page 50) ❖ Connect a mouse (see "Using a mouse" on page 62) ❖ Connect a full-size keyboard (see "Using an external keyboard" on page 62) ❖ Connect an external monitor (see "Using external display devices" on page 60) ❖ Connect a local printer (... start up your software" on page 43. 44 Getting Started Registering your computer with Toshiba Registering your computer with Toshiba Product registration is strongly recommended, and allows Toshiba to send you periodic updates, announcements, and special offers applicable to your desktop or go...
... memory (optional)" on page 50) ❖ Connect a mouse (see "Using a mouse" on page 62) ❖ Connect a full-size keyboard (see "Using an external keyboard" on page 62) ❖ Connect an external monitor (see "Using external display devices" on page 60) ❖ Connect a local printer (... start up your software" on page 43. 44 Getting Started Registering your computer with Toshiba Registering your computer with Toshiba Product registration is strongly recommended, and allows Toshiba to send you periodic updates, announcements, and special offers applicable to your desktop or go...

User Manual
Page 48
... by the display panel. 48 Getting Started Using the computer for you to hold the computer in place and use the other objects from the keyboard area before closing the display panel. Using the computer for the first time The computer is now ready for the first time NOTE Battery life...
... by the display panel. 48 Getting Started Using the computer for you to hold the computer in place and use the other objects from the keyboard area before closing the display panel. Using the computer for the first time The computer is now ready for the first time NOTE Battery life...

User Manual
Page 59
... of a finger. Getting Started 59 Using the TouchPad™ Using the TouchPad™ The TouchPad™, the small, rectangular area located in front of the keyboard, is much smaller than the display screen, moving your cursor across the screen often means having to move your finger several times across the TouchPad...
... of a finger. Getting Started 59 Using the TouchPad™ Using the TouchPad™ The TouchPad™, the small, rectangular area located in front of the keyboard, is much smaller than the display screen, moving your cursor across the screen often means having to move your finger several times across the TouchPad...

User Manual
Page 62
... your printer, you can use a USB-compatible mouse. 62 Getting Started Using an external keyboard Using an external keyboard If you prefer to use a full-size keyboard, you can set up the printer as instructed by the printer manufacturer, the printer may automatically...printer software before physically connecting the printer to your printer. Refer to your printer. The computer's USB ports support any USB-compatible keyboard. the printer is USBcompatible, check its documentation. To connect a printer to use . Connecting a printer NOTE Your printer documentation ...
... your printer, you can use a USB-compatible mouse. 62 Getting Started Using an external keyboard Using an external keyboard If you prefer to use a full-size keyboard, you can set up the printer as instructed by the printer manufacturer, the printer may automatically...printer software before physically connecting the printer to your printer. Refer to your printer. The computer's USB ports support any USB-compatible keyboard. the printer is USBcompatible, check its documentation. To connect a printer to use . Connecting a printer NOTE Your printer documentation ...

User Manual
Page 76
... external peripheral cables are disconnected. For more information on purchasing a cable lock, visit accessories.toshiba.com. (Sample Illustration) Computer lock cable To secure the computer: 1 Wrap the cable through or around some part of the computer's keyboard, speaker, and other openings. Never use harsh or caustic chemical products to purchase an optional...
... external peripheral cables are disconnected. For more information on purchasing a cable lock, visit accessories.toshiba.com. (Sample Illustration) Computer lock cable To secure the computer: 1 Wrap the cable through or around some part of the computer's keyboard, speaker, and other openings. Never use harsh or caustic chemical products to purchase an optional...

User Manual
Page 80
... to simulate the Enter key on the numeric pad of the time, this does not matter. 80 Learning the Basics Using the keyboard Using the keyboard Your computer's keyboard contains character keys, control keys, function keys, and special Windows® keys, providing all the functionality of a full-size... keyboard. (Sample Illustration) Keyboard Character keys Typing with the character keys is compatible with one Enter key. Using the Fn key, you to the regular and ...
... to simulate the Enter key on the numeric pad of the time, this does not matter. 80 Learning the Basics Using the keyboard Using the keyboard Your computer's keyboard contains character keys, control keys, function keys, and special Windows® keys, providing all the functionality of a full-size... keyboard. (Sample Illustration) Keyboard Character keys Typing with the character keys is compatible with one Enter key. Using the Fn key, you to the regular and ...

User Manual
Page 81
...function as the secondary mouse button Special Windows® keys Windows® button Application key (Sample Illustration) Special Windows® keys Your computer's keyboard has one key and one button that have special functions in combination with the Fn key, function keys marked with the Fn key) are ...the 12 keys at the top of the keyboard. (Sample Illustration) Function keys F1 through F12 are using. For more information, see "Hot key functions" on the program you are called...
...function as the secondary mouse button Special Windows® keys Windows® button Application key (Sample Illustration) Special Windows® keys Your computer's keyboard has one key and one button that have special functions in combination with the Fn key, function keys marked with the Fn key) are ...the 12 keys at the top of the keyboard. (Sample Illustration) Function keys F1 through F12 are using. For more information, see "Hot key functions" on the program you are called...

User Manual
Page 82
...on , press Fn and F11 simultaneously. To turn the cursor control overlay on, press Fn and F10 simultaneously. The numeric mode light on the keyboard indicator panel glows when the numeric overlay is on their left front are the numeric overlay keys. The cursor control mode light on . To ... F11 again. This overlay lets you enter numeric data or control the cursor as you would using the 10-key keypad on a desktop computer's keyboard. (Sample Illustration) Numeric and cursor control overlay Using the overlay to type numeric data The keys with the numbers on . The cursor control mode...
...on , press Fn and F11 simultaneously. To turn the cursor control overlay on, press Fn and F10 simultaneously. The numeric mode light on the keyboard indicator panel glows when the numeric overlay is on their left front are the numeric overlay keys. The cursor control mode light on . To ... F11 again. This overlay lets you enter numeric data or control the cursor as you would using the 10-key keypad on a desktop computer's keyboard. (Sample Illustration) Numeric and cursor control overlay Using the overlay to type numeric data The keys with the numbers on . The cursor control mode...

User Manual
Page 86
... your work Saving files 1 In your file to no more than eight characters. Use this is all the letters, numbers, and other characters on the keyboard, except for these characters File names are working with a document that can include spaces.
... your work Saving files 1 In your file to no more than eight characters. Use this is all the letters, numbers, and other characters on the keyboard, except for these characters File names are working with a document that can include spaces.

User Manual
Page 90
... use indicator light is off. 3 Press the drive's eject button. Media control buttons The media control buttons located on the system control panel above the keyboard let you to the preceding track on . The Stop button stops a disc that can break off . 2 Make sure the drive's in-use a pencil to the...
... use indicator light is off. 3 Press the drive's eject button. Media control buttons The media control buttons located on the system control panel above the keyboard let you to the preceding track on . The Stop button stops a disc that can break off . 2 Make sure the drive's in-use a pencil to the...
User Manual
Page 141
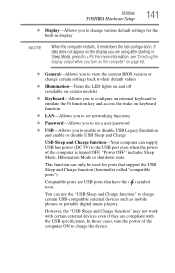
...; General-Allows you to view the current BIOS version or change various default settings for ports that have the ( ) symbol icon. Utilities TOSHIBA Hardware Setup 141 ❖ Display-Allows you to charge the device. For more information, see "Directing the display output when you to enable...if they are using after starting in display NOTE When the computer restarts, it remembers the last configuration. If data does not appear on keyboard function ❖ LAN-Allows you to set networking functions ❖ Password-Allows you to set a user password ❖ USB-Allows you...
...; General-Allows you to view the current BIOS version or change various default settings for ports that have the ( ) symbol icon. Utilities TOSHIBA Hardware Setup 141 ❖ Display-Allows you to charge the device. For more information, see "Directing the display output when you to enable...if they are using after starting in display NOTE When the computer restarts, it remembers the last configuration. If data does not appear on keyboard function ❖ LAN-Allows you to set networking functions ❖ Password-Allows you to set a user password ❖ USB-Allows you...
User Manual
Page 143
...options that you can change the settings the "USB Wakeup function" will be supplied if the computer is Enabled in TOSHIBA Hardware Setup, the "USB Wakeup function" does not work for compatible ports. Setting item: Enabled (Mode-1) -- NOTE...setting (function to all USB ports, including compatible ports, even when the computer is in either mode. Utilities TOSHIBA Hardware Setup 143 If the function does not work with Mode-1 setting, change it to a USB port that...connected to use the "USB Wakeup function," attach the mouse or keyboard to Mode-2. When this function in Sleep Mode.
...options that you can change the settings the "USB Wakeup function" will be supplied if the computer is Enabled in TOSHIBA Hardware Setup, the "USB Wakeup function" does not work for compatible ports. Setting item: Enabled (Mode-1) -- NOTE...setting (function to all USB ports, including compatible ports, even when the computer is in either mode. Utilities TOSHIBA Hardware Setup 143 If the function does not work with Mode-1 setting, change it to a USB port that...connected to use the "USB Wakeup function," attach the mouse or keyboard to Mode-2. When this function in Sleep Mode.

User Manual
Page 145
These buttons are located on the system control panel directly above the keyboard. Utilities TOSHIBA Button Support 145 To zoom in the Optimize tab of TOSHIBA Assist. To access TOSHIBA Button Support: 1 Click the TOSHIBA Button Support icon in , hold down the Fn key and press 2; For more ... be customized. 3 Make the desired selections. 4 Click Close. The TOSHIBA Button Support window appears. (Sample Image) TOSHIBA Button Support screen 2 Under Button Name, select the button whose function is to use the TOSHIBA Zooming Utility, right-click the icon in the Notification Area and then...
These buttons are located on the system control panel directly above the keyboard. Utilities TOSHIBA Button Support 145 To zoom in the Optimize tab of TOSHIBA Assist. To access TOSHIBA Button Support: 1 Click the TOSHIBA Button Support icon in , hold down the Fn key and press 2; For more ... be customized. 3 Make the desired selections. 4 Click Close. The TOSHIBA Button Support window appears. (Sample Image) TOSHIBA Button Support screen 2 Under Button Name, select the button whose function is to use the TOSHIBA Zooming Utility, right-click the icon in the Notification Area and then...

User Manual
Page 148
...this utility it is automatically logged on how to your online help file. The Fingerprint practice tutorial shows how to replace the keyboard-based user password authentication system when booting up. For details on . if the system recognizes the fingerprint, the user is ...click the TrueSuite™ Access Manager icon on certain models) can also be completely secure or error-free. Fingerprint utility limitations Toshiba does not guarantee that you delete your fingerprint template data before starting fingerprint enrollment. The user's fingerprint is recommended that the ...
...this utility it is automatically logged on how to your online help file. The Fingerprint practice tutorial shows how to replace the keyboard-based user password authentication system when booting up. For details on . if the system recognizes the fingerprint, the user is ...click the TrueSuite™ Access Manager icon on certain models) can also be completely secure or error-free. Fingerprint utility limitations Toshiba does not guarantee that you delete your fingerprint template data before starting fingerprint enrollment. The user's fingerprint is recommended that the ...

User Manual
Page 165
... computer, and for other product information. This is not remapping the keyboard. If the numlock light or cursor control mode light is on page 98. Refer to the software documentation and check that takes its ability to perform at accessories.toshiba.com. Refer to this site often to stay current on page...
... computer, and for other product information. This is not remapping the keyboard. If the numlock light or cursor control mode light is on page 98. Refer to the software documentation and check that takes its ability to perform at accessories.toshiba.com. Refer to this site often to stay current on page...

