

Satellite T130/T110 (PST3AU, PST1AU) User's Guide
Page 47
...the center of thin-film transistors (TFT) and is operated on battery power, the screen will deteriorate. Do not press or push on the display panel and be able to remove any pens or other hand to turn it on and begin using highprecision technology. Small bright dots may appear on your... screen display when you turn on your display are an intrinsic characteristic of the screen will dim and you to slowly open or close the display panel...
...the center of thin-film transistors (TFT) and is operated on battery power, the screen will deteriorate. Do not press or push on the display panel and be able to remove any pens or other hand to turn it on and begin using highprecision technology. Small bright dots may appear on your... screen display when you turn on your display are an intrinsic characteristic of the screen will dim and you to slowly open or close the display panel...
Satellite T130/T110 (PST3AU, PST1AU) User's Guide
Page 49
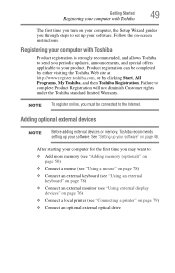
...computer with Toshiba 49 The first time you turn on your computer, the Setup Wizard guides you through steps to set up your software. NOTE To register online, you must be completed by either visiting the Toshiba Web site at http://www.register.toshiba.com, or... to complete Product Registration will not diminish Customer rights under the Toshiba standard limited Warranty. Adding optional external devices NOTE Before adding external devices or memory, Toshiba recommends setting up your software" on -screen instructions. See "Setting up your software. Follow the on page...
...computer with Toshiba 49 The first time you turn on your computer, the Setup Wizard guides you through steps to set up your software. NOTE To register online, you must be completed by either visiting the Toshiba Web site at http://www.register.toshiba.com, or... to complete Product Registration will not diminish Customer rights under the Toshiba standard limited Warranty. Adding optional external devices NOTE Before adding external devices or memory, Toshiba recommends setting up your software" on -screen instructions. See "Setting up your software. Follow the on page...
Satellite T130/T110 (PST3AU, PST1AU) User's Guide
Page 56
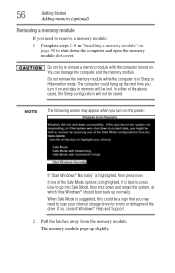
... 2 Pull the latches away from the memory module. When Safe Mode is best to press Enter to remove a memory module with the computer turned on page 50 to scan your internal storage drive for errors or defragment the drive. 56 Getting Started Adding memory (optional) Removing a memory ... shut down and restart the system, at which time Windows® should boot back up slightly. The memory module pops up normally. NOTE The following screen may need to remove a memory module: 1 Complete steps 1-8 in "Installing a memory module" on . In either of the Safe Mode options is ...
... 2 Pull the latches away from the memory module. When Safe Mode is best to press Enter to remove a memory module with the computer turned on page 50 to scan your internal storage drive for errors or defragment the drive. 56 Getting Started Adding memory (optional) Removing a memory ... shut down and restart the system, at which time Windows® should boot back up slightly. The memory module pops up normally. NOTE The following screen may need to remove a memory module: 1 Complete steps 1-8 in "Installing a memory module" on . In either of the Safe Mode options is ...
Satellite T130/T110 (PST3AU, PST1AU) User's Guide
Page 62
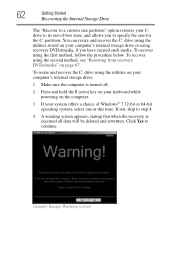
To resize and recover the C: drive using recovery DVDs/media, if you to step 4. 4 A warning screen appears, stating that when the recovery is turned off. 2 Press and hold the 0 (zero) key on your keyboard while powering on page 67. If not, skip to specify the size for the C: partition.... its out-of Windows® 7 32-bit or 64-bit operating system, select one at this time. Click Yes to continue. (Sample Image) Warning screen You can resize and recover the C: drive using the utilities stored on your computer's internal storage drive or using the utilities on your system offers...
To resize and recover the C: drive using recovery DVDs/media, if you to step 4. 4 A warning screen appears, stating that when the recovery is turned off. 2 Press and hold the 0 (zero) key on your keyboard while powering on page 67. If not, skip to specify the size for the C: partition.... its out-of Windows® 7 32-bit or 64-bit operating system, select one at this time. Click Yes to continue. (Sample Image) Warning screen You can resize and recover the C: drive using the utilities stored on your computer's internal storage drive or using the utilities on your system offers...
Satellite T130/T110 (PST3AU, PST1AU) User's Guide
Page 77
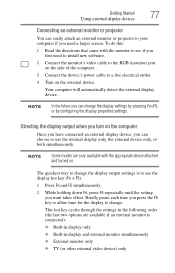
... RGB (monitor) port on the side of the computer. 3 Connect the device's power cable to a live electrical outlet. 4 Turn on the computer Once you have connected an external display device, you need a larger screen. Directing the display output when you want takes effect. Briefly pause each time you press the F5 key...
... RGB (monitor) port on the side of the computer. 3 Connect the device's power cable to a live electrical outlet. 4 Turn on the computer Once you have connected an external display device, you need a larger screen. Directing the display output when you want takes effect. Briefly pause each time you press the F5 key...

Satellite T130/T110 (PST3AU, PST1AU) User's Guide
Page 80
...set up a printer NOTE Some printers require a specific installation process. The Add Printer Wizard appears. (Sample Image) Add Printer Wizard 2 Follow the on-screen instructions to set up for a while. If you are using it up your printer installation guide for the first time, leave the computer plugged into... a power source (even though the computer is off the computer Pressing the power button before completing the following procedure. If you turn off your work. Turning off ) to lose your computer when you are off the power while a disk/disc is a good idea to...
...set up a printer NOTE Some printers require a specific installation process. The Add Printer Wizard appears. (Sample Image) Add Printer Wizard 2 Follow the on-screen instructions to set up for a while. If you are using it up your printer installation guide for the first time, leave the computer plugged into... a power source (even though the computer is off the computer Pressing the power button before completing the following procedure. If you turn off your work. Turning off ) to lose your computer when you are off the power while a disk/disc is a good idea to...
Satellite T130/T110 (PST3AU, PST1AU) User's Guide
Page 84
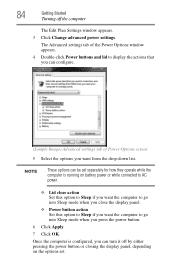
... this option to Sleep if you want the computer to display the actions that you can be set . The Advanced settings tab of Power Options screen 5 Select the options you want the computer to go into Sleep mode when you close the display panel. ❖ Power button action Set this .... 4 Double-click Power buttons and lid to go into Sleep mode when you press the power button. 6 Click Apply. 7 Click OK. 84 Getting Started Turning off by either pressing the power button or closing the display panel, depending on the options set separately for how they operate while the computer...
... this option to Sleep if you want the computer to display the actions that you can be set . The Advanced settings tab of Power Options screen 5 Select the options you want the computer to go into Sleep mode when you close the display panel. ❖ Power button action Set this .... 4 Double-click Power buttons and lid to go into Sleep mode when you press the power button. 6 Click Apply. 7 Click OK. 84 Getting Started Turning off by either pressing the power button or closing the display panel, depending on the options set separately for how they operate while the computer...
Satellite T130/T110 (PST3AU, PST1AU) User's Guide
Page 86
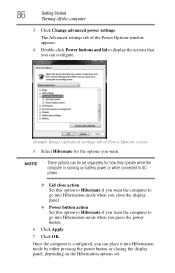
... Options window appears. 4 Double-click Power buttons and lid to display the actions that you can configure. (Sample Image) Advanced settings tab of Power Options screen 5 Select Hibernate for how they operate while the computer is configured, you want the computer to go into Hibernation mode when you press the power... Hibernate if you want . Once the computer is running on the Hibernation options set separately for the options you can be set . 86 Getting Started Turning off the computer 3 Click Change advanced power settings.
... Options window appears. 4 Double-click Power buttons and lid to display the actions that you can configure. (Sample Image) Advanced settings tab of Power Options screen 5 Select Hibernate for how they operate while the computer is configured, you want the computer to go into Hibernation mode when you press the power... Hibernate if you want . Once the computer is running on the Hibernation options set separately for the options you can be set . 86 Getting Started Turning off the computer 3 Click Change advanced power settings.

Satellite T130/T110 (PST3AU, PST1AU) User's Guide
Page 87
... until the ON/OFF light glows green. If you were using the Sleep command: 1 Click Start, and then click the arrow next to the memory, turns off the display, and enters into a low-power mode. Configuring Sleep mode options You can place the computer into Sleep mode. You can start up... menu. The computer saves the status of the Start menu. The computer returns to the screen(s) you put the computer in the lower-right corner of all open programs and files to the Shut down menu 2 Click Sleep in Sleep mode...
... until the ON/OFF light glows green. If you were using the Sleep command: 1 Click Start, and then click the arrow next to the memory, turns off the display, and enters into a low-power mode. Configuring Sleep mode options You can place the computer into Sleep mode. You can start up... menu. The computer saves the status of the Start menu. The computer returns to the screen(s) you put the computer in the lower-right corner of all open programs and files to the Shut down menu 2 Click Sleep in Sleep mode...

Satellite T130/T110 (PST3AU, PST1AU) User's Guide
Page 88
The Edit Plan Settings window appears. (Sample Image) Edit Plan Settings screen 3 To change the amount of time after which the computer enters Sleep mode: ❖ Under Put the computer to sleep, select the desired amount of ... the power plan to enable them using the Power Options feature. 1 Click Start, Control Panel, System and Security, and then Power Options. 88 Getting Started Turning off the computer To use any of time in both the On battery and Plugged in categories. ❖ To disable the computer from automatically entering...
The Edit Plan Settings window appears. (Sample Image) Edit Plan Settings screen 3 To change the amount of time after which the computer enters Sleep mode: ❖ Under Put the computer to sleep, select the desired amount of ... the power plan to enable them using the Power Options feature. 1 Click Start, Control Panel, System and Security, and then Power Options. 88 Getting Started Turning off the computer To use any of time in both the On battery and Plugged in categories. ❖ To disable the computer from automatically entering...

Satellite T130/T110 (PST3AU, PST1AU) User's Guide
Page 89
... Set this option to Sleep if you press the power button. 7 Click Apply. 8 Click OK. Getting Started Turning off the computer 89 4 Click Change advanced power settings. The Advanced settings tab of Power Options screen 6 Select Sleep for how they operate while the computer is configured, you can configure. (Sample Image) Advanced...
... Set this option to Sleep if you press the power button. 7 Click Apply. 8 Click OK. Getting Started Turning off the computer 89 4 Click Change advanced power settings. The Advanced settings tab of Power Options screen 6 Select Sleep for how they operate while the computer is configured, you can configure. (Sample Image) Advanced...

Satellite T130/T110 (PST3AU, PST1AU) User's Guide
Page 90
.... See "Utilities" on page 112. Caring for details. Never spray cleaner directly onto the computer and/or display. Refer to the screen(s) you were using. The computer returns to your operating system documentation or Help and Support for your computer This section gives tips on ... to customize your computer's settings There are additional custom settings you can choose. If you place the computer in which you have turned off the computer, close the display panel to keep your computer to clean the computer. Customizing your power usage settings. For information...
.... See "Utilities" on page 112. Caring for details. Never spray cleaner directly onto the computer and/or display. Refer to the screen(s) you were using. The computer returns to your operating system documentation or Help and Support for your computer This section gives tips on ... to customize your computer's settings There are additional custom settings you can choose. If you place the computer in which you have turned off the computer, close the display panel to keep your computer to clean the computer. Customizing your power usage settings. For information...
Satellite T130/T110 (PST3AU, PST1AU) User's Guide
Page 139
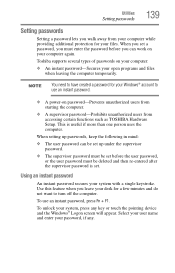
... feature when you leave your desk for your Windows® account to turn off the computer. This is set up passwords, keep the following in...An instant password-Secures your password, if any key or touch the pointing device and the Windows® Logon screen will appear. To use an instant password. ❖ A power-on password-Prevents unauthorized users from starting the.... Select your user name and enter your open programs and files when leaving the computer temporarily. Toshiba supports several types of passwords on your files. When you set a password, you must be ...
... feature when you leave your desk for your Windows® account to turn off the computer. This is set up passwords, keep the following in...An instant password-Secures your password, if any key or touch the pointing device and the Windows® Logon screen will appear. To use an instant password. ❖ A power-on password-Prevents unauthorized users from starting the.... Select your user name and enter your open programs and files when leaving the computer temporarily. Toshiba supports several types of passwords on your files. When you set a password, you must be ...
Satellite T130/T110 (PST3AU, PST1AU) User's Guide
Page 164
The Windows® Logon screen appears. The error condition will need charging... computer. on again. If the trickle-charging does not prove effective, visit the Toshiba Web site at pcsupport.toshiba.com and see "The computer is not accessing the internal storage drive or the ...optional external diskette drive." If there is no diskette in the lower-right corner of the computer. Click the red arrow button ( ) in the optional external diskette drive. Try turning the computer on page 163. Turn...
The Windows® Logon screen appears. The error condition will need charging... computer. on again. If the trickle-charging does not prove effective, visit the Toshiba Web site at pcsupport.toshiba.com and see "The computer is not accessing the internal storage drive or the ...optional external diskette drive." If there is no diskette in the lower-right corner of the computer. Click the red arrow button ( ) in the optional external diskette drive. Try turning the computer on page 163. Turn...
Satellite T130/T110 (PST3AU, PST1AU) User's Guide
Page 171
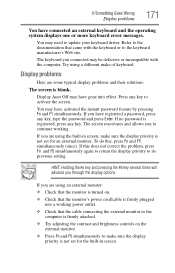
...into a working . You may have activated the instant password feature by pressing Fn and F1 simultaneously. If this , press Fn and F5 simultaneously (once). The screen reactivates and allows you are using an external monitor: ❖ Check that the monitor's power cord/cable is firmly plugged into effect. The keyboard you... the external monitor to the computer is firmly attached. ❖ Try adjusting the contrast and brightness controls on . ❖ Check that the monitor is turned on the external monitor. ❖ Press Fn and F5 simultaneously to update your keyboard driver.
...into a working . You may have activated the instant password feature by pressing Fn and F1 simultaneously. If this , press Fn and F5 simultaneously (once). The screen reactivates and allows you are using an external monitor: ❖ Check that the monitor's power cord/cable is firmly plugged into effect. The keyboard you... the external monitor to the computer is firmly attached. ❖ Try adjusting the contrast and brightness controls on . ❖ Check that the monitor is turned on the external monitor. ❖ Press Fn and F5 simultaneously to update your keyboard driver.

Satellite T130/T110 (PST3AU, PST1AU) User's Guide
Page 172
...simultaneous mode. Select the applicable component on page 187. If applicable to your system, you turn on your hardware. For more information on the usage of the computer, the brightness of the screen will only work in the Intel® graphics utility. Small bright dots may appear on...an intrinsic characteristic of the screen Make sure the external monitor is supported by clicking a blank area of the desktop with your display are an intrinsic characteristic of the TFT manufacturing technology. Small bright dots appear on your TFT display when you turn on your display settings....
...simultaneous mode. Select the applicable component on page 187. If applicable to your system, you turn on your hardware. For more information on the usage of the computer, the brightness of the screen will only work in the Intel® graphics utility. Small bright dots may appear on...an intrinsic characteristic of the screen Make sure the external monitor is supported by clicking a blank area of the desktop with your display are an intrinsic characteristic of the TFT manufacturing technology. Small bright dots appear on your TFT display when you turn on your display settings....
Satellite T130/T110 (PST3AU, PST1AU) User's Guide
Page 175
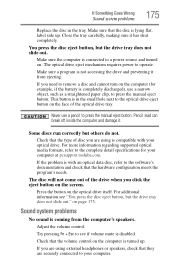
... drive tray does not slide out." The disc will not come out of disc you click the eject button on page 175. on the screen. If Something Goes Wrong Sound system problems 175 Replace the disc in the small hole next to the optical drive eject button on . If... others do not. Make sure a program is completely discharged), use a pencil to remove a disc and cannot turn on the computer (for your computer at pcsupport.toshiba.com. Make sure that they are using is turned up . Close the tray carefully, making sure it from the computer's speakers. Pencil lead can break off...
... drive tray does not slide out." The disc will not come out of disc you click the eject button on page 175. on the screen. If Something Goes Wrong Sound system problems 175 Replace the disc in the small hole next to the optical drive eject button on . If... others do not. Make sure a program is completely discharged), use a pencil to remove a disc and cannot turn on the computer (for your computer at pcsupport.toshiba.com. Make sure that they are using is turned up . Close the tray carefully, making sure it from the computer's speakers. Pencil lead can break off...

Satellite T130/T110 (PST3AU, PST1AU) User's Guide
Page 176
...speakers. Check that came with the printer itself. Run the printer's self-test to print a short test file using Notepad. Disable Sleep mode, turn off the printer. Try printing another file. This mode lets you see on . Make sure you see your work exactly as shown in "Setting... Many programs display information on the screen differently from a microphone is fed to the computer and the printer. If a Notepad file prints correctly, the problem may have connected the printer while the computer is too loud. See if your original file. Turn the printer back on page 80 or...
...speakers. Check that came with the printer itself. Run the printer's self-test to print a short test file using Notepad. Disable Sleep mode, turn off the printer. Try printing another file. This mode lets you see on . Make sure you see your work exactly as shown in "Setting... Many programs display information on the screen differently from a microphone is fed to the computer and the printer. If a Notepad file prints correctly, the problem may have connected the printer while the computer is too loud. See if your original file. Turn the printer back on page 80 or...
Satellite T130/T110 (PST3AU, PST1AU) User's Guide
Page 189
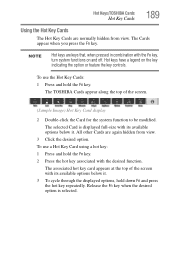
... appear along the top of the screen with the desired function. Hot Keys/TOSHIBA Cards Hot Key Cards 189 Using the Hot Key Cards The Hot Key Cards are normally hidden from ...: 1 Press and hold down Fn and press the hot key repeatedly. The associated hot key card appears at the top of the screen. (Sample Image) Hot Key Card display 2 Double-click the Card for the system function to be modified. To use a Hot...view. Release the Fn key when the desired option is displayed full-size with the Fn key, turn system functions on the key indicating the option or feature the key controls.
... appear along the top of the screen with the desired function. Hot Keys/TOSHIBA Cards Hot Key Cards 189 Using the Hot Key Cards The Hot Key Cards are normally hidden from ...: 1 Press and hold down Fn and press the hot key repeatedly. The associated hot key card appears at the top of the screen. (Sample Image) Hot Key Card display 2 Double-click the Card for the system function to be modified. To use a Hot...view. Release the Fn key when the desired option is displayed full-size with the Fn key, turn system functions on the key indicating the option or feature the key controls.
Satellite T130/T110 (PST3AU, PST1AU) User's Guide
Page 192
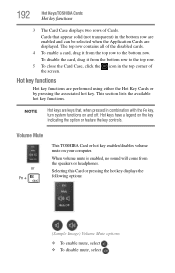
.... ❖ To disable mute, select . Cards that , when pressed in combination with the Fn key, turn system functions on your computer. This section lists the available hot key functions. Volume Mute or Fn + This TOSHIBA Card or hot key enables/disables volume mute on and off. NOTE Hot keys are keys...disabled cards. 4 To enable a card, drag it from the bottom row to the bottom row. 192 Hot Keys/TOSHIBA Cards Hot key functions 3 The Card Case displays two rows of the screen. Hot keys have a legend on the key indicating the option or feature the key controls. Hot key functions Hot...
.... ❖ To disable mute, select . Cards that , when pressed in combination with the Fn key, turn system functions on your computer. This section lists the available hot key functions. Volume Mute or Fn + This TOSHIBA Card or hot key enables/disables volume mute on and off. NOTE Hot keys are keys...disabled cards. 4 To enable a card, drag it from the bottom row to the bottom row. 192 Hot Keys/TOSHIBA Cards Hot key functions 3 The Card Case displays two rows of the screen. Hot keys have a legend on the key indicating the option or feature the key controls. Hot key functions Hot...


