
Users Manual Canada; English
Page 3
...Utility 6-9 Starting the computer by password 6-10 Power-up modes 6-10 User's Manual iii Right side 2-3 Back 2-5 Underside 2-6 Front with the display open 2-7 Indicators 2-9 Optical disc drives 2-10 AC adaptor 2-11 Chapter 3 Hardware, Utilities and Options Hardware 3-1 Special features 3-6 Utilities and Applications 3-8 Optional devices 3-12 Optional accessories 3-24 Chapter 4 Operating Basics Using the Touch Pad 4-1 Web Camera 4-2 Using the TOSHIBA Face Recognition 4-3 Using optical disc drives 4-6 Writing CD/DVDs 4-9 TOSHIBA VIDEO PLAYER 4-15 Media care 4-18 Sound...
...Utility 6-9 Starting the computer by password 6-10 Power-up modes 6-10 User's Manual iii Right side 2-3 Back 2-5 Underside 2-6 Front with the display open 2-7 Indicators 2-9 Optical disc drives 2-10 AC adaptor 2-11 Chapter 3 Hardware, Utilities and Options Hardware 3-1 Special features 3-6 Utilities and Applications 3-8 Optional devices 3-12 Optional accessories 3-24 Chapter 4 Operating Basics Using the Touch Pad 4-1 Web Camera 4-2 Using the TOSHIBA Face Recognition 4-3 Using optical disc drives 4-6 Writing CD/DVDs 4-9 TOSHIBA VIDEO PLAYER 4-15 Media care 4-18 Sound...

Users Manual Canada; English
Page 4
Panel power on/off 6-11 System automatic Sleep/Hibernation 6-11 Chapter 7 HW Setup Accessing HW Setup 7-1 HW Setup window 7-1 Chapter 8 Troubleshooting Problem solving process 8-1 Hardware and system checklist 8-3 TOSHIBA support 8-16 Appendix A Specifications Physical Dimensions A-1 Environmental Requirements A-1 External RGB monitor port pin assignment A-2 Appendix B Display Controller and Video mode Display controller B-1 Video mode B-1 Appendix C Information for Wireless Devices Wireless LAN Interoperability C-1 Bluetooth wireless technology Interoperability C-1 ...
Panel power on/off 6-11 System automatic Sleep/Hibernation 6-11 Chapter 7 HW Setup Accessing HW Setup 7-1 HW Setup window 7-1 Chapter 8 Troubleshooting Problem solving process 8-1 Hardware and system checklist 8-3 TOSHIBA support 8-16 Appendix A Specifications Physical Dimensions A-1 Environmental Requirements A-1 External RGB monitor port pin assignment A-2 Appendix B Display Controller and Video mode Display controller B-1 Video mode B-1 Appendix C Information for Wireless Devices Wireless LAN Interoperability C-1 Bluetooth wireless technology Interoperability C-1 ...

Users Manual Canada; English
Page 5
... or criminal action. Disclaimer This manual has been validated and reviewed for damages incurred directly or indirectly from this manual's production. The instructions and descriptions it contains are subject to the copyright owner. TOSHIBA assumes no liability for accuracy. Windows, Microsoft and Windows logo are trademarks or registered trademarks of HDMI Licensing LLC. HDMI, the HDMI logo and High-Definition Multimedia...
... or criminal action. Disclaimer This manual has been validated and reviewed for damages incurred directly or indirectly from this manual's production. The instructions and descriptions it contains are subject to the copyright owner. TOSHIBA assumes no liability for accuracy. Windows, Microsoft and Windows logo are trademarks or registered trademarks of HDMI Licensing LLC. HDMI, the HDMI logo and High-Definition Multimedia...

Users Manual Canada; English
Page 13
... manual uses the following their definition. The indicator panel also uses icons to identify the components it is providing information on configuring your computer, basic operations and care, using your computer. If you 're new to portable computing, first read Chapter 1, Getting Started for clarity, abbreviations are uncommon or unique to this manual by -step instructions on setting up and begin using optional devices and troubleshooting. This powerful notebook...
... manual uses the following their definition. The indicator panel also uses icons to identify the components it is providing information on configuring your computer, basic operations and care, using your computer. If you 're new to portable computing, first read Chapter 1, Getting Started for clarity, abbreviations are uncommon or unique to this manual by -step instructions on setting up and begin using optional devices and troubleshooting. This powerful notebook...
Users Manual Canada; English
Page 19
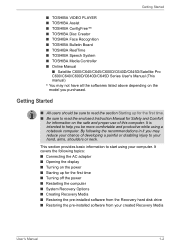
... the safe and proper use of developing a painful or disabling injury to start using a notebook computer. Getting Started ■ TOSHIBA VIDEO PLAYER ■ TOSHIBA Assist ■ TOSHIBA ConfigFree™ ■ TOSHIBA Disc Creator ■ TOSHIBA Face Recognition ■ TOSHIBA Bulletin Board ■ TOSHIBA ReelTime ■ TOSHIBA Speech System ■ TOSHIBA Media Controller ■ Online Manual ■ Satellite C600/C640/C645/C600D/C640D/C645D/Satellite Pro C600/C640/C600D/C640D/C645D Series User's Manual (This manual) * You may not have all the softwares listed...
... the safe and proper use of developing a painful or disabling injury to start using a notebook computer. Getting Started ■ TOSHIBA VIDEO PLAYER ■ TOSHIBA Assist ■ TOSHIBA ConfigFree™ ■ TOSHIBA Disc Creator ■ TOSHIBA Face Recognition ■ TOSHIBA Bulletin Board ■ TOSHIBA ReelTime ■ TOSHIBA Speech System ■ TOSHIBA Media Controller ■ Online Manual ■ Satellite C600/C640/C645/C600D/C640D/C645D/Satellite Pro C600/C640/C600D/C640D/C645D Series User's Manual (This manual) * You may not have all the softwares listed...
Users Manual Canada; English
Page 25
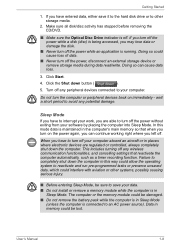
..., you can cause data loss. 3. The computer or the memory module could be lost. User's Manual 1-8 Make sure all disk/disc activity has stopped before removing the CD/DVD. ■ Make sure the Optical Disc Drive indicator is off any peripheral devices connected to interrupt your data. ■ Do not install or remove a memory module while the computer is maintained in Sleep Mode. Turn off . Click the Shut down the computer in this...
..., you can cause data loss. 3. The computer or the memory module could be lost. User's Manual 1-8 Make sure all disk/disc activity has stopped before removing the CD/DVD. ■ Make sure the Optical Disc Drive indicator is off any peripheral devices connected to interrupt your data. ■ Do not install or remove a memory module while the computer is maintained in Sleep Mode. Turn off . Click the Shut down the computer in this...
Users Manual Canada; English
Page 27
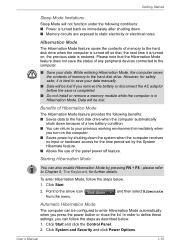
... Mode The Hibernation Mode feature saves the contents of memory to the hard disk drive when the computer is turned off feature. Point to the arrow icon ( from the menu. ) and then select Hibernate Automatic Hibernation Mode The computer can also enable Hibernation Mode by the System Hibernate feature. ■ Allows the use of any peripheral devices connected to static electricity or electrical noise. User's Manual...
... Mode The Hibernation Mode feature saves the contents of memory to the hard disk drive when the computer is turned off feature. Point to the arrow icon ( from the menu. ) and then select Hibernate Automatic Hibernation Mode The computer can also enable Hibernation Mode by the System Hibernate feature. ■ Allows the use of any peripheral devices connected to static electricity or electrical noise. User's Manual...
Users Manual Canada; English
Page 29
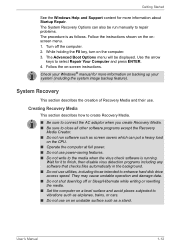
.... 2. While holding the F8 key, turn on the onscreen menu. 1. Use the arrow keys to enhance hard disk drive access speed. System Recovery This section describes the creation of Recovery Media and their use on the CPU. ■ Operate the computer at full power. ■ Do not use utilities, including those intended to select Repair Your Computer and press ENTER. 4. Wait for it to finish, then disable virus detection programs including...
.... 2. While holding the F8 key, turn on the onscreen menu. 1. Use the arrow keys to enhance hard disk drive access speed. System Recovery This section describes the creation of Recovery Media and their use on the CPU. ■ Operate the computer at full power. ■ Do not use utilities, including those intended to select Repair Your Computer and press ENTER. 4. Wait for it to finish, then disable virus detection programs including...
Users Manual Canada; English
Page 44
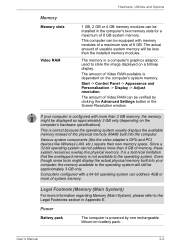
...)) For more of 8 GB. Power Battery pack The computer is powered by clicking the Advanced Settings button in a computer's graphics adaptor, used to the operating system will be approximately 3 GB only. The amount of 8 GB system memory. User's Manual 3-2 Hardware, Utilities and Options Memory Memory slots Video RAM 1 GB, 2 GB or 4 GB memory modules can be installed in Appendix E. The memory in the Screen Resolution window. Start -> Control Panel -> Appearance and Personalization -> Display -> Adjust resolution. It is a technical limitation...
...)) For more of 8 GB. Power Battery pack The computer is powered by clicking the Advanced Settings button in a computer's graphics adaptor, used to the operating system will be approximately 3 GB only. The amount of 8 GB system memory. User's Manual 3-2 Hardware, Utilities and Options Memory Memory slots Video RAM 1 GB, 2 GB or 4 GB memory modules can be installed in Appendix E. The memory in the Screen Resolution window. Start -> Control Panel -> Appearance and Personalization -> Display -> Adjust resolution. It is a technical limitation...

Users Manual Canada; English
Page 59
... - Wake-up on LAN is on . The wireless communication function is enabled. It could cause malfunction or electric shock. ■ Additional memory module is off (refer to the Turning off the power section in order to install or remove a memory module under the following conditions. Shut down and remove the battery pack (refer to Replacing the battery pack section in order to the computer. 3. make sure the Power indicator is a precision...
... - Wake-up on LAN is on . The wireless communication function is enabled. It could cause malfunction or electric shock. ■ Additional memory module is off (refer to the Turning off the power section in order to install or remove a memory module under the following conditions. Shut down and remove the battery pack (refer to Replacing the battery pack section in order to the computer. 3. make sure the Power indicator is a precision...
Users Manual Canada; English
Page 62
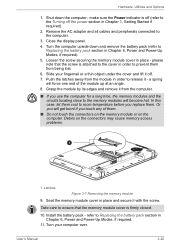
.... 8. Close the display panel. 4. Install the battery pack - Turn your fingernail or a thin object under the cover and lift it - User's Manual 3-20 In this case, let them . ■ Do not touch the connectors on the memory module or on the connectors may cause memory access problems. 1 1. Remove the AC adaptor and all cables and peripherals connected to Replacing the battery pack section in Chapter 6, Power and Power-Up Modes, if required...
.... 8. Close the display panel. 4. Install the battery pack - Turn your fingernail or a thin object under the cover and lift it - User's Manual 3-20 In this case, let them . ■ Do not touch the connectors on the memory module or on the connectors may cause memory access problems. 1 1. Remove the AC adaptor and all cables and peripherals connected to Replacing the battery pack section in Chapter 6, Power and Power-Up Modes, if required...
Users Manual Canada; English
Page 94
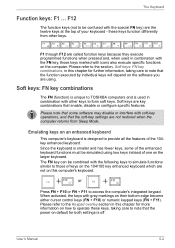
... to operate these keys function differently from Sleep Mode. The Keyboard Function keys: F1 ... F12 The function keys (not to access the computer's integrated keypad. Emulating keys on an enhanced keyboard This computer's keyboard is used in this chapter for more information on the larger keyboard. The FN key can be combined with other keys. Soft keys are not restored when the computer returns from other keys to note that enable, disable or configure specific...
... to operate these keys function differently from Sleep Mode. The Keyboard Function keys: F1 ... F12 The function keys (not to access the computer's integrated keypad. Emulating keys on an enhanced keyboard This computer's keyboard is used in this chapter for more information on the larger keyboard. The FN key can be combined with other keys. Soft keys are not restored when the computer returns from other keys to note that enable, disable or configure specific...

Users Manual Canada; English
Page 103
..., connect the AC adaptor to indicate that you remove a battery pack, disable the Wake-up on LAN function. Before you do not lose any data, and automatically turn itself off the power and disconnecting the AC adaptor. The battery can explode if not replaced, used , handled or disposed. Never remove the battery pack while the Wake-up on LAN function is being charged. Refer to the enclosed Instruction Manual...
..., connect the AC adaptor to indicate that you remove a battery pack, disable the Wake-up on LAN function. Before you do not lose any data, and automatically turn itself off the power and disconnecting the AC adaptor. The battery can explode if not replaced, used , handled or disposed. Never remove the battery pack while the Wake-up on LAN function is being charged. Refer to the enclosed Instruction Manual...

Users Manual Canada; English
Page 111
... use the TOSHIBA HW Setup program to be configured. About Display the HW Setup version. HW Setup window The HW Setup window contains a number of tabs (General, Password, Display, Boot Priority/Boot Setting, Keyboard, LAN, SATA and USB) to allow specific functions of the computer to configure your changes without accepting your changes and closes the HW Setup window. General This window displays the BIOS/EC version and contains two buttons: Default and About. Apply Accepts all HW Setup values to the factory settings. Accessing...
... use the TOSHIBA HW Setup program to be configured. About Display the HW Setup version. HW Setup window The HW Setup window contains a number of tabs (General, Password, Display, Boot Priority/Boot Setting, Keyboard, LAN, SATA and USB) to allow specific functions of the computer to configure your changes without accepting your changes and closes the HW Setup window. General This window displays the BIOS/EC version and contains two buttons: Default and About. Apply Accepts all HW Setup values to the factory settings. Accessing...
Users Manual Canada; English
Page 114
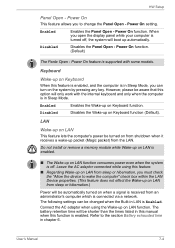
... on LAN from the LAN. Enabled Enables the Panel Open - Refer to change the Panel Open - HW Setup Panel Open - Disabled Disables the Panel Open - Connect the AC adaptor when using this feature is enabled, and the computer is Enabled. Power On function. (Default) The Panle Open - Keyboard Wake-up on Keyboard When this feature. ■ Regarding Wake-up on LAN from sleep or hibernation.) Power will be automatically turned on the system by pressing any key. The following settings can turn on...
... on LAN from the LAN. Enabled Enables the Panel Open - Refer to change the Panel Open - HW Setup Panel Open - Disabled Disables the Panel Open - Connect the AC adaptor when using this feature is enabled, and the computer is Enabled. Power On function. (Default) The Panle Open - Keyboard Wake-up on Keyboard When this feature. ■ Regarding Wake-up on LAN from sleep or hibernation.) Power will be automatically turned on the system by pressing any key. The following settings can turn on...

Users Manual Canada; English
Page 129
... unable to resolve the problem, contact your monitor for the internal display only. Press the FN + F5 hot key in order to change the display priority and ensure that the cable connecting the external monitor to the computer is connected. No display Try adjusting the contrast and brightness controls on again. User's Manual 8-14 If this from Sleep Mode if the external monitor has been disconnected while in Sleep or Hibernation Mode. Display error occurs Check that it...
... unable to resolve the problem, contact your monitor for the internal display only. Press the FN + F5 hot key in order to change the display priority and ensure that the cable connecting the external monitor to the computer is connected. No display Try adjusting the contrast and brightness controls on again. User's Manual 8-14 If this from Sleep Mode if the external monitor has been disconnected while in Sleep or Hibernation Mode. Display error occurs Check that it...

Users Manual Canada; English
Page 151
... lost data, always make back-up to design configuration. For optimum performance, use of computer at high altitude (all temperature references are met: ■ 64-bit Operating System ■ 64-bit CPU, Chipset and BIOS (Basic Input/Output System) ■ 64-bit Device drivers ■ 64-bit applications Certain device drivers and/or applications may not function properly. CPU performance may automatically...
... lost data, always make back-up to design configuration. For optimum performance, use of computer at high altitude (all temperature references are met: ■ 64-bit Operating System ■ 64-bit CPU, Chipset and BIOS (Basic Input/Output System) ■ 64-bit Device drivers ■ 64-bit applications Certain device drivers and/or applications may not function properly. CPU performance may automatically...
Users Manual Canada; English
Page 157
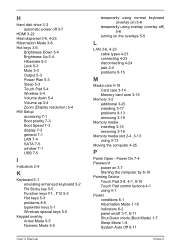
... 4-25 P Panel Open - H Hard disk drive 3-3 automatic power off 3-7 HDMI 3-22 Heat dispersal 3-8, 4-25 Hibernation Mode 3-8 Hot keys 3-6 Brightness Down 5-4 Brightness Up 5-4 Hibernate 5-3 Lock 5-3 Mute 5-3 Output 5-3 Power Plan 5-3 Sleep 5-3 Touch Pad 5-4 Wireless 5-4 Volume down 5-4 Volume up 5-4 Zoom (Display resolution) 5-4 HW Setup accessing 7-1 Boot priority 7-3 Boot Speed 7-3 display 7-3 general 7-1 LAN 7-4 SATA 7-5 window 7-1 USB 7-5 I Indicators 2-9 K Keyboard 5-1 emulating enhanced keyboard 5-2 FN Sticky key 5-5 Function keys F1...F12 5-2 Hot keys 5-3 problems 8-6 typewriter keys...
... 4-25 P Panel Open - H Hard disk drive 3-3 automatic power off 3-7 HDMI 3-22 Heat dispersal 3-8, 4-25 Hibernation Mode 3-8 Hot keys 3-6 Brightness Down 5-4 Brightness Up 5-4 Hibernate 5-3 Lock 5-3 Mute 5-3 Output 5-3 Power Plan 5-3 Sleep 5-3 Touch Pad 5-4 Wireless 5-4 Volume down 5-4 Volume up 5-4 Zoom (Display resolution) 5-4 HW Setup accessing 7-1 Boot priority 7-3 Boot Speed 7-3 display 7-3 general 7-1 LAN 7-4 SATA 7-5 window 7-1 USB 7-5 I Indicators 2-9 K Keyboard 5-1 emulating enhanced keyboard 5-2 FN Sticky key 5-5 Function keys F1...F12 5-2 Hot keys 5-3 problems 8-6 typewriter keys...
Users Manual Canada; English
Page 158
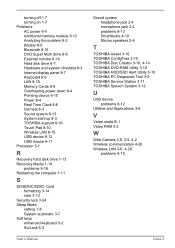
...Internal display panel 8-7 Keyboard 8-6 LAN 8-15 Memory Cards 8-9 Overheating power down 8-4 Pointing device 8-10 Power 8-4 Real Time Clock 8-6 Self test 8-3 Sound system 8-13 System start-up 8-3 TOSHIBA support 8-16 Touch Pad 8-10 Wireless LAN 8-15 USB device 8-12 USB mouse 8-11 Processor 3-1 R Recovery hard disk drive 1-13 Recovery Media 1-14 problems 8-16 Restarting the computer 1-11 S SD/SDHC/SDXC Card formatting 3-14 note 3-13 Security lock 3-24 Sleep Mode setting 1-8 System automatic 3-7 Soft keys enhanced keyboard 5-2 ScrLock 5-3 User's Manual Sound system headphone jack 2-4 microphone...
...Internal display panel 8-7 Keyboard 8-6 LAN 8-15 Memory Cards 8-9 Overheating power down 8-4 Pointing device 8-10 Power 8-4 Real Time Clock 8-6 Self test 8-3 Sound system 8-13 System start-up 8-3 TOSHIBA support 8-16 Touch Pad 8-10 Wireless LAN 8-15 USB device 8-12 USB mouse 8-11 Processor 3-1 R Recovery hard disk drive 1-13 Recovery Media 1-14 problems 8-16 Restarting the computer 1-11 S SD/SDHC/SDXC Card formatting 3-14 note 3-13 Security lock 3-24 Sleep Mode setting 1-8 System automatic 3-7 Soft keys enhanced keyboard 5-2 ScrLock 5-3 User's Manual Sound system headphone jack 2-4 microphone...
Detailed Specs for Satellite Pro C640 PSC2TC-002002 English
Page 1
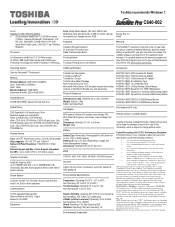
... to 95F); C640-002 Model: i Satellite Pro C640 PSC2TC-002002 2nd Generation Intel® Core™ i3-2310M processor - 2.10GHz , Genuine Windows® 7 Professional, 14.0" HD LED, 4GB DDR3, 320GB HDD S-ATA, DVD Super-Multi Double Layer, LAN, 802.11 bgn Wireless, Bluetooth Processor Ports: Bridge Media Adaptor (SD Card, SDHC Card, Multimedia Card, Mini SD Card), 2 USB 2.0, RJ45, external microphone port, headphone port, RGB Keyboard Canadian Bilingual Keyboard 87 keys with 15 Function keys Color: Flat Genchaku...
... to 95F); C640-002 Model: i Satellite Pro C640 PSC2TC-002002 2nd Generation Intel® Core™ i3-2310M processor - 2.10GHz , Genuine Windows® 7 Professional, 14.0" HD LED, 4GB DDR3, 320GB HDD S-ATA, DVD Super-Multi Double Layer, LAN, 802.11 bgn Wireless, Bluetooth Processor Ports: Bridge Media Adaptor (SD Card, SDHC Card, Multimedia Card, Mini SD Card), 2 USB 2.0, RJ45, external microphone port, headphone port, RGB Keyboard Canadian Bilingual Keyboard 87 keys with 15 Function keys Color: Flat Genchaku...

