
User Guide
Page 15
Contents Introduction 23 This guide 23 Safety icons 24 Other icons used 25 Other documentation 25 Service options 26 Chapter 1: Finding Your Way Around 27 Making sure you have everything 27 Front with the display panel closed 28 Back with rear panel closed 29 Back with rear panel open 30 Right side 31 Left side 31 Underside 33 Keyboard and display features 34 Front with the display panel open 34 Indicator panel lights 36 Keyboard indicator panel lights 37 Chapter 2: Getting Started 39 15
Contents Introduction 23 This guide 23 Safety icons 24 Other icons used 25 Other documentation 25 Service options 26 Chapter 1: Finding Your Way Around 27 Making sure you have everything 27 Front with the display panel closed 28 Back with rear panel closed 29 Back with rear panel open 30 Right side 31 Left side 31 Underside 33 Keyboard and display features 34 Front with the display panel open 34 Indicator panel lights 36 Keyboard indicator panel lights 37 Chapter 2: Getting Started 39 15

User Guide
Page 16
... display output when you turn on the computer 57 Adjusting the quality of the external display 58 Video limitations 58 Using an external keyboard 59 Making your external keyboard emulate the Fn key...... 59 Using a mouse 60 Setting up a PS/2 mouse with the AccuPoint II 60 Connecting a local printer 61 Connecting an...
... display output when you turn on the computer 57 Adjusting the quality of the external display 58 Video limitations 58 Using an external keyboard 59 Making your external keyboard emulate the Fn key...... 59 Using a mouse 60 Setting up a PS/2 mouse with the AccuPoint II 60 Connecting a local printer 61 Connecting an...

User Guide
Page 17
... modem to a telephone line 78 Connecting to a phone line 78 Chapter 4: Learning the Basics 81 Computing tips 81 Using the keyboard 82 Character keys 83 Making your keyboard emulate a full-size keyboard..... 83 Ctrl, Fn, and Alt keys 84 Function keys 84 Windows special keys 84 Overlay keys 85 Starting a program 87 Starting...
... modem to a telephone line 78 Connecting to a phone line 78 Chapter 4: Learning the Basics 81 Computing tips 81 Using the keyboard 82 Character keys 83 Making your keyboard emulate a full-size keyboard..... 83 Ctrl, Fn, and Alt keys 84 Function keys 84 Windows special keys 84 Overlay keys 85 Starting a program 87 Starting...

User Guide
Page 20
... the quality of the external display 177 UsVAinicdgceetohsesliimWngiit-atFhtiieo™nWsMi.-.iF.n.i.i.™.P...C.M.I..im.n..i.o.P.d..Cu..I.le.m.......o....d....u....l..e 178 178 178 Using an expansion device 179 Chapter 8: Toshiba Utilities 181 Fn-esse 182 Starting Fn-esse 182 Using the keyboard or pointing device to assign keys 184 Viewing existing key assignments 185
... the quality of the external display 177 UsVAinicdgceetohsesliimWngiit-atFhtiieo™nWsMi.-.iF.n.i.i.™.P...C.M.I..im.n..i.o.P.d..Cu..I.le.m.......o....d....u....l..e 178 178 178 Using an expansion device 179 Chapter 8: Toshiba Utilities 181 Fn-esse 182 Starting Fn-esse 182 Using the keyboard or pointing device to assign keys 184 Viewing existing key assignments 185

User Guide
Page 21
... Computer 188 Network 189 Security 189 Power Management 189 Slim SelectBay™ and Docking 192 Mobile Extension Service 192 Slim SelectBay™ Service 193 Toshiba Hardware Setup 193 Toshiba Power Saver utility 195 Enabling Hibernation 195 Setting user passwords 196 Using an instant password 197 Setting a user password 197 Disabling a user password... A plan of action 207 Resolving hardware conflicts on your own 208 Fixing a problem with Device Manager 209 Memory problems 211 Power and the batteries 211 Keyboard problems 213
... Computer 188 Network 189 Security 189 Power Management 189 Slim SelectBay™ and Docking 192 Mobile Extension Service 192 Slim SelectBay™ Service 193 Toshiba Hardware Setup 193 Toshiba Power Saver utility 195 Enabling Hibernation 195 Setting user passwords 196 Using an instant password 197 Setting a user password 197 Disabling a user password... A plan of action 207 Resolving hardware conflicts on your own 208 Fixing a problem with Device Manager 209 Memory problems 211 Power and the batteries 211 Keyboard problems 213

User Guide
Page 28
... port provides a cable-free connection for transferring data between your computer and another computer that provide information about various system functions. For more information, see "Keyboard and display features" on page 36. Connecting headphones or other devices to connect stereo headphones or other audio input device to the computer. For more...
... port provides a cable-free connection for transferring data between your computer and another computer that provide information about various system functions. For more information, see "Keyboard and display features" on page 36. Connecting headphones or other devices to connect stereo headphones or other audio input device to the computer. For more...

User Guide
Page 29
... performing at its maximum speed. CAUTION: To prevent possible overheating of up to 12 million bits per second (Mbps) for peripherals such as keyboards, pointing devices, a diskette drive and a video camera. USB allows "hot swapping" of peripherals, which means that supports a data transfer... Way Around Making sure you have a single standard for USB peripherals. Cooling vent-Provides ventilation to 12 Mbps for peripherals such as keyboards, pointing devices, and monitors. USB is a single-cabling and connection standard that components may be plugged and unplugged while the computer ...
... performing at its maximum speed. CAUTION: To prevent possible overheating of up to 12 million bits per second (Mbps) for peripherals such as keyboards, pointing devices, a diskette drive and a video camera. USB allows "hot swapping" of peripherals, which means that supports a data transfer... Way Around Making sure you have a single standard for USB peripherals. Cooling vent-Provides ventilation to 12 Mbps for peripherals such as keyboards, pointing devices, and monitors. USB is a single-cabling and connection standard that components may be plugged and unplugged while the computer ...

User Guide
Page 30
... monitor or projector. Ether The Network port (RJ45 jack) provides access to the port. Modem port-Lets you connect an optional PS/2-compatible mouse or keyboard. 30 Finding Your Way Around Making sure you have everything PS/2™ port-Lets you connect the computer's internal modem directly to a conventional telephone line.... Parallel port-Lets you connect a parallel printer or other serial device. You can use an optional Y-cable to connect both a mouse and a keyboard to a LAN via standard Ethernet® network cable.
... monitor or projector. Ether The Network port (RJ45 jack) provides access to the port. Modem port-Lets you connect an optional PS/2-compatible mouse or keyboard. 30 Finding Your Way Around Making sure you have everything PS/2™ port-Lets you connect the computer's internal modem directly to a conventional telephone line.... Parallel port-Lets you connect a parallel printer or other serial device. You can use an optional Y-cable to connect both a mouse and a keyboard to a LAN via standard Ethernet® network cable.

User Guide
Page 34
Keyboard and display features Front with the display panel open To view the front of the computer. Releasing the display latch 2 Slide the display latch to two memory modules. Opening the display panel 34 Finding Your Way Around Keyboard and display features The expansion memory cover protects the slot in which you can install up to the right and lift the display panel. For more information on expanding your computer's memory, see "Adding memory" on the front of the computer with the display panel open: 1 Locate the display latch on page 64.
Keyboard and display features Front with the display panel open To view the front of the computer. Releasing the display latch 2 Slide the display latch to two memory modules. Opening the display panel 34 Finding Your Way Around Keyboard and display features The expansion memory cover protects the slot in which you can install up to the right and lift the display panel. For more information on expanding your computer's memory, see "Adding memory" on the front of the computer with the display panel open: 1 Locate the display latch on page 64.

User Guide
Page 35
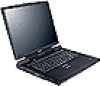
..."Different ways to turn the computer on and off" on power to turn on page 104. Keyboard-The 85-key keyboard provides all the functionality of a full-size keyboard. It has several built-in hot-key functions that provides clear, sharp images. Speaker Power button... CapsLock indicator AccuPoint II pointing device Screen Keyboard Speaker Keyboard indicator panel Programmable buttons Primary Secondary AccuPoint II button button buttons System indicator panel Power button -The power button is ...
..."Different ways to turn the computer on and off" on power to turn on page 104. Keyboard-The 85-key keyboard provides all the functionality of a full-size keyboard. It has several built-in hot-key functions that provides clear, sharp images. Speaker Power button... CapsLock indicator AccuPoint II pointing device Screen Keyboard Speaker Keyboard indicator panel Programmable buttons Primary Secondary AccuPoint II button button buttons System indicator panel Power button -The power button is ...

User Guide
Page 36
...is overheating. The AccuPoint II buttons (Primary and Secondary) work with the convenience of never having to remove your hands from the keyboard. See "Keyboard indicator panel lights" on page 82. AccuPoint® II pointing device-This device combines the function of a mouse with the ...AccuPoint II pointing device. System indicator panel-These lights provide status information about various keyboard functions. See the following section for a description of the panel lights. For more information on how to an AC power source. ...
...is overheating. The AccuPoint II buttons (Primary and Secondary) work with the convenience of never having to remove your hands from the keyboard. See "Keyboard indicator panel lights" on page 82. AccuPoint® II pointing device-This device combines the function of a mouse with the ...AccuPoint II pointing device. System indicator panel-These lights provide status information about various keyboard functions. See the following section for a description of the panel lights. For more information on how to an AC power source. ...

User Guide
Page 37
... the battery is fully charged. ❖ Does not glow if there is no battery in the Slim SelectBay. Finding Your Way Around Keyboard and display features 37 Main battery light-Indicates the status of the main battery. ❖ Flashes amber when you are running on battery...is currently in use . Hard disk drive light-Flashes to indicate that wireless device is on page 86. Keyboard indicator panel lights The keyboard indicator lights provide information about keyboard functions. Slim SelectBay indicator light-Indicates the status of the key. For more information, see "Using the ...
... the battery is fully charged. ❖ Does not glow if there is no battery in the Slim SelectBay. Finding Your Way Around Keyboard and display features 37 Main battery light-Indicates the status of the main battery. ❖ Flashes amber when you are running on battery...is currently in use . Hard disk drive light-Flashes to indicate that wireless device is on page 86. Keyboard indicator panel lights The keyboard indicator lights provide information about keyboard functions. Slim SelectBay indicator light-Indicates the status of the key. For more information, see "Using the ...

User Guide
Page 38
38 Finding Your Way Around Keyboard and display features Numlock light-Glows when the numeric overlay is on, pressing an overlay key produces the white number printed on the right front of the key instead of the key. When this light is on the top of the letter printed on . For more information, see "Using the overlay to type numeric data" on page 85.
38 Finding Your Way Around Keyboard and display features Numlock light-Glows when the numeric overlay is on, pressing an overlay key produces the white number printed on the right front of the key instead of the key. When this light is on the top of the letter printed on . For more information, see "Using the overlay to type numeric data" on page 85.

User Guide
Page 40
... Strain and stress injuries are connected to work comfortably throughout the day. If the discomfort persists, consult a physician. WARNING: Using the computer keyboard incorrectly can work ❖ Liquids and corrosive chemicals CAUTION: If you spill liquid into the computer, turn it back on again. However, ... you turn it off, unplug it from the AC power source and let it dry out completely before turning it on , contact a Toshiba service representative or your hands, wrists, and/or arms hurt while typing, stop using their computers. 40 Getting Started Selecting a place to...
... Strain and stress injuries are connected to work comfortably throughout the day. If the discomfort persists, consult a physician. WARNING: Using the computer keyboard incorrectly can work ❖ Liquids and corrosive chemicals CAUTION: If you spill liquid into the computer, turn it back on again. However, ... you turn it off, unplug it from the AC power source and let it dry out completely before turning it on , contact a Toshiba service representative or your hands, wrists, and/or arms hurt while typing, stop using their computers. 40 Getting Started Selecting a place to...

User Guide
Page 42
... a place to work Below eye level Footrest Approximately 90° angles Correct posture and positioning of the computer ❖ Position your chair so that the keyboard is at many office supply stores. ❖ Sit with your shoulders relaxed and your hips. If necessary, use a cushion to the floor. If you work...
... a place to work Below eye level Footrest Approximately 90° angles Correct posture and positioning of the computer ❖ Position your chair so that the keyboard is at many office supply stores. ❖ Sit with your shoulders relaxed and your hips. If necessary, use a cushion to the floor. If you work...

User Guide
Page 44
.... Before using your computer Your computer comes with prolonged use external power or to : ❖ Add more memory ❖ Connect a mouse ❖ Connect a full-size keyboard ❖ Connect an external monitor ❖ Connect a local printer CAUTION: Do not apply heavy pressure to a power source" on page 45. 44 Getting Started Setting...
.... Before using your computer Your computer comes with prolonged use external power or to : ❖ Add more memory ❖ Connect a mouse ❖ Connect a full-size keyboard ❖ Connect an external monitor ❖ Connect a local printer CAUTION: Do not apply heavy pressure to a power source" on page 45. 44 Getting Started Setting...

User Guide
Page 49
... in the direction you to move the cursor and to move the cursor, gently push the AccuPoint II pointing device in the middle of the keyboard is the AccuPoint II pointing device. For information, see "Using a mouse" on the AccuPoint II pointing device moves the cursor faster. it provides the same...
... in the direction you to move the cursor and to move the cursor, gently push the AccuPoint II pointing device in the middle of the keyboard is the AccuPoint II pointing device. For information, see "Using a mouse" on the AccuPoint II pointing device moves the cursor faster. it provides the same...

User Guide
Page 59
...and the display area (resolution) set up this NOTE: If you connect a PS/2 keyboard to the computer while it is in keyboard. CAUTION: When connecting any PS/2 device, turn the computer on the Satellite Pro® 6000 Series computer's built-in Standby mode, you will not be able to use a ...key combination on the external keyboard to 640 x 480 or 800 x 600, the image on the internal display panel may appear stretched. Making your external keyboard emulate the Fn key...
...and the display area (resolution) set up this NOTE: If you connect a PS/2 keyboard to the computer while it is in keyboard. CAUTION: When connecting any PS/2 device, turn the computer on the Satellite Pro® 6000 Series computer's built-in Standby mode, you will not be able to use a ...key combination on the external keyboard to 640 x 480 or 800 x 600, the image on the internal display panel may appear stretched. Making your external keyboard emulate the Fn key...

User Guide
Page 82
...shut down the computer" on a regular basis. Take frequent breaks to conserve disk space and improve performance. ❖ Scan all the functionality of a full-size keyboard. If you have a separate backup copy. ❖ Use Error-checking and Disk Defragmenter regularly to avoid repetitive-motion injuries and eyestrain. ❖ Don't turn ... your desktop setup, during its shutdown procedure. Label the backup copies clearly and store them in a safe place. 82 Learning the Basics Using the keyboard ❖ Back up because it takes time. It's easy to learn more about Standby.
...shut down the computer" on a regular basis. Take frequent breaks to conserve disk space and improve performance. ❖ Scan all the functionality of a full-size keyboard. If you have a separate backup copy. ❖ Use Error-checking and Disk Defragmenter regularly to avoid repetitive-motion injuries and eyestrain. ❖ Don't turn ... your desktop setup, during its shutdown procedure. Label the backup copies clearly and store them in a safe place. 82 Learning the Basics Using the keyboard ❖ Back up because it takes time. It's easy to learn more about Standby.

User Guide
Page 83
..., except that: ❖ The space bar creates a space character instead of just passing over an area of the time this doesn't matter. Your computer's keyboard has only one Enter and one of the specially marked keys allows you can simulate these separate keys, as follows: A standard full-size... keyboard has two Enter, Ctrl, and Alt keys, editing keys, cursor positioning keys, and a numeric keypad. Most of the page. ❖ The lowercase letter l (el...
..., except that: ❖ The space bar creates a space character instead of just passing over an area of the time this doesn't matter. Your computer's keyboard has only one Enter and one of the specially marked keys allows you can simulate these separate keys, as follows: A standard full-size... keyboard has two Enter, Ctrl, and Alt keys, editing keys, cursor positioning keys, and a numeric keypad. Most of the page. ❖ The lowercase letter l (el...

