User Guide
Page 64
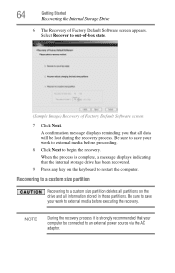
...save your work to external media before proceeding. 8 Click Next to external media before executing the recovery. Recovering to a custom size partition Recovering to an external power source via the AC adaptor. 64 Getting Started Recovering the Internal Storage Drive 6 The Recovery of... Factory Default Software screen 7 Click Next. NOTE During the recovery process it is complete, a message displays indicating that all data will be connected to a custom size partition deletes all partitions on the keyboard to out-of-box ...
...save your work to external media before proceeding. 8 Click Next to external media before executing the recovery. Recovering to a custom size partition Recovering to an external power source via the AC adaptor. 64 Getting Started Recovering the Internal Storage Drive 6 The Recovery of... Factory Default Software screen 7 Click Next. NOTE During the recovery process it is complete, a message displays indicating that all data will be connected to a custom size partition deletes all partitions on the keyboard to out-of-box ...
User Guide
Page 65
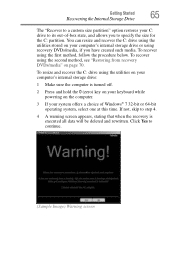
...second method, see "Restoring from recovery DVDs/media" on page 70. Getting Started Recovering the Internal Storage Drive 65 The "Recover to a custom size partition" option restores your system offers a choice of -box state, and allows you have created such media. To resize and recover the C: drive... system, select one at this time. To recover using the first method, follow the procedure below. If not, skip to step 4. 4 A warning screen appears, stating that when the recovery is turned off. 2 Press and hold the 0 (zero) key on your keyboard while powering on your computer's ...
...second method, see "Restoring from recovery DVDs/media" on page 70. Getting Started Recovering the Internal Storage Drive 65 The "Recover to a custom size partition" option restores your system offers a choice of -box state, and allows you have created such media. To resize and recover the C: drive... system, select one at this time. To recover using the first method, follow the procedure below. If not, skip to step 4. 4 A warning screen appears, stating that when the recovery is turned off. 2 Press and hold the 0 (zero) key on your keyboard while powering on your computer's ...
User Guide
Page 66
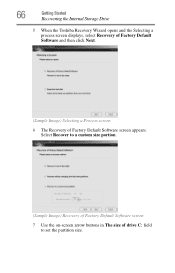
Select Recover to a custom size portion. (Sample Image) Recovery of Factory Default Software screen 7 Use the on-screen arrow buttons in The size of Factory Default Software screen appears. 66 Getting Started Recovering the Internal Storage Drive 5 When the Toshiba Recovery Wizard opens and the Selecting a process screen displays, select Recovery of Factory Default Software and then click Next. (Sample Image) Selecting a Process screen 6 The Recovery of drive C: field to set the partition size.
Select Recover to a custom size portion. (Sample Image) Recovery of Factory Default Software screen 7 Use the on-screen arrow buttons in The size of Factory Default Software screen appears. 66 Getting Started Recovering the Internal Storage Drive 5 When the Toshiba Recovery Wizard opens and the Selecting a process screen displays, select Recovery of Factory Default Software and then click Next. (Sample Image) Selecting a Process screen 6 The Recovery of drive C: field to set the partition size.
User Guide
Page 71
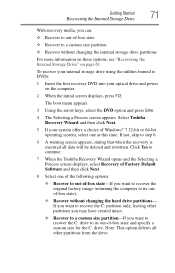
... 1 Insert the first recovery DVD into your system offers a choice of -box state ❖ Recover to continue. 7 When the Toshiba Recovery Wizard opens and the Selecting a Process screen displays, select Recovery of Factory Default Software and then click Next. 8 Select one at this time. Select... Toshiba Recovery Wizard and then click Next. 5 If your optical drive and power on page 61. The boot menu appears. 3 Using the arrow keys, select the DVD option and press Enter. 4 The Selecting a Process screen appears. Click Yes to a custom size partition ❖ Recover ...
... 1 Insert the first recovery DVD into your system offers a choice of -box state ❖ Recover to continue. 7 When the Toshiba Recovery Wizard opens and the Selecting a Process screen displays, select Recovery of Factory Default Software and then click Next. 8 Select one at this time. Select... Toshiba Recovery Wizard and then click Next. 5 If your optical drive and power on page 61. The boot menu appears. 3 Using the arrow keys, select the DVD option and press Enter. 4 The Selecting a Process screen appears. Click Yes to a custom size partition ❖ Recover ...
User Guide
Page 73
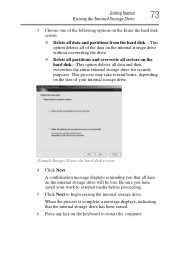
...drive for security purposes. Getting Started Erasing the Internal Storage Drive 73 3 Choose one of the following options on the Erase the hard disk screen: ❖ Delete all data and partitions from the hard disk-This option deletes all of your work to external media before proceeding. 5 Click... Next to restart the computer. This process may take several hours, depending on the size of the data on the internal storage drive without overwriting the drive. ❖ Delete all partitions and overwrite all sectors on the hard ...
...drive for security purposes. Getting Started Erasing the Internal Storage Drive 73 3 Choose one of the following options on the Erase the hard disk screen: ❖ Delete all data and partitions from the hard disk-This option deletes all of your work to external media before proceeding. 5 Click... Next to restart the computer. This process may take several hours, depending on the size of the data on the internal storage drive without overwriting the drive. ❖ Delete all partitions and overwrite all sectors on the hard ...
User Guide
Page 193
...Try adjusting the contrast and brightness controls on the external monitor. ❖ Press Fn and F5 simultaneously to its previous setting. Reduce the size of these components individually. If Something Goes Wrong Display problems 193 You may have registered a password, press any key. If you are ... set for an external monitor. HINT: Holding the Fn key and pressing the F5 key several times will advance you to choose the screen resolution. This opens the Personalization window. For more information, see the Windows® online Help. If you are using an external monitor...
...Try adjusting the contrast and brightness controls on the external monitor. ❖ Press Fn and F5 simultaneously to its previous setting. Reduce the size of these components individually. If Something Goes Wrong Display problems 193 You may have registered a password, press any key. If you are ... set for an external monitor. HINT: Holding the Fn key and pressing the F5 key several times will advance you to choose the screen resolution. This opens the Personalization window. For more information, see the Windows® online Help. If you are using an external monitor...

User Guide
Page 214
...when you press the Fn key. To use a Hot Key Card using a hot key: 1 Press and hold the Fn key. The TOSHIBA Cards appear along the top of the screen with its available options below it . 3 To cycle through the displayed options, hold down Fn and press the hot key repeatedly. Hot... keys have a legend on and off. Release the Fn key when the desired option is displayed full-size with its available options below...
...when you press the Fn key. To use a Hot Key Card using a hot key: 1 Press and hold the Fn key. The TOSHIBA Cards appear along the top of the screen with its available options below it . 3 To cycle through the displayed options, hold down Fn and press the hot key repeatedly. Hot... keys have a legend on and off. Release the Fn key when the desired option is displayed full-size with its available options below...
User Guide
Page 216
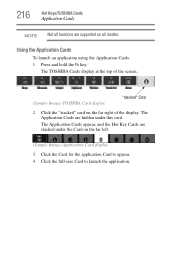
... under the Card on all models. The Application Cards appear, and the Hot Key Cards are stacked under this card. 216 Hot Keys/TOSHIBA Cards Application Cards NOTE Not all functions are supported on the far left. (Sample Image) Application Card display 3 Click the Card for ... application Card to appear. 4 Click the full-size Card to launch the application. Using the Application Cards To launch an application using the Application Cards: 1 Press and hold the Fn key. The TOSHIBA Cards display at the top of the screen. (Sample Image) TOSHIBA Card display "stacked" Card 2 Click the "...
... under the Card on all models. The Application Cards appear, and the Hot Key Cards are stacked under this card. 216 Hot Keys/TOSHIBA Cards Application Cards NOTE Not all functions are supported on the far left. (Sample Image) Application Card display 3 Click the Card for ... application Card to appear. 4 Click the full-size Card to launch the application. Using the Application Cards To launch an application using the Application Cards: 1 Press and hold the Fn key. The TOSHIBA Cards display at the top of the screen. (Sample Image) TOSHIBA Card display "stacked" Card 2 Click the "...
User Guide
Page 235
...CDs and DVDs. device driver - DC flows in one or more read from and written to hold information in digital form, and used in two sizes: 5.25-inch and 3.5-inch. disk drive - diskette - The setting selected by batteries. direct current (DC) - To turn a computer option off... The device that indicates the position where characters will appear when you enter data. An on-screen symbol (usually a flashing vertical line) that reads and writes information and programs on -screen window displayed by optical (laser) technology, and used in a protective jacket that can be ...
...CDs and DVDs. device driver - DC flows in one or more read from and written to hold information in digital form, and used in two sizes: 5.25-inch and 3.5-inch. disk drive - diskette - The setting selected by batteries. direct current (DC) - To turn a computer option off... The device that indicates the position where characters will appear when you enter data. An on-screen symbol (usually a flashing vertical line) that reads and writes information and programs on -screen window displayed by optical (laser) technology, and used in a protective jacket that can be ...
User Guide
Page 240
...to the computer or the network. non-system disk - A drive which reads plastic coated discs on a screen or printer. See color palette. A credit-card-sized expansion card designed to the computer and controlled by communications facilities. Any device, such as the electron beam ...scans across and down the screen. The smallest dot that is attached to increase the capabilities of information at a ...
...to the computer or the network. non-system disk - A drive which reads plastic coated discs on a screen or printer. See color palette. A credit-card-sized expansion card designed to the computer and controlled by communications facilities. Any device, such as the electron beam ...scans across and down the screen. The smallest dot that is attached to increase the capabilities of information at a ...
User Guide
Page 241
... is lost when you plug in dots per inch (dpi). Used to point to as well as icons, menu items, and buttons. A socket on -screen items, such as read -only memory - See also operating system, application, utility. R RAM (random access memory) - random access memory - See ROM... produced by a device manufacturer, allows a computer to configure itself to work with the device. A set of a file include the file's type, size, and creation date. An icon (usually an arrow) that enables you are operating system, application, and utility. A disk that , when followed by...
... is lost when you plug in dots per inch (dpi). Used to point to as well as icons, menu items, and buttons. A socket on -screen items, such as read -only memory - See also operating system, application, utility. R RAM (random access memory) - random access memory - See ROM... produced by a device manufacturer, allows a computer to configure itself to work with the device. A set of a file include the file's type, size, and creation date. An icon (usually an arrow) that enables you are operating system, application, and utility. A disk that , when followed by...

