User Guide
Page 27
27 Contents Viewing the contents of a CD or DVD 81 Removing a disc with the computer on 82 Removing a disc with the computer off 82 Caring for CDs and ... from Hibernation mode 92 Using Stand by 92 Going into Stand by mode more quickly ...........93 Starting again from Stand by 94 Toshiba's online resources 94 Chapter 3: Mobile Computing 95 Toshiba's energy-saver design 95 Running the computer on battery power 95 Power management 96 Using additional batteries 97 Charging the batteries...
27 Contents Viewing the contents of a CD or DVD 81 Removing a disc with the computer on 82 Removing a disc with the computer off 82 Caring for CDs and ... from Hibernation mode 92 Using Stand by 92 Going into Stand by mode more quickly ...........93 Starting again from Stand by 94 Toshiba's online resources 94 Chapter 3: Mobile Computing 95 Toshiba's energy-saver design 95 Running the computer on battery power 95 Power management 96 Using additional batteries 97 Charging the batteries...

User Guide
Page 53
... to find whether it uses the right mouse button. The Mouse Properties window appears. 4 Click the TouchPAD ON/OFF tab. The TouchPAD ON/OFF tab view window appears. 5 Select Disable or Enable, whichever is enabled by default. The Mouse Properties window closes. 8 Close the Printers and Other Hardware window. 9 Close the...
... to find whether it uses the right mouse button. The Mouse Properties window appears. 4 Click the TouchPAD ON/OFF tab. The TouchPAD ON/OFF tab view window appears. 5 Select Disable or Enable, whichever is enabled by default. The Mouse Properties window closes. 8 Close the Printers and Other Hardware window. 9 Close the...
User Guide
Page 57
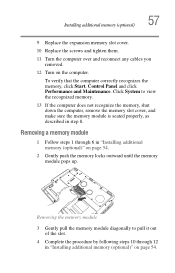
... a memory module 1 Follow steps 1 through 12 in "Installing additional memory (optional)" on the computer. Removing the memory module 3 Gently pull the memory module diagonally to view the recognized memory. 13 If the computer does not recognize the memory, shut down the computer, remove the memory slot cover, and make sure the...
... a memory module 1 Follow steps 1 through 12 in "Installing additional memory (optional)" on the computer. Removing the memory module 3 Gently pull the memory module diagonally to view the recognized memory. 13 If the computer does not recognize the memory, shut down the computer, remove the memory slot cover, and make sure the...

User Guide
Page 81
... are often used to pause, click the Play/Pause button on the CD Player control panel. ❖ To stop the CD, click the Stop button. Viewing the contents of space, such as photographs and large presentation files.
... are often used to pause, click the Play/Pause button on the CD Player control panel. ❖ To stop the CD, click the Stop button. Viewing the contents of space, such as photographs and large presentation files.

User Guide
Page 82
... the computer on the center of the tray until it clicks indicating that it is glowing. Pencil lead can use Explorer or My Computer to view the contents of the disc tray and pull it fully open the disc tray, wait for the disc to stop before removing it. 4 Close the...
... the computer on the center of the tray until it clicks indicating that it is glowing. Pencil lead can use Explorer or My Computer to view the contents of the disc tray and pull it fully open the disc tray, wait for the disc to stop before removing it. 4 Close the...

User Guide
Page 118
... it is not checked. The operating system displays a shortcut menu of the desktop, then click the secondary button. The My Computer window appears. 2 On the View menu, point to an empty area of commands applicable to Know the Windows® XP Operating System Lesson 4: Creating a new document you can also type...
... it is not checked. The operating system displays a shortcut menu of the desktop, then click the secondary button. The My Computer window appears. 2 On the View menu, point to an empty area of commands applicable to Know the Windows® XP Operating System Lesson 4: Creating a new document you can also type...

User Guide
Page 131
... and time 7 To apply a pattern to your desktop, click Apply. 8 After you have chosen a screen saver pattern and applied it to the desktop. You can view any object's properties by clicking the object with the secondary button, then choosing Properties from the shortcut menu that appears. To change the date and...
... and time 7 To apply a pattern to your desktop, click Apply. 8 After you have chosen a screen saver pattern and applied it to the desktop. You can view any object's properties by clicking the object with the secondary button, then choosing Properties from the shortcut menu that appears. To change the date and...

User Guide
Page 141
... interface 1 Point to an empty space on the desktop and click the secondary button. 2 Click on the Web content interface: 1 Point to the desktop. 6 To view additional components, click New.
... interface 1 Point to an empty space on the desktop and click the secondary button. 2 Click on the Web content interface: 1 Point to the desktop. 6 To view additional components, click New.

User Guide
Page 142
... style, enter desktop in several other Web site, type the address of the Web site you want or click Browse to customize the way you view your desktop and browse the files and folders on your desktop 7 To browse the Gallery for more information about changing your operating system documentation or...
... style, enter desktop in several other Web site, type the address of the Web site you want or click Browse to customize the way you view your desktop and browse the files and folders on your desktop 7 To browse the Gallery for more information about changing your operating system documentation or...

User Guide
Page 145
If you want to display. This means displaying an individual window as copying, pasting, deleting items, changing views, and browsing backward and forward. The My Computer window appears. The toolbar appears below the menu bar of the toolbar you start typing a previously... finishes the address for commonly used commands, such as a Web page. 1 Click Start, then click My Computer. The My Computer window appears. 2 On the View menu, point to Toolbars, then click the name of the current window. Displaying a toolbar in a window 1 Click Start, then click My Computer. 145 Exploring ...
If you want to display. This means displaying an individual window as copying, pasting, deleting items, changing views, and browsing backward and forward. The My Computer window appears. The toolbar appears below the menu bar of the toolbar you start typing a previously... finishes the address for commonly used commands, such as a Web page. 1 Click Start, then click My Computer. The My Computer window appears. 2 On the View menu, point to Toolbars, then click the name of the current window. Displaying a toolbar in a window 1 Click Start, then click My Computer. 145 Exploring ...

User Guide
Page 146
... your computer at the office By connecting an external monitor, external full-size keyboard, an external mouse, and an external diskette drive, you want to view as a Web page. 3 In the Tools menu, select Folder Options. 4 In the Tasks section, click the button for how to use the folder on the...
... your computer at the office By connecting an external monitor, external full-size keyboard, an external mouse, and an external diskette drive, you want to view as a Web page. 3 In the Tools menu, select Folder Options. 4 In the Tasks section, click the button for how to use the folder on the...

User Guide
Page 153
... communication tools to help you perform many tasks. ❖ Internet email To send and receive email of your Web browser to transfer There are instantly viewed by others in real-time, it uses a Web site as attaching a file or document to an email, or you can use the HTTP features of...
... communication tools to help you perform many tasks. ❖ Internet email To send and receive email of your Web browser to transfer There are instantly viewed by others in real-time, it uses a Web site as attaching a file or document to an email, or you can use the HTTP features of...

User Guide
Page 154
... box TECHNICAL NOTE: Video CD playback capability is not enabled on your desktop and select Properties. Exploring video features Your computer's video features provide the viewing of data. 154 Exploring Your Options Exploring video features large amounts of presentations or DVD movies on the computer screen.
... box TECHNICAL NOTE: Video CD playback capability is not enabled on your desktop and select Properties. Exploring video features Your computer's video features provide the viewing of data. 154 Exploring Your Options Exploring video features large amounts of presentations or DVD movies on the computer screen.

User Guide
Page 155
... appears and asks if you can make audio recordings and save them as .wav files by connecting an external microphone or other sound source to view DVD movies or presentations on page 199. Display settings hot key Using the Fn + F5 keys, you want to record sounds using an external microphone...
... appears and asks if you can make audio recordings and save them as .wav files by connecting an external microphone or other sound source to view DVD movies or presentations on page 199. Display settings hot key Using the Fn + F5 keys, you want to record sounds using an external microphone...
User Guide
Page 173
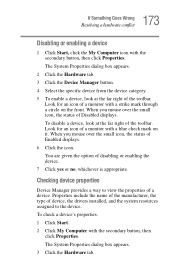
Properties include the name of the manufacturer, the type of device, the drivers installed, and the system resources assigned to view the properties of the toolbar. The System Properties dialog box appears. 2 Click the Hardware tab. 3 Click the Device Manager button. 4 Select the specific device from ...
Properties include the name of the manufacturer, the type of device, the drivers installed, and the system resources assigned to view the properties of the toolbar. The System Properties dialog box appears. 2 Click the Hardware tab. 3 Click the Device Manager button. 4 Select the specific device from ...

User Guide
Page 174
... time" on page 50, and making sure it is also present. 174 If Something Goes Wrong Resolving a hardware conflict 4 Click the Device Manager button. 5 To view the device(s) installed, double-click the device type. 6 To...
... time" on page 50, and making sure it is also present. 174 If Something Goes Wrong Resolving a hardware conflict 4 Click the Device Manager button. 5 To view the device(s) installed, double-click the device type. 6 To...
User Guide
Page 206
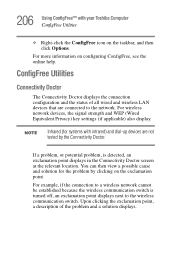
... wireless communication switch is detected, an exclamation point displays in the Connectivity Doctor screen at the relevant location. You can then view a possible cause and solution for systems with your Toshiba Computer ConfigFree Utilities ❖ Right-click the ConfigFree icon on configuring ConfigFree, see the online help. ConfigFree Utilities Connectivity Doctor The...
... wireless communication switch is detected, an exclamation point displays in the Connectivity Doctor screen at the relevant location. You can then view a possible cause and solution for systems with your Toshiba Computer ConfigFree Utilities ❖ Right-click the ConfigFree icon on configuring ConfigFree, see the online help. ConfigFree Utilities Connectivity Doctor The...

User Guide
Page 208
... change. ❖ Enable Wireless when cable disconnect occurs - Select this check box to enable the Auto Switch feature. 208 Using ConfigFree™ with your Toshiba Computer ConfigFree Utilities Viewing the device settings ❖ Network Connections - Displays the Network Connection window, which contains detailed information about the network connection. ❖ Enable/Disable - For...
... change. ❖ Enable Wireless when cable disconnect occurs - Select this check box to enable the Auto Switch feature. 208 Using ConfigFree™ with your Toshiba Computer ConfigFree Utilities Viewing the device settings ❖ Network Connections - Displays the Network Connection window, which contains detailed information about the network connection. ❖ Enable/Disable - For...
User Guide
Page 209
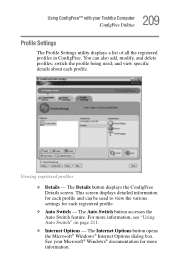
... various settings for each registered profile. ❖ Auto Switch - You can be used ; Viewing registered profiles ❖ Details - The Auto Switch button accesses the Auto Switch feature. This screen displays detailed information for each profile. ...- The Internet Options button opens the Microsoft® Windows® Internet Options dialog box. and view specific details about each profile and can also add, modify, and delete profiles; See your Toshiba Computer ConfigFree Utilities Profile Settings The Profile Settings utility displays a list of all the registered profiles in...
... various settings for each registered profile. ❖ Auto Switch - You can be used ; Viewing registered profiles ❖ Details - The Auto Switch button accesses the Auto Switch feature. This screen displays detailed information for each profile. ...- The Internet Options button opens the Microsoft® Windows® Internet Options dialog box. and view specific details about each profile and can also add, modify, and delete profiles; See your Toshiba Computer ConfigFree Utilities Profile Settings The Profile Settings utility displays a list of all the registered profiles in...

User Guide
Page 228
... Player 81 DVD-ROM or multi-function drive eject 75 Start 113 C calculator 126 Card and Socket Services 160 CD and DVDs caring for 83 viewing contents 82 CD Player control panel 81 CD/DVD control and digital audio modes 77 CDs inserting 78 problem solving 181 channels DMA 171 Character...
... Player 81 DVD-ROM or multi-function drive eject 75 Start 113 C calculator 126 Card and Socket Services 160 CD and DVDs caring for 83 viewing contents 82 CD Player control panel 81 CD/DVD control and digital audio modes 77 CDs inserting 78 problem solving 181 channels DMA 171 Character...


