
User Guide
Page 26
Contents Introduction 34 This guide 35 Safety icons 36 Other icons used 37 Other documentation 37 Service options 38 Chapter 1: Getting Started 39 Selecting a place to work 39 Creating a computer-friendly environment........39 Keeping yourself comfortable 40 Precautions 40 Important information on your computer's cooling fan 42 Setting up your computer 43 Setting up your software 44 Registering your computer with Toshiba 45 Adding optional external devices 45 Connecting to a power source 46 Charging the main battery 49 26
Contents Introduction 34 This guide 35 Safety icons 36 Other icons used 37 Other documentation 37 Service options 38 Chapter 1: Getting Started 39 Selecting a place to work 39 Creating a computer-friendly environment........39 Keeping yourself comfortable 40 Precautions 40 Important information on your computer's cooling fan 42 Setting up your computer 43 Setting up your software 44 Registering your computer with Toshiba 45 Adding optional external devices 45 Connecting to a power source 46 Charging the main battery 49 26
User Guide
Page 28
... Creating a CD/DVD 99 Removing a disc with the computer on...........100 Removing a disc with the computer off ..........100 Caring for CD or DVD Discs 101 Toshiba's online resources 101 Chapter 3: Mobile Computing 102 Toshiba's energy-saver design 102 Running the computer on battery power 102 Battery Notice 103 Power management 104 Using additional...
... Creating a CD/DVD 99 Removing a disc with the computer on...........100 Removing a disc with the computer off ..........100 Caring for CD or DVD Discs 101 Toshiba's online resources 101 Chapter 3: Mobile Computing 102 Toshiba's energy-saver design 102 Running the computer on battery power 102 Battery Notice 103 Power management 104 Using additional...

User Guide
Page 29
... 112 Using a hot key to set the Power Scheme.......113 Changing the main battery 114 Removing the battery from the computer .......114 Inserting a charged battery 116 Taking care of your battery 117 Safety precautions 117 Maximizing battery life 118 Disposing of used batteries 119 Traveling tips 121 Chapter 4: Exploring Your Computer's Features 122 Exploring the desktop...
... 112 Using a hot key to set the Power Scheme.......113 Changing the main battery 114 Removing the battery from the computer .......114 Inserting a charged battery 116 Taking care of your battery 117 Safety precautions 117 Maximizing battery life 118 Disposing of used batteries 119 Traveling tips 121 Chapter 4: Exploring Your Computer's Features 122 Exploring the desktop...
User Guide
Page 31
... Utility 163 CD/DVD Drive Acoustic Silencer 164 TOSHIBA Accessibility 165 Fingerprint Authentication Utility 166 Fingerprint utility limitations 166 Fingerprint Enrollment 167 Fingerprint Logon 168 Power-on Security 169 Control Center 170 Password Bank ... conflict 186 A plan of action 186 Resolving hardware conflicts on your own .....187 Fixing a problem with Device Manager ...........189 Memory problems 191 Power and the batteries 191 Keyboard problems 193 Display problems 194 Disk drive problems 197 Optical drive problems 199 Sound system problems 200 PC Card problems 201
... Utility 163 CD/DVD Drive Acoustic Silencer 164 TOSHIBA Accessibility 165 Fingerprint Authentication Utility 166 Fingerprint utility limitations 166 Fingerprint Enrollment 167 Fingerprint Logon 168 Power-on Security 169 Control Center 170 Password Bank ... conflict 186 A plan of action 186 Resolving hardware conflicts on your own .....187 Fixing a problem with Device Manager ...........189 Memory problems 191 Power and the batteries 191 Keyboard problems 193 Display problems 194 Disk drive problems 197 Optical drive problems 199 Sound system problems 200 PC Card problems 201

User Guide
Page 32
...Data and system configuration backup in Windows XP 213 If you need further assistance 219 Before you contact Toshiba 219 Contacting Toshiba 220 Other Toshiba Internet Web sites 221 Toshiba's worldwide offices 221 Appendix A: Hot Keys 223 Volume Mute 223 Password security 224 Without a password... 224 With a password 224 Maintaining security when the battery is not fully charged 225 Power usage 226 Standby ...
...Data and system configuration backup in Windows XP 213 If you need further assistance 219 Before you contact Toshiba 219 Contacting Toshiba 220 Other Toshiba Internet Web sites 221 Toshiba's worldwide offices 221 Appendix A: Hot Keys 223 Volume Mute 223 Password security 224 Without a password... 224 With a password 224 Maintaining security when the battery is not fully charged 225 Power usage 226 Standby ...
User Guide
Page 41
Turn off the computer if a drive light indicates a drive is reading from the power plug socket and computer. 3. Remove the battery pack. Computer base and palm rest can cause electric shock or fire, resulting in serious injury or permanent damage to the computer. It could result ...
Turn off the computer if a drive light indicates a drive is reading from the power plug socket and computer. 3. Remove the battery pack. Computer base and palm rest can cause electric shock or fire, resulting in serious injury or permanent damage to the computer. It could result ...

User Guide
Page 43
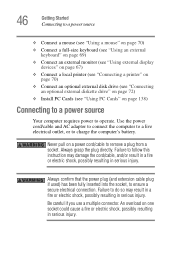
..., such as an electric blanket or heater. ❖ Never block the air vents. ❖ Always operate your computer. Your computer contains a rechargeable main battery that needs to be charged before adding external or internal components to your computer on page 44 before you can use external power or to... charge the battery you must complete all setup steps up to a power source" on a carpet or other soft material can block the vents. See "Connecting...
..., such as an electric blanket or heater. ❖ Never block the air vents. ❖ Always operate your computer. Your computer contains a rechargeable main battery that needs to be charged before adding external or internal components to your computer on page 44 before you can use external power or to... charge the battery you must complete all setup steps up to a power source" on a carpet or other soft material can block the vents. See "Connecting...
User Guide
Page 46
... plug directly. Always confirm that the power plug (and extension cable plug if used) has been fully inserted into the socket, to charge the computer's battery. Failure to do so may damage the cord/cable, and/or result in a fire or electric shock, possibly resulting in serious injury. Use the power...
... plug directly. Always confirm that the power plug (and extension cable plug if used) has been fully inserted into the socket, to charge the computer's battery. Failure to do so may damage the cord/cable, and/or result in a fire or electric shock, possibly resulting in serious injury. Use the power...
User Guide
Page 47
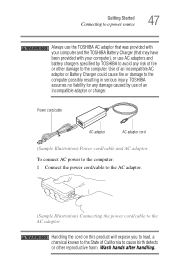
... of California to the computer possibly resulting in serious injury. Getting Started Connecting to a power source 47 Always use the TOSHIBA AC adaptor that was provided with your computer and the TOSHIBA Battery Charger (that may have been provided with your computer), or use AC adaptors and... battery chargers specified by use of an incompatible adaptor or charger. TOSHIBA assumes no liability for any damage caused by TOSHIBA to avoid any risk of fire...
... of California to the computer possibly resulting in serious injury. Getting Started Connecting to a power source 47 Always use the TOSHIBA AC adaptor that was provided with your computer and the TOSHIBA Battery Charger (that may have been provided with your computer), or use AC adaptors and... battery chargers specified by use of an incompatible adaptor or charger. TOSHIBA assumes no liability for any damage caused by TOSHIBA to avoid any risk of fire...

User Guide
Page 48
... light on the back of the main battery's current charge: ❖ Glows amber while the main battery is being charged (AC adaptor connected) ❖ Glows blue when the main battery is fully charged ❖ Is unlit when the main battery has discharged, the battery is not charging, or the AC adaptor...not plugged into the computer or AC outlet ❖ Flashes amber when the main battery charge is low and it is time to recharge the main battery or plug in serious injury. The computer's main battery light gives you an indication of the computer. (Sample Illustration) Connecting the AC ...
... light on the back of the main battery's current charge: ❖ Glows amber while the main battery is being charged (AC adaptor connected) ❖ Glows blue when the main battery is fully charged ❖ Is unlit when the main battery has discharged, the battery is not charging, or the AC adaptor...not plugged into the computer or AC outlet ❖ Flashes amber when the main battery charge is low and it is time to recharge the main battery or plug in serious injury. The computer's main battery light gives you an indication of the computer. (Sample Illustration) Connecting the AC ...
User Guide
Page 49
...The recharging of the power provided by the AC adaptor to power the computer, you must charge the battery. Your computer's Power Options Properties can damage the battery. See "Changing the main battery" on page 114 for the first time, avoid leaving the computer plugged in and turned off until ...the battery light glows blue. After that, the battery will be used . To charge the battery, leave the computer plugged into an AC power source with its battery already installed. Disconnect the AC power cord/cable and remove the ...
...The recharging of the power provided by the AC adaptor to power the computer, you must charge the battery. Your computer's Power Options Properties can damage the battery. See "Changing the main battery" on page 114 for the first time, avoid leaving the computer plugged in and turned off until ...the battery light glows blue. After that, the battery will be used . To charge the battery, leave the computer plugged into an AC power source with its battery already installed. Disconnect the AC power cord/cable and remove the ...
User Guide
Page 50
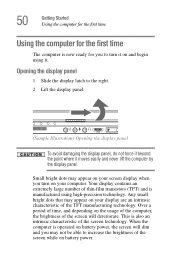
... and never lift the computer by the display panel. Small bright dots may not be able to increase the brightness of the screen while on battery power. Over a period of time, and depending on the usage of the computer, the brightness of the screen technology. When the computer is operated... on battery power, the screen will deteriorate. 50 Getting Started Using the computer for the first time Using the computer for the first time The computer is...
... and never lift the computer by the display panel. Small bright dots may not be able to increase the brightness of the screen while on battery power. Over a period of time, and depending on the usage of the computer, the brightness of the screen technology. When the computer is operated... on battery power, the screen will deteriorate. 50 Getting Started Using the computer for the first time Using the computer for the first time The computer is...
User Guide
Page 51
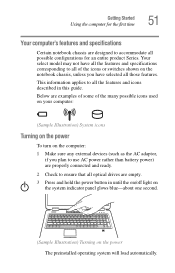
... power To turn on the computer: 1 Make sure any external devices (such as the AC adaptor, if you plan to use AC power rather than battery power) are properly connected and ready. 2 Check to ensure that all optical drives are designed to all those features. Your select model may not have...
... power To turn on the computer: 1 Make sure any external devices (such as the AC adaptor, if you plan to use AC power rather than battery power) are properly connected and ready. 2 Check to ensure that all optical drives are designed to all those features. Your select model may not have...
User Guide
Page 53
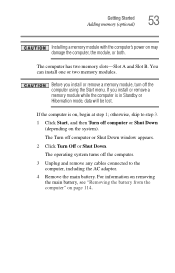
The computer has two memory slots-Slot A and Slot B. otherwise, skip to the computer, including the AC adaptor. 4 Remove the main battery. The operating system turns off the computer. 3 Unplug and remove any cables connected to step 3. 1 Click Start, and then Turn off ... Started Adding memory (optional) 53 Installing a memory module with the computer's power on page 114. For information on removing the main battery, see "Removing the battery from the computer" on may damage the computer, the module, or both. Before you install or remove a memory module while the computer...
The computer has two memory slots-Slot A and Slot B. otherwise, skip to the computer, including the AC adaptor. 4 Remove the main battery. The operating system turns off the computer. 3 Unplug and remove any cables connected to step 3. 1 Click Start, and then Turn off ... Started Adding memory (optional) 53 Installing a memory module with the computer's power on page 114. For information on removing the main battery, see "Removing the battery from the computer" on may damage the computer, the module, or both. Before you install or remove a memory module while the computer...

User Guide
Page 58
...system has loaded, you need to work. You can verify that the computer has recognized it using the screws. 15 Re-insert the main battery. 58 Getting Started Adding memory (optional) 14 Replace the memory module slot cover and secure it correctly as described in "Installing a memory module..." on page 52 to shut down the computer and open the memory module slot cover. For more information on inserting the main battery, see "Inserting a charged battery" on page 61. Removing a memory module If you can now continue setting up . 17 Reconnect the cables. 18 Restart the computer....
...system has loaded, you need to work. You can verify that the computer has recognized it using the screws. 15 Re-insert the main battery. 58 Getting Started Adding memory (optional) 14 Replace the memory module slot cover and secure it correctly as described in "Installing a memory module..." on page 52 to shut down the computer and open the memory module slot cover. For more information on inserting the main battery, see "Inserting a charged battery" on page 61. Removing a memory module If you can now continue setting up . 17 Reconnect the cables. 18 Restart the computer....

User Guide
Page 60
Memory slots Front of the slot. For more information on inserting the main battery, see "Inserting a charged battery" on page 116. 6 Turn the computer right side up. 7 Reconnect the cables. 8 Restart the computer. 60 Getting Started Adding memory (optional) 3 Gently lift the memory module to work. TECHNICAL NOTE: You must have at least one memory module installed for the computer to a 30-degree angle and slide it out of computer (Sample Illustration) Removing the memory module 4 Replace the memory module slot cover and tighten the screws. 5 Re-insert the main battery.
Memory slots Front of the slot. For more information on inserting the main battery, see "Inserting a charged battery" on page 116. 6 Turn the computer right side up. 7 Reconnect the cables. 8 Restart the computer. 60 Getting Started Adding memory (optional) 3 Gently lift the memory module to work. TECHNICAL NOTE: You must have at least one memory module installed for the computer to a 30-degree angle and slide it out of computer (Sample Illustration) Removing the memory module 4 Replace the memory module slot cover and tighten the screws. 5 Re-insert the main battery.
User Guide
Page 73
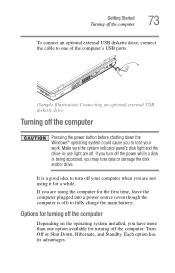
... drive Turning off the computer Pressing the power button before shutting down the Windows® operating system could cause you to fully charge the main battery. Getting Started Turning off the computer 73 To connect an optional external USB diskette drive, connect the cable to one option available for a while. If...
... drive Turning off the computer Pressing the power button before shutting down the Windows® operating system could cause you to fully charge the main battery. Getting Started Turning off the computer 73 To connect an optional external USB diskette drive, connect the cable to one option available for a while. If...
User Guide
Page 74
... Hibernation mode does not require power to save your system settings so that, when you have work in Hibernation mode, the computer uses no main battery power. ❖ Because the state of the system is stored on the hard disk, no data is lost if the main... battery discharges. Factors to consider when choosing Hibernation: ❖ While in progress and are not connected to a network, use the Windows® Standby or Hibernate commands ...
... Hibernation mode does not require power to save your system settings so that, when you have work in Hibernation mode, the computer uses no main battery power. ❖ Because the state of the system is stored on the hard disk, no data is lost if the main... battery discharges. Factors to consider when choosing Hibernation: ❖ While in progress and are not connected to a network, use the Windows® Standby or Hibernate commands ...

User Guide
Page 75
...information is being retrieved from the hard disk rather than from memory, restarting from Hibernation takes a little more time and consumes more main battery power to start up than when restarting from Standby. ❖ When starting up again, the computer returns to use and configure Hibernation... mode see "Using and configuring Hibernation mode" on Standby. ❖ Restarting from Standby takes less time and consumes less main battery power than restarting from turning off the computer or using . Standby mode The Standby command places the computer into a powersaving mode. ...
...information is being retrieved from the hard disk rather than from memory, restarting from Hibernation takes a little more time and consumes more main battery power to start up than when restarting from Standby. ❖ When starting up again, the computer returns to use and configure Hibernation... mode see "Using and configuring Hibernation mode" on Standby. ❖ Restarting from Standby takes less time and consumes less main battery power than restarting from turning off the computer or using . Standby mode The Standby command places the computer into a powersaving mode. ...
User Guide
Page 76
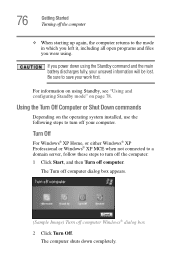
... in which you left it, including all open programs and files you power down completely. If you were using the Standby command and the main battery discharges fully, your work first.
... in which you left it, including all open programs and files you power down completely. If you were using the Standby command and the main battery discharges fully, your work first.


